Page 1 of 2 12 LastLast
Results 1 to 15 of 17

Thread: Dust Collection at Router Table

  1. #1

    Dust Collection at Router Table

    I'm about to set-up a new cyclone dust collection system. The main trunks will be 6" diameter PVC and I plan to run the 6" to as many tools as I can. The router table perplexes me since the back of the fence has a 2.5" opening. Going from 6" down to 2.5" does not seem like a good solution. For anyone that has their DC system at their router table, how have you done it? Thanks.

  2. #2
    DC units generally don't do very well with small ports. I had tried a 1.5hp DC into a fence some years back and find I got better results with my vacuum.

    Now, I have a 4" port feeding a 2HP Oneida cyclone underneath the table and my CT26 collects at the fence.

    It's very clean, hardly any dust, and the large majority of dust/chips appear to get sucked down to the cyclone.

    I have thought about trying a 3" into the fence, plus the 4" underneath all to the cyclone - but what I'm doing works so well and there is only so much time in the day...

    Good luck.

  3. #3
    I have a Norm Abrams type router table with a Jessem fence and I am pleased with my dust collection. I run a ClearVue 1800 with 6" S&D piping. From a 6" wye I ran a 4" flex through the rear of the table into the router compartment and I ran a 4" flex choked down to 2 1/2" to the back of the fence. I did make a change to Norm's design in that I added more and larger holes in the acrylic door in the front of the router compartment to permit more air intake

  4. #4
    Join Date
    Oct 2006
    Location
    Bloomington, IL
    Posts
    6,009
    4" woodpecker box under router and 4"x2.5" y branch to incra fence. Works perfectly fine even on 2hp single stage. Collect below the router.
    Glad its my shop I am responsible for - I only have to make me happy.

  5. #5
    Thanks for the replys. Paul - do you know of a link for the the Norm Abrams table?

  6. #6
    Join Date
    Mar 2003
    Location
    SE PA - Central Bucks County
    Posts
    65,842
    Norm Abram's (no "s" in his last name... ) Deluxe Router Table is here:

    https://www.newyankee.com/product/de...outer-station/

    My router station loosely follows the same concept of a larger port to the cabinet that surrounds the router with some air entry porting in the door that brings the average inlet area between the fence/table and the cabinet ports up to the equivalent area of the port on the box. The smaller hose from the fence plugs into the box. The holes in the cabinet (below the door in my case) also help keep the cabinet clear because they create a "sweep" action when air enters from down low in combination with what's coming in from above.
    Last edited by Jim Becker; 09-14-2018 at 7:58 PM.
    --

    The most expensive tool is the one you buy "cheaply" and often...

  7. #7
    Edward,

    I worked both from a New Yankee Workshop TV Program (link below) and plans by Creston Woods, They are similar and the Creston Woods plans were easier to follow

    https://www.youtube.com/watch?v=4hMsj4YnuCo


    http://www.crestonwood.com/router.php

  8. #8
    Router table dust collection... there are two points, above and below, where collection happens. My setup has a 4" for the bottom and 2" at the fence. There's a 4x2 Y that creates the split. There are blast gates at each branch to control the flow. It is the best dust collection I've ever seen with this setup.

    For years I tried to isolate the intake of the router motor within the dust collection shroud and for years that was my nemesis. When I finally accepted I'd have to clean the intake on the router motor regularly, if I ever want peace, I built an enclosure that pretty much ended the dust collection issues that hounded me for decades.

    And every once in a while I open the chamber and clean the motor intake.
    “Travel is fatal to prejudice, bigotry, and narrow-mindedness..." - Mark Twain

  9. #9
    Join Date
    Oct 2005
    Location
    Helensburgh, Australia
    Posts
    2,710
    Google >yet another router table build< and go to page one, he has done exactly what you propose, a six inch line straight into the table itself. BTW this is the most advance router table build on the planet I would reckon. If anyone can find a better one I would appreciate hearing about it before I copy his.
    Chris

    Everything I like is either illegal, immoral or fattening

  10. #10
    I have 6" to a 6x6x4 wye with a 4" gate. 4" flex going from there. I have 4" port on the fence as well as a 4" port in the cabinet under the table. I switch the flex to whichever one is more applicable. Works well with my Pentz cyclone.


    [SIGPIC][/SIGPIC]

  11. #11
    Join Date
    May 2005
    Location
    Highland MI
    Posts
    4,521
    Blog Entries
    11
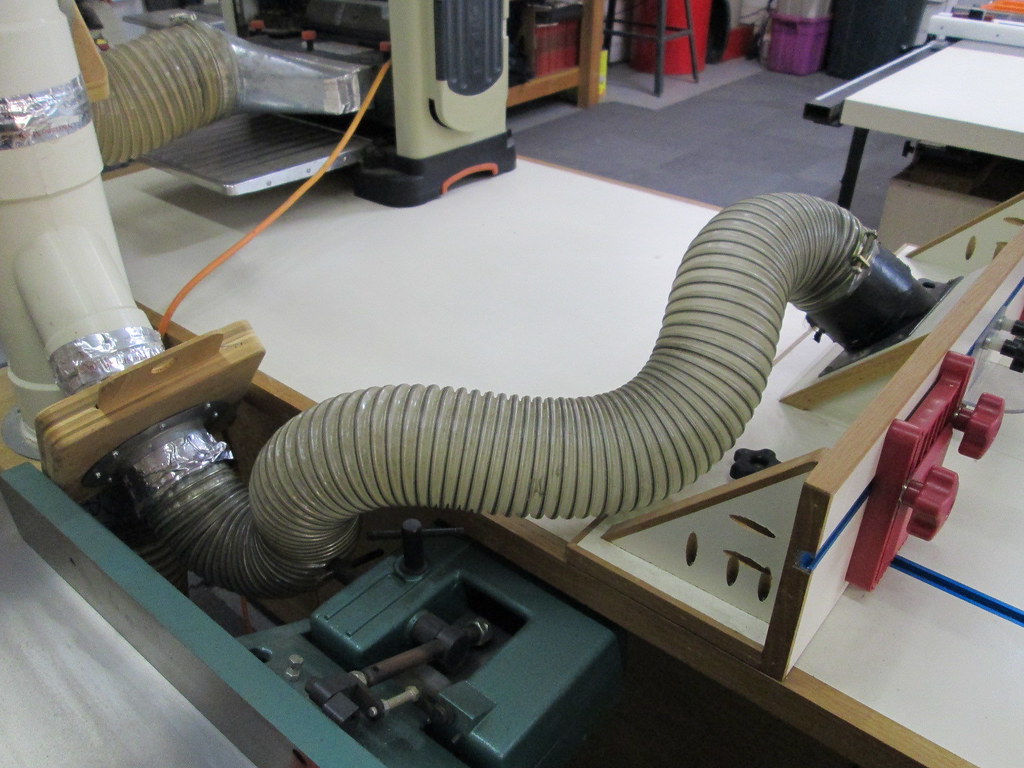
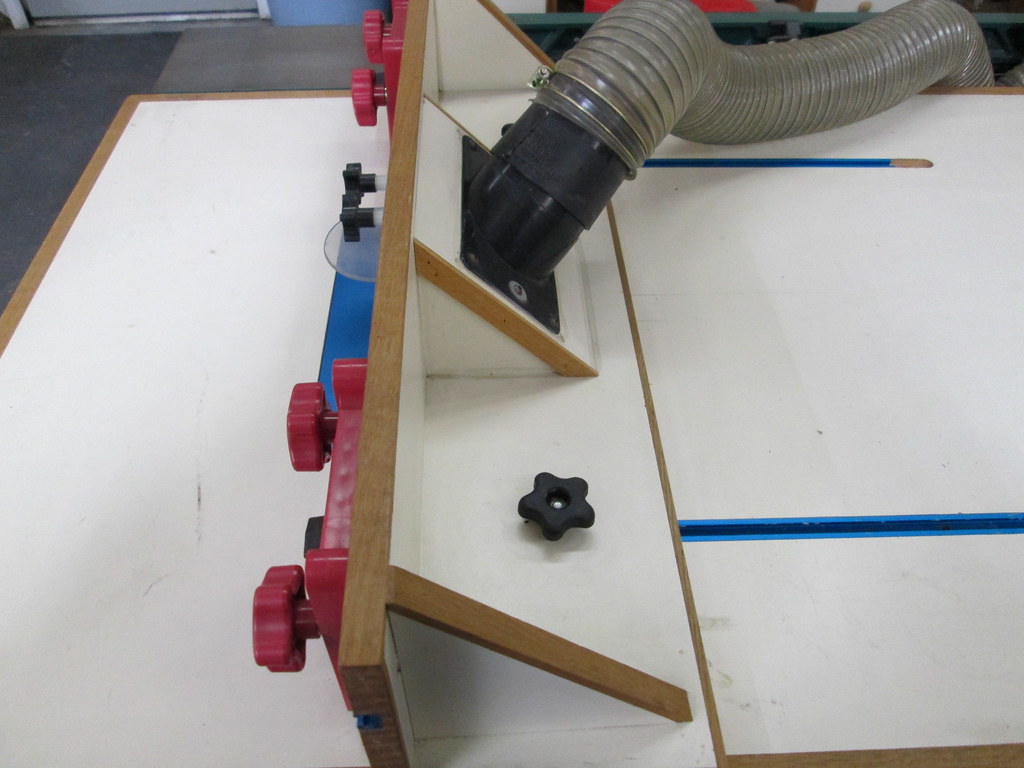
    Another here with a 4" under table collector and 2" behind the fence. I use the below table box as a plenum. In the first photo, I disconnected the collector at the rear of the fence so I could use the 2" connection with my Leigh dovetail jig dust collector.

    https://www.woodstore.net/Tilt-Top-R...p/gr-00064.htm
    Attached Images Attached Images
    Last edited by Ole Anderson; 09-15-2018 at 8:13 AM.
    NOW you tell me...

  12. #12
    Join Date
    Apr 2009
    Location
    Palm Springs, CA
    Posts
    1,085
    Yet another here with the 4"/2.5" split arrangement. Worked well. Was connected to 6" blast gate and Oneida V3000.

    Router Table Dust Collection.jpg
    Dick Mahany.

  13. #13
    Thanks for the links and the photos.

  14. #14
    Join Date
    Jun 2005
    Location
    Shorewood, WI
    Posts
    897
    I use the DC only for below the table. To keep the router air inlet clean, about 3" below the top is another layer with narrow clearance around the router. The DC pulls from between these, and nothing gets below to the air intake. The fence has a small gap around the bit, and a shopvac works better than a big DC for that, so that's what I use at the fence.

  15. #15
    Join Date
    Apr 2006
    Location
    Phoenix AZ Area
    Posts
    2,505
    With a 2.5" port on the table, all you can do to improve is to redesign to make that port larger, at least 4". 3.5" by 3.5" square is about the same as a 4" round port. If you hook up to the current 2.5" diameter port with your collector and use 4", 5", 6", or 8" duct you will get the same performance as the smallest opening in any branch is the primary driver of airflow.

Posting Permissions

  • You may not post new threads
  • You may not post replies
  • You may not post attachments
  • You may not edit your posts
  •