
-
Well...no groove across the bottom edge....would have been a rebate, anyway,,,,notched the plywood to fit..
IMG_5350 (640x480).jpg
had a forest of clamps spring up in the shop..
IMG_5352 (640x480).jpg
Will let this sit a day..or three....then clean up all the joints.
Laid out the parts for a lid..
IMG_5356 (640x480).jpg
Once the box is cleaned up, I can size the lid to fit. Thinking there MAY be some brass corner trim plates added. We'll see how it goes...
back corners.jpg
Maybe something like these?
Stay tuned
-
Trying to correct a few "issues" with this box...
IMG_5358 (640x480).jpg
Added a caul, to pull the ends into alignment....
IMG_5359 (640x480).jpg
Undercover clamp?
IMG_5360 (640x480).jpg
Added a strip of Maple, to correct a mis-alignment issuse,,,,not sure whether it was the tongue or the groove that was out of line....
IMG_5361 (640x480).jpg
Not a whole lot of room left on the bench....may check things later today and see IF the clamps can be removed.
Spider bite on the left arm.....they didn't like me broom taking down all their webs....not sure if it was a small white spider, or a tiny black one....left a nasty hole, and me of blood thinners to boot..
Errands to run this morning..might be late this afternoon, before I can get to the "spider den", er..shop.
Stay tuned...might even make SDI Hartmann blush.....
-
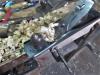
Wasn't much cussing, today. Got the box out of the clamps ( and it didn't fly apart...) and started to clean the corners up...
IMG_5362 (640x480).jpg
Plane, and a couple sanders were used....even some hand sanding 
IMG_5363 (640x480).jpg
All corners got done, a few spots were fixed...dusted this thing off.
IMG_5365 (640x480).jpg
Amber Shellac as a seal coat...
IMG_5366 (640x480).jpg
Back didn't look too bad..
IMG_5364 (640x480).jpg
Nor did the front....laid out parts to make a lid...
IMG_5367 (640x480).jpg
Need to plane the panel flat, and then make it a Raised Panel...then cut a groove to house it.
IMG_5368 (640x480).jpg
Need to cut this one in exactly half, to make the ends of the lid. After that....we'll see how it turns out, first....as to what details will get done to it.
Stay tuned...
-
Ok...after a decent rest...I went back to the shop....Panel was planed flat, on both faces. Chose the best looking of the two, and raised the panel. #3c did all the panel raising....Millers Falls No. 14 flattened the panel.
Long stiles (?) were jointed straight. Then face planed until they were straight along that way. Mitre box to cut the third in to two equal parts...Stanley 45 to mill a groove in all four parts, to house the raised panel.
Stubby tenons were milled onto the short rails (?)....then glue and a couple clamps...
IMG_5370 (640x480).jpg
Will sit flush with the back of the box, with a bit of overhang on the other sides...
IMG_5371 (640x480).jpg
Wanted to get the lid at least built today....not sure when I will be allowed back in the shop....
Stay tuned...
-
Hi Steven,
The box is starting to look very good, and it looks like you are making rapid progress, but take care of the ticker.
Stew
Last edited by Stew Denton; 08-06-2018 at 8:37 PM.
-
Lab work and scans are done...go back there in the morning for the Ablation thing....
The T.E.E. Scan left me with a sore throat...and very "loopy".....No shop time tonight....Wasn't even allowed to drive home, needed a "Designated Driver" for that...
CT Scan, with contrast after that other scan....
About all I CAN do right now...is sit and bug you all on the computer.....
-
Back home again....shop is closed for about the next two weeks.....letting the vein heal up....
Before I left for the place yesterday morning....I brought the box, the lid...a couple brass hinges, the screws, and push drill for pilot holes...and the screwdriver needed...upstairs, where I could install the hinges, at least.....
IMG_5372 (640x447).jpg
A look at the front of the box....
IMG_5373 (640x480).jpg
Lid still needs a coat of Amber Shellac....
IMG_5374 (640x480).jpg
An idea of the hinge size. VERY tiny screws.
Letting a hole in a vein where the top of the leg is, heal up.....Still very sore today....spent the night over there...0400 they came in and changed the dressing. Was a LONG night...
-
Hi Steven,
The box is looking good, and it sounds like you are on the bend....good news all the way around.
Stew
-
Hinges are installed, now.
IMG_5375 (640x480).jpg
Yankee push drill, with the smallest bit it had....out of the 6 in the handle..to drill a few pilot holes..
IMG_5376 (640x480).jpg
Because the screws are kind of small..
IMG_5377 (640x480) (2).jpg
Needed a very small, Phillips screwdriver, too...Installed the hinges on the lid, first...then onto the box it went.....then these holes..
IMG_5381 (640x480).jpg
Thinking about adding a handle on each end....
IMG_5380 (640x480).jpg
Centered right in the panel...one of these?
IMG_5383 (640x480).jpg
Also looking at something for the lid to be opened with...
IMG_5384 (640x480).jpg
Whether to set one of these here..or...out on the front of the edge?
Shellac, a brush, and the Poly Gloss have also been brought up. Had to send a "runner" down the steps, as I am not allowed. Even brought up a tool tray..
IMG_5385.jpg
As it had the black screws for the handles...
Will see how things go...
-
Handles are chosen, and installed....and a coat of Amber Shellac applied where needed...
lid handle.jpg
Lid has a handle..
end view 2.jpg
Both ends have a handle, as well..
end view 1.jpg
Open the lid...
opened lid.jpg
May or may not get a short chain to hold the lid.
Needs buffed out, before the gloss poly goes on. Haven't decided about anything on the inside...not much I can do, right now.
Stay tuned....almost done.
-
Box has been lightly sanded to 220 grit, and wiped down. Now, IF I can find that "good" ( Purdy) brush....I might be able to get a coat of clear gloss on it....
Not really feeling all that great, today.....still too sore to do a whole lot of moving around. Debating on whether to varnish the inside of the box....
When done, it will sit over on the Maple Chest of drawers I built....as the wood figure seems to match each other....other than the Walnut trim ( didn't have enough Walnut scraps for the box)
Maybe rub the varnish down later,,,and see how it looks. Have a bit of black chain to attach to the lid....will see about how to attach that.
May be one more post to this long winded episode...be a few weeks before any other projects get started...stay tuned.
-
OK, found the brush! No, it is not a Purdy.  ...something called SHUR-LINE. 1-1/2" wide trim brush. Bummer #2? Nothing in the house to clean the poly off, once I am done with the varnish....doubt IF a cup of gas from the mower would work...
Tired and sore, today...may wait a day, before the varnish goes on. trying not to get too carried away, and mess me up.
-
To do the varnish, tomorrow....I needed a way to hold the lid open, without it flopping backwards too far. So....got out a length of chain, and two of the smallest "Cup Hooks" I could find. Yankee #41 to drill a few pilot holes....first one didn't line up with the open area....cut the chain to a decently short length, add it to the hooks, and crimp the hooks closed. Put the toys away. That be the extent of the woodworking for today. Didn't even set the camera up....unless someone wants to see the results?
Stay tuned,.....
Edit to add:
IMG_5394 (640x480).jpg
Chain installed...
IMG_5396 (640x480).jpg
Hook details....and..where this little box will be going to...
IMG_5397 (640x480).jpg
As the Maple grain seems to match....
IMG_5393 (640x480).jpg
Tomorrow's job....
Last edited by steven c newman; 08-11-2018 at 11:01 PM.
-
Letting the first coat of varnish dry....and see IF a second one would be needed...
-
Calling this one done....
IMG_5400 (640x510).jpg
Have rubbed things out...
IMG_5399 (597x640).jpg
Have added some pads for the feet..
IMG_5408 (612x640).jpg
Seems a shame this side will be the back..
IMG_5407 (640x502).jpg
Guess this was better than just burning the wood scraps. Stands 9" tall, lid is 9-1/4 x 14"
Thanks for following along.
 Posting Permissions
- You may not post new threads
- You may not post replies
- You may not post attachments
- You may not edit your posts
-
Forum Rules


 Reply With Quote