Well - I burned a lot of electrons on this one.... but this is the forum I usually post in! Did use scrapers, planes, screwdrivers, mallets - and made shellac, so I guess it can stay here....
Weve had the same large wall unit in our current house for more than 20 years . It was a Scandinavian design about 8 ½ feet wide, and seven feet tall. It held a lot of stuff and has served us well. The biggest issue with it was the center cavity for the television would only accommodate a 32 TV, which weve had for more than 10 years now. For about a year, Ive been coveting an OLED TV so the big wall unit had to go. I bought the TV but left it in the box, in the basesment, as motivation to complete the project!
I wish Id taken a picture of the all of the wires and patch cords in back of the old unit, and underneath. There were dozens. Two game systems, Apple TV, a DVD player, a Sonos bridge, a wireless transmitter (for speakers on the other side of the room), a Logitech universal remote, a Home Theatre amp with wired speakers, and a subwoofer. It was a real rats nest of power cords, patch cords, and HDMI cables.
So I decided it was time to replace it with something that concealed all of wires, and got rid of all the things we didnt use .
The wall was about 12 wide, and had two outlets, a cable connection, and a central vac outlet (not used). I wanted the new unit to hide everything, so sketched up a carcass that would incorporate all outlets into an accessible space behind the drawers.
Sketch
I decided to make the carcass from cherry veneered ply, with solid edging, a solid top, and solid face frame, and drawer fronts. The drawers themselves would be Baltic birch ply. The lower drawers would cover the wall outlets; they would have to be less deep than the upper drawers, and would need a removable panel behind them to contain any wiring.
The basic carcass would be assembled using a Domino (any decent project should require the acquisition of new tools ). I decided to pre-finish the center interior faces of the carcass before assembly. The bottom panel is about 82 wide, and 17 ½ deep. Only the center part is exposed, so I did a bit of testing either side of it. The bottom rail of the face frame is flush with the upper surface, so was finished at the same time as the center.
Bottom Panel
The top panel has the top rail of the face frame flush with its upper surface, and has milled expansion slots and expansion washers for attaching the solid top, after assembly and mounting.
Top Panel
The end panels had solid cherry edging added, and a face frame vertical member on the front edge.
End Panels Outer
On the inside face, stand-offs for the full-extension drawer slides, and lots of Domino slots to joint to the top panel, drawer divider panel (not just a dust panel), and blocking to attach a 6 wide full width plywood strip for mounting.
End Panels Inner
The drawer divider panels were edged with solid cherry.
Drawer Divider Panel
The center panels have drawer slide spacers, and grommet holes located to access the cable run space behind the bottom drawer.
Center Panel Drawer Side
The center panel exposed side was pre-finished, and has installed support sleeves for an adjustable center shelf. The center shelf (not shown alone) has a 1 1/8 solid cherry front lip, and is situated to be centered on the gap between the drawers either side. The rear is notched (yay Carvex!) for cables to run through to the top.
Center Panel Exposed Side
Using only a couple of dominos per joint, I test fit the panels to ensure that everything would align. I got a bit lucky here, as I hadnt considered that it was actually possible to domino a carcass and face frame in a manner that simultaneous assembly would not be possible. As it was, I had planned to glue the inner vertical face frame members after assembly, and not domino them to the upper and lower rails, and the edge of the inner panels.
Test Fit 1
With end caps and panels in place, I mounted some ¼ U-channel for the removable panel to conceal the cables and outlets.
Aluminum Channel
After test fitting, I mounted the drawer slides and was ready to glue:
Test Fit 2
Gluing most stressful 40 minutes ever. Of course, I assumed that it would be easy to simultaneously align and push together seven panels, with about 75 individual dominos . by myself. And the top, bottom, and end caps also had dominos in a second orientation for face frames. Somehow it got done . And I was soaked at the end. Squared it all up and clamped it.
Glued
I still had the two inside face frame vertical members to fit. I use tape instead of pencil (or a knife) to mark exposed surfaces, and glued them to the edge of the center panels
MarkingTape
Now the face frame and carcass ends are ready to finish. Also discovered that stacks of Festool systainers make great risers .
Didnt take pictures of this part, but installed a finished back panel on the center section, then screwed the full width mounting strip to the blocking on the end caps, screwed through the top, and also into the back edge of the center panels. A 2 ½ grommet hole was drilled through the carcase. When I mount that top, I will use a 2 grommet hole eliminating alignment concern.
Ready to Finish
Upstairs, I put a line of masking tape on the wall to identify stud locations, and installed two 1square steel tubes lagged into studs. There is that 6 by ¾ full width strap which will also get lagged into the studs while the bottom panel rests on the steel tubes.
Wall Prep
Crossed my fingers that it would go up the basement stairs (was pretty sure it would), and set it on the steel tubes, propping the front up with boards I had cut to length for that purpose. Set 6 lag bolts through the strapping into four studs, kicked out the props, and had Kid #2 get on top to test it .
Stress Test
Now I could unpack the TV to test it (to make sure it worked!). The only 4K Blu-ray I had was Planet of the Apes ..
TV Test
Next up, I cut the drawer sides from 12mm Baltic birch ply, and used 6mm for the bottom panel. I housed the drawer front and back panels in the sides. Note the blown out corner on the second panel. I regret using ply in this way .. most of the corners blew out. Being a type A, Icut tiny little squares using a Japanese saw, and filled the gaps after glue-up. Wish Id used birch, or something else .
Drawer Panels
Housed Joint
Drawer Glue-up
Drawers were installed in to the correct depth (sound easy when you type it).
Drawers Installed
The drawer faces were cut to size to fit the opening, less a bit more than a 1/8. I drilled 1/16 or so pilot holes where the handles mount .
Handle Pilot holes
I used a steel ruler to establish the gap between the drawer front bottom and the carcass, centered it horizontally, and screwed the drawer front to the drawer using the pilot holes.
Ruler Spacing
Repeated for all four drawer fronts.
Drawer Fronts Screwed to Drawers
Removed the drawers, and screwed from inside the drawer, back into the drawer front (countersunk holes). I then removed the screws from the handle pilot holes, and drilled the appropriate clearance hole for the handle screws, and mounted the handles.
Drawers Screwed to Fronts
Drawers all done and installed! Note the shorter bottom drawers:
Drawers Done
Here you can see the 4 space for outlets etc. (the panel is lying flat in front of the channel)
Cable Run
Here is the panel in place:
Acces Panel in Place
All that was left to do was mount the top (cherry panel, 87 wide, and 1 thick. I used an angled head on my drill to predrill a pilot hole in the center of the expansion slot and up into the top. Space was a bit tight where the drawers were but workable with a stubby screwdriver. Note here you can see where the 6 strap is lagged into a stud ..
Pilot holes - Top
Expansion slots in the center section are concealed by the face frame. I had planned to install 21 total (9 each drawer section 3 expansion front, 3 expansion middle, 3 fixed back, and the inside the front center section) but after putting in about 10, it was solid.
Screwed Expansion Slot
Top is on!
Top On
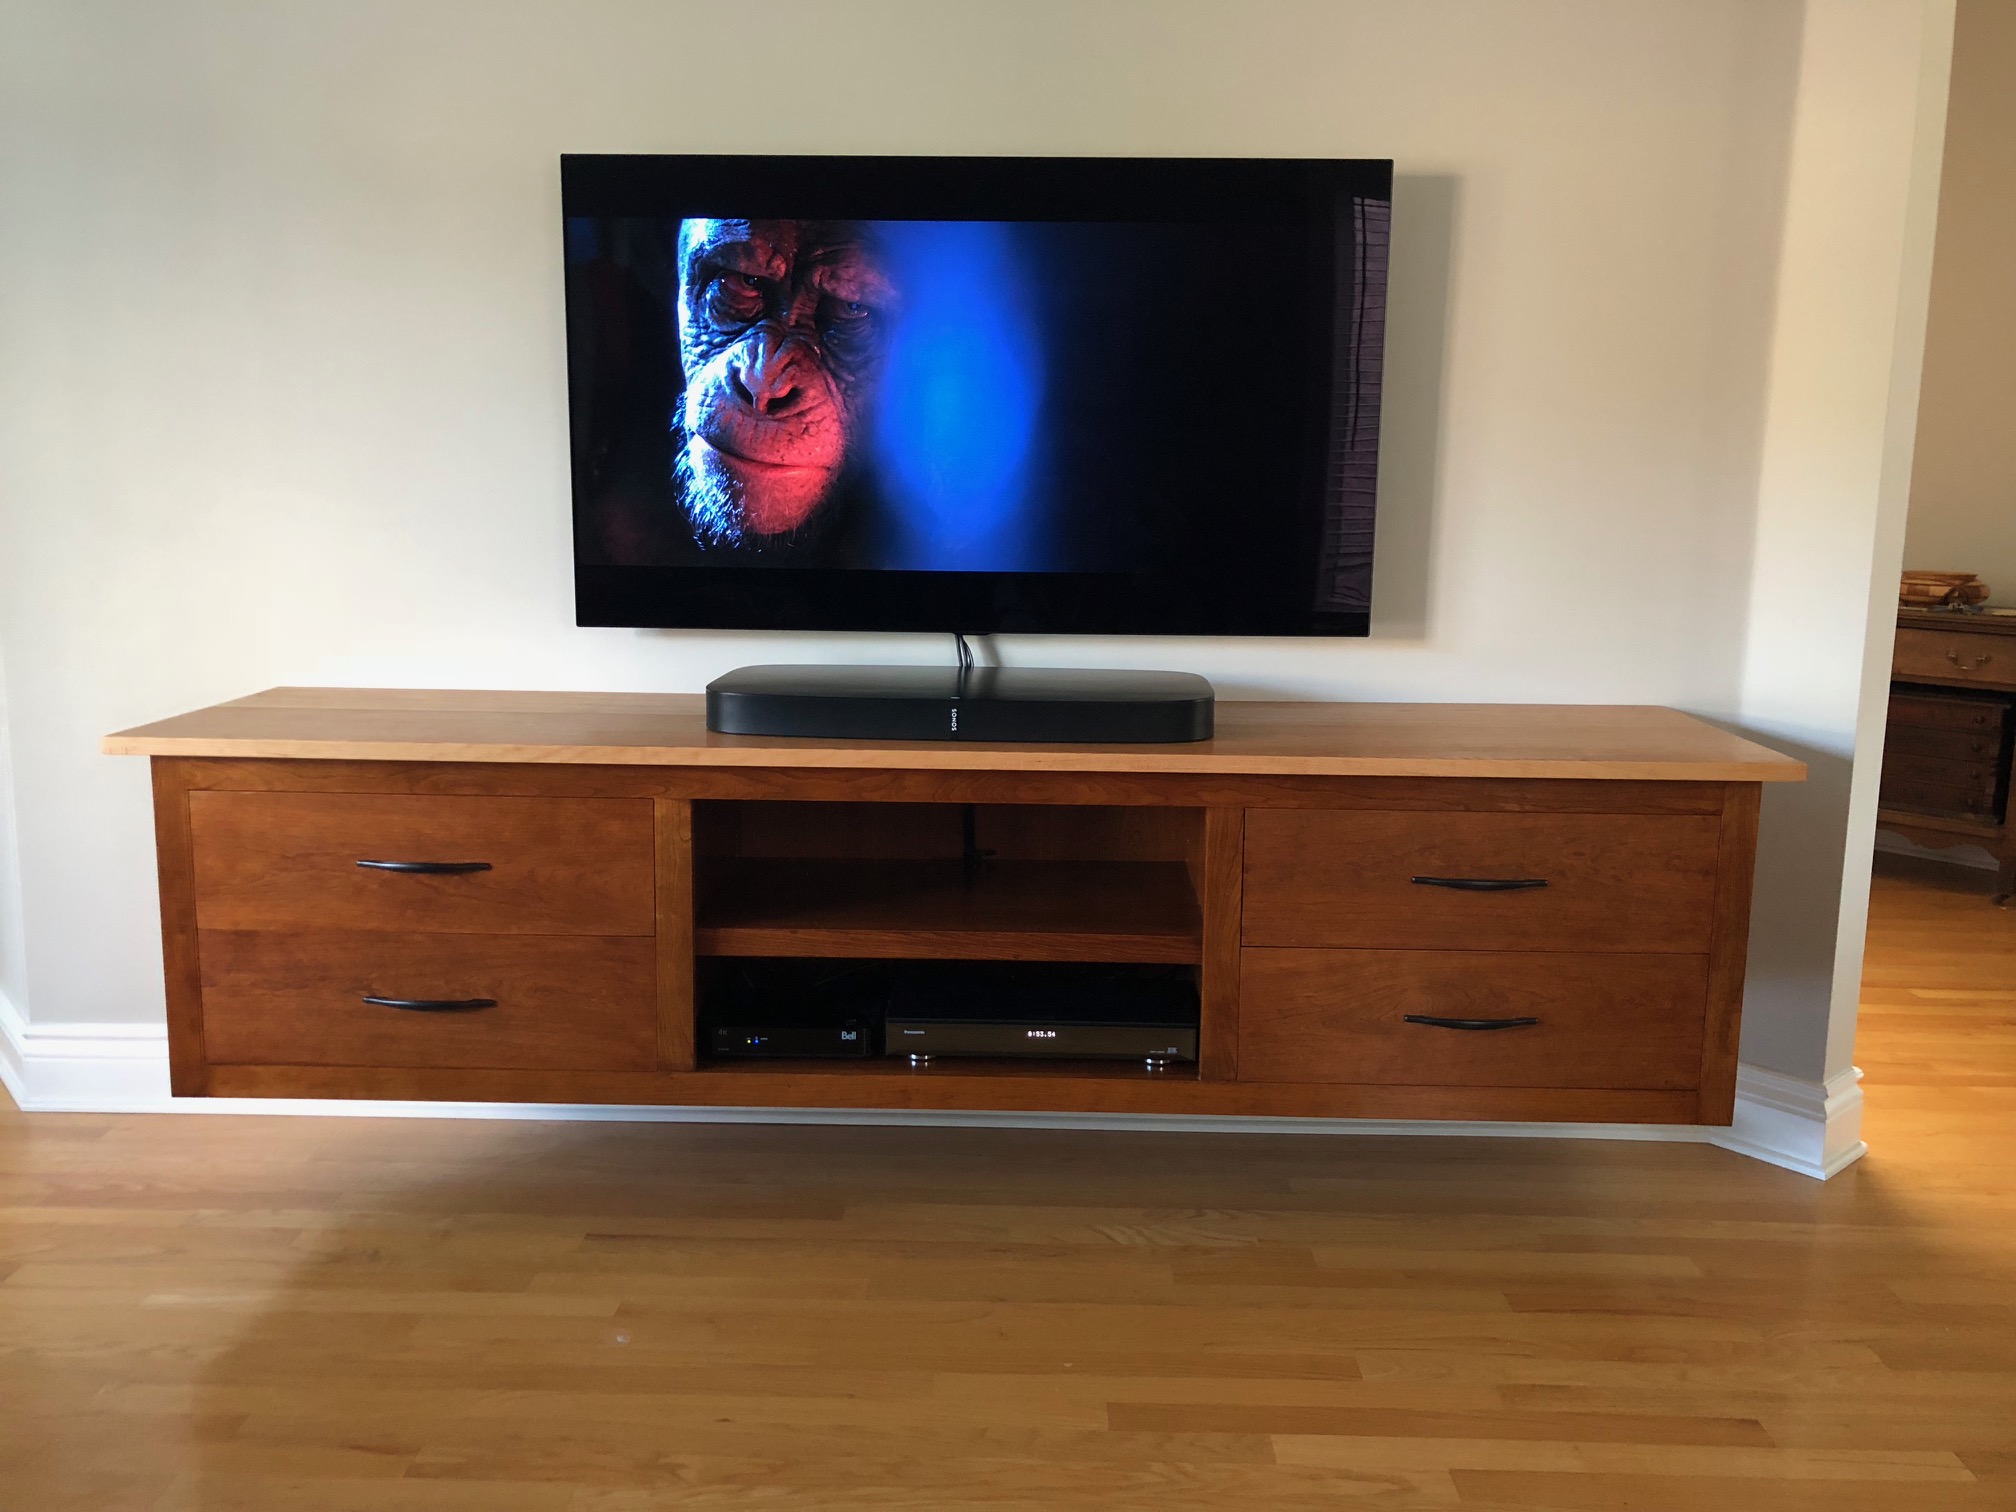
Mounted TV to the wall. Black oval below is a Sonos playbase. Front view:
Front View
Side view:
Side View
Carcass is finished with a wiping stain, and shellacked, Top is finished with Tried and True Original Wood finish, and a light coat of wax. Photos appear a bit blotchy, but thats just the light. Top surface was hand scraped, with end grain sanded to 400 grit.
Overall I am pleased with the end product. The top should continue to darken with time, but should still remain lighter than the carcass.
Mistakes/changes I would make.
1) I would not cut through my TS55 power cord again .
2) I would have used solid wood for the drawers. Ply was ok, but did not save much time or cost.
3) I would have sanded and finished drawer panels BEFORE assembly. Rookie error. Decided to finish them with a 1 coat poly to consolidate the surface ..
4) Probably would not go with shellac again, or would use a thinner cut (had a few lap marks)
5) Would have had help for assembly
6) Would not have used so many dominos. Yeah they are fun to cut . But do I really need them every 4 for 7 on a face frame?
7) Do not try to spot refinish. Bite the bullet, strip it all, and start again. (I did this twice .slow learner)
8) Buy my hardware all at once, and not in multiple trips to the store.
Cheers
Rob

 Reply With Quote