Page 1 of 2 12 LastLast
Results 1 to 15 of 22

Thread: Apothecary chest - shiplapping the back

  1. #1
    Join Date
    Feb 2004
    Location
    Perth, Australia
    Posts
    9,494

    Apothecary chest - shiplapping the back

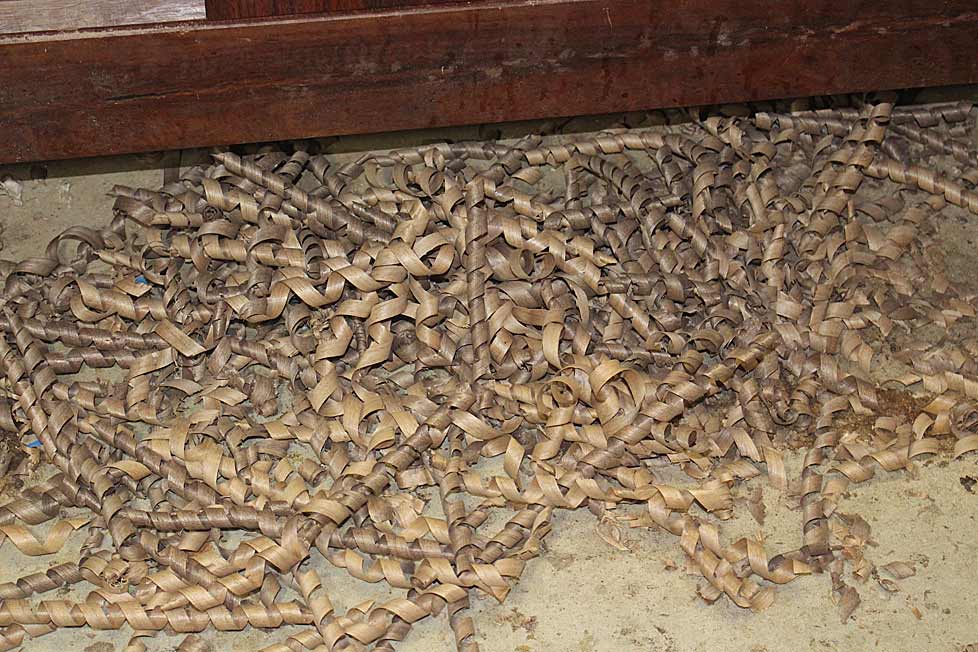
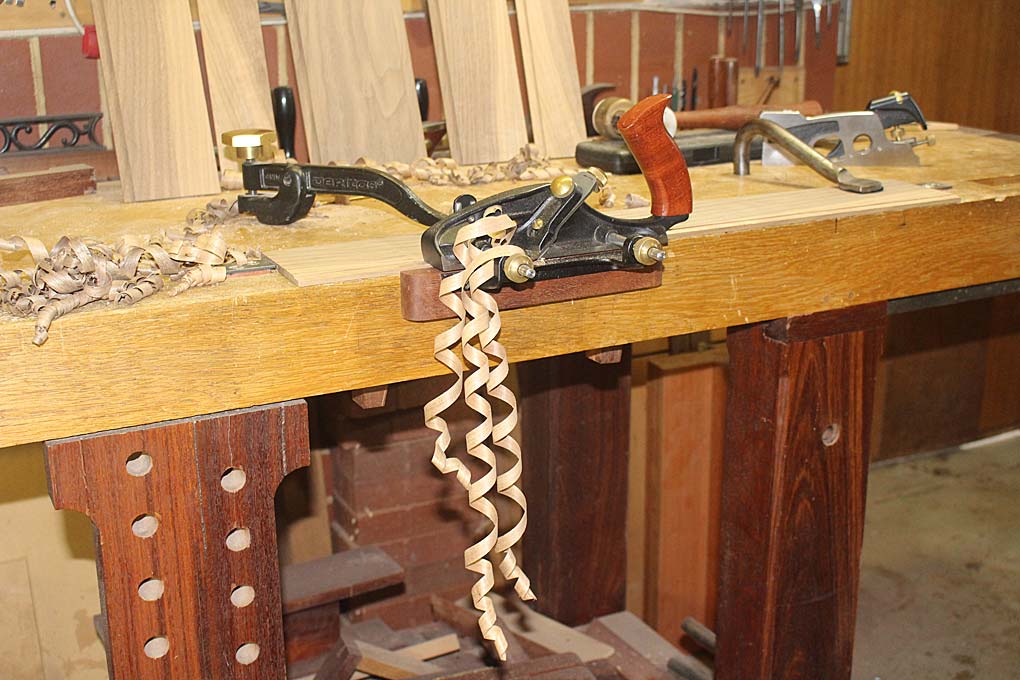
    When you see shavings like this ...


    ... you know a skew rebate plane is at work.


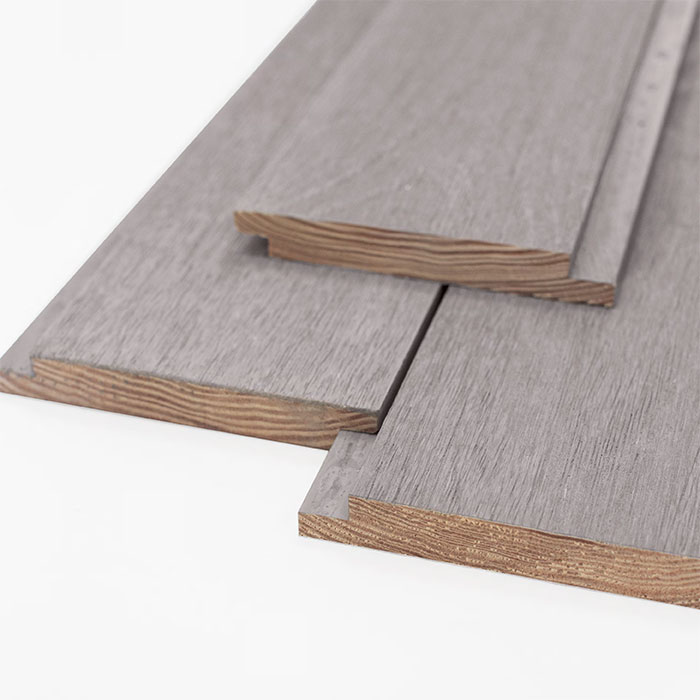
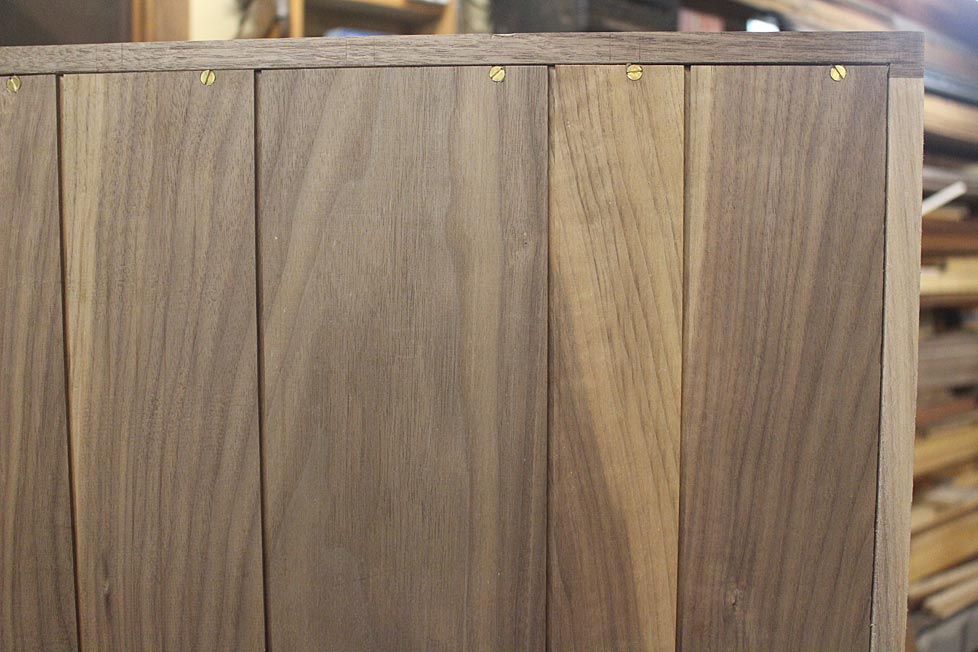
    Shiplapping is the joining of boards using an overlapped rebate. The advantage of this is to allow for movement while presenting an outward solid and sealed surface.


    The rebate is on each, but opposite sides of the board. In this case, I have made the rebate 10mm wide. This will allow for an overlap of about 7-8mm.


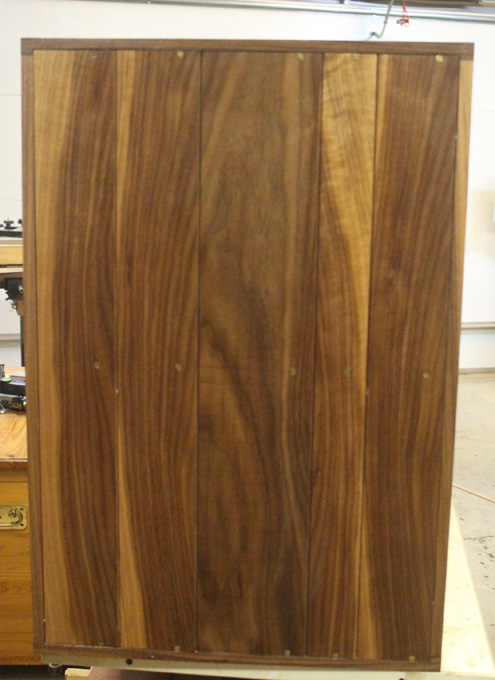
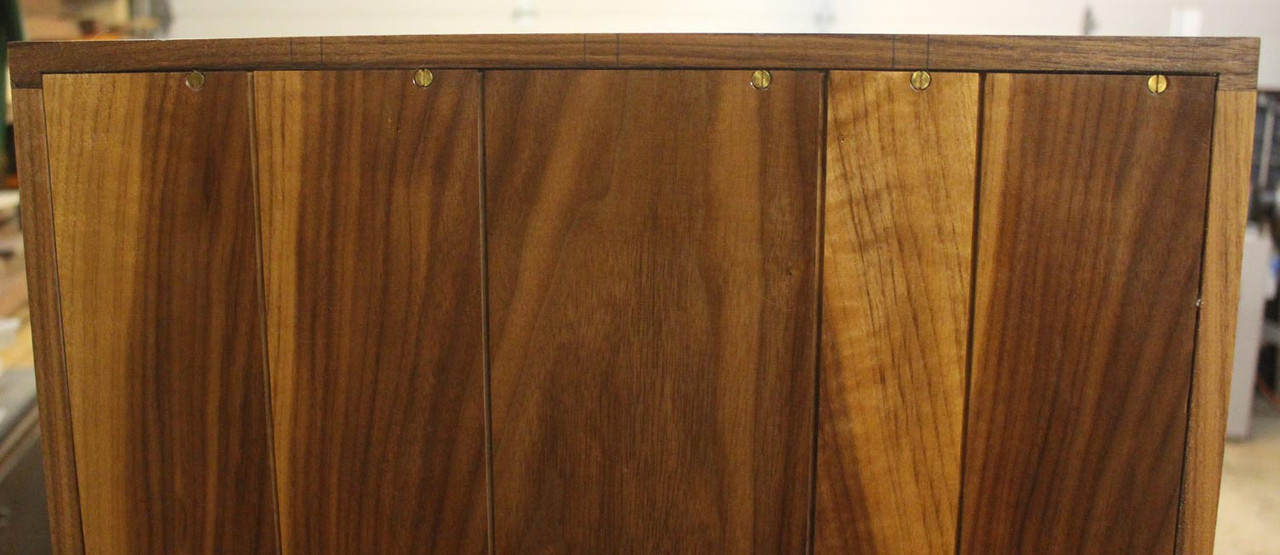
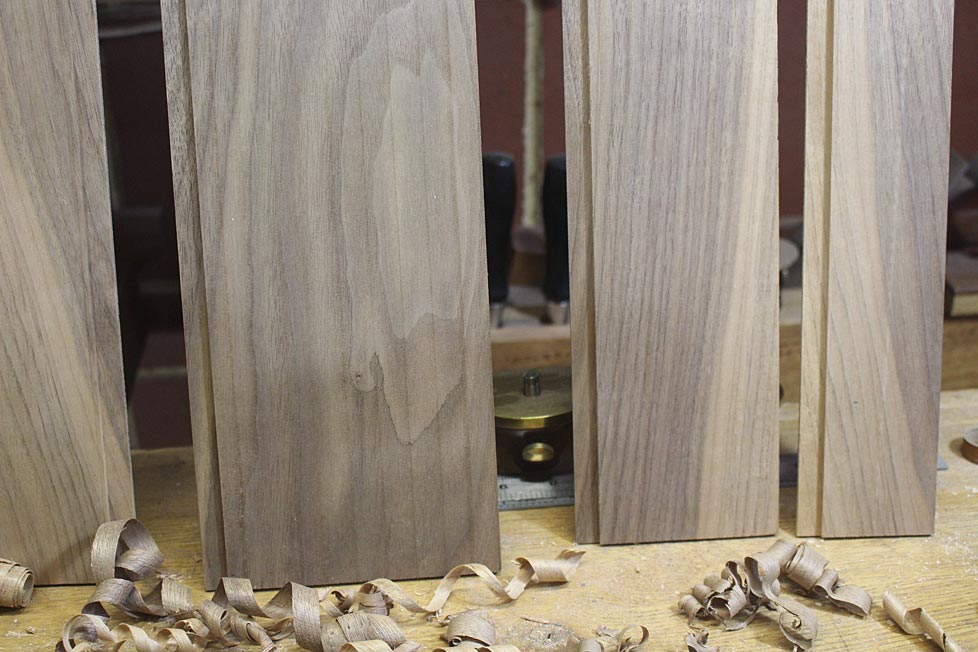
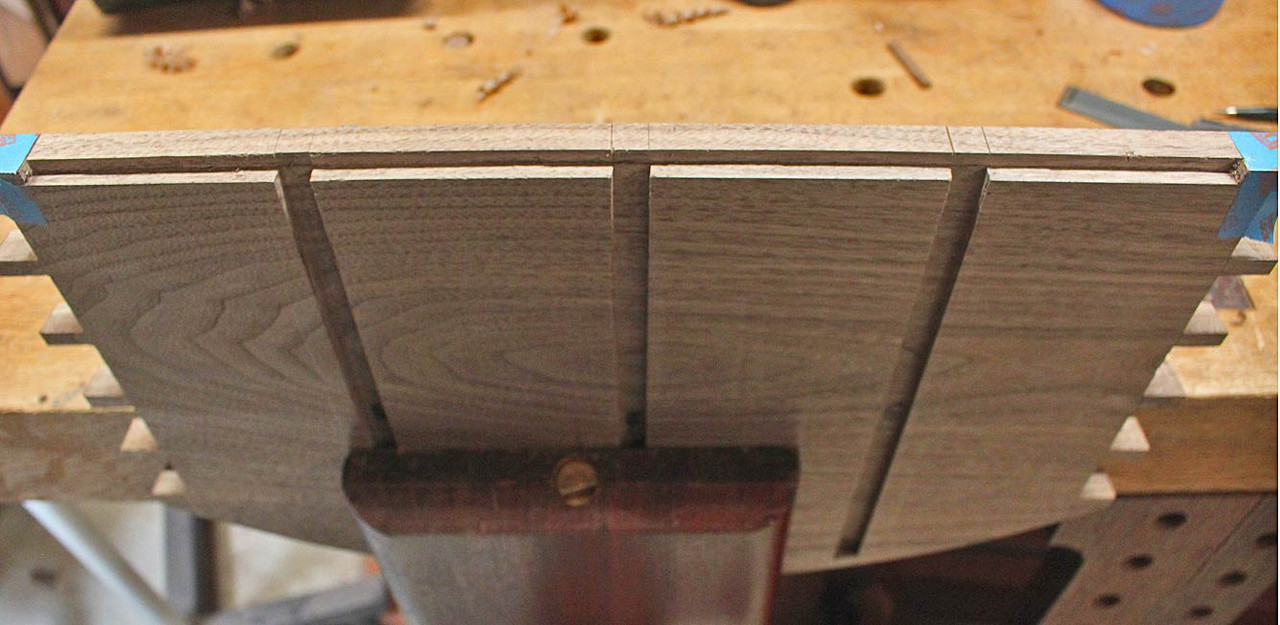
    Here I have made use of sections of Black Walnut that would otherwise be considered offcuts ...


    The boards are 6mm thick, and each rebate is just 3mm high ...


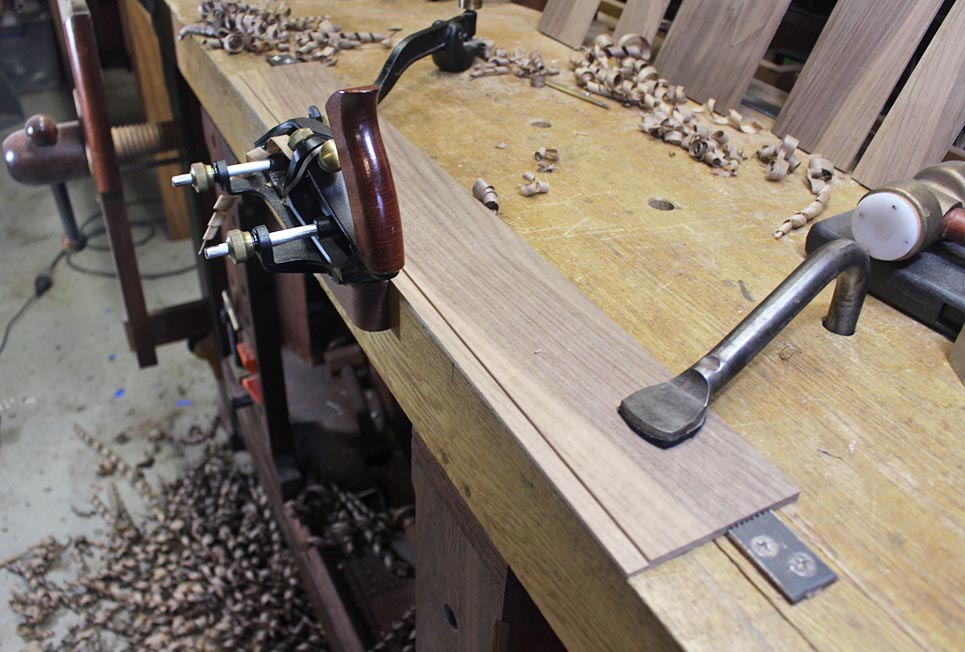
    Planing take a few minutes with the Veritas Skew Rabbet plane ...


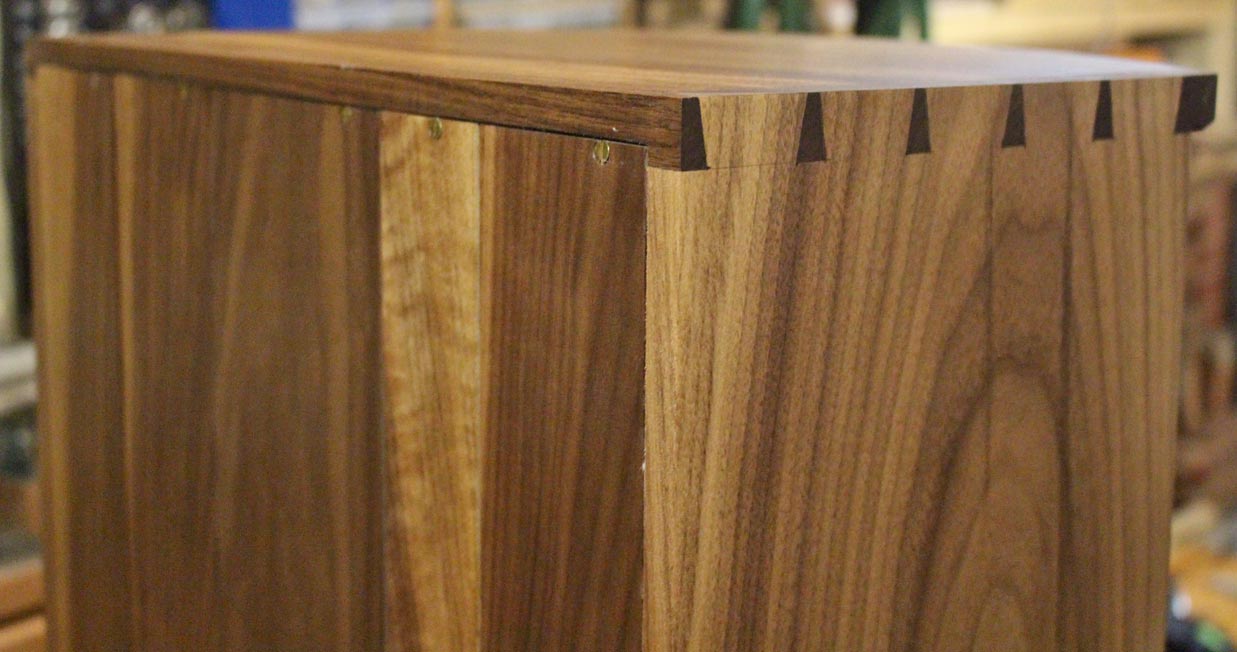
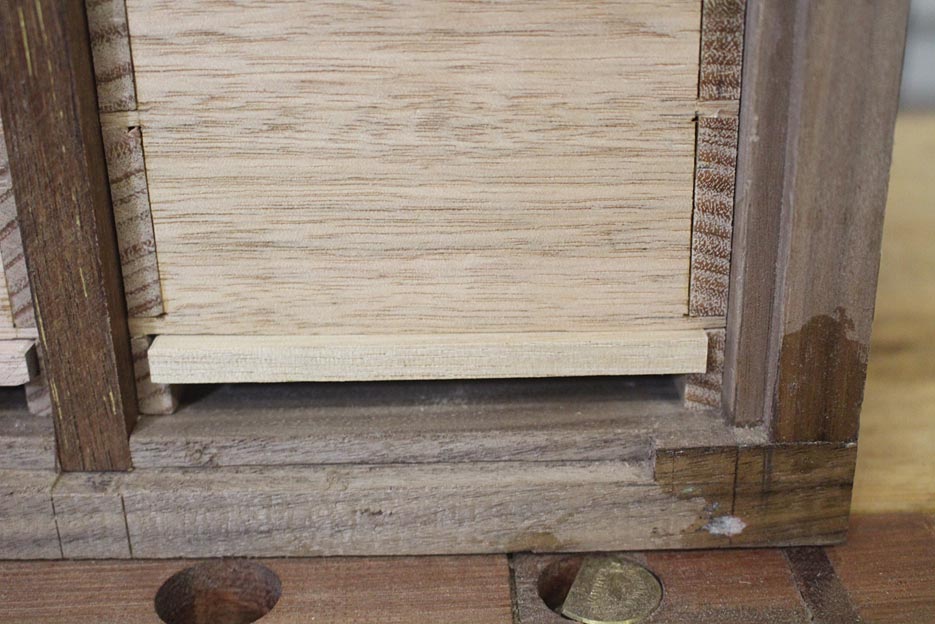
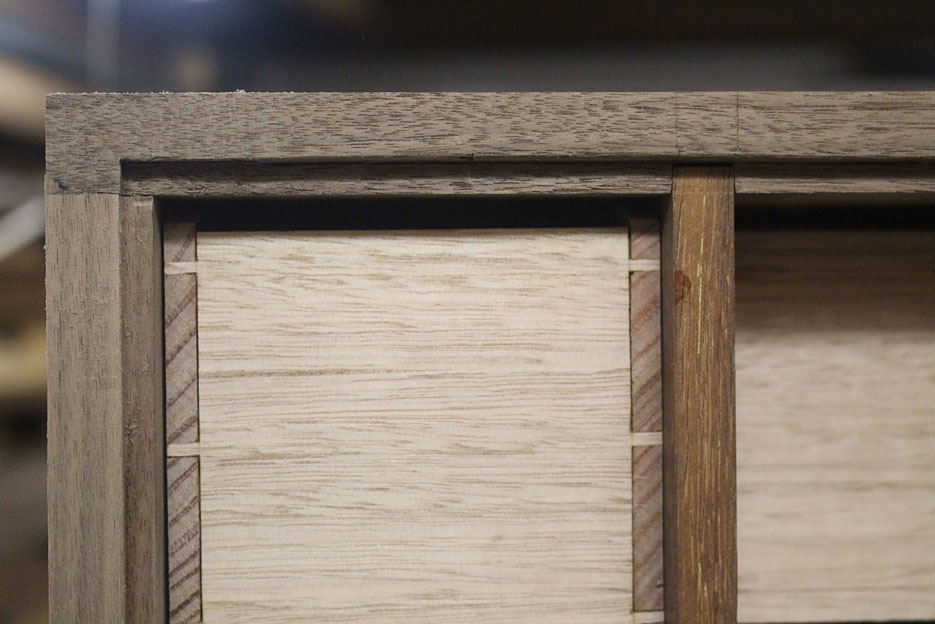
    When the carcass was dovetailed together, allowance was made for a rebate all around the rear of the chest. This required that the area close to the pins was left uncut ...


    ... which can be seen at the corners ..


    The waste was now chiselled out ...


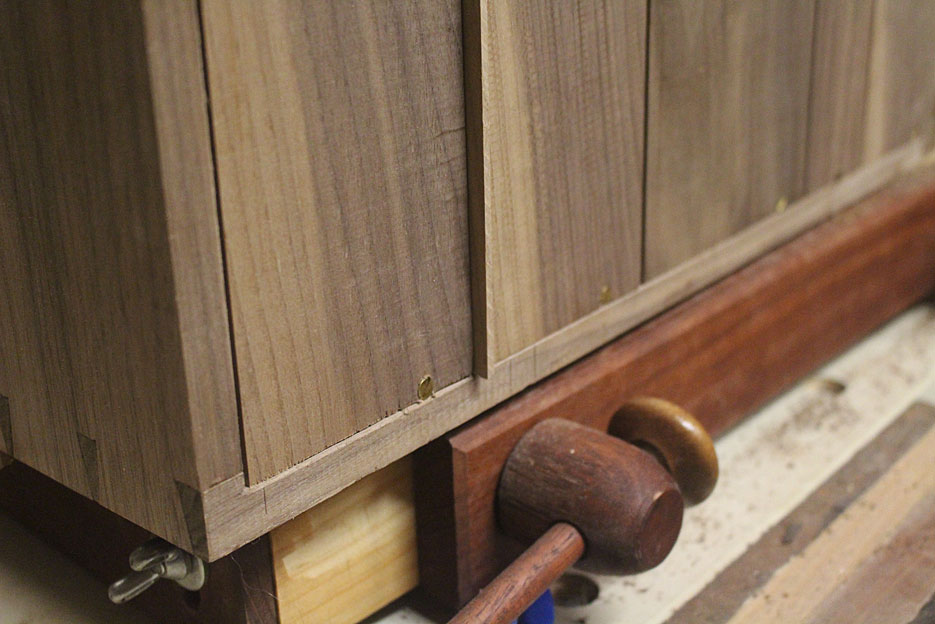
    The boards could now be cut to length and fitted. The rebate gap between boards was set with a spacer ...


    No glue is used as the boards are free to expand into the gap. A single screw holds them close to the overlap ...


    Done ...


    And no one will see any of this

    Regards from Perth


    Derek

  2. #2
    Join Date
    Mar 2006
    Location
    Austin Texas
    Posts
    1,957
    Thanks for the continuing progress photos/description Derek. I still lust for a skewed blade style rebate plane.
    David

  3. #3
    Join Date
    Jun 2010
    Location
    twomiles from the "peak of Ohio
    Posts
    12,183
    Have watched Ishitani use a splined version for the backs he makes.....narrow groove along each side of the boards for the back...connected with a spline...no glue used.

  4. #4
    Join Date
    Feb 2004
    Location
    Perth, Australia
    Posts
    9,494
    Steven, yes. I have also done this with tongue-and-grooved boards. However they were thicker than those used here.


    Regards from Perth

    Derek

  5. #5
    Join Date
    Oct 2007
    Location
    Cache Valley, Utah
    Posts
    1,723
    Nice work; no one but you and the final owner will see it, but it's nice to do anyway. I built a large entertainment unit a few years ago and did ship lap frame and panel backs for it; Three or four separate panels, I believe, with the lapped sections captured in a rabbet top and bottom. It looked very nice, but when the owner put a sound bar in the cabinet and turned up the volume (and bass) the individual slats rattled like crazy. A small screw top and bottom as you did probably would have helped. Next time (on an entertainment unit, anyway) I'll have to use ply...

  6. #6
    Join Date
    Apr 2008
    Location
    Provo, UT
    Posts
    390
    So I can't quite tell, but are the rebates on both sides of the board the same width? It almost looks like they have two different widths.

    Jeff

  7. #7
    Join Date
    Oct 2007
    Location
    Cache Valley, Utah
    Posts
    1,723
    Could we see the front of the chest and drawers?

  8. #8
    Join Date
    Feb 2004
    Location
    Perth, Australia
    Posts
    9,494
    Quote Originally Posted by Jeff Ranck View Post
    So I can't quite tell, but are the rebates on both sides of the board the same width? It almost looks like they have two different widths.

    Jeff
    Hi Jeff

    The boards are different widths. The rebates are all 10mm wide and 3mm deep. They are on alternating sides of the boards, with the exception of the two on the ends, where there is no rebate needed on the outside.

    Regards from Perth

    Derek

  9. #9
    Join Date
    Feb 2004
    Location
    Perth, Australia
    Posts
    9,494
    Quote Originally Posted by Dave Cav View Post
    Could we see the front of the chest and drawers?
    Dave, there are many pictures of the front in previos posts. I have not yet installed the new knobs. The drawer fronts need to be drilled for a 3/8" tenon, and thus requires a jig. I shall do it on the weekend. At this time I have begun work on the base for the chest.

    Regards from Perth

    Derek

  10. #10
    Join Date
    Oct 2007
    Location
    Cache Valley, Utah
    Posts
    1,723
    Thanks, very nice. I don't come around to this forum often enough, apparently.

  11. #11
    I really enjoy the random width effect of the back boards Derek. Thanks for your effort in documenting this entire project. Well done on both accounts! I can even smell the wood.

    Blair.

  12. #12
    Join Date
    Apr 2017
    Location
    Michigan
    Posts
    2,772
    The back of my desk has loose shiplapped boards. They cover a shallow electrical chase in the back of the desk. I can leave one out to accommodate plugging in to an outlet and still push the desk tight to the wall.

  13. #13
    Join Date
    Sep 2008
    Location
    N. Idaho
    Posts
    1,621
    Hello Derek,

    Those shavings make me itch to get back into my shop, which is almost back to basic functionality...

    A bit surprised you didn't clock those screws that no one will see given crispness of the design and execution

    Best,
    C
    "You can observe a lot just by watching."
    --Yogi Berra

  14. #14
    Join Date
    Feb 2004
    Location
    Perth, Australia
    Posts
    9,494
    As requested by a number of people, I have clocked the screws at the rear of cabinet. Gad, some are so OCD!


    One coat of oil so far ..


    Regards from Perth


    Derek

  15. #15
    Join Date
    Nov 2008
    Location
    Lewisville, Tx
    Posts
    158
    Beautiful, Derek.

    By the way, my daughter's Girl Scout troop raised funds for a trip to London and Paris. While in England we visited Windsor Castle. The following may shock and dismay many here: the Queen's screws were not clocked (on the switchplates for the lights).

    And the applied Oak molding on one of the interior doors had visible nail holes.

    Please try to contain your horror, fellow creekers.

Posting Permissions

  • You may not post new threads
  • You may not post replies
  • You may not post attachments
  • You may not edit your posts
  •