Results 1 to 15 of 15

Thread: Apothecary chest - through dovetails on a drawer

  1. #1
    Join Date
    Feb 2004
    Location
    Perth, Australia
    Posts
    9,450

    Apothecary chest - through dovetails on a drawer

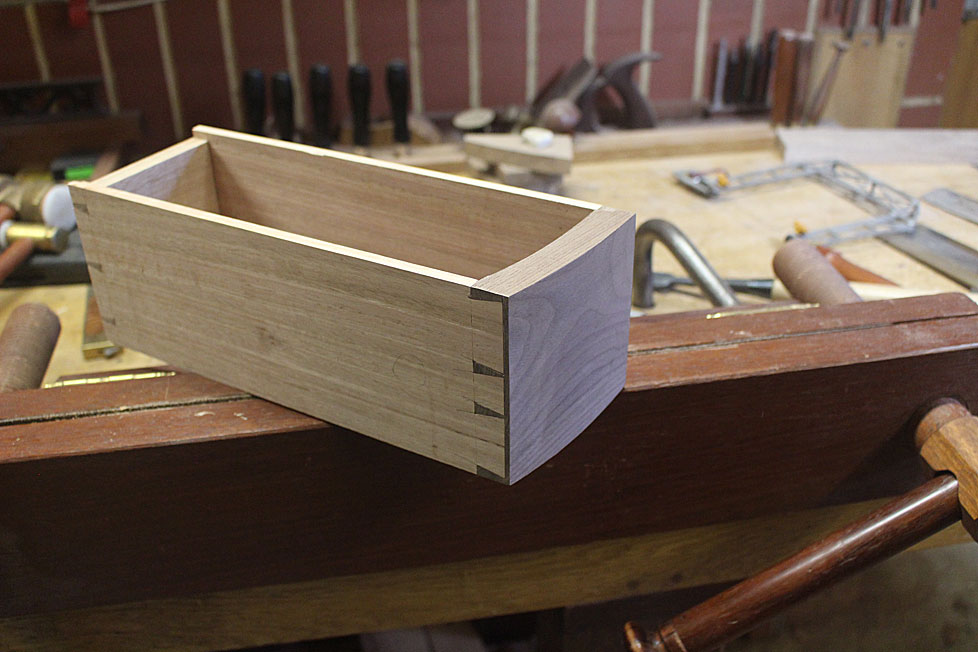
    This is a long post, and so feel free to skim through it. Who needs another dovetailing documentary?


    This one is specific to the back of a drawer, and so is different from the through dovetails which one might use on boxes. Also, I have a few techniques to share, ones that I do not see mentioned much, if at all.


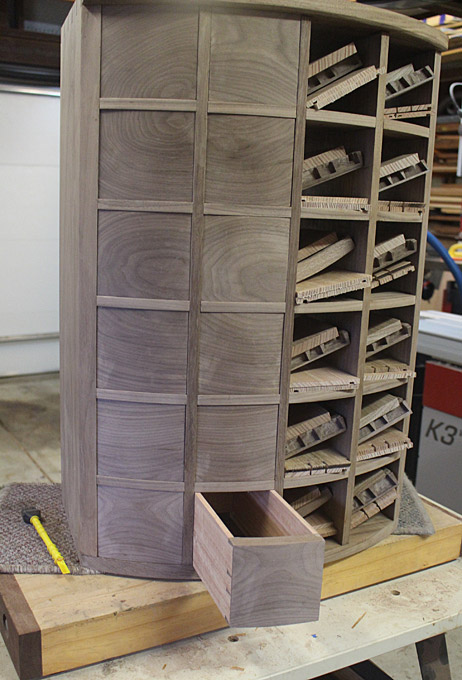
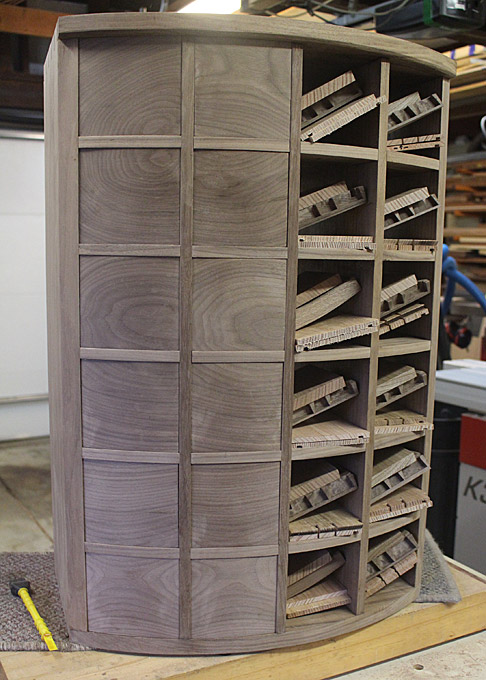
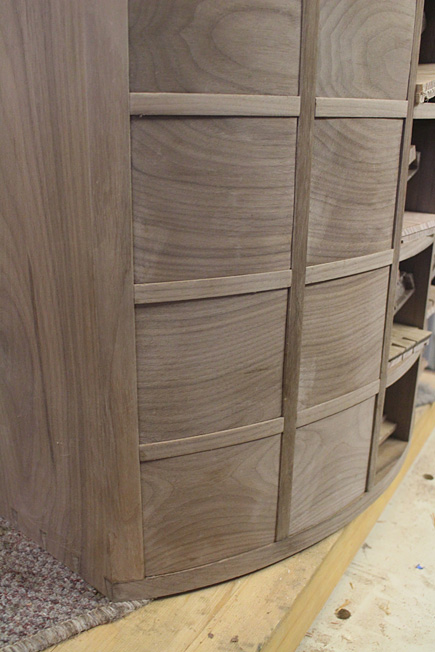
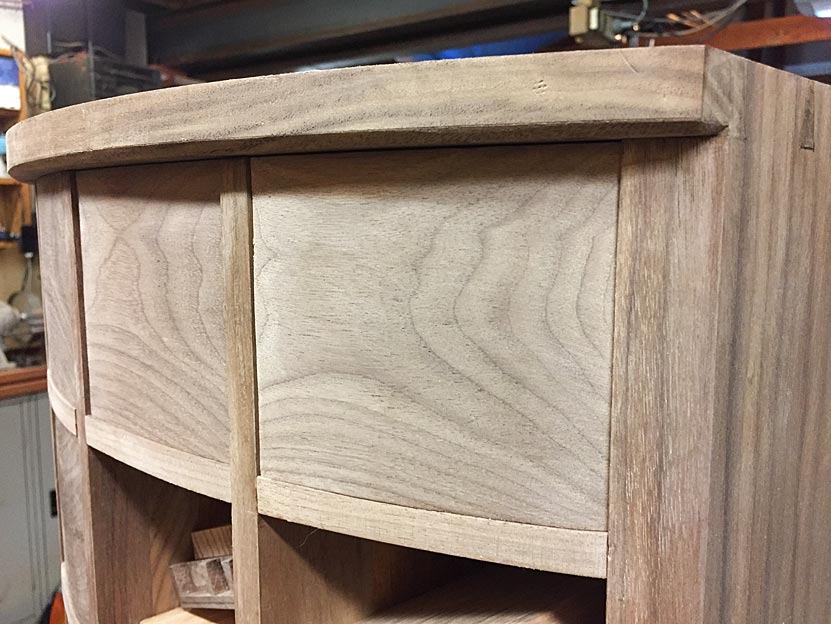
    The drawer is one in the Apothecary chest. What has been shown before was the dovetailing hijinks needed for the curved fronts. This affects the drawer sides as well, since they are not equal in length. In fact, the length for the sides need to be measured individually.


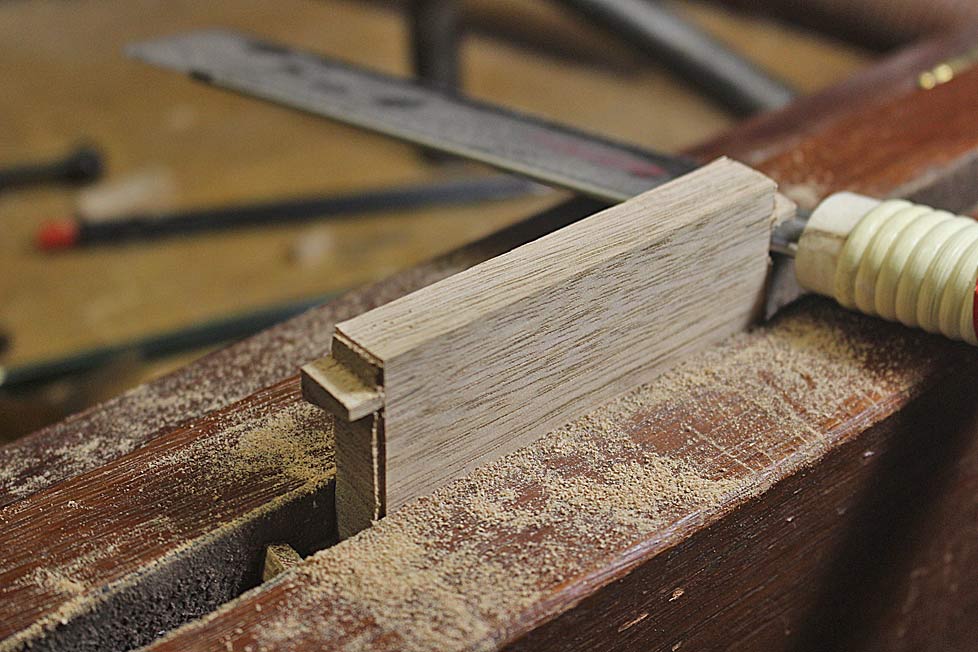
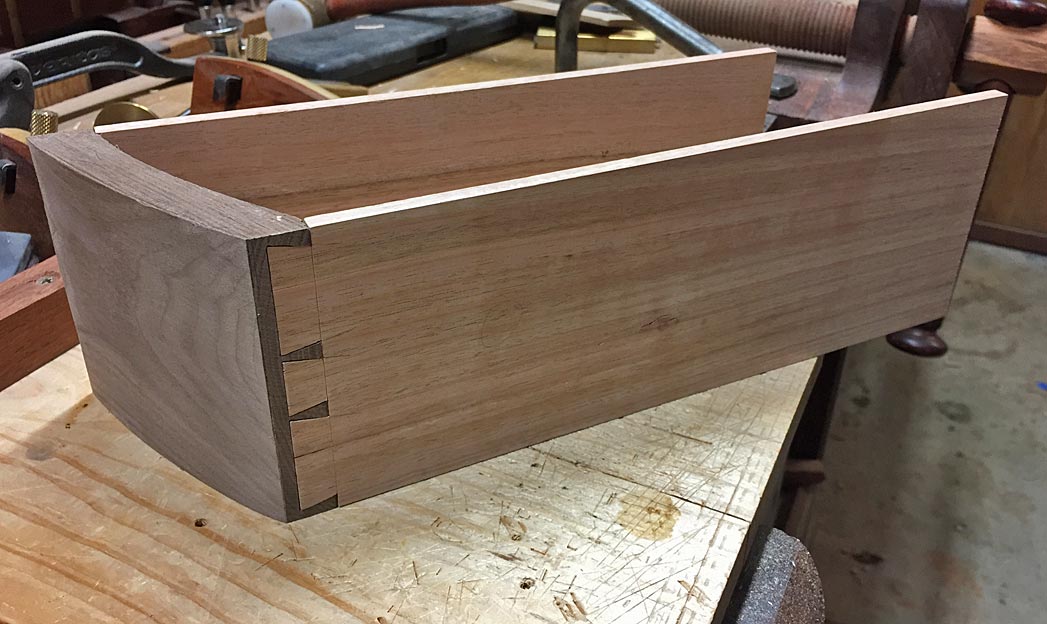
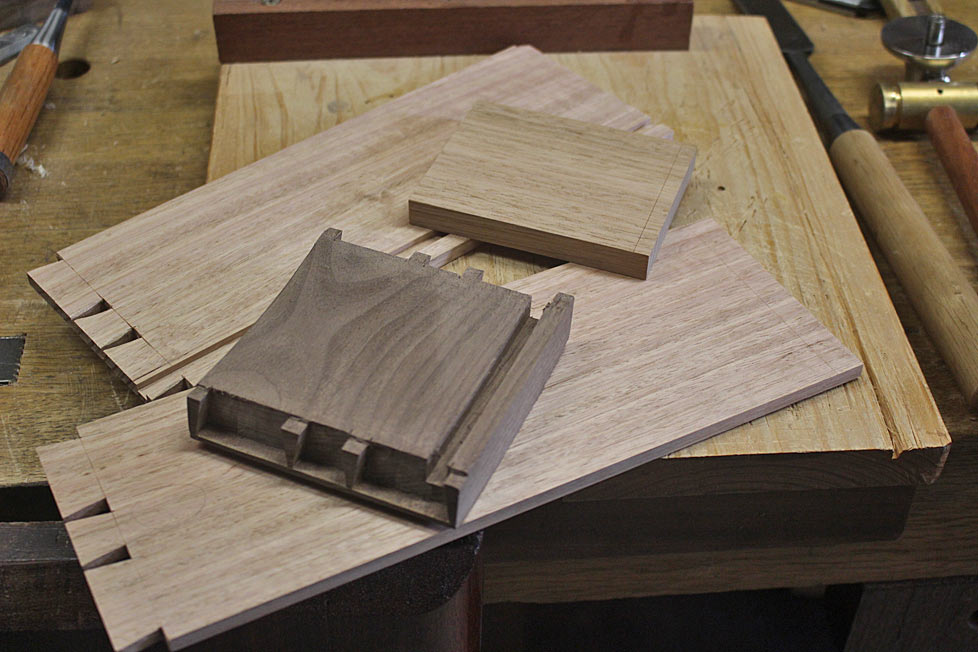
    Here is a drawer front with sides ...


    It is fitted in the recess and positioned carefully (top right hand drawer) ...


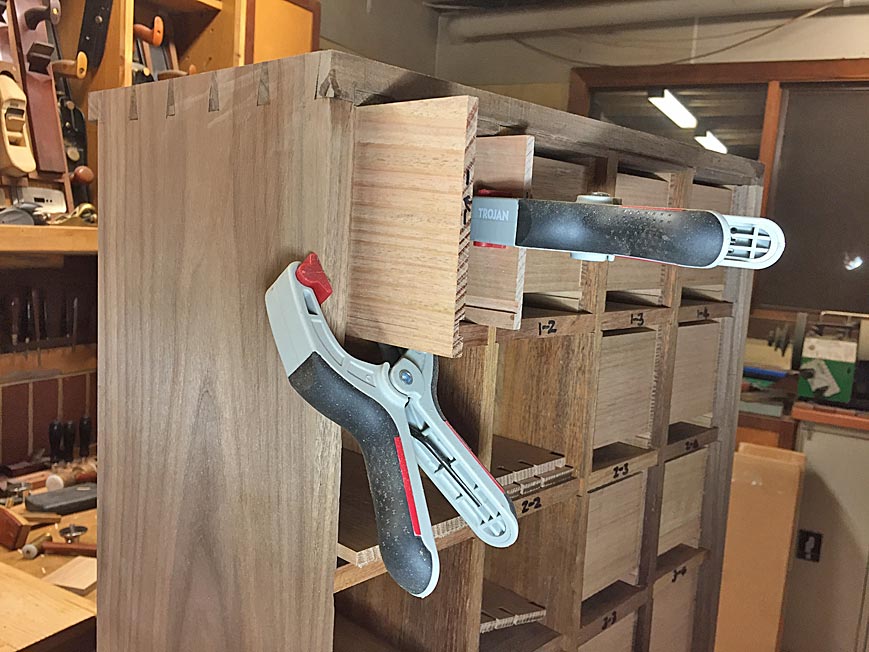
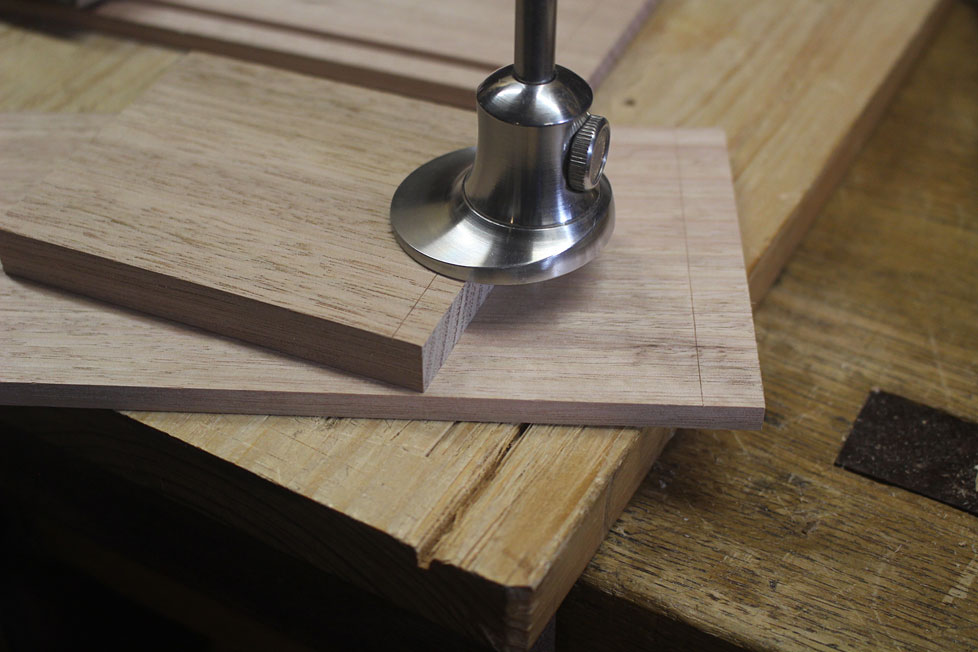
    At the rear of the chest, the drawer sides are clamped to avoid any movement ...


    Now the drawer side length can be marked. The final length is 10mm in from the back of the recess.


    We are ready to begin joining the rear of the drawer. A drawer back has been added to the parts ...


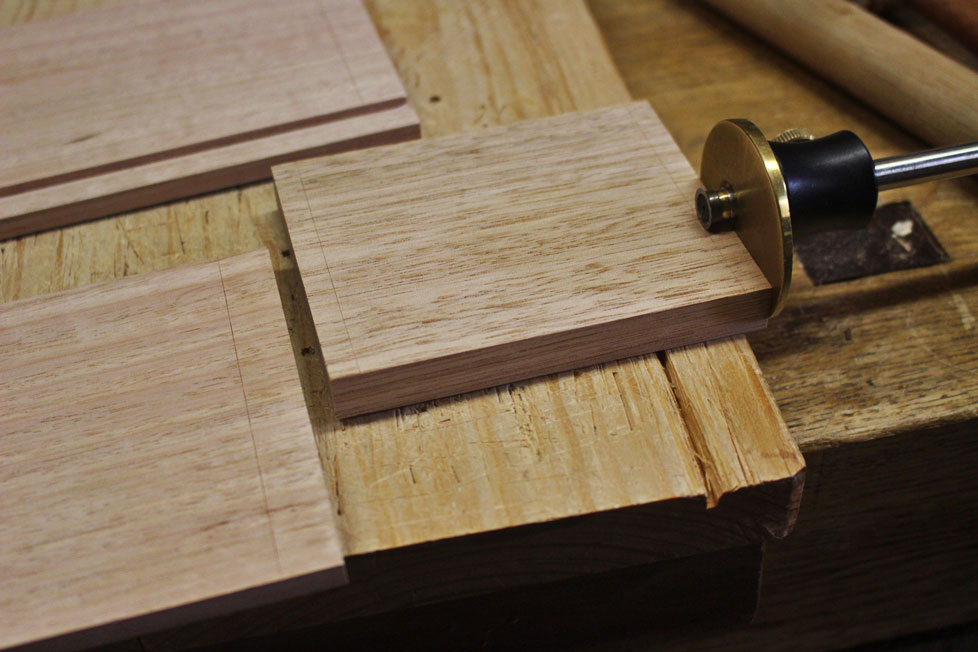
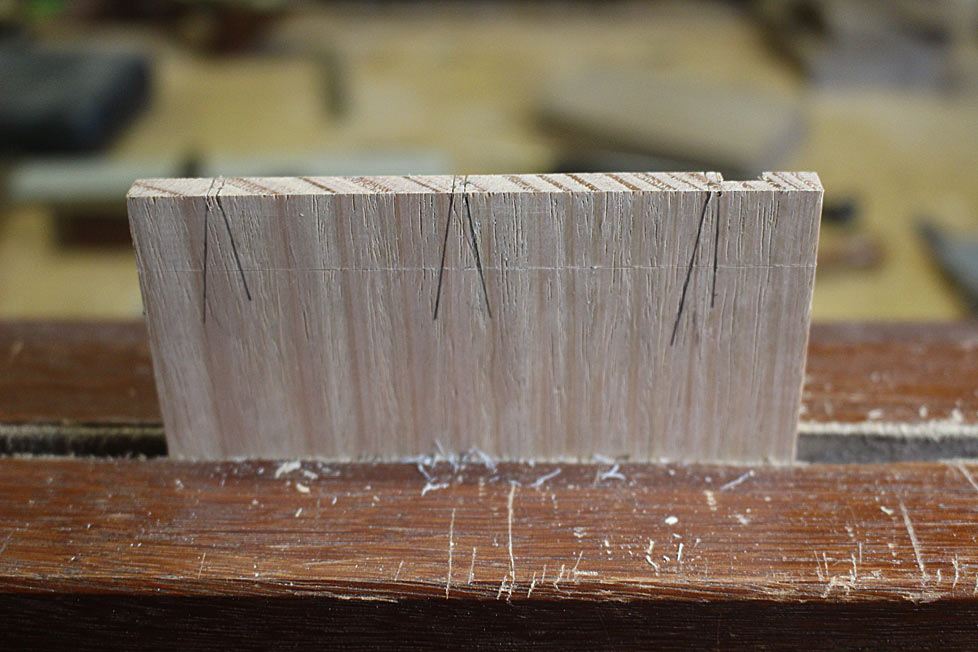
    "Drop" (the gauge) for the width of the drawer back and transfer it to the ends of the drawer sides ...


    Now do the same for the drawer sides and transfer this to the drawer back ...


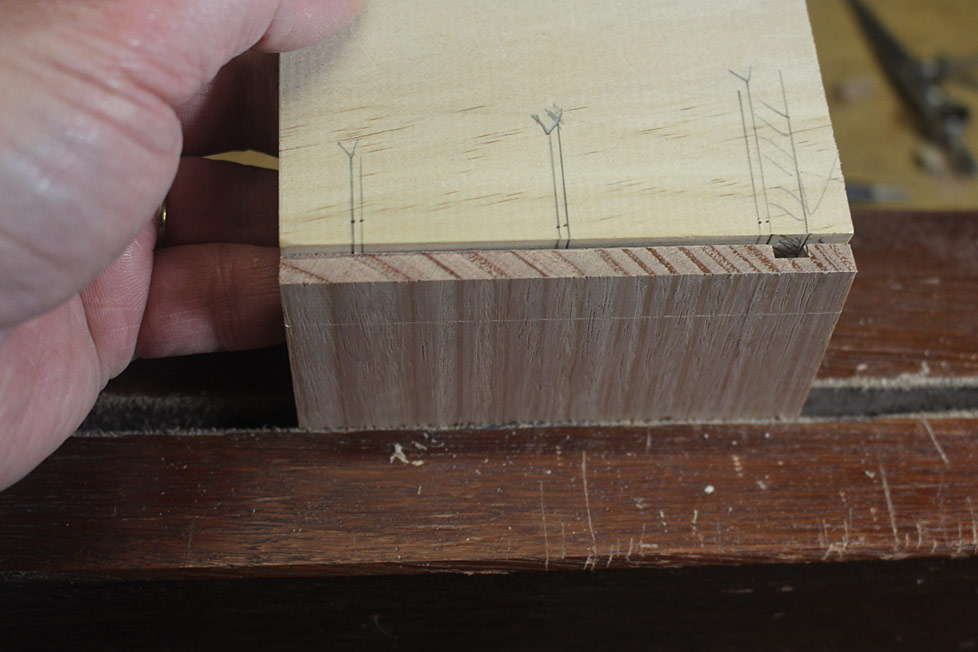
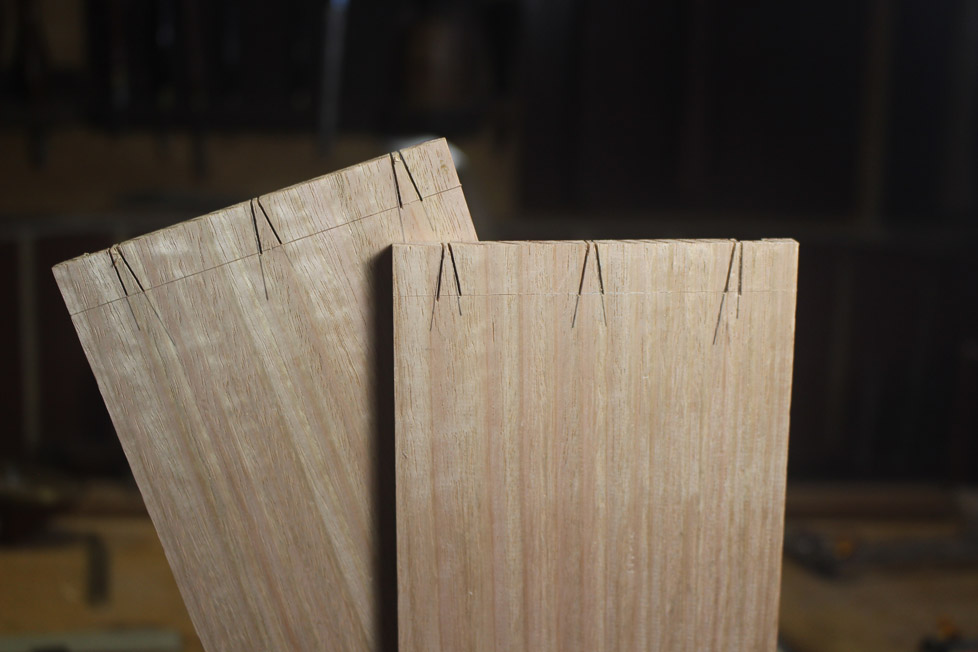
    With 24 drawers, it was quicker and easier to make up a template for positioning the tails ...


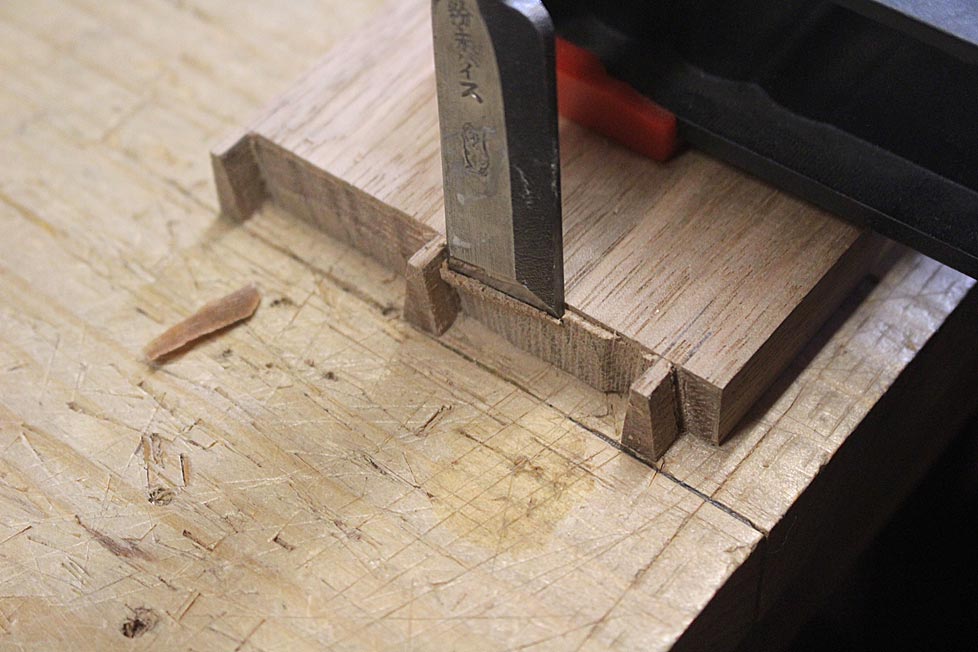
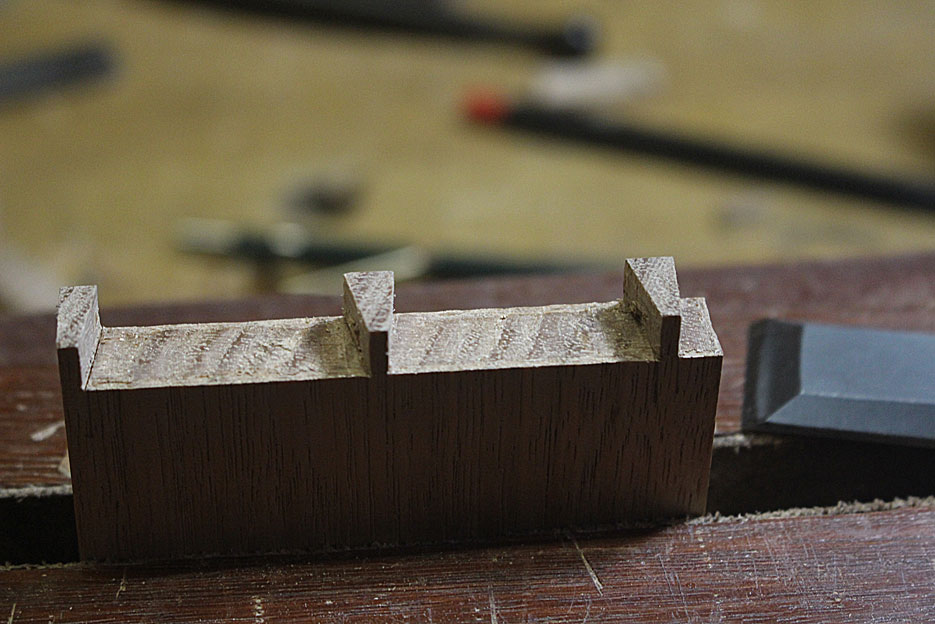
    Note that the tail alongside the groove (for the drawer bottom) is not a triangle, but one side is vertical (flanking the groove) ...


    Saw both drawer sides ...


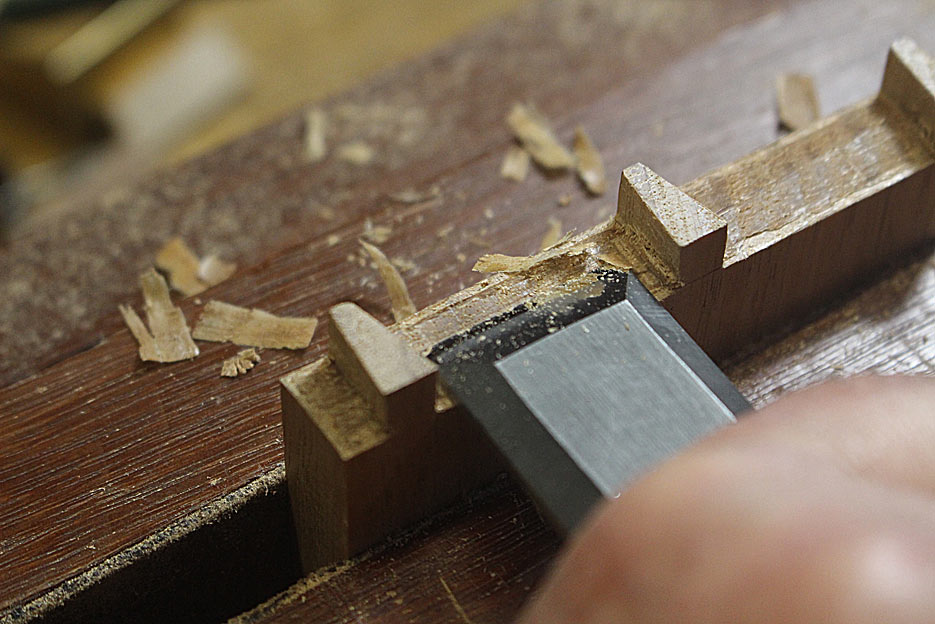
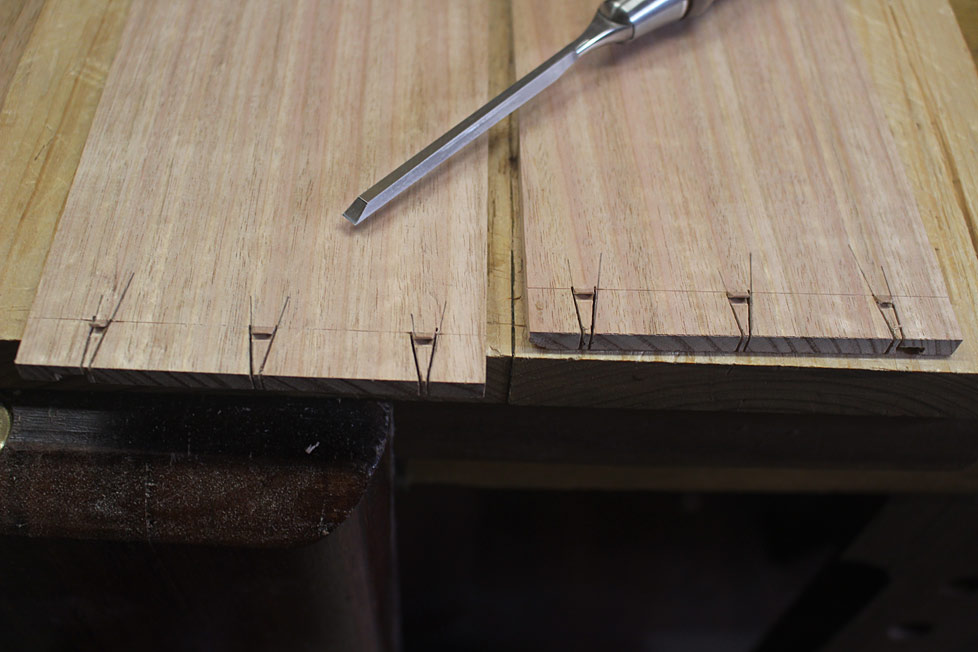
    Time to remove the waste from the tails. First, create a chisel wall for all the tails ...


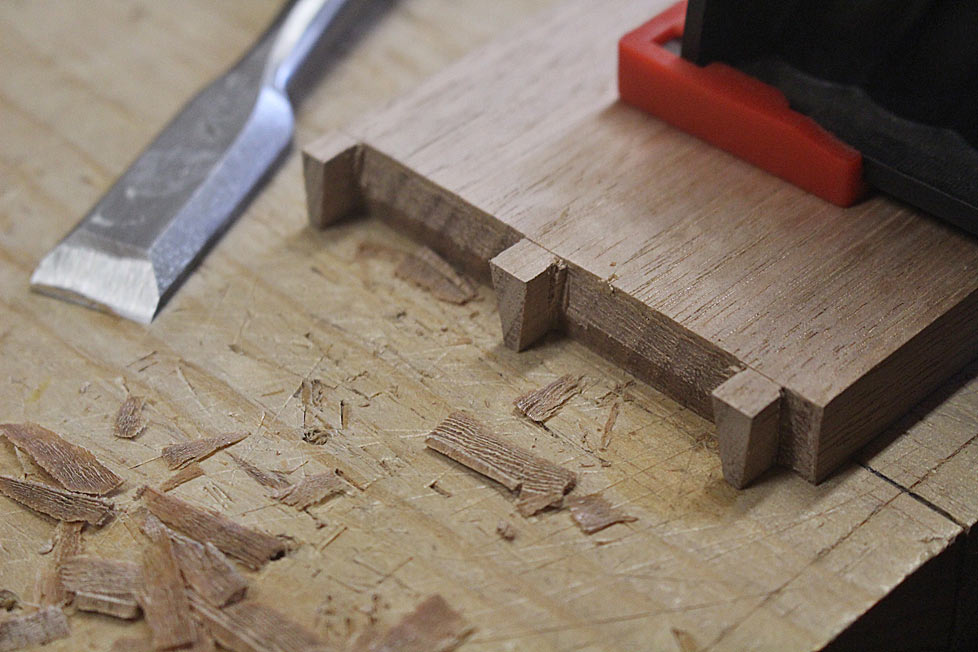
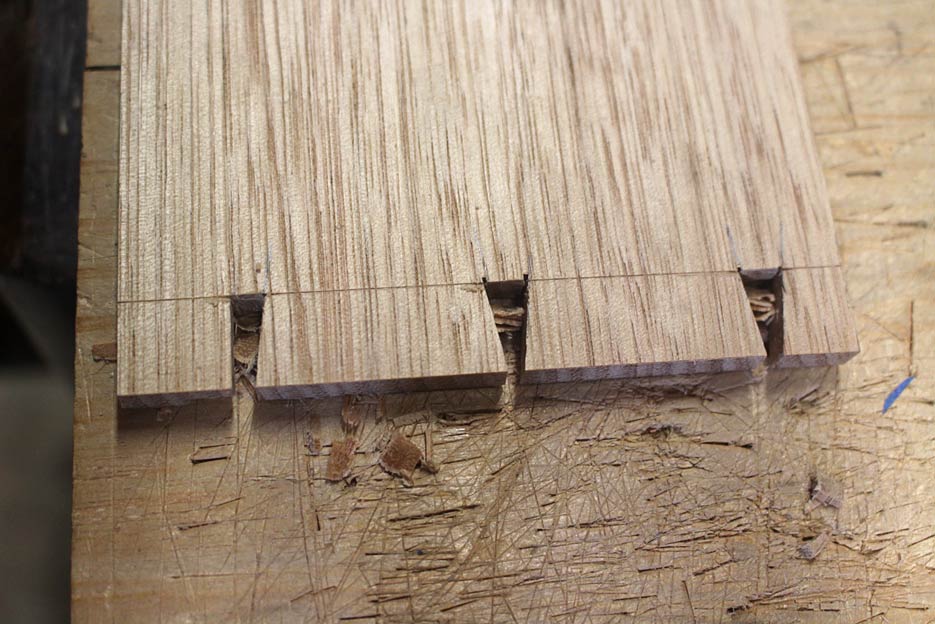
    Fretsaw the waste to 1-2mm from the line ...


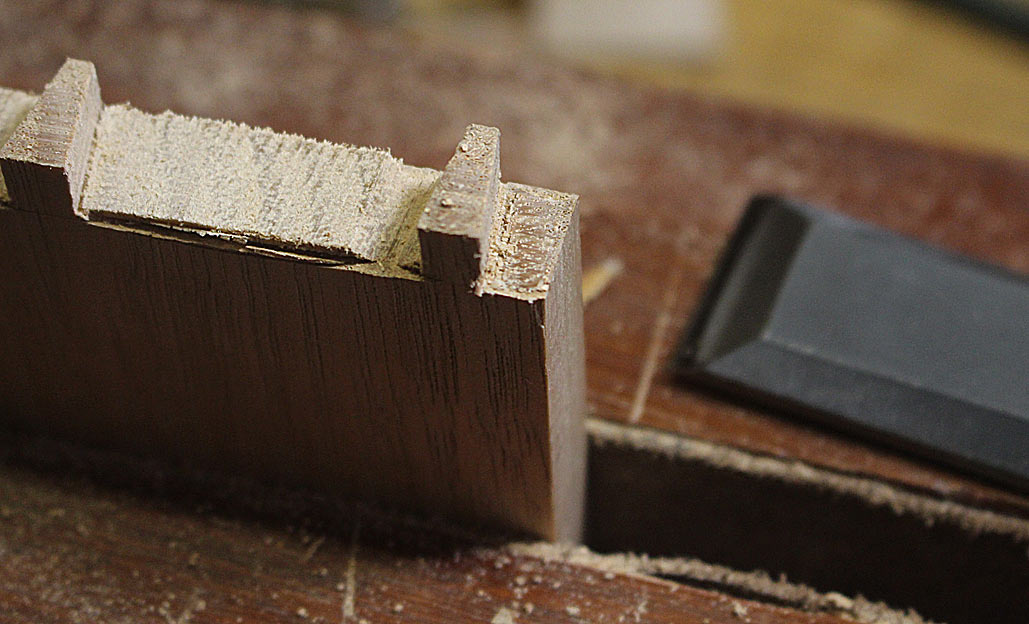
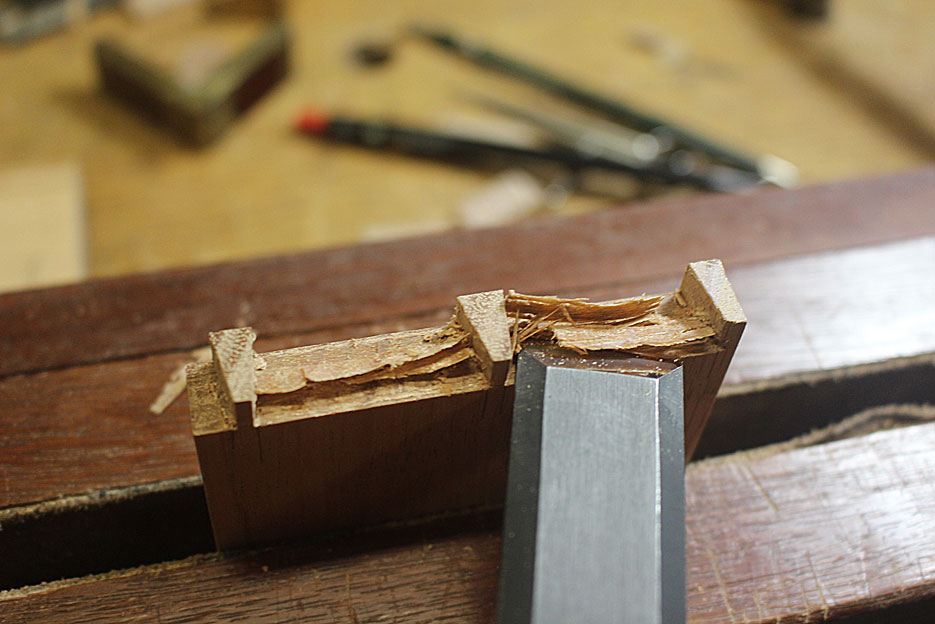
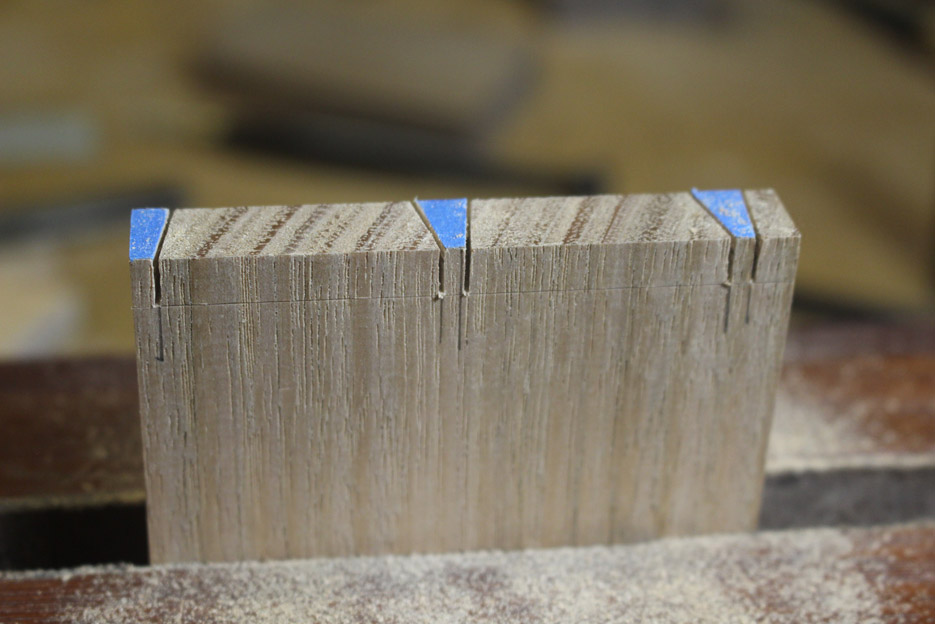
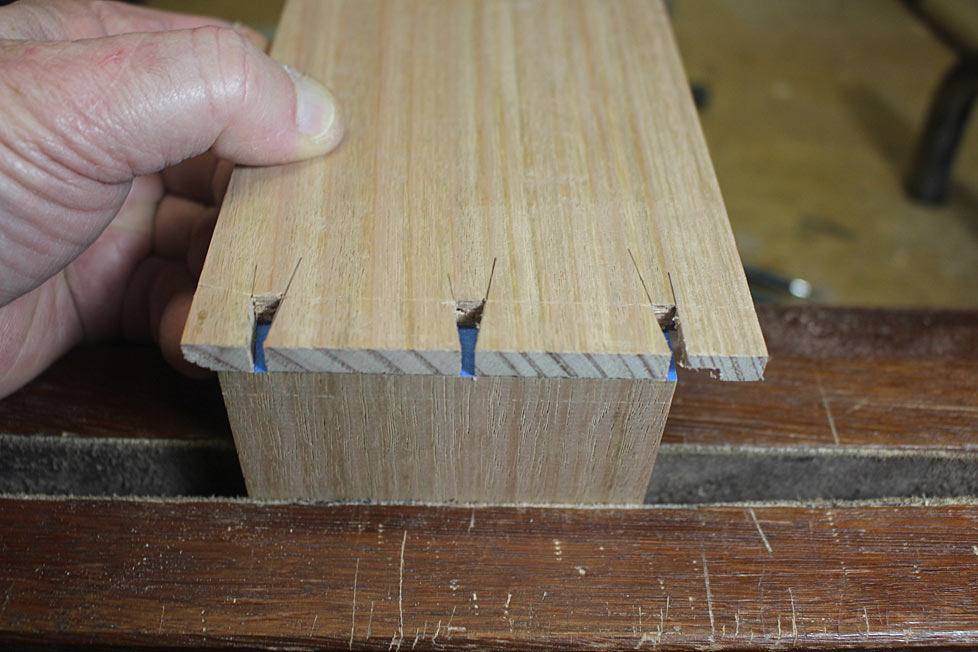
    Remove the waste in thin layers for the cleanest finish. Note that the Tasmanian Oak is too thin (6.5m) to confidently pare half way by hand (better to use a hammer for precision). By taking very fine layers it is possible to push through the board without spelching the other side ...


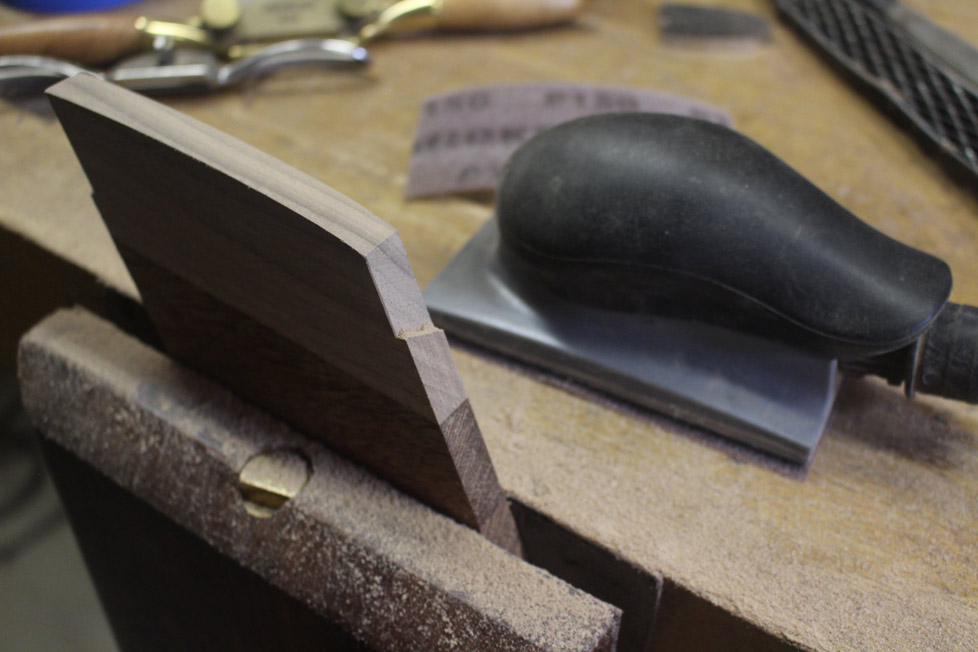
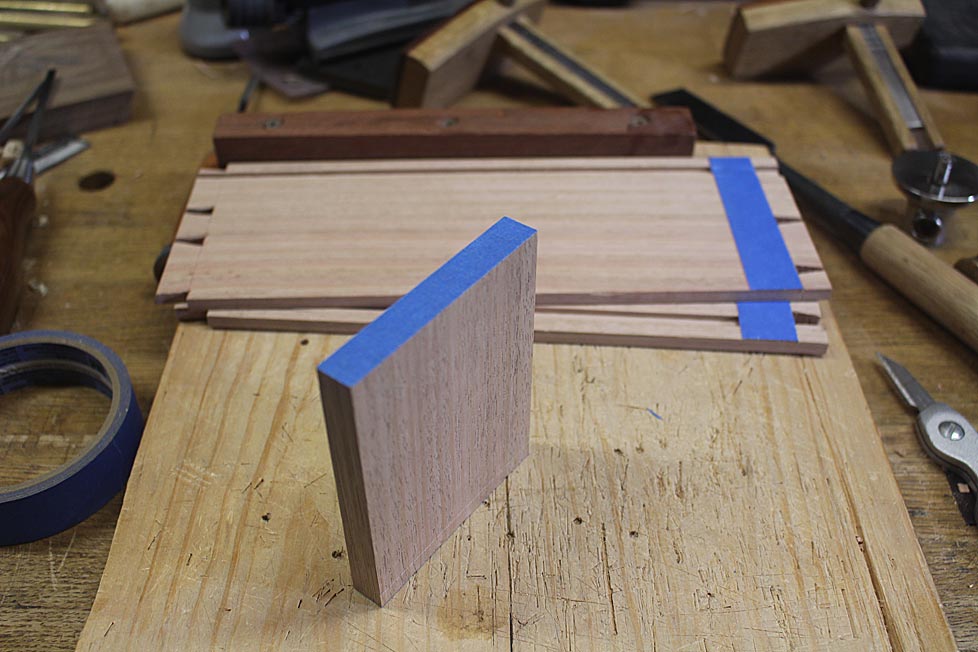
    Blue tape on everything!! The drawer sides have blue tape ala the #140 trick (I wrote this up recently on my website). There are 4 layers. The drawer back has tape to aid in transferring marks (don't knock it if your eyesight is better than mine).


    Transfer the tails to the pin board ...


    The great thing about the blue tape method is that you only need one knife stroke to cut through. No sawing away to make an impression in the end grain. Saw against the tape. Go for it!


  2. #2
    Join Date
    Feb 2004
    Location
    Perth, Australia
    Posts
    9,450
    Now remove the waste with a fretsaw. Again, aim for about 1mm above the line. For control, hold the saw handle very gently, and saw as lightly as you can - do not force the cut. Let the saw do the work. You will be rewarded with a straight line ...


    I saw away the ends about 1mm above the line ...


    In years past, I used to saw to the line. I now see more value in paring to the line. What you will notice is the chisel wall around the section. I am reminded of David Charlesworth's method of removing end waste. He calls his process "tenting". In this he pares upward, reducing the waste all the time. In my method, this is unnecessary since the chisel wall protects the sides and you can see when you are getting close to level ...


    Of all the aspects in through dovetailing, I think that removing the waste between the pins is the hardest. This is again where I was reminded of David's tenting method (but which he does not use in this section, only at the ends).


    Again the chisel wall aides in enabling the chisel to register against the line without any danger of going over it. The chisel here is PM HSS, and very tough (and sharp!). The blade is driven at an angle away from the sides ...


    Turning the board over, and repeating the manoeuvre, the result is a tent ...


    I have two methods for removing the remaining waste. The first is to pare the tent, slowly reducing the angle. Since you are paring upwards, there is now danger to spelching the opposite side of the board ...


    The second is a side-to-side sweep, which slices away the waste ...


    Finished ...


    The parts are now assembled. From the top ....


    ... and the bottom ...


    Fitting the drawer ...


    My plan is to set the drawers back a mm or two ...


    Any thoughts about this?


    Regards from Perth


    Derek

  3. #3
    Join Date
    Mar 2006
    Location
    Austin Texas
    Posts
    1,957
    Was blue tape used to create the original base lines of the tails before making the tail side saw cuts? From your description, it seems you added four layers of tape afterwards to create the backstop for the pin marking operation. I confess, the "tenting" technique is new to me, as I had figured that thin-thin paring (hand pressure push only) strokes with a sharp chisel down halfway from each side in a pure vertical plane would prevent spelching. I have not had much spelching issues, but each wood species differs and I will try it next time I dovetail. I also have not been creating a chisel wall prior to fret sawing the waste away and have been using the original base line score as my final waste clearance stroke registration point. When I first used to chop (rather than saw) the waste out, I created the chisel wall as I went down the thickness of the waste. Then I changed my technique for waste removal to chop the waste from approx. 1/16" - 1/8" away from the base line and pare the remainder from that point to the base line. Since acquiring the new fret saw, I now saw very close to the base line and pare from the original base line (without creating a chisel wall). Your technique varies and provides food for thought. Thanks for sharing and nice work on the drawers.
    David

  4. #4
    Thoughts? Only that I see you have overcut through the baseline. I like that, cleans out the corner very well.

  5. #5
    Quote Originally Posted by Kees Heiden View Post
    Thoughts? Only that I see you have overcut through the baseline. I like that, cleans out the corner very well.
    Proof that Derek is actually human!
    Fair winds and following seas,
    Jim Waldron

  6. #6
    Join Date
    Aug 2012
    Location
    Missouri
    Posts
    2,151
    Tried to think about your reason for setting the drawers back. A heavier shadow line is my guess. I wouldn't think it would make much difference. I believe I'd like to see flush before I could answer. I guess you may have some small variance in the faces or your leaving room for that veneer job that has been fervently suggested.
    Jim

  7. #7
    Join Date
    Feb 2004
    Location
    Perth, Australia
    Posts
    9,450
    Quote Originally Posted by Kees Heiden View Post
    Thoughts? Only that I see you have overcut through the baseline. I like that, cleans out the corner very well.
    At the rear of the drawer, where it is unlikely to ever be seen, the overcut is not an issue for me.

    It is the inside of the drawer back that is more relevant than the outside.

    Regards from Perth

    Derek

  8. #8
    Join Date
    May 2015
    Location
    NJ
    Posts
    1,349
    Derek, if you're asking for opinions...definitely set the drawers back from the edge. I think it'll hide a bit of the run-out and the uniformity of depth on all 24 drawers will give it...something, looking for the right word here...for lack of better description: aesthetically subdued but gracefully attractive.
    "The reward of a thing well done is having done it." - Ralph Waldo Emerson

  9. #9
    I think I would undercut the baseline a little bit too. Everything to make it easier.

    Regarding the setback. Do you give the edges of the dividers a slight radius or chamfer? I would do that first and then decide what looks better. You can wait until the very last to glue in the stopblocks before you set in the backpanel.

  10. #10
    Join Date
    Feb 2004
    Location
    Perth, Australia
    Posts
    9,450
    Hi Kees

    The dividers were given a very fine radius at the start of the build (to continue the radius of the chest front). Before finally installing and gluing the drawer blades, each was sanded and this has the effect of softening the look as it created a slight radius on each (without rounding over).


    Regards from Perth

    Derek

  11. #11
    Join Date
    Apr 2008
    Location
    Provo, UT
    Posts
    390
    I like the setback. To me the shadow lines it creates emphasizes the distinction between the dividers and drawers and makes sure that visually it doesn't turn into "one big bowed front" looking thing. This is going to be a great piece when it is finished.

  12. #12
    Join Date
    Nov 2015
    Location
    Vienna, Austria
    Posts
    168
    My first thought was about wood movement... If drawers are stopped at the end (at back side) then it means that the fronts will not always stay still, compared to dividers edge. If there would be a notch in the drawers' sides that would fix it near to the front, then it would be stable. And, it is much harder to do them all at one level with dividers... would show the craftsmanship much better!

  13. #13
    Join Date
    Feb 2004
    Location
    Perth, Australia
    Posts
    9,450
    Hi Andrey

    The drawers will have stops at the front (I have an interesting design I have worked out). I am not overly concerned about movement. Still, I like the setback. It adds character and detail.

    Regards from Perth

    Derek

  14. #14
    Join Date
    Feb 2007
    Location
    Libertyville, IL (Chicago - North)
    Posts
    360
    If the drawers will be removed from the case during use... in and out, in and out; I think there may be some dings and wear on the frame. Because the frame is a bit proud, those dings may be more prominent. I might soften the edges to guard against that. Aesthetically, I think the protruding 1 mm will look great. All the swirling grain needs some structure and the grid will stand out with the shadow lines. I expect that will help people appreciate all the engineering work you did.

    Regarding the concave insides of the drawer faces, did you consider getting the appearance of the fully curved face but the simplified joinery of a straight line by only hollowing from the top down - leaving the bottom of the face flat? Just an idea that popped into my head when I saw the manual hollowing process you used.

  15. #15
    Join Date
    Feb 2004
    Location
    Perth, Australia
    Posts
    9,450
    Bill, I have done the "cheating" inside curve once, but that was on a drawer with the first curved front I made (and that was really because it was a modification to a straight drawer front). It really was not satisfying, although I doubt that anyone else would know. I resolved not to take short cuts again. Especially with all the detail that has gone into this chest.

    Regards from Perth

    Derek

Posting Permissions

  • You may not post new threads
  • You may not post replies
  • You may not post attachments
  • You may not edit your posts
  •