Page 1 of 2 12 LastLast
Results 1 to 15 of 16

Thread: Question on Upgrading Filter Type on Older 3hp Oneida Cyclone

  1. #1

    Question on Upgrading Filter Type on Older 3hp Oneida Cyclone

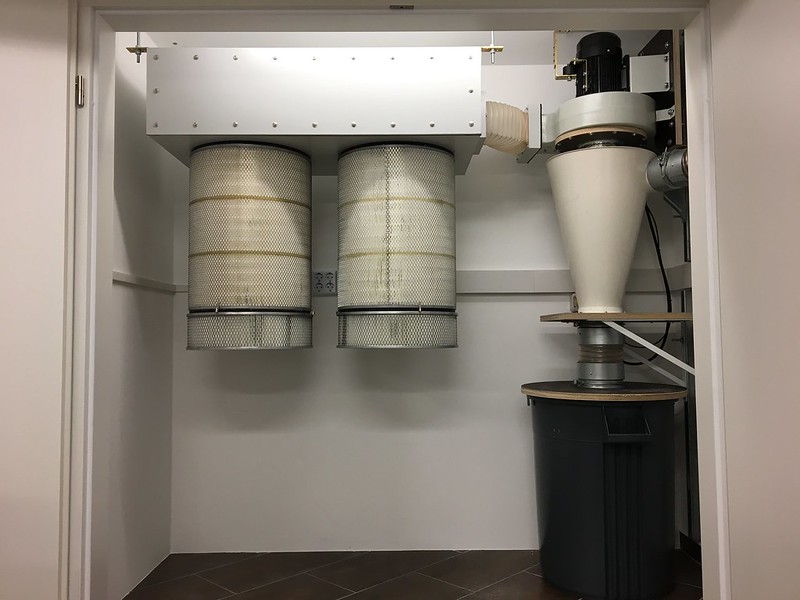
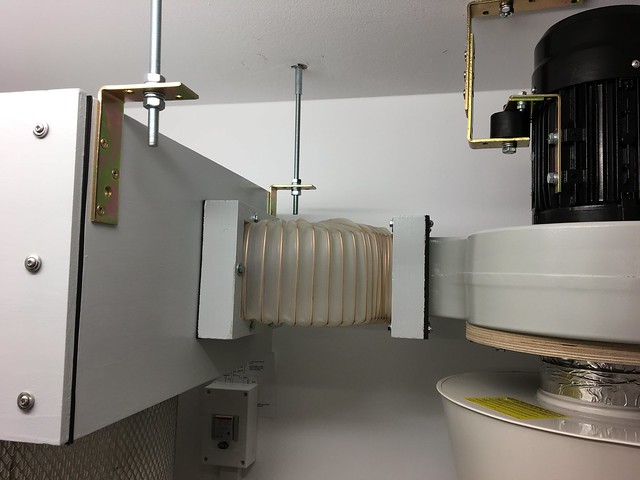
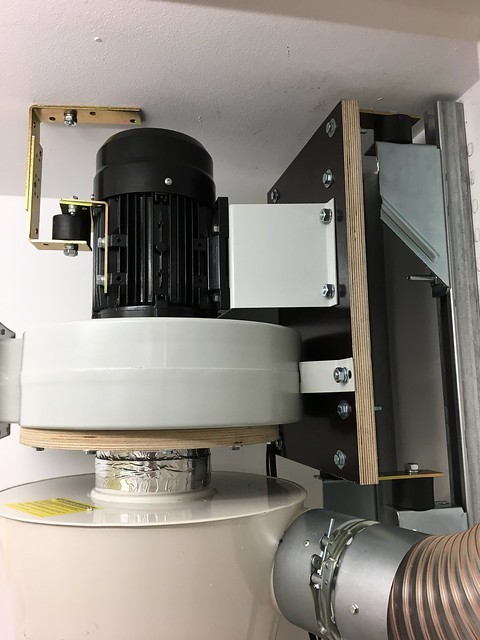
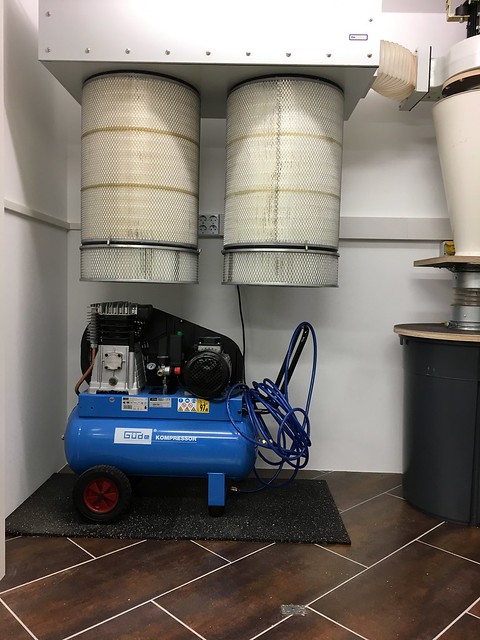
    I recently was lucky enough to purchase an older 3hp Oneida cyclone (originally from 1998), for $300 with a bunch of gates and ducting! The system has an 8” round inlet and 6.5” x 7.5” rectangle outlet. The system was originally set up with (6) 8’ long 12” felt tube filters mounted to a custom plenum. These filters take up too much space for my shop so I’m looking switch to a new canister style filter. Oneida offers a filter upgrade kit to one of their spun bound filters but they use an 8” round duct...the outlet on my system is 6.5” x 7.5” and I’m having trouble finding this transition. Another option is I could make a plywood plenum box and mount Wynn nano filters.

    I have so many thoughts on what to do going back and forth in my head that I’m getting stuck... Has anyone upgraded the filters on an older Oneida system and mind sharing what you did for inspiration?

    Thanks!

  2. #2
    Join Date
    Apr 2013
    Location
    Okotoks AB
    Posts
    3,499
    Blog Entries
    1
    A sheet metal shop will be able to make one for you. The cartridge filters will be a big upgrade in filtering efficiency.

  3. #3
    Join Date
    Mar 2003
    Location
    SE PA - Central Bucks County
    Posts
    65,842
    Yea, a local sheet metal shop can easily make up a rectangular to round adapter for you and it shouldn't cost too much. You'll enjoy having the more modern filer system...just be sure you have zero leaks between the cyclone and your bin to void plugging them with blow-by that always results from a leak. (or overfilling the bin)
    --

    The most expensive tool is the one you buy "cheaply" and often...

  4. #4
    Join Date
    Dec 2006
    Location
    Madison, Wisconsin
    Posts
    489
    Have you called Oneida? I have the old internal filter cyclone that I upgraded with an external filter....I think I got all parts needed from Oneida.

  5. #5
    Thanks for all the advice everyone. I have reached out to Oneida, but the unit is old enough that the transition is the challenge. One sheet metal place was hundreds of dollars, I’m going to try some other places to try and get Oneida’s solution to work. I have also looked at Wynn and will just make a wooden plenum and add two nanos if I can’t get an adapter.

    Thanks again.

  6. #6
    I have a Wynn filter, and just built a plywood shelf to attach the filter to, and cut a hole and ran an elbow into it. Sealed with silicone, and screwed through the edges of the elbow into the ply.

  7. #7
    Join Date
    Sep 2016
    Location
    Modesto, CA, USA
    Posts
    9,974
    Can't you just cut the existing manifold down to just one or two 8" outlets? Plug the cutoff with a piece of plywood.
    Bill D.

  8. #8
    Join Date
    Sep 2016
    Location
    Modesto, CA, USA
    Posts
    9,974
    I have seen transitions made of what look to be heavy canvas then painted.
    Bil lD

  9. #9
    I have just finished converting 90's era Oneida 2 hp, internal filter to the plenum box and wynn filter. On Wynn's advise, i lined the plenum with remanent carpet for noise reduction. New set up works great and is Quiet compared to original.

  10. #10
    I built a separate plenum for my Wynn filters and it took me a while to come up with a good solution for the rectangular output of the blower assembly. More information is in this thread starting at Post #23.


    DC_System-2 by Mike66GE, on Flickr


    I used a section of 180mm flex ducting and formed it into a rectangle that had the same ratio as the output of the blower assembly. When I designed the closet for the DC system, I didn't have the 3HP blower or the Oneida SDD, so I was guessing at the relative locations of the cyclone and filters. Unfortunately, the filter plenum was offset from the output of the blower, so the flexible ducting seemed to be the best solution. If I was doing this again, I would make the DC closet another 50cm deeper and shift the components around so the blower was better aligned with the plenum.


    DC_System-3 by Mike66GE, on Flickr

  11. #11
    Join Date
    Sep 2016
    Location
    Modesto, CA, USA
    Posts
    9,974
    Mike what is above your DC. Does it transmit a rumble to the upstairs or is that not a concern. My big air compressor would shake every time it started. So I placed some 1/2" rubber pads under each foot. They where tire rubber found on the side of the road.
    Bill D.

  12. #12
    Join Date
    Mar 2003
    Location
    SE PA - Central Bucks County
    Posts
    65,842
    Bill, if I recall, Mike's dealing with...concrete. Lots of concrete.
    --

    The most expensive tool is the one you buy "cheaply" and often...

  13. #13
    Quote Originally Posted by Bill Dufour View Post
    Mike what is above your DC. Does it transmit a rumble to the upstairs or is that not a concern. My big air compressor would shake every time it started. So I placed some 1/2" rubber pads under each foot. They where tire rubber found on the side of the road.
    Bill D.
    Bill,

    My dining room is directly above the DC closet and the living room is off to the side. With the five rubber isolation mounts on the blower assembly, no discernible sound or vibration is transmitted to the room above. With the DC closet and shop doors closed, my wife can't hear the DC or saw even when she's standing at the head of the stairs. It's only when she is halfway down the stairs that she can hear the saw if its running.


    Blower_Motor by Mike66GE, on Flickr


    Here is my compressor in the DC closet. The rubber mat is commonly used here to isolate the vibration of washing machines, and it does a great job with the compressor. Nothing can be heard or felt upstairs when the compressor is running.


    DC-System-4 by Mike66GE, on Flickr

  14. #14
    Quote Originally Posted by Jim Becker View Post
    Bill, if I recall, Mike's dealing with...concrete. Lots of concrete.
    Yes! The walls and slabs for the house are cast in place concrete. Only the walls I added to create my shop are GWB, but even then it was double layers of 15mm board on each side of the studs and densely packed rock wool insulation between the studs.

  15. #15
    The isolation mounts are a great idea! I’m going to look into something like this to reduce the vibration going into the wall studs, thanks for the idea.

Posting Permissions

  • You may not post new threads
  • You may not post replies
  • You may not post attachments
  • You may not edit your posts
  •