
-
Well..wasn't as bad as I thought it would be.....was a "pic-nic", either. Had to slide the loose side off the frames....install the kickers with glue and screws....apply the glue...then try to slide the side back into place.....then add a few clamps.....started at the bottom of the case....once a couple pipe clamps were in place...I could place the case on the flattest part of the shop's floor....and add a few more clamps..
Tried to keep the LONG ends to one side..takes up less room that way...
IMG_4959 (640x480).jpgIMG_4958 (640x480).jpg
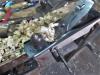
Kickers do not have to be exactly centered...merely close. Bottom two are more to attach the bottom rail of the face frame with...and give it a bit of support...
IMG_4961 (640x480).jpg
And these are the corner blocks. I'll add a slot for the screw, and attach the top to these. Same toys to drill the holes..
IMG_4964 (640x480).jpg
Yes..I did indeed bring that fan back into the shop...set on "HIGH", of course
IMG_4963 (640x480).jpg
Turned the assembly around...this thing is heavy! And placed it out of the way...for a day or two..
IMG_4962 (640x480).jpg
Still have two pipe clamps left, too....time for a cold one...maybe later this evening, I can work on cleaning a new saw?
Stay tuned..
-
May remove the clamps today.....might try to attach the top. Then, until the rest of the lumber arrives....will take a break..
First, I need to put these two saws away..
relatives.jpg
Disston D-112 in front, Disston D-100 behind it....may drag out the Disston D-8, 10ppi that matches...for a family photo?
have two of the D-8, 10ppi....20" and 26" set.
-
Ok... can't do much, until the lumber arrives, but....
IMG_4976 (640x480).jpg
Pipe clamps have been removed, and stashed out of the way..
IMG_4984 (640x480).jpg
Same with the C clamps. Drilled four holes..
IMG_4977 (640x480).jpg
Then, rock the drill back and forth..
IMG_4978 (640x480).jpg
Hey...it IS a Vintage drill, ok? Something I learned from Norm....make a slot to attach a top to a case..
IMG_4979 (640x480).jpg
Allows the top to expand, or contract. Set the top onto the bench..."best" side down...was a bit of debate on that one....
2" screws were a tad too long. Grinder and a pair of visegrips, and a cup of water....screws are now 1/8" shorter, so they won't poke through the top ( hate when that happens)
IMG_4980 (640x480).jpg
So...unless the lumber or some other project shows up wanting to use the bench..
IMG_4981 (640x480).jpg
I do have a bit of leftover plywood....will trim it to size, when I build the drawers..
IMG_4983 (640x480).jpg
First, I need to attach a back, and build the face frame...before I can start on drawers...
Stay tuned...looks like Friday before the lumber can be bought...
-
Had thought about rebuilding the bandsaw....discovered that will have to wait, as well....motor seems to be working again, starts right up. More of getting a few parts, like a pulley to fit the new motor, a cord for the new motor, and maybe some new snap rings. Had an issue with the drive/lower wheel being loose on the shaft.....finally got it back to where things will run. May try after the dresser gets built..if there is anytime. About a week to go...
We'll see how things go......
-
Priced a new pulley today....depending on diameter....$11.99 up to $16.99. May get a three prong cord, like an "Outdoor" extension cord, and cut off what I don't need. Will see about new snap rings, later.
When I do through dovetails, it is easier for me to cut the tails on the bandsaw, then chop out the waste. I do pins first, anyway. All I need to do is cut on the waste side of the lines, leaving most of the lines, to cut the tails. A few extra straight cuts in the waste, to help with the chisel work.
May or may not use the Stanley 45 for dado work...I will use it for the grooves to house the drawer bottoms. May give the Stanley #39 3/8" a try, again. Mitre box to cut the dado's walls, then the 39 to remove the waste.
Saturday looks like the "shopping day" for the shop...stay tuned...
-
Well..that was exciting...spent half the night in the ER.....Mother of all Migraines had hit. Hands are still a bit numb....at least I can see a bit better....
Got some lumber from Menard's today....they don't carry 1/4" x 4' x 4' Luann plywood....the two types they do carry, are over $13!!! Will go back to Lowes for the plywood...tomorrow.
I can at least get the face frame done..and then start on the drawers...have a drawer bottom for one, at least.
Both arms got shots into them....all of them hurt. Been spending most of yesterday and today sleeping it off...or trying to ( why the trip to the ER)...maybe tomorrow, I'll feel a bit better..
-
Head is still spinning around.....May have to wait a while, yet. Either the Migraine was also a TIA, or what the ER people shot me up with.....things are still not right....
Will see how today goes....
-
I stayed away from sharp chisels today....used one handplane....everything else was either the miter box or a drill of some sort....managed to get a part of the back panel installed...waiting on the brain to float back here, before I try again with the sabresaw..
Nothing Fancy about the face frame...just 6 sticks, glued and screwed in place.. with counter bores so I can plug the holes....later..
IMG_5005 (516x640).jpg
Nothing fancy....dealing with a 9 yr old....when he outgrows this one, I'll build him a better one.
IMG_5004 (543x640).jpg
I don't install back panels all the way to the floor....carpet tends to tear it up. I will get the top section closed in...as soon as I can haul the board to the shop.
Will plug all those counter bores with matching pine plugs....and, NO. you will not see a trace of end grain in any of the plugs.
BTW...anyone know a good use for this little clamp, now that I have it all cleaned up...
IMG_5007 (640x480).jpg
Not all that big, either...
-
OK...doing a little bit at a time....then have to rest a spell....hopefully I can work more than sit..later.
Back is now completed on the dresser
IMG_5012 (640x480).jpg
Top drawer area needed wider runners for the drawer to slide on.....couple of piece of scrap and a few screws...
IMG_5009 (640x480).jpg
All sides also got a guide to guide the drawer along.
IMG_5008 (640x480).jpg
They do not have to go all the way to the back....just enough to guide the drawer.
IMG_5013 (640x480).jpg
So..next step for the case, itself...plugs to cover the screw holes. Oh, and...build 3 drawers. Figures...glue bottle had just run out, too....
I'll dig out that Veritas plug cutter ( AND I LOVE IT!!) and cutter a few dozen plugs out Pine...
Stay tuned.....( "Ground Control to Major....)
-
Monday.....Doctor visit....Boss has a road trip to do....I need a bottle of glue before too much else gets done....may look for some handles for the drawers.
Normally, the shop is closed on a Monday.....haven't the time for that right now....Will see about getting a drawer done today....and go from there...
-
Monday-itis struck hard today..
Van is in another town, can not keep antifreeze in it.....runs out as fast as I put some in....
Was going to get the Blood count done this morning...had to sit and wait....others ahead of me, for the first time...
Now have no way to go to the store, and buy supplies for the shop....unless I walk 2 miles each way...
Can't work in the shop, today....thanks to a "Gulley-washer" rolling by...there are a couple creeks going through the shop....
Hitched a ride home....same storm followed us to the house....ankle deep puddles to run through..
NOT a "good" day, today. Afraid to even touch anything sharp....one of those days......
-
OK, back to the shop..all day long...other than a 5 block walk to and from the Lung Doctor's office...50 photos, needed to be processed down to something usable on here....couple of them were deleted...
So..going to break this down a bit....maybe hit just the high points? Started out making plugs...lots of plugs..
IMG_5016 (640x480).jpg
Plug cutter ate a couple....needed 29, and a couple extras....had to throw out one, had a knot in it....
IMG_5019 (640x480).jpg
Screwdriver to pop a plug out. Coat the narrow end with glue, and hammer each home....keeping an eye on the grain..
IMG_5020 (640x480).jpg
Got the entire piece plugged up..
IMG_5022 (640x480).jpg
Spent a little time, bringing a 1 x 8 x 8' plank down to the shop, while the glue set up....
IMG_5023 (640x480).jpg
Hammer and a chisel, to trim each plug flush, working from the oldest to the last plug. A little sanding, before I set the case on the floor..
How well did the plugs blend in?
IMG_5024 (640x480).jpg
Look right in front of the chisel......
IMG_5025 (640x480).jpg
Circular saw to cut the plank down into four parts.....had to plane the ends square.
IMG_5026 (640x480).jpg
This will be the front of the drawer....stay tuned....more fun and games coming right up...
-
Ok, that last picture....I needed to rip a bit off one edge, so the blank would fit in the drawer opening..
IMG_5028 (640x480).jpg
Took a few extra swipes with the jack plane, to get it to fit. Same with the two sides, and the back.....
IMG_5029 (640x480).jpg
Got these to fit..at least the two sides..
IMG_5030 (640x480).jpg
As for any "leftovers" from the plank?
IMG_5031 (640x480).jpg
There was a fourth one...but it is already in the trash can..
IMG_5033 (640x480).jpg
Decided to set this up, and use it on the blank for the front, before the dovetails get started..
IMG_5035 (640x480).jpg
Then I can lay out the pins.
IMG_5036 (640x480).jpg
I do pins first. Bevel square is set to the angle to be used.
IMG_5039 (640x480).jpg
Trying out another dovetail saw....cuts nice..but that boxy handle hurts the hand...
Stay tuned..
-
Yep, cuts nice..
IMG_5043 (640x480).jpg
Nice part about this sort of work..I can sit down all day..
IMG_5040 (640x480).jpg
Ok, clamp the board to the bench, and chop a bit..
IMG_5044 (640x480).jpg
Then flip this over, and finish the chops.....transfer the lines to the other end of the board....saw the lines, chop the waste...and
IMG_5047 (640x480).jpg
Both ends of the front of the drawer are done...Use the pins to lay out the tails...
IMG_5048 (640x480).jpg
Make a few saw cuts....first set was on the bandsaw..before it broke down, second set was by handsaw..
IMG_5049 (640x480).jpg
Chop 1/2 way, flip over, and finish the chop, dry fit?
IMG_5050 (640x480).jpg
then repeat for the other side of the drawer...
IMG_5055 (640x480).jpg
Then run the Stanley #45 to plough the grooves for the bottom.
Stay tuned..
-
Ok, once the grooves were done, then I had a dado to mill..
IMG_5058 (640x480).jpg
Langdon 75 to cut the side walls. I WAS going to use that chisel, but found a better toy..
IMG_5060 (640x480).jpg
Stanley #39 3/8". I can go along both walls, as the dado is 3/4" wide...depth stop is 3/8". Once both dados were milled, a couple holes were drilled and counter sunk
IMG_5061 (640x480).jpg
These are to hold the back in place. I had to size the plywood panel for the bottom of the drawer.
Spread some glue, with a brush....added a few clamps....then a diagonal clamp to set things square..
IMG_5062 (640x480).jpg
And checked with a square..
IMG_5063 (640x480).jpg
Will let this sit til morning. Then fit it to the drawer opening, and add a pair of knobs. Then repeat the entire show for two more drawers.
We'll see how things turn out....stay tuned
 Posting Permissions
- You may not post new threads
- You may not post replies
- You may not post attachments
- You may not edit your posts
-
Forum Rules


 Reply With Quote