Page 1 of 2 12 LastLast
Results 1 to 15 of 23

Thread: Reclaimed Quarter Sawn White Oak Build

  1. #1
    Join Date
    Feb 2011
    Location
    Carlsbad, CA
    Posts
    2,230
    Blog Entries
    2

    Reclaimed Quarter Sawn White Oak Build

    I live in Southern California where there are no naturally occurring hardwood trees and I have a confession; there’s one type of story I hear from my fellow Neanders that makes me green with envy. It usually starts like this “after a recent storm, a 200-year-old, 100’ tall walnut/cherry/oak tree was blown down in in my yard/neighbor’s house/rural property and I had the tree sawn into lumber for various woodworking projects”.

    As a hand tool woodworker living in a place where all hardwoods are imported, I can’t imagine how fantastic it would be to have quality lumber like this close at hand!

    For the first time ever, I’ve lucked into a small amount of interesting domestic hardwoods lumber – it didn’t come from a tree, but I hope my fellow Neanders will find the story interesting nonetheless:

    My wife’s grandfather was a French-Canadian immigrant who operated a one-man cabinet making shop in Greenwich Village, NYC from about 1920 -1950. He and his wife raised 5 kids and during the depression, he built furniture for the family. This wasn’t the stylish stuffy he built for clients, just utilitarian pieces he could bang out quickly.
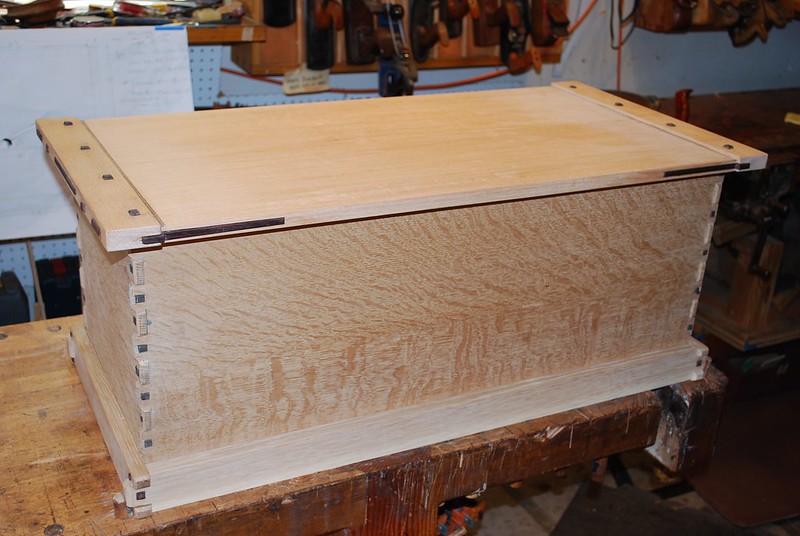
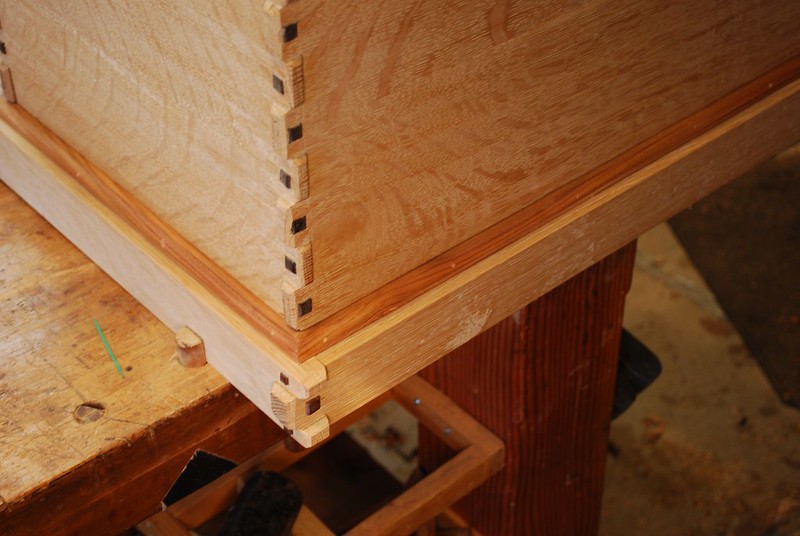
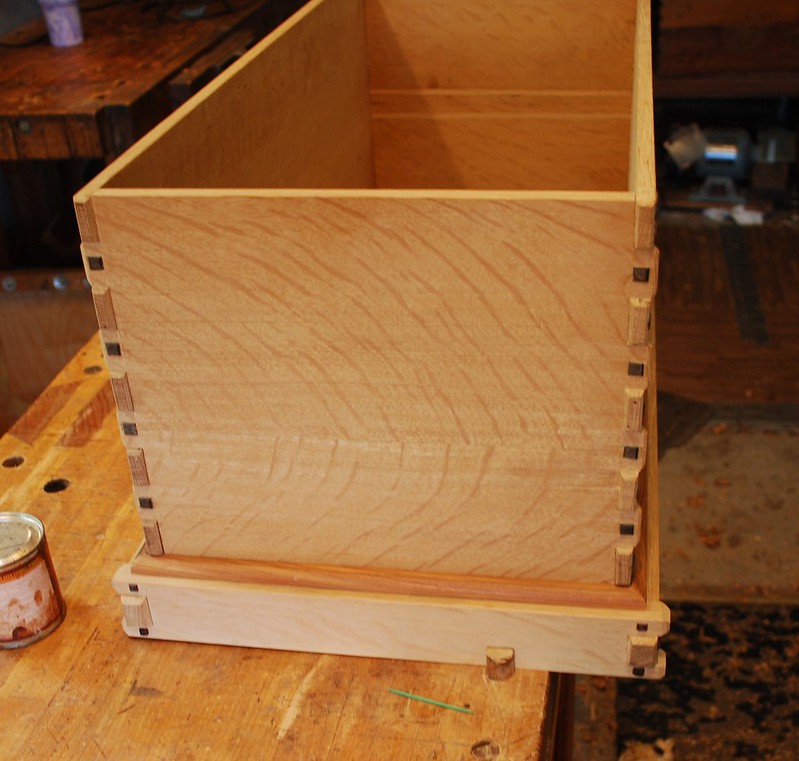
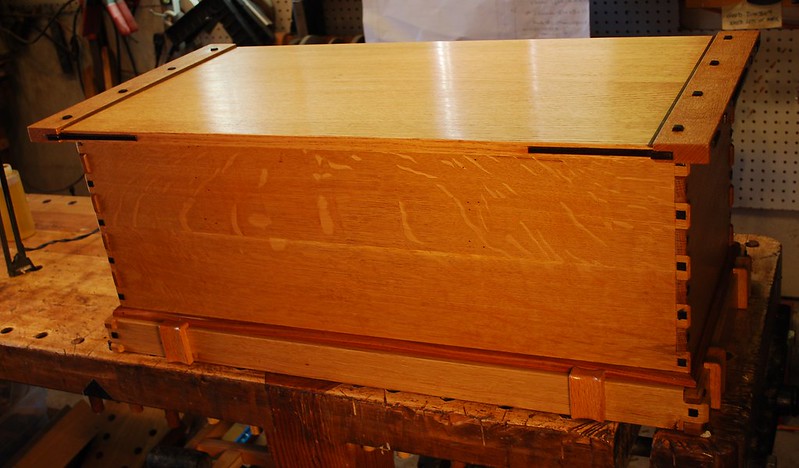
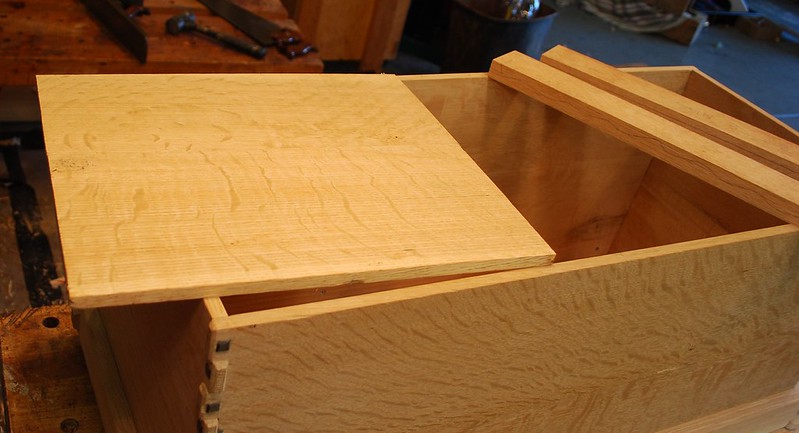
    We recently inherited a pair of these 3 drawer dresser’s and they’re pretty ugly; 50-year-old carcass tops/sides of solid poplar, with peeling oak veneer. However the drawers, including side/backs, were made of quarter sawn white oak. I have no idea why Granddad consider this a “secondary wood”, but I was able to salvage some that I used to build a Greene & Greene inspired blanket chest described in this thread.
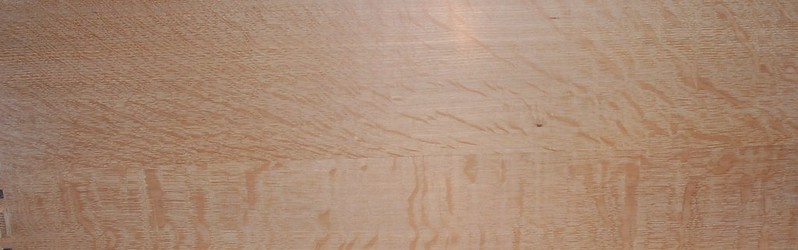
    I wasn’t planning on posting so I don’t have pictures from the very beginning, however once I started planing this 50-year-old, air dried QSWO, I was so impressed by the figure and ease of working with hand tools that I took a few pics and wanted to share the build. I think of QSWO as a dense wood that’s challenging to work with hand tools. This old lumber was so dry it literally came off as crumbled dust rather than shavings with a hand plane.

    Here’s a couple pictures of the salvage lumber:

    [url=https://flic.kr/p/JkJCDz]

    [url=https://flic.kr/p/26CbZi2]

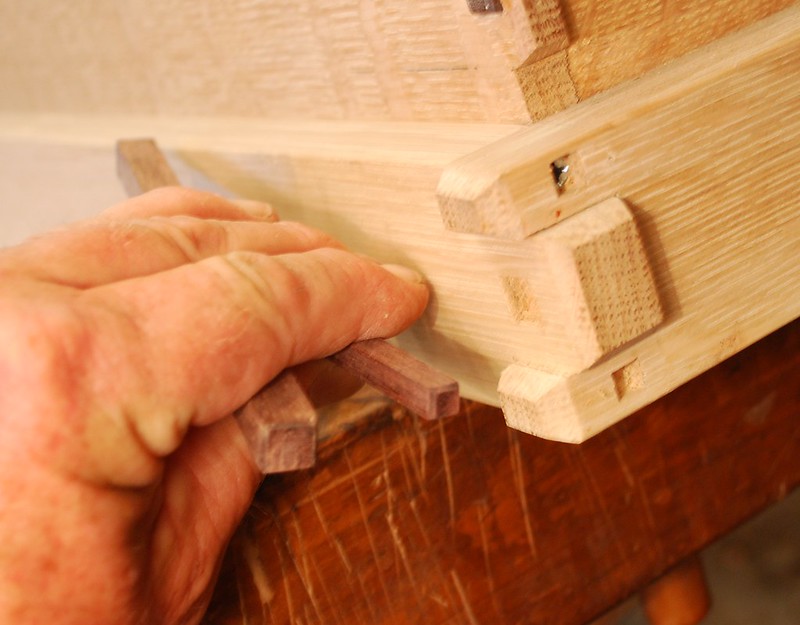
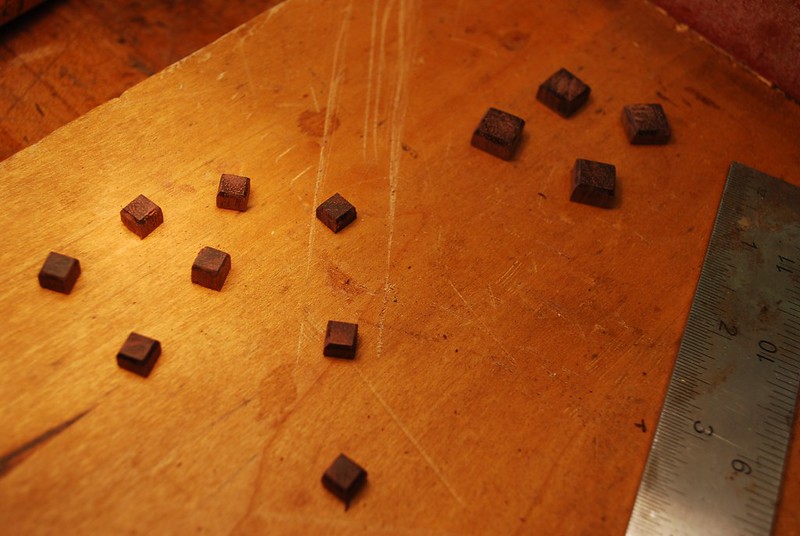
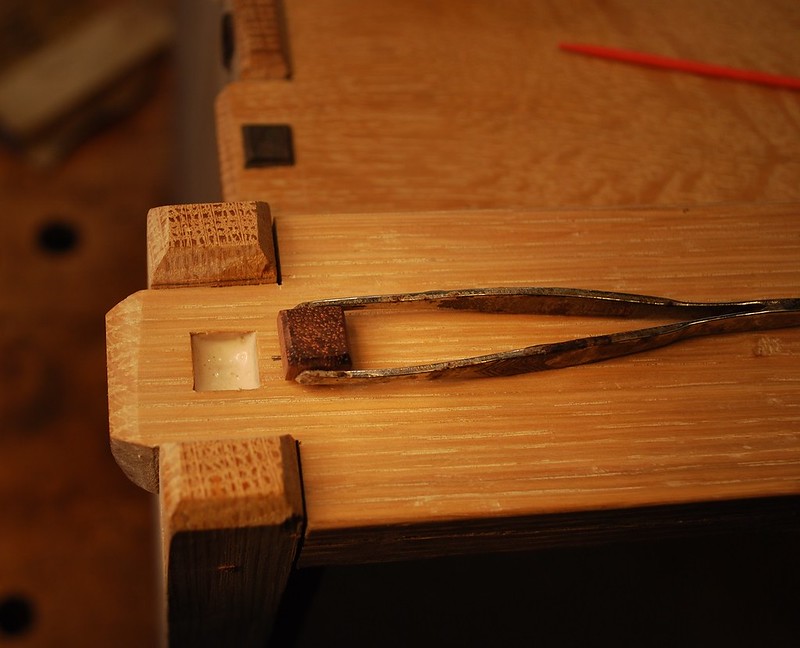
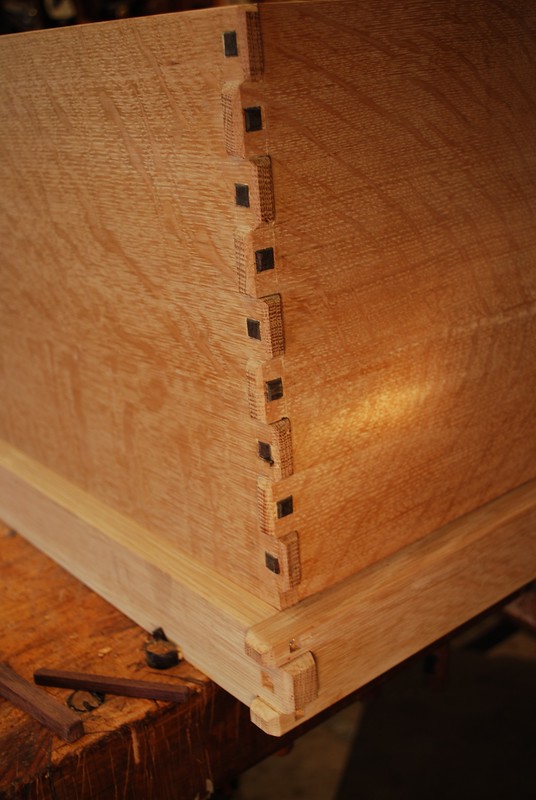
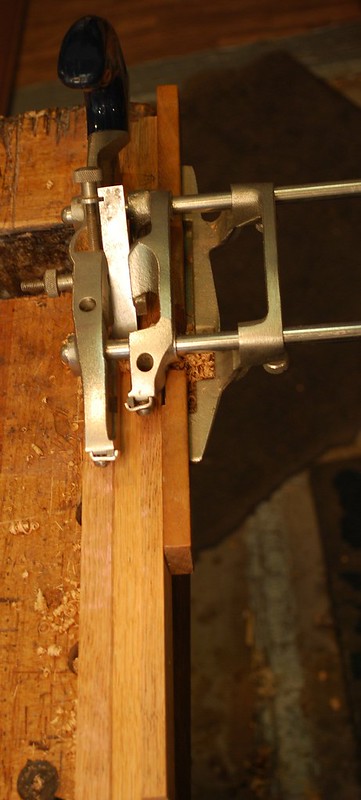
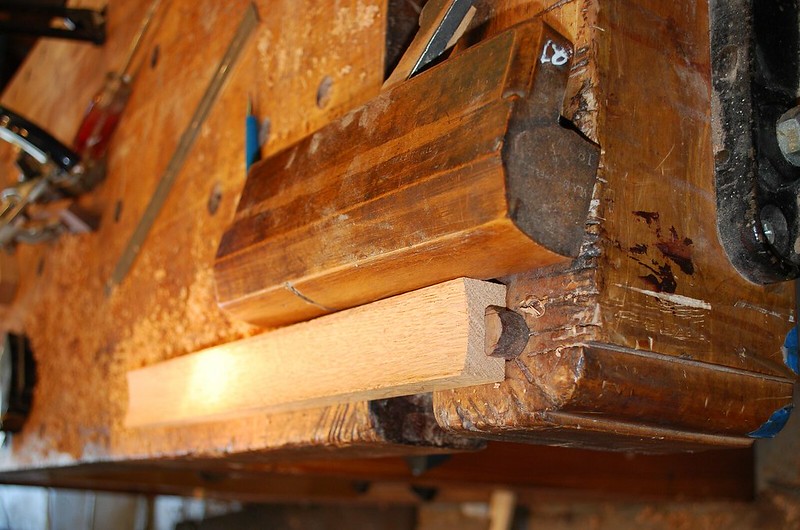
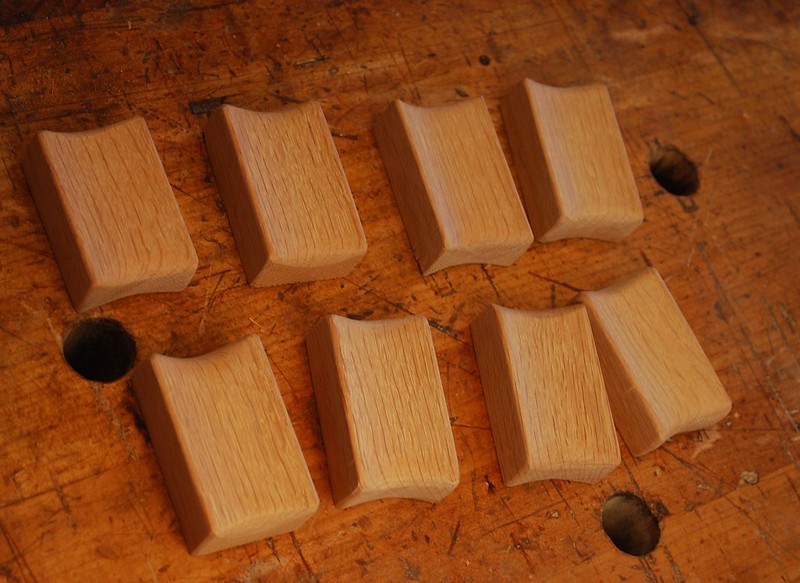
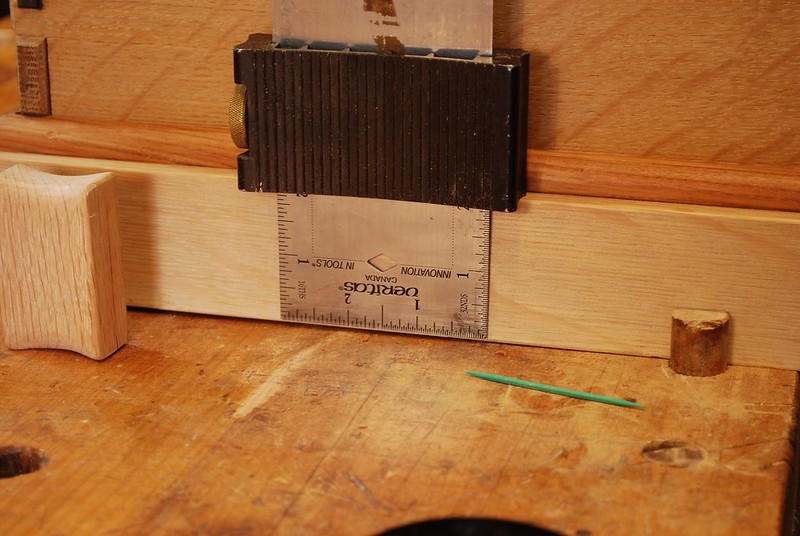
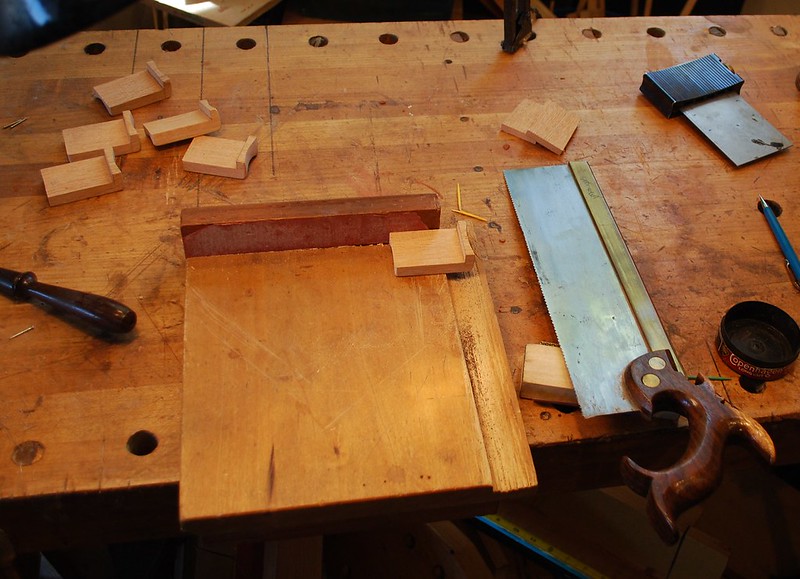
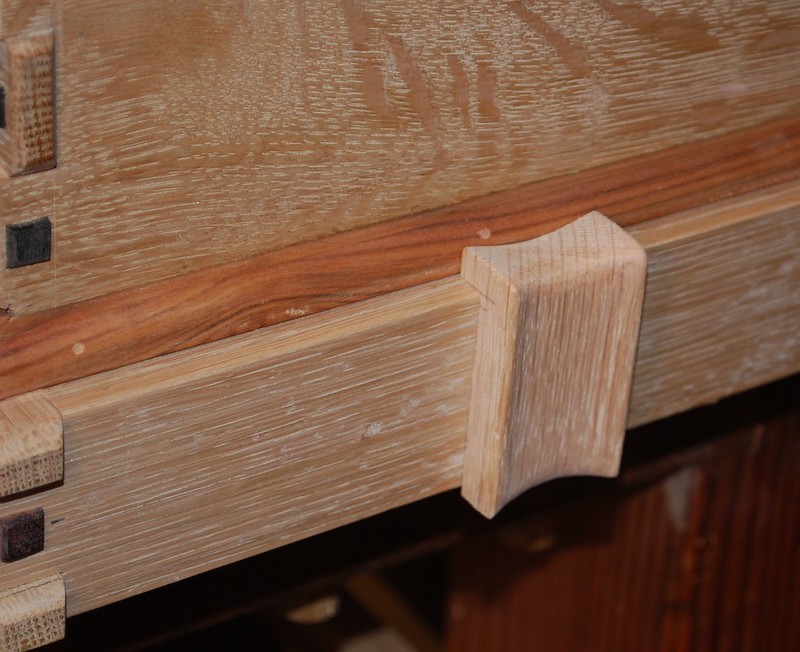
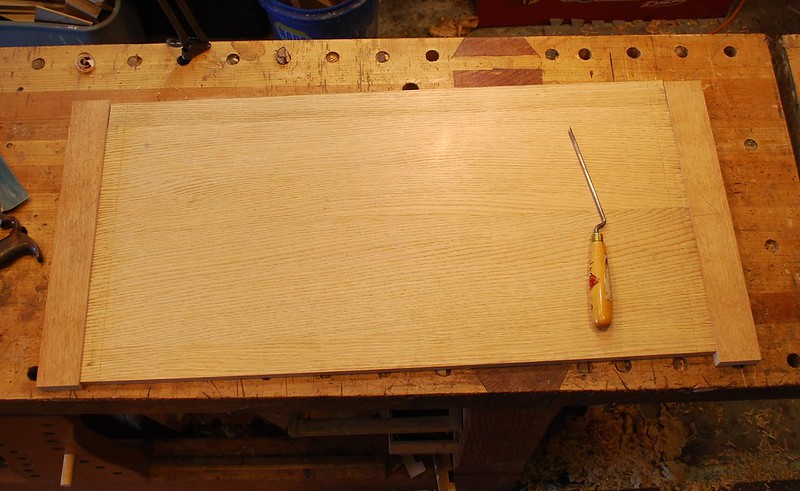
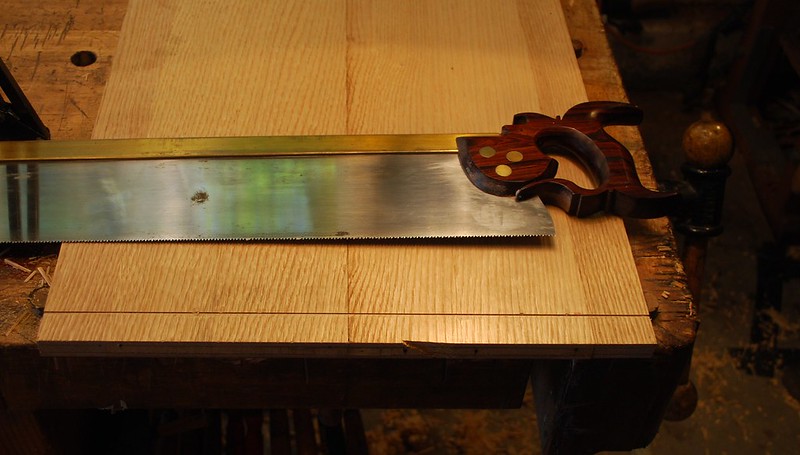
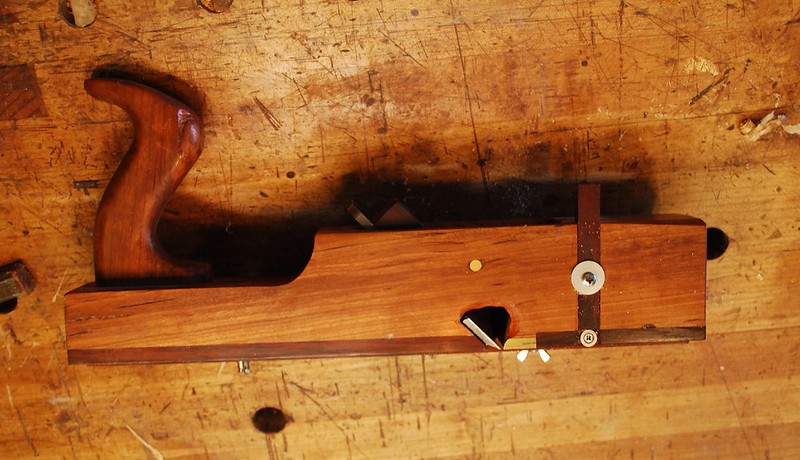
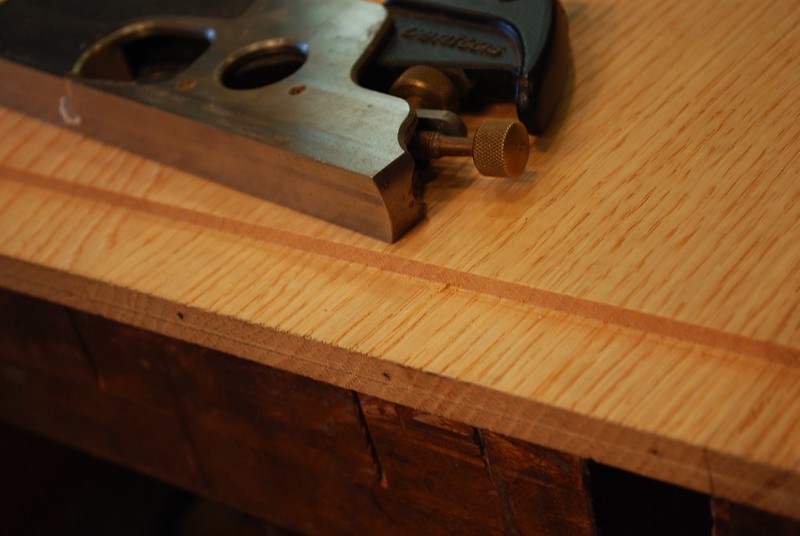
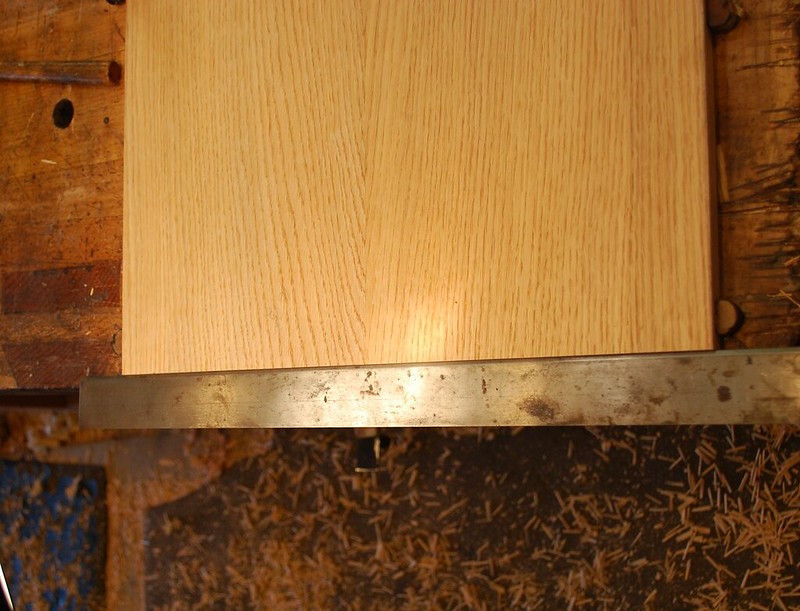
    I already built the chest carcass so following pics are of the remaining steps. The top is a solid panel with breadboard ends pinned with contrasting Rosewood accents. Here’s some pics of making the tennons on the end of the panel to be captured in the breadboards. Paring chisel to create a ramp against layout line and saw to establish the shoulder, followed by my shop built rabbit plane:
    [url=https://flic.kr/p/27VgM7q]


    [url=https://flic.kr/p/JkJCxc]

    [url=https://flic.kr/p/KRJzY7]


    [url=https://flic.kr/p/JkJCte]

    [url=https://flic.kr/p/KRJzVb]


    [url=https://flic.kr/p/26UfVFh]

    [url=https://flic.kr/p/JkJCk8]


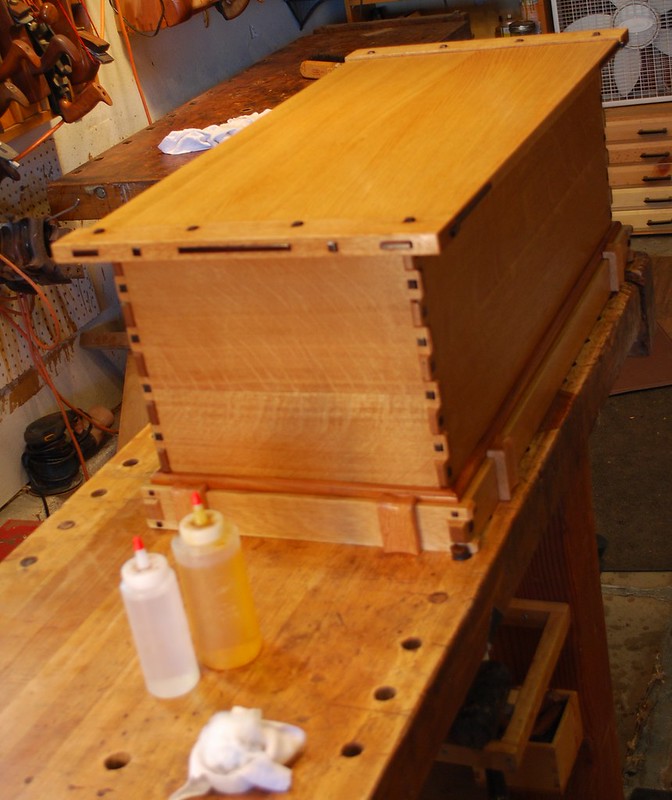
    No pictures of the breadboard mortises, but here’s the chest top prior to assembly.

    [url=https://flic.kr/p/JkJCfZ]

  2. #2
    Join Date
    Feb 2011
    Location
    Carlsbad, CA
    Posts
    2,230
    Blog Entries
    2
    The distinguishing characteristic of this Greene & Greene inspired design is proud finger joints for the carcass and base molding, with Rosewood accents. I've built this design before in a larger version with Walnut. After creating all the mortises in that project freehand with chisels I bought a Lee Valley dedicated tool for the purpose (sorry can’t remember the proper name) sort of a squared off hollow chisel mortising cutter. This made it a lot easier to get square mortises for the Rosewood accents.

    Creating the beveled reveal on the end grain of the Rosewood was way more sanding than I wanted. Here’s some pics:

    [url=https://flic.kr/p/27VgLLL]

    [url=https://flic.kr/p/27VgLJm]

    [url=https://flic.kr/p/26Cc15H]

    [url=https://flic.kr/p/27VgLEU][img]https://farm2.staticflickr.com/1748/42609684392_cb0b182508_c.jpg[/img


    [url=https://flic.kr/p/26Cc12X]

    [url=https://flic.kr/p/27VgLzd]

    [url=https://flic.kr/p/26CbZUT]

    With most of the chest construction completed, next was creating decorative “buckle” accents to be applied to the base molding. Probably sounds strange, but hopefully pictures make it easier to understand. To create the concave show surface, I used a rabbit plane to establish the groove and then my largest hollow molding plane to complete the profile.

    [url=https://flic.kr/p/27VgLuy]

    [url=https://flic.kr/p/27VgKH3]


    [url=https://flic.kr/p/27VgLs9]

    [url=https://flic.kr/p/27VgLjd]


    The quarter round molding for the transition from baseboard to carcass was also Brazilian Rosewood, but it didn’t even remotely match the color of the ostensibly “Brazilian Rosewood” I used for the decorative plugs – oh well!

    [url=https://flic.kr/p/26CbZHk]

    [url=https://flic.kr/p/27VgLfW]

    To layout the rabbit on the back of the decorative “buckles” to fit over the base molding, I used one of my favorite and most used layout tools – again my apologies I don’t know what LV calls them, but IMHO there super handy.

    [url=https://flic.kr/p/KRJzr5]


    [url=https://flic.kr/p/27VgLdb]


    [url=https://flic.kr/p/26CbZBi]

  3. #3
    Join Date
    Feb 2011
    Location
    Carlsbad, CA
    Posts
    2,230
    Blog Entries
    2
    Here’s pics of the completed buckles and super cool brass hardware (thank you Chet!).

    27 by Mike Allen, on Flickr

    28.5 by Mike Allen, on Flickr


    Finishing is my least favorite part of any project because low Return on Investment; High “screw up” potential because I’m not smart enough to understand confusing chemistry/labeling of finishing products, and even if finished turns out great (which rarely happens for me), it’s not something most people will notice.

    I’ve always been confused by the instruction to “fill the pores” in finishing open grain woods like white oak – not really sure what that means? FWIW, my only “go to” finish is: Watco oil/varnish sanded while wet with 600 grit sandpaper (I think this does something to fill the pores), and after minimum 2 days of rubbing with rags to thoroughly dry, shellac applied in thin coats with a pad as described in “French polishing” instructions.

    After the first, rather heavy coat of shellac has dried, I use a small amount of rotten stone applied to the cloth rubber charged with alcohol/shellac to rub in the shellac/rotten stone mixture in hopes of further “filling the pores”. No idea if that really happens, but I’m happy with the results.

    Here’s some pics after first couple coats of shellac, all applied within the space of an hour or 2, because it dries so quickly. Tomorrow all put on several more finishing coats of shellac to build the depth of the finish and add the Cedar chest bottom.

    [url=https://flic.kr/p/26CbZpK]

    [url=https://flic.kr/p/26UfVQW]


    [url=https://flic.kr/p/26UfVsS]


    The LOML has tried to convince me we should give this chest to her brother (after all lumber came from his grandfather), but I’m embarrassed to admit I kinda like it? On second thought, Nah, who am I kidding – as empty-nesters trying to downsize we got waaay more furniture than we need and it would be "character building" for me to embrace the power of giving (at least that’s what Sherrie says).

    Thanks for looking, Mike

  4. #4
    Join Date
    Nov 2007
    Location
    Goleta / Santa Barbara
    Posts
    968
    Michael, love it, and the back story!

  5. #5
    Join Date
    Sep 2007
    Location
    Longview WA
    Posts
    27,441
    Blog Entries
    1
    Inspiring project, makes me want to try making something in the Greene & Greene style. William Ng has a video on a quick method of making the plugs:

    https://www.youtube.com/watch?v=HLopA6NF7dk

    jtk
    "A pessimist sees the difficulty in every opportunity; an optimist sees the opportunity in every difficulty."
    - Sir Winston Churchill (1874-1965)

  6. #6
    Mike. as with all your work, well thought out and beautifully done.

    ken

  7. #7
    Join Date
    Aug 2013
    Location
    Princeton, NJ
    Posts
    7,295
    Blog Entries
    7
    Very nice work, Mike!
    Bumbling forward into the unknown.

  8. #8
    Join Date
    Apr 2008
    Location
    Provo, UT
    Posts
    390
    Beautiful work Mike! I've always liked the Greene and Greene type look.

  9. #9
    Join Date
    Feb 2014
    Location
    Lake Gaston, Henrico, NC
    Posts
    9,029
    Wonderful, as usual!

    I see you like the depth stop on the Record combination plane about as much as I do. As much as I like Record planes, the depth stop on my 044C is the single worst design I've ever seen on a hand tool.

  10. #10
    Join Date
    Sep 2008
    Location
    N. Idaho
    Posts
    1,621
    Mike, what a story! And a beautiful transformation for the heirloom wood. I'm sure your brother in-law will be blown away. And I can see why you'd want to keep it in the house.

    As always, thanks for posting and always learn something from your posts.

    Best,
    Chris
    "You can observe a lot just by watching."
    --Yogi Berra

  11. #11
    Quartersawn White oak was used for drawers in many older case pieces. It is exceptionally stable, and thus ideal for solid wood drawers.

    I made a chest of drawers for my wife, and used glued up leftover white oak hardwood floor (QS) pieces for all the drawer sides/backs. It's a little tough to dovetail (need sharp chisels), but works beautifully with planes.

  12. #12
    Join Date
    Apr 2017
    Location
    Michigan
    Posts
    2,770
    Very nice.

    While Ebony is a more traditional wood for G & G plugs and accents, Rosewood is a good choice. Also consider Purpleheart with a light wood like Oak.

  13. #13
    Join Date
    Jan 2009
    Location
    N.E, Ohio
    Posts
    3,029
    Interesting story and a beautiful creation.
    George

    Making sawdust regularly, occasionally a project is completed.

  14. #14
    That's gorgeous! If I wasn't in the middle of building a guitar I would have to try to copy what you've shown.

  15. #15
    Join Date
    Feb 2011
    Location
    Carlsbad, CA
    Posts
    2,230
    Blog Entries
    2
    Quote Originally Posted by Tom M King View Post
    Wonderful, as usual!

    I see you like the depth stop on the Record combination plane about as much as I do. As much as I like Record planes, the depth stop on my 044C is the single worst design I've ever seen on a hand tool.

    Tom, I appreciate your comment about record depth stop. I could never make it work and thought I was just doing it wrong. Glad to know I'm not the only one with issues!

Posting Permissions

  • You may not post new threads
  • You may not post replies
  • You may not post attachments
  • You may not edit your posts
  •