Results 1 to 10 of 10

Thread: Apothecary chest - part eight and a bit more

  1. #1
    Join Date
    Feb 2004
    Location
    Perth, Australia
    Posts
    9,494

    Apothecary chest - part eight and a bit more

    Today was a public holiday in Western Australia (WA Day), and so I managed a few hours in the workshop this afternoon ("arvo", which is afternoon in Australian). The morning was filled with writing bloody reports. Aren't I the lucky one! It was great to escape back to the build.


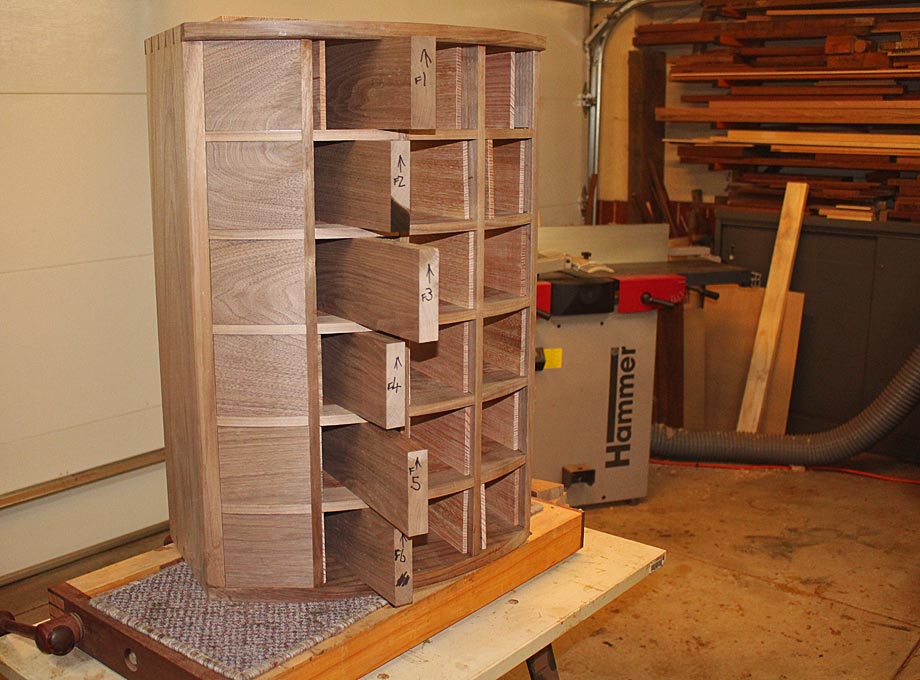
    I wanted to show some of the other preliminary tasks that are needed before one can begin dovetailing the drawers.


    Here are the collective drawer fronts. They have been sized for height ...


    The original rough sawn board of black walnut was cut into three sections, and each section is enough for two rows. The rows were separated, and will be used sequentially. This is shown above.


    The original test drawer front served as a template for width ..


    The plan is to work with one vertical row at a time, since each will have the same width. This will reduce set up time fitting each drawer blank.


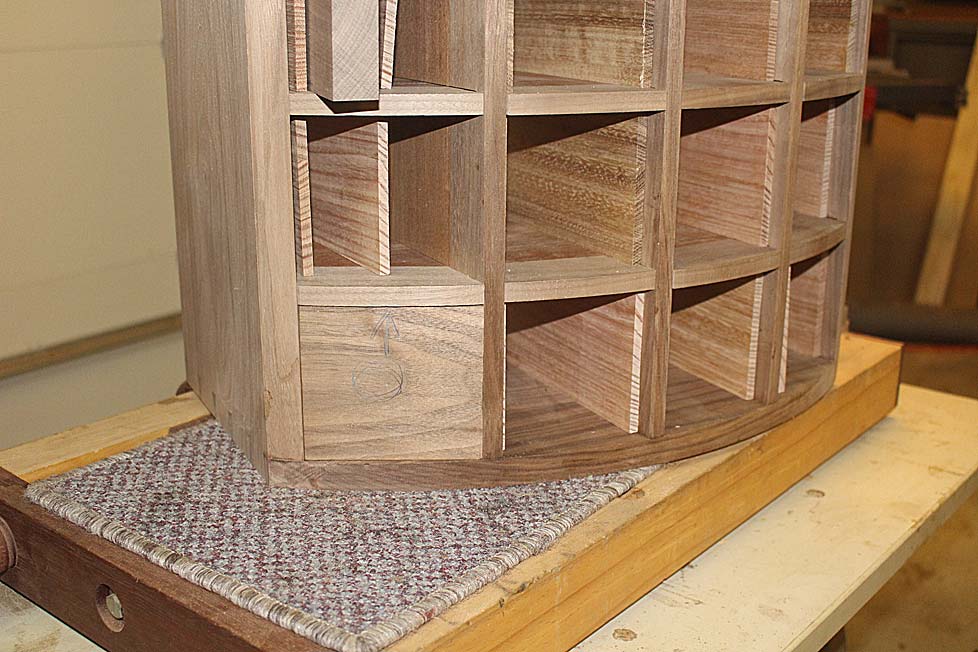
    Here is the template drawer front fitted to the lower most drawer ...


    All the drawers in this row have the same width.


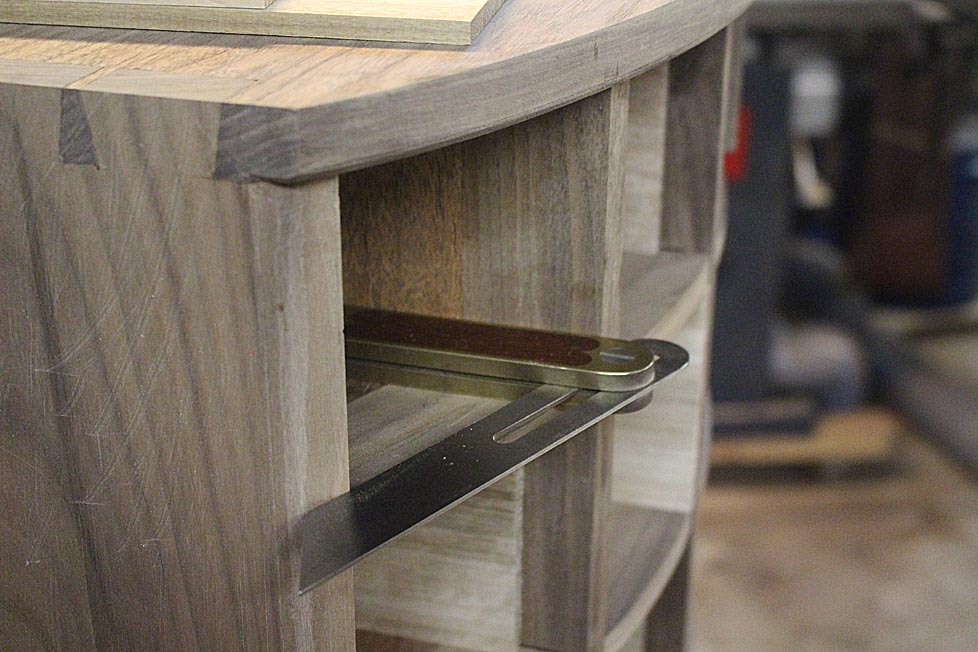
    Fitting the drawer front involves (1) sizing the height ... this was done (above), then (2) mitering the sides to fit the drawer opening.


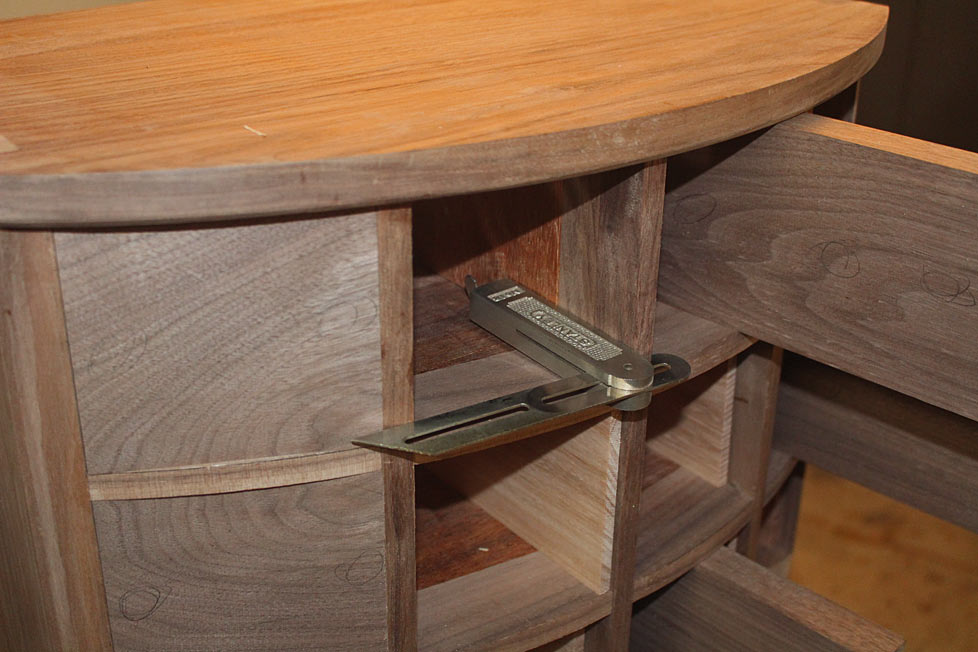
    Begin by obtaining the angle across the opening ...


    That was for the first row.


    This is for the second row.


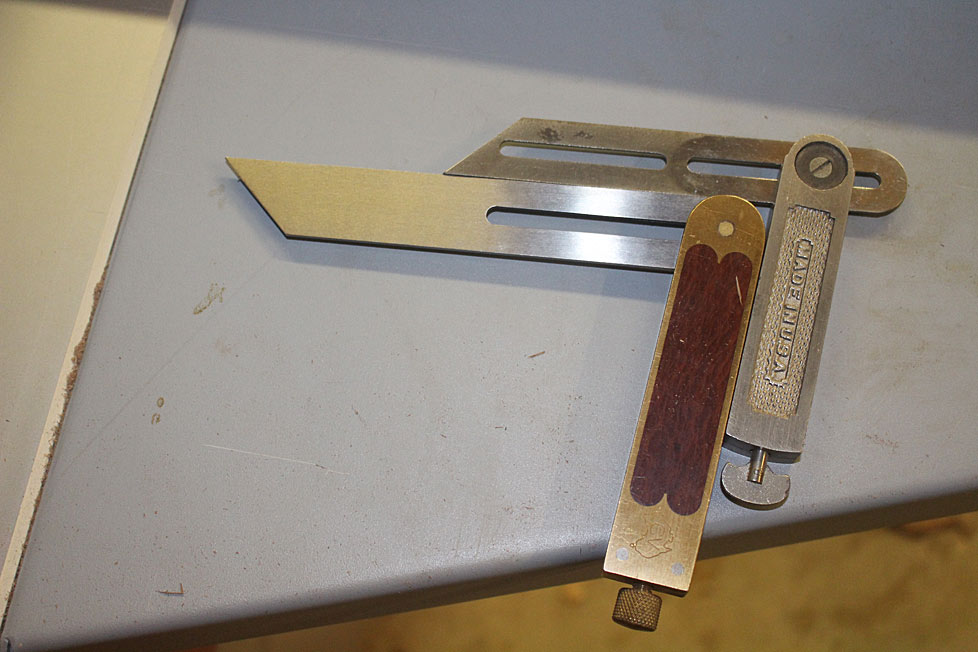
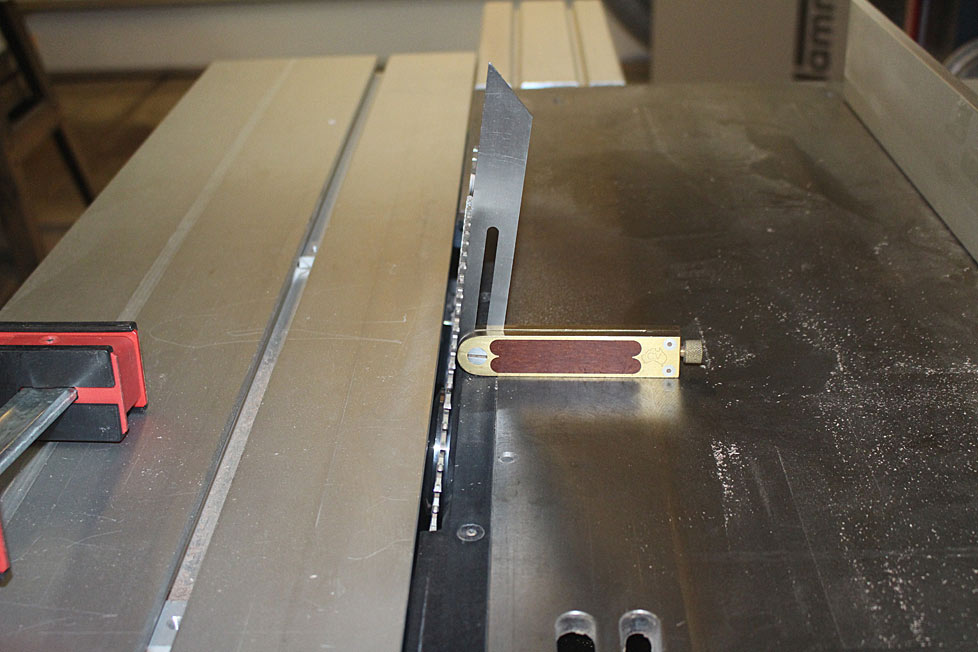
    Transfer the angle to a second sliding bevel (to set the blade angle on my table saw) ...


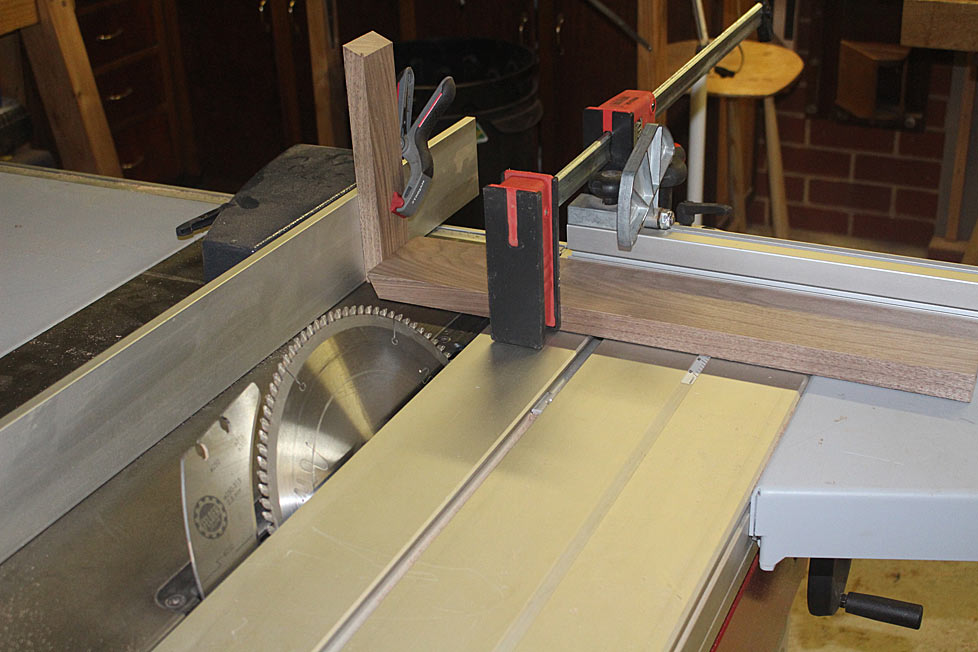
    Cut the angle on one end, and then set up the table saw for a repeat saw cut ...


    The first row is done ...


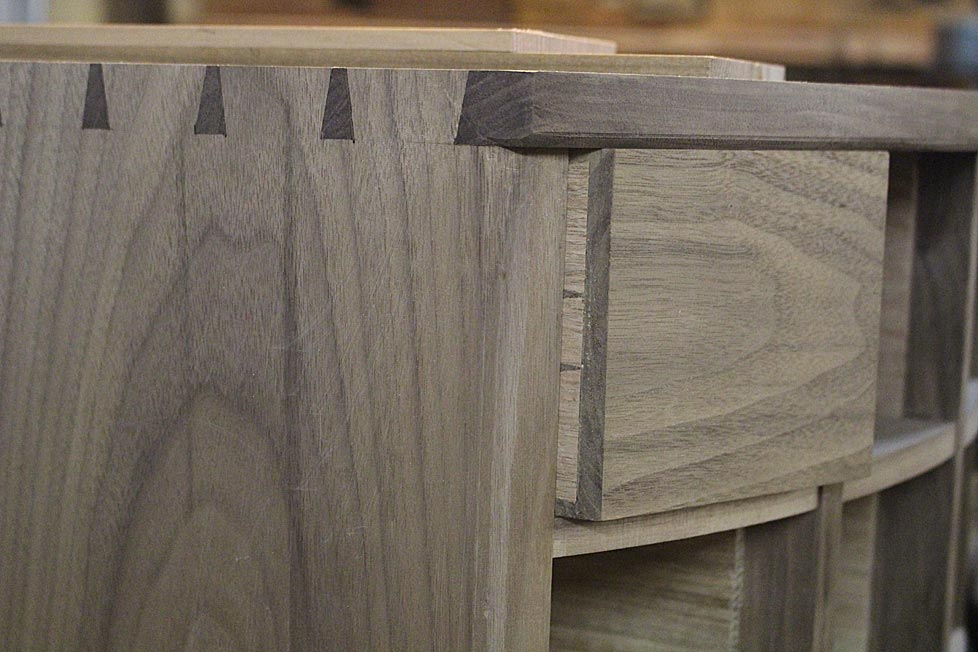
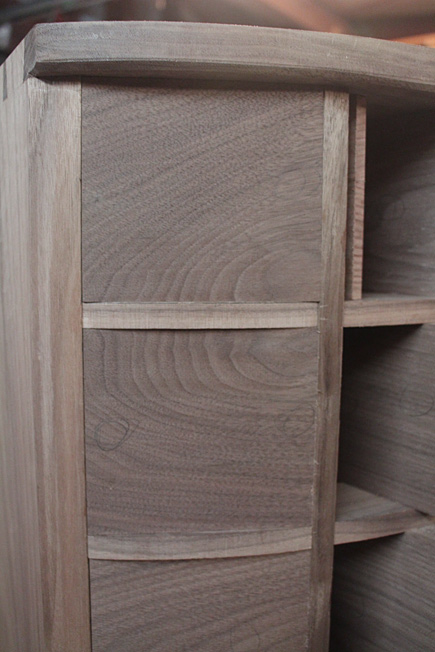
    A close up of some figure ...


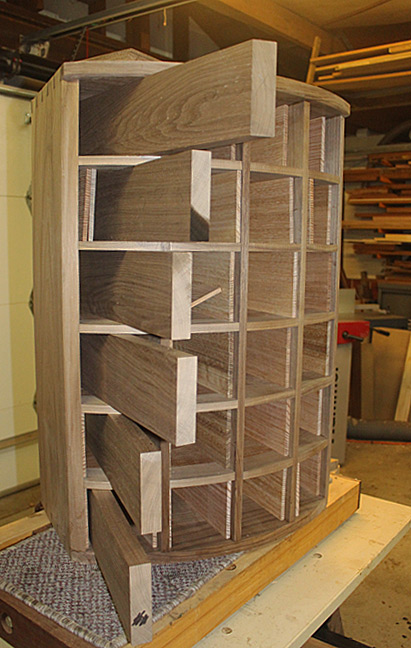
    I was looking at the effect of the straight drawers fronts against the curved drawer blades. It was interesting ... no, I'm sticking to curved drawers.


    More next week.


    Regards from Perth


    Derek

  2. #2
    Join Date
    Apr 2008
    Location
    Provo, UT
    Posts
    390
    I like the figure.

  3. #3
    Join Date
    Jun 2008
    Location
    So Cal
    Posts
    3,775
    I don't see any figure. Just plain sawn cathedral grain.
    Im not trying to be a bucket dipper Derek's workmanship is top notch. And this is a very challenging pice I'll be quite now so Derek can concentrate.
    Aj

  4. #4
    Join Date
    Feb 2011
    Location
    Carlsbad, CA
    Posts
    2,230
    Blog Entries
    2
    Gorgeous – I can't wait to see the rest! The way you've matched the figure across the drawer fronts IMHO is a hallmark of top-notch, handmade work (you're not gonna find that at IKEA – or whatever the equivalent is in OZ).


    Personally, I think achieving a cabinet full of well fitting drawers is one of the most satisfying aspects of hand tool woodworking – certainly not easy, but worth it in the end.


    Derek, I really appreciate/admire the close tolerances you work to. Your high standards are readily apparent in all your projects. For example, the dry fit of the first column of drawer fronts seems perfect.


    I wouldn't presume to offer any suggestions. FWIW, my biggest mistakes with multiple drawers have come from not accounting for how the finish will affect the final fit of the drawers. I've often done "final planing" of drawer that fits great "in the white", but after several coats of shellac/finish, don't slide freely. For me, this typically results in aggravated, aggressive corrective sanding/planning that usually overshoots the mark and ended up with less than ideal fit. I'm sure this isn't anything you don't already know, but thought it was worth mentioning.


    Can't wait to see the rest.


    All the best, Mike

  5. #5
    Thanks again for sharing all of the details in your work. It is always full of golden tidbits (and envy of apparent shop time).

  6. #6
    Join Date
    Feb 2004
    Location
    Perth, Australia
    Posts
    9,494
    I wouldn't presume to offer any suggestions. FWIW, my biggest mistakes with multiple drawers have come from not accounting for how the finish will affect the final fit of the drawers. I've often done "final planing" of drawer that fits great "in the white", but after several coats of shellac/finish, don't slide freely. For me, this typically results in aggravated, aggressive corrective sanding/planning that usually overshoots the mark and ended up with less than ideal fit. I'm sure this isn't anything you don't already know, but thought it was worth mentioning.
    Thanks for the reminder, Mike. I agree - we try and work to tight tolerances, and then can alter dimensions with finish.

    My internal finish for drawer sides is just wax. If I do use shellac, it is just a light, sealing coat, which I will rub back. If this causes any tightness, then I will be guided by your reminder, and sand with a block or use a scraper, rather than a plane.

    Regards from Perth

    Derek

  7. #7
    You probably know this Derek. But one thing I learned when matching the grain across several boards is to accont for the dividers. So I would cut out a portion in between the drawer front boards as wide as the divider. Especially on the drawers next to each other you get a better continuation of the grainlines this way.

  8. #8
    Join Date
    Aug 2012
    Location
    Missouri
    Posts
    2,152
    Quote Originally Posted by Kees Heiden View Post
    You probably know this Derek. But one thing I learned when matching the grain across several boards is to accont for the dividers. So I would cut out a portion in between the drawer front boards as wide as the divider. Especially on the drawers next to each other you get a better continuation of the grainlines this way.
    Interesting observation Kees. I think Derek said early on that he wanted to accentuate the verticle lines of the piece. It would look good to run the faces thru but then the horizontal would take precedent. It may appear to flatten the curve of the face also. Of course this is just an opinion and not a criticism of either way.
    Jim

  9. #9
    Join Date
    Feb 2004
    Location
    Perth, Australia
    Posts
    9,494
    Hi Kees

    I have never cut away for the "divider". I understand that this could make a difference, but in practice it does not seem to do so (or I may be insensitive to the effect). The drawer fronts in the photo above were sawn this way. In fact, the drawer blades were done the same way.

    Regards from Perth

    Derek

  10. #10
    It depends on the divider size of course. Just on of these little tidbits one could loose sleep over.

Posting Permissions

  • You may not post new threads
  • You may not post replies
  • You may not post attachments
  • You may not edit your posts
  •