Results 1 to 5 of 5

Thread: Queen sized bed frame..out of Pine

  1. #1
    Join Date
    Jun 2010
    Location
    twomiles from the "peak of Ohio
    Posts
    12,164

    Queen sized bed frame..out of Pine

    The Boss wanted something besides a cheap, metal frame that a mattress just sat on...
    Un-treated Pine 4 x 4s for the posts
    2 x 10s for the rails
    Padded headboard panel was 1/2" plywood, covered with 1" foam, covered with gray fabric...
    Finish was a Rustoleum Weathered Gray Stain/varnish....
    bed's made.jpgcorner.jpgIMG_4506 (640x480).jpgslats.jpgthird slat.jpg
    Side rails connect to the head and foot boards via 2 lag screws. Need to be able to take the bed apart for any moves.
    Head and foot boards are glued and screwed together. # slats, screwed in place, support a sheet of 3/4" plywood. It needed a filler along one edge...to get the 5' width.

    Bed is solid as a rock, does not even slide around on the floor. Post have a bead detail on the "show sides"
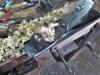
    parts.jpg

  2. #2
    Join Date
    Feb 2003
    Location
    McKean, PA
    Posts
    15,635
    Blog Entries
    1
    Very nice bed. Pine is a soft wood so I hope you don't have problems with the lag screws tearing out. I tend to use t-nuts or cross dowels and regular bolts when I can hide them. In built up posts I have hidden the t-nuts or cross dowels inside the post before it is glued up with a clearance hole in the next layer for the bolt to thread into.

    Sleep well.
    Lee Schierer
    USNA '71
    Go Navy!

    My advice, comments and suggestions are free, but it costs money to run the site. If you found something of value here please give a little something back by becoming a contributor! Please Contribute

  3. #3
    Join Date
    Jun 2010
    Location
    twomiles from the "peak of Ohio
    Posts
    12,164
    Might take a closer look...rails are "housed" in notches in the posts. Lags go through long grain, and into long grain...Rails are also "stopped" by the head or foot board's rails..
    footboard.jpg
    Note where the rail meets the foot board..and how it is fitted in place. Post closest to the camera also shows the notch to house the rail. Lags go through the rail, through counter-bored pilot holes, and into the post....Rail butts up tight to the foot board' s rail..which is glued and screwed in place. The head and foot board can be moved as units....just remove the side rails.

  4. #4
    Join Date
    Jun 2010
    Location
    twomiles from the "peak of Ohio
    Posts
    12,164
    And, a look at the lags and the holes they go into..
    two done.jpg
    I used a 1/2" socket to drive the lags home. Bit laying there was used after this other one
    cordless drill.jpg
    Made the 13/16" counter bore.
    Rails fit tightly into the notches in the posts.

  5. #5
    Join Date
    Mar 2005
    Location
    Cashiers NC
    Posts
    603
    Nicely doe. Sometimes the simpler way is the most practical .
    Charlie Jones

Posting Permissions

  • You may not post new threads
  • You may not post replies
  • You may not post attachments
  • You may not edit your posts
  •