I see how Glen Huey dovetails drawer rails into the front of casework with floating stiles going toward the back for case side expansion. I wonder if it is worth the extra effort compared to making standard web frames and using a blind dado in the front. ( Other than aesthetic) I have used the blind dado method on 5 pieces 30 years ago and everything is still strong, no failures so far. I tried the dovetail method once in white oak and had tear out and other issues and ended up having to add a front frame to cover the mess. I'm about to start a chest on chest dresser and have to decide here soon.
Thanks, ron

 Reply With Quote


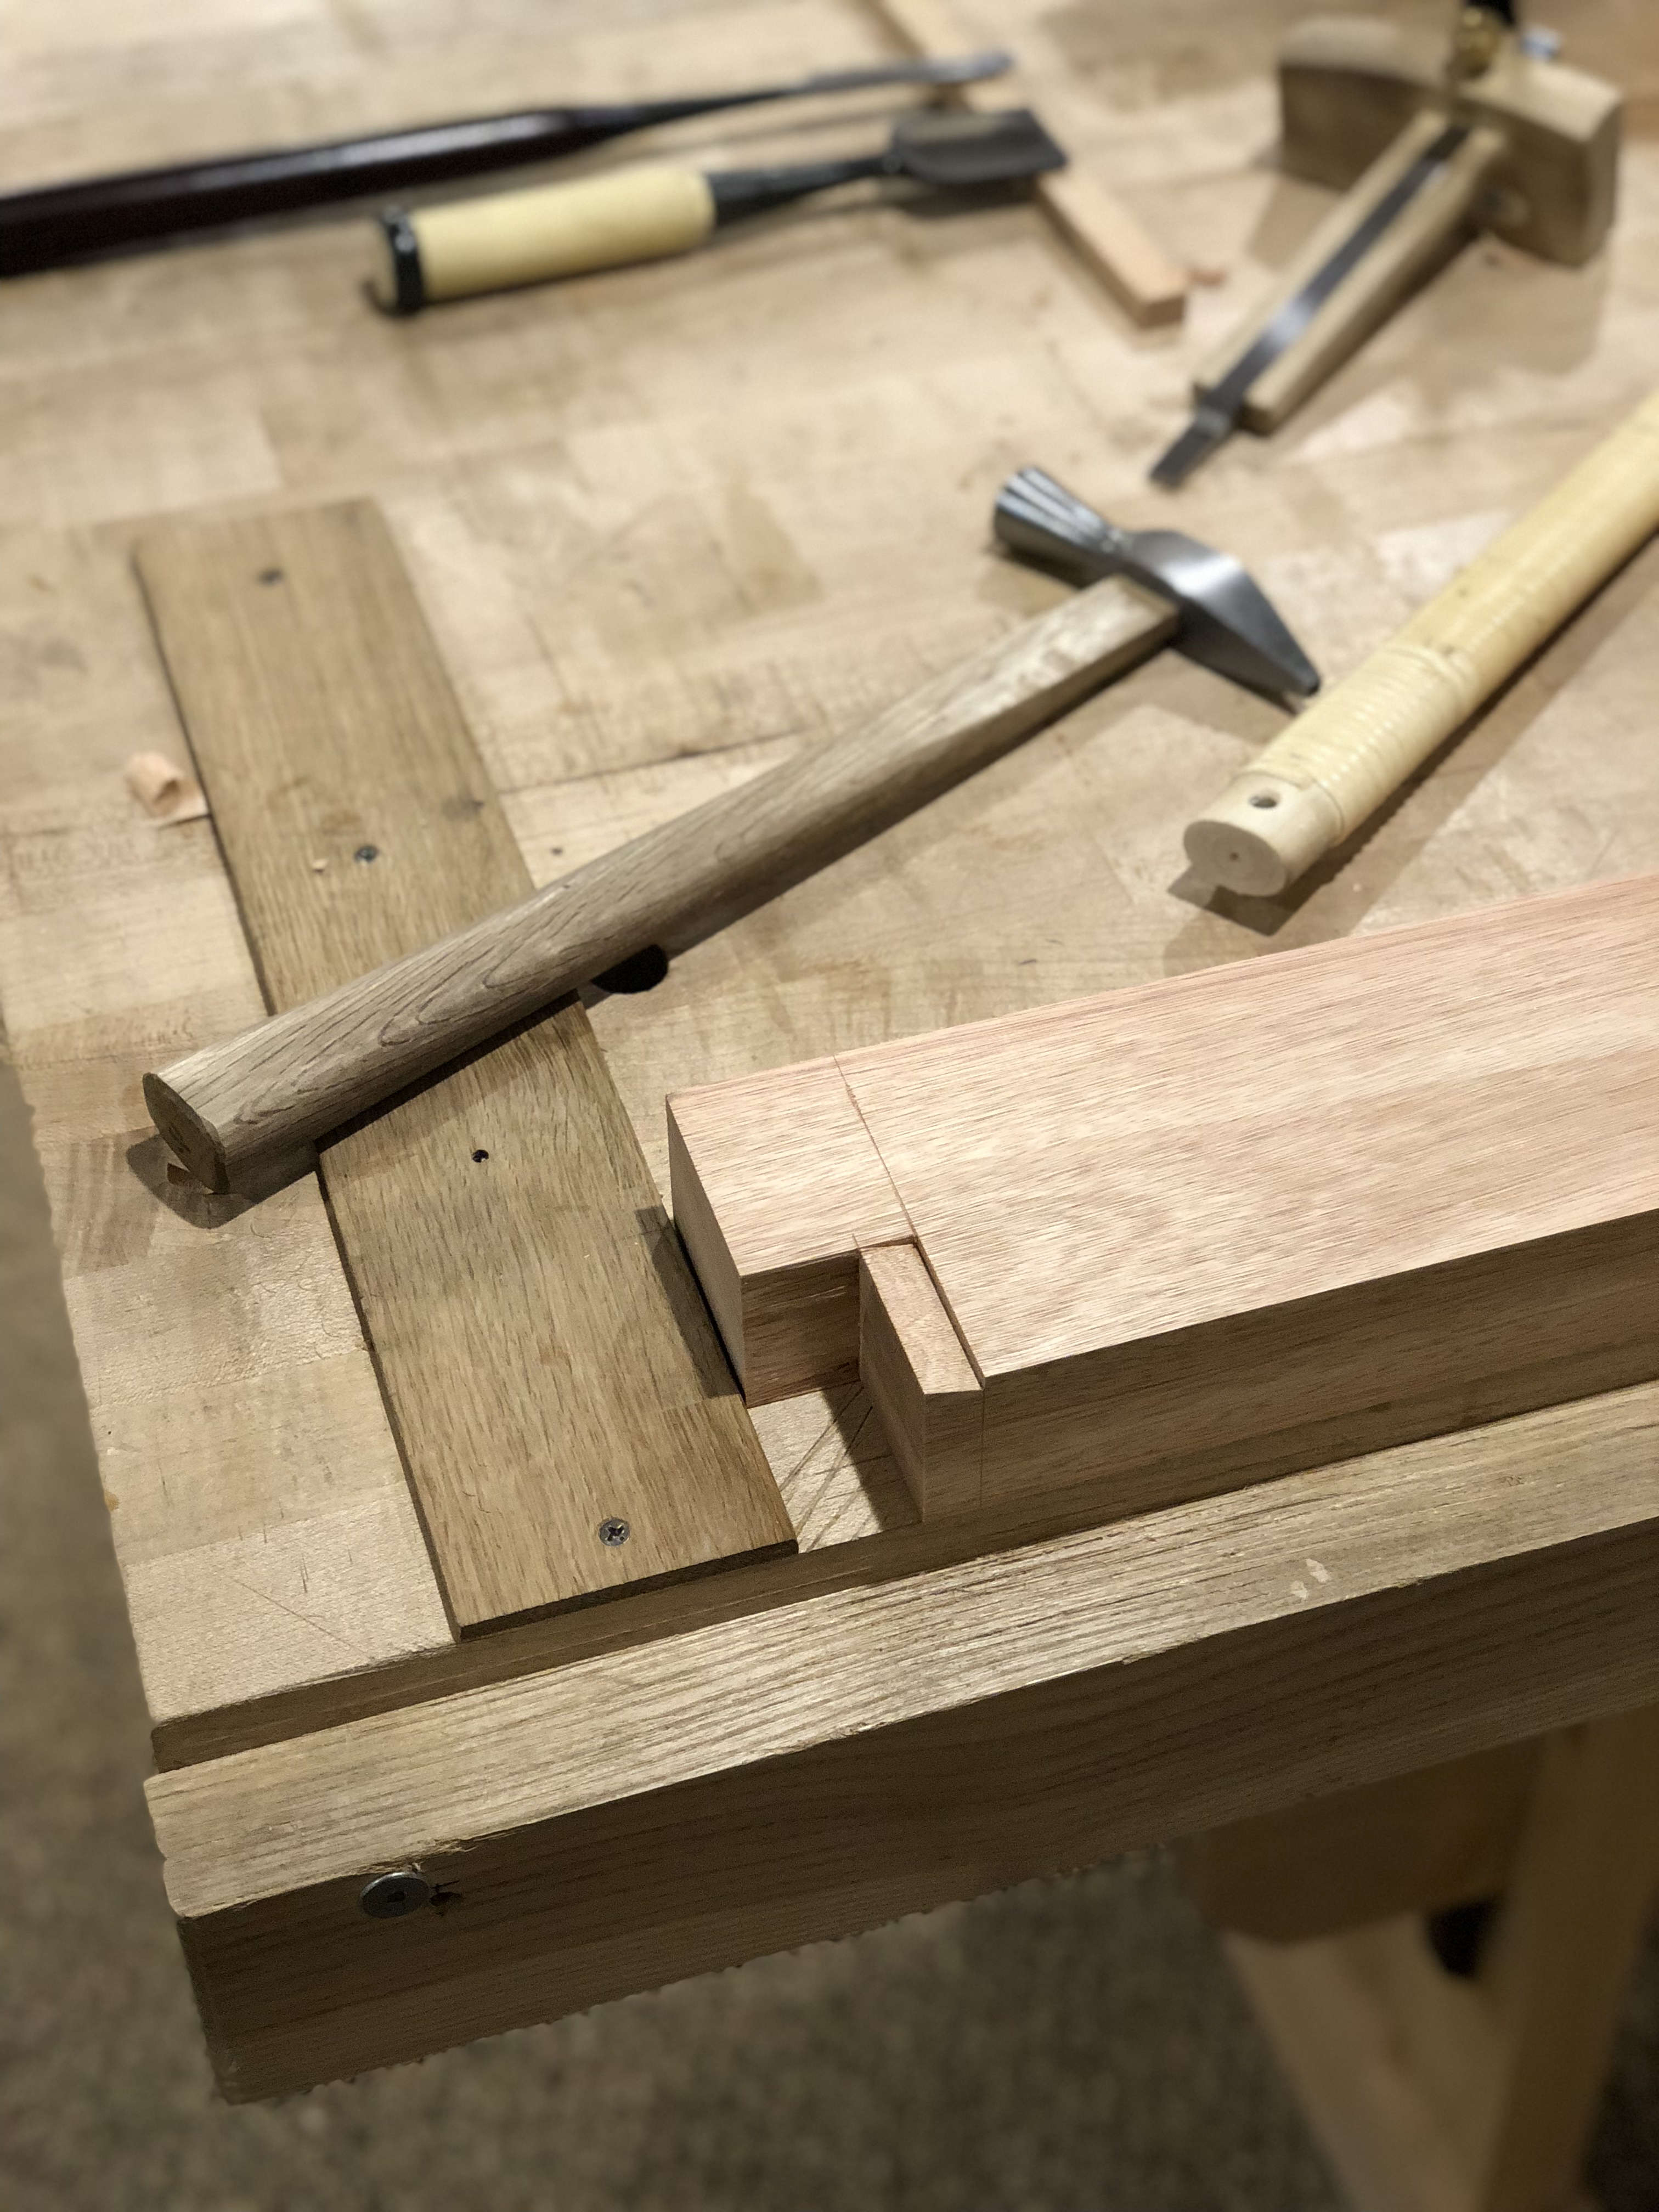
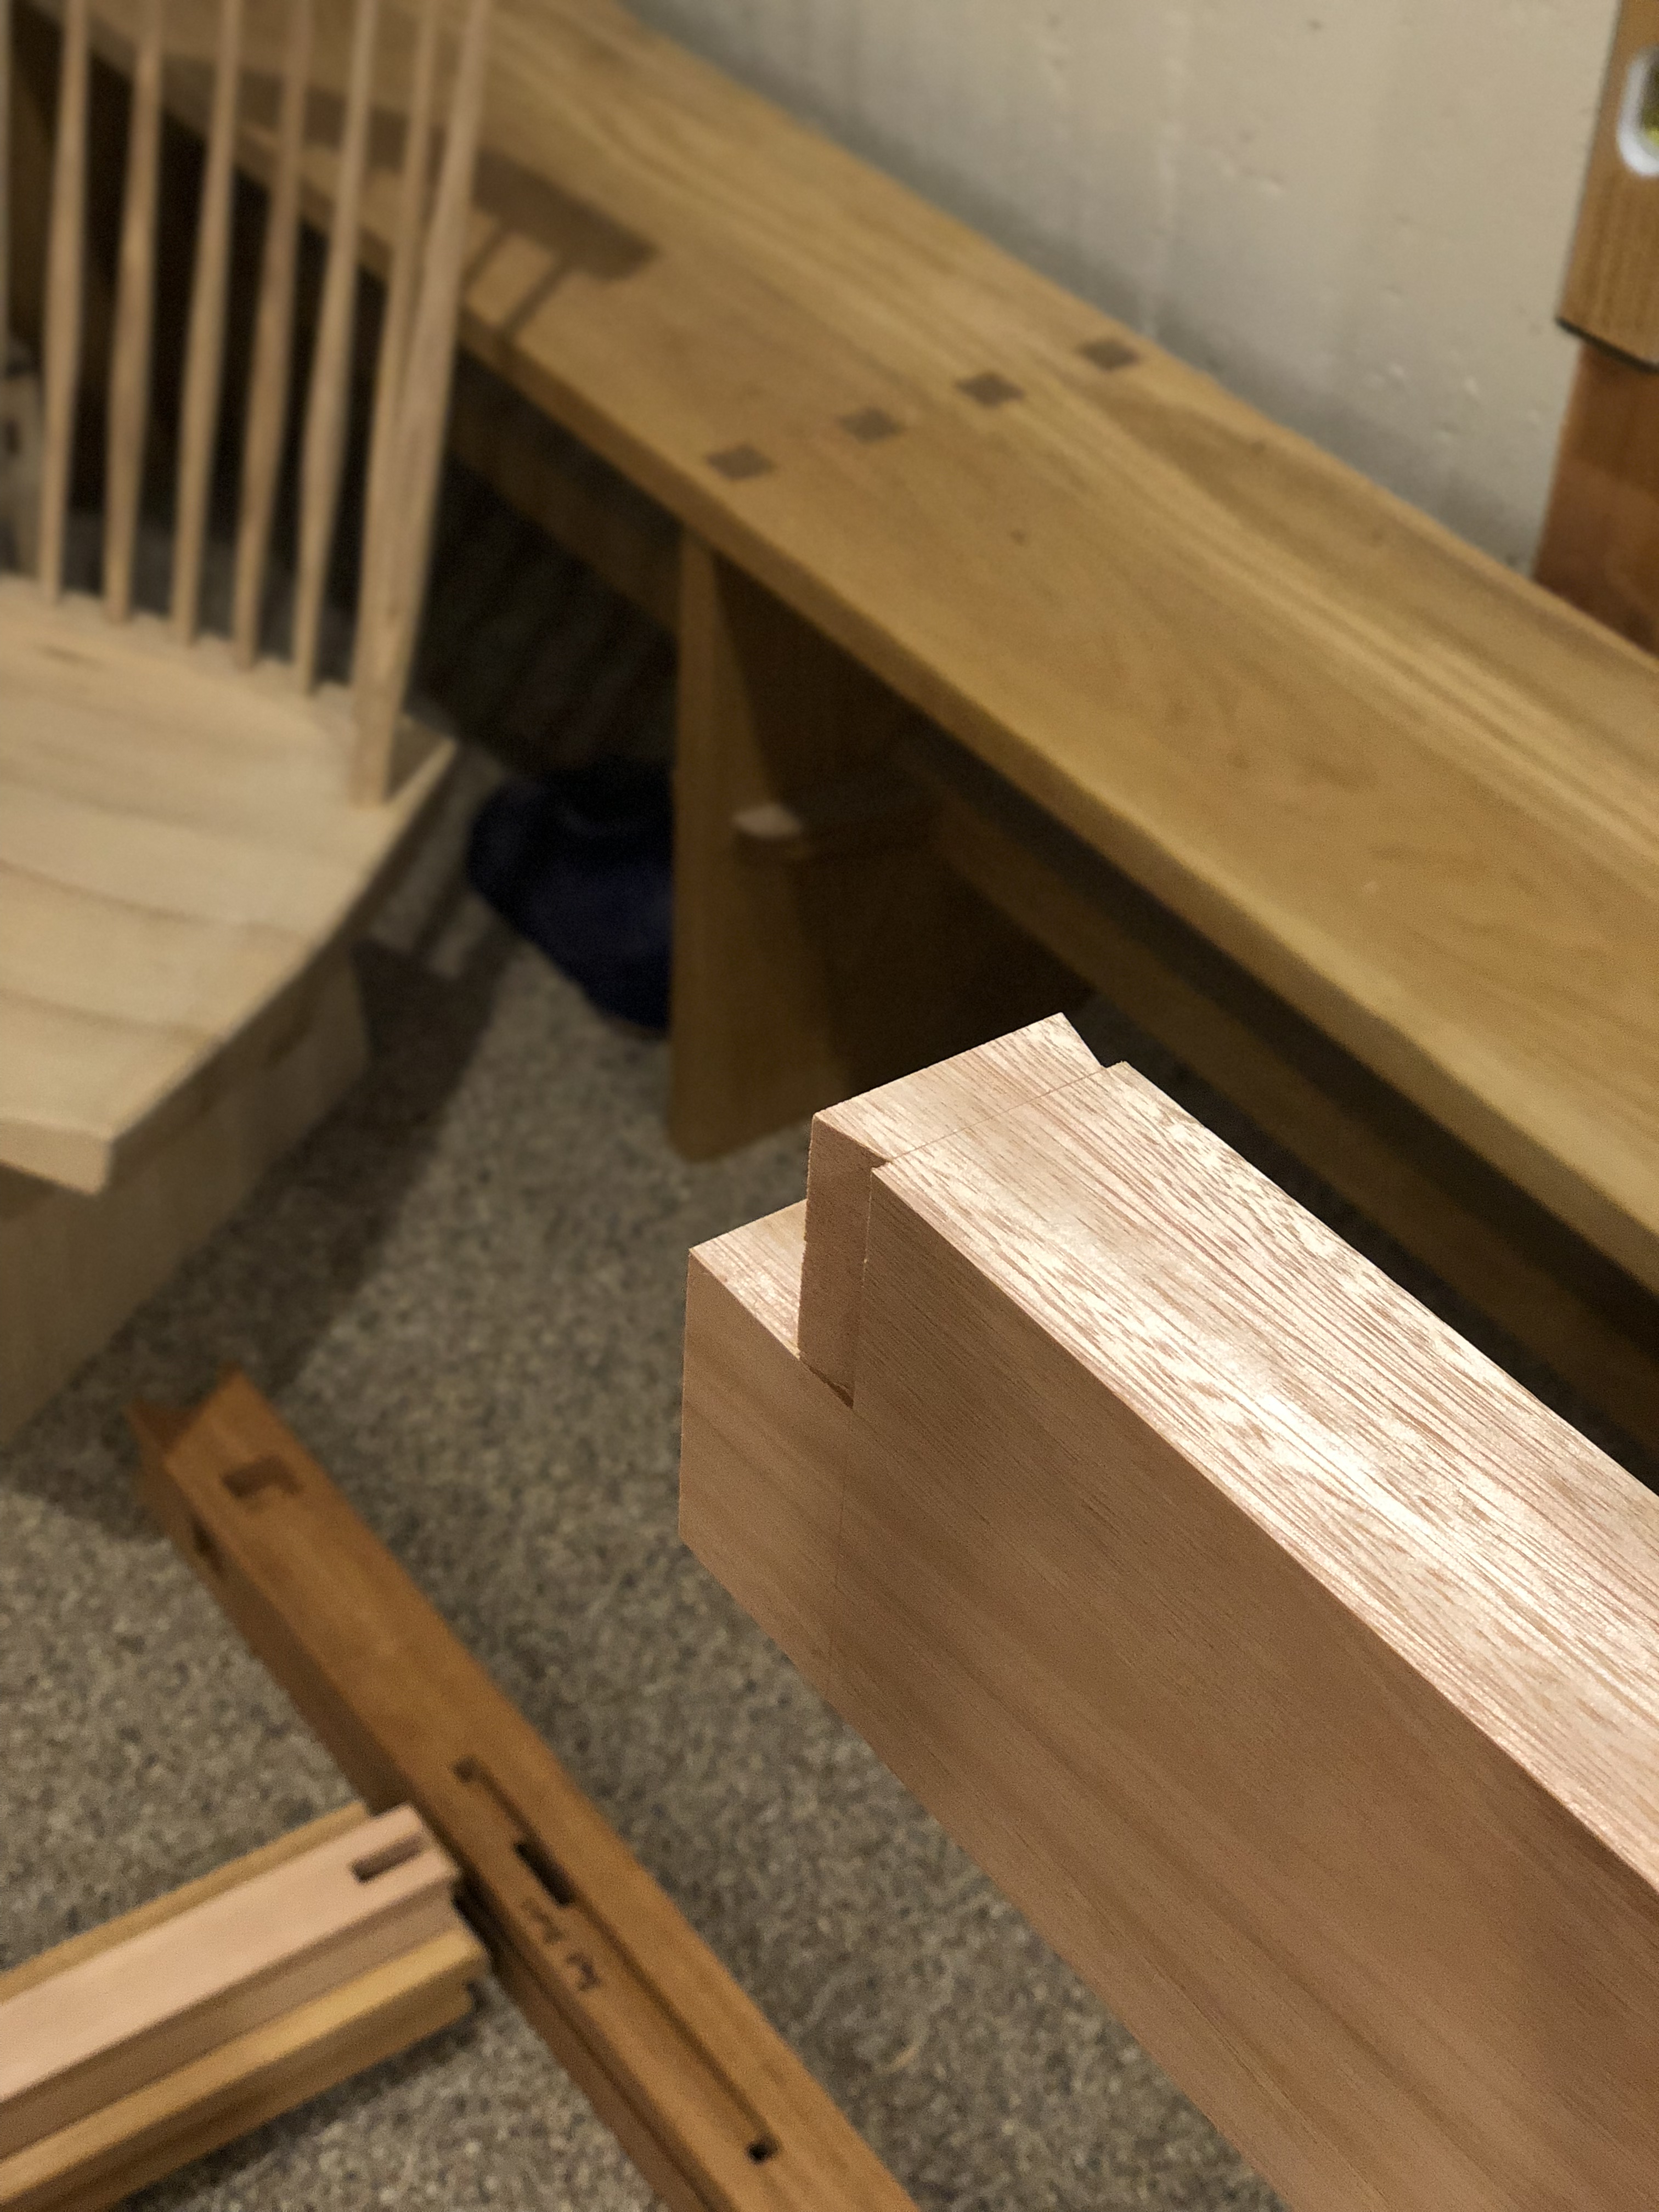
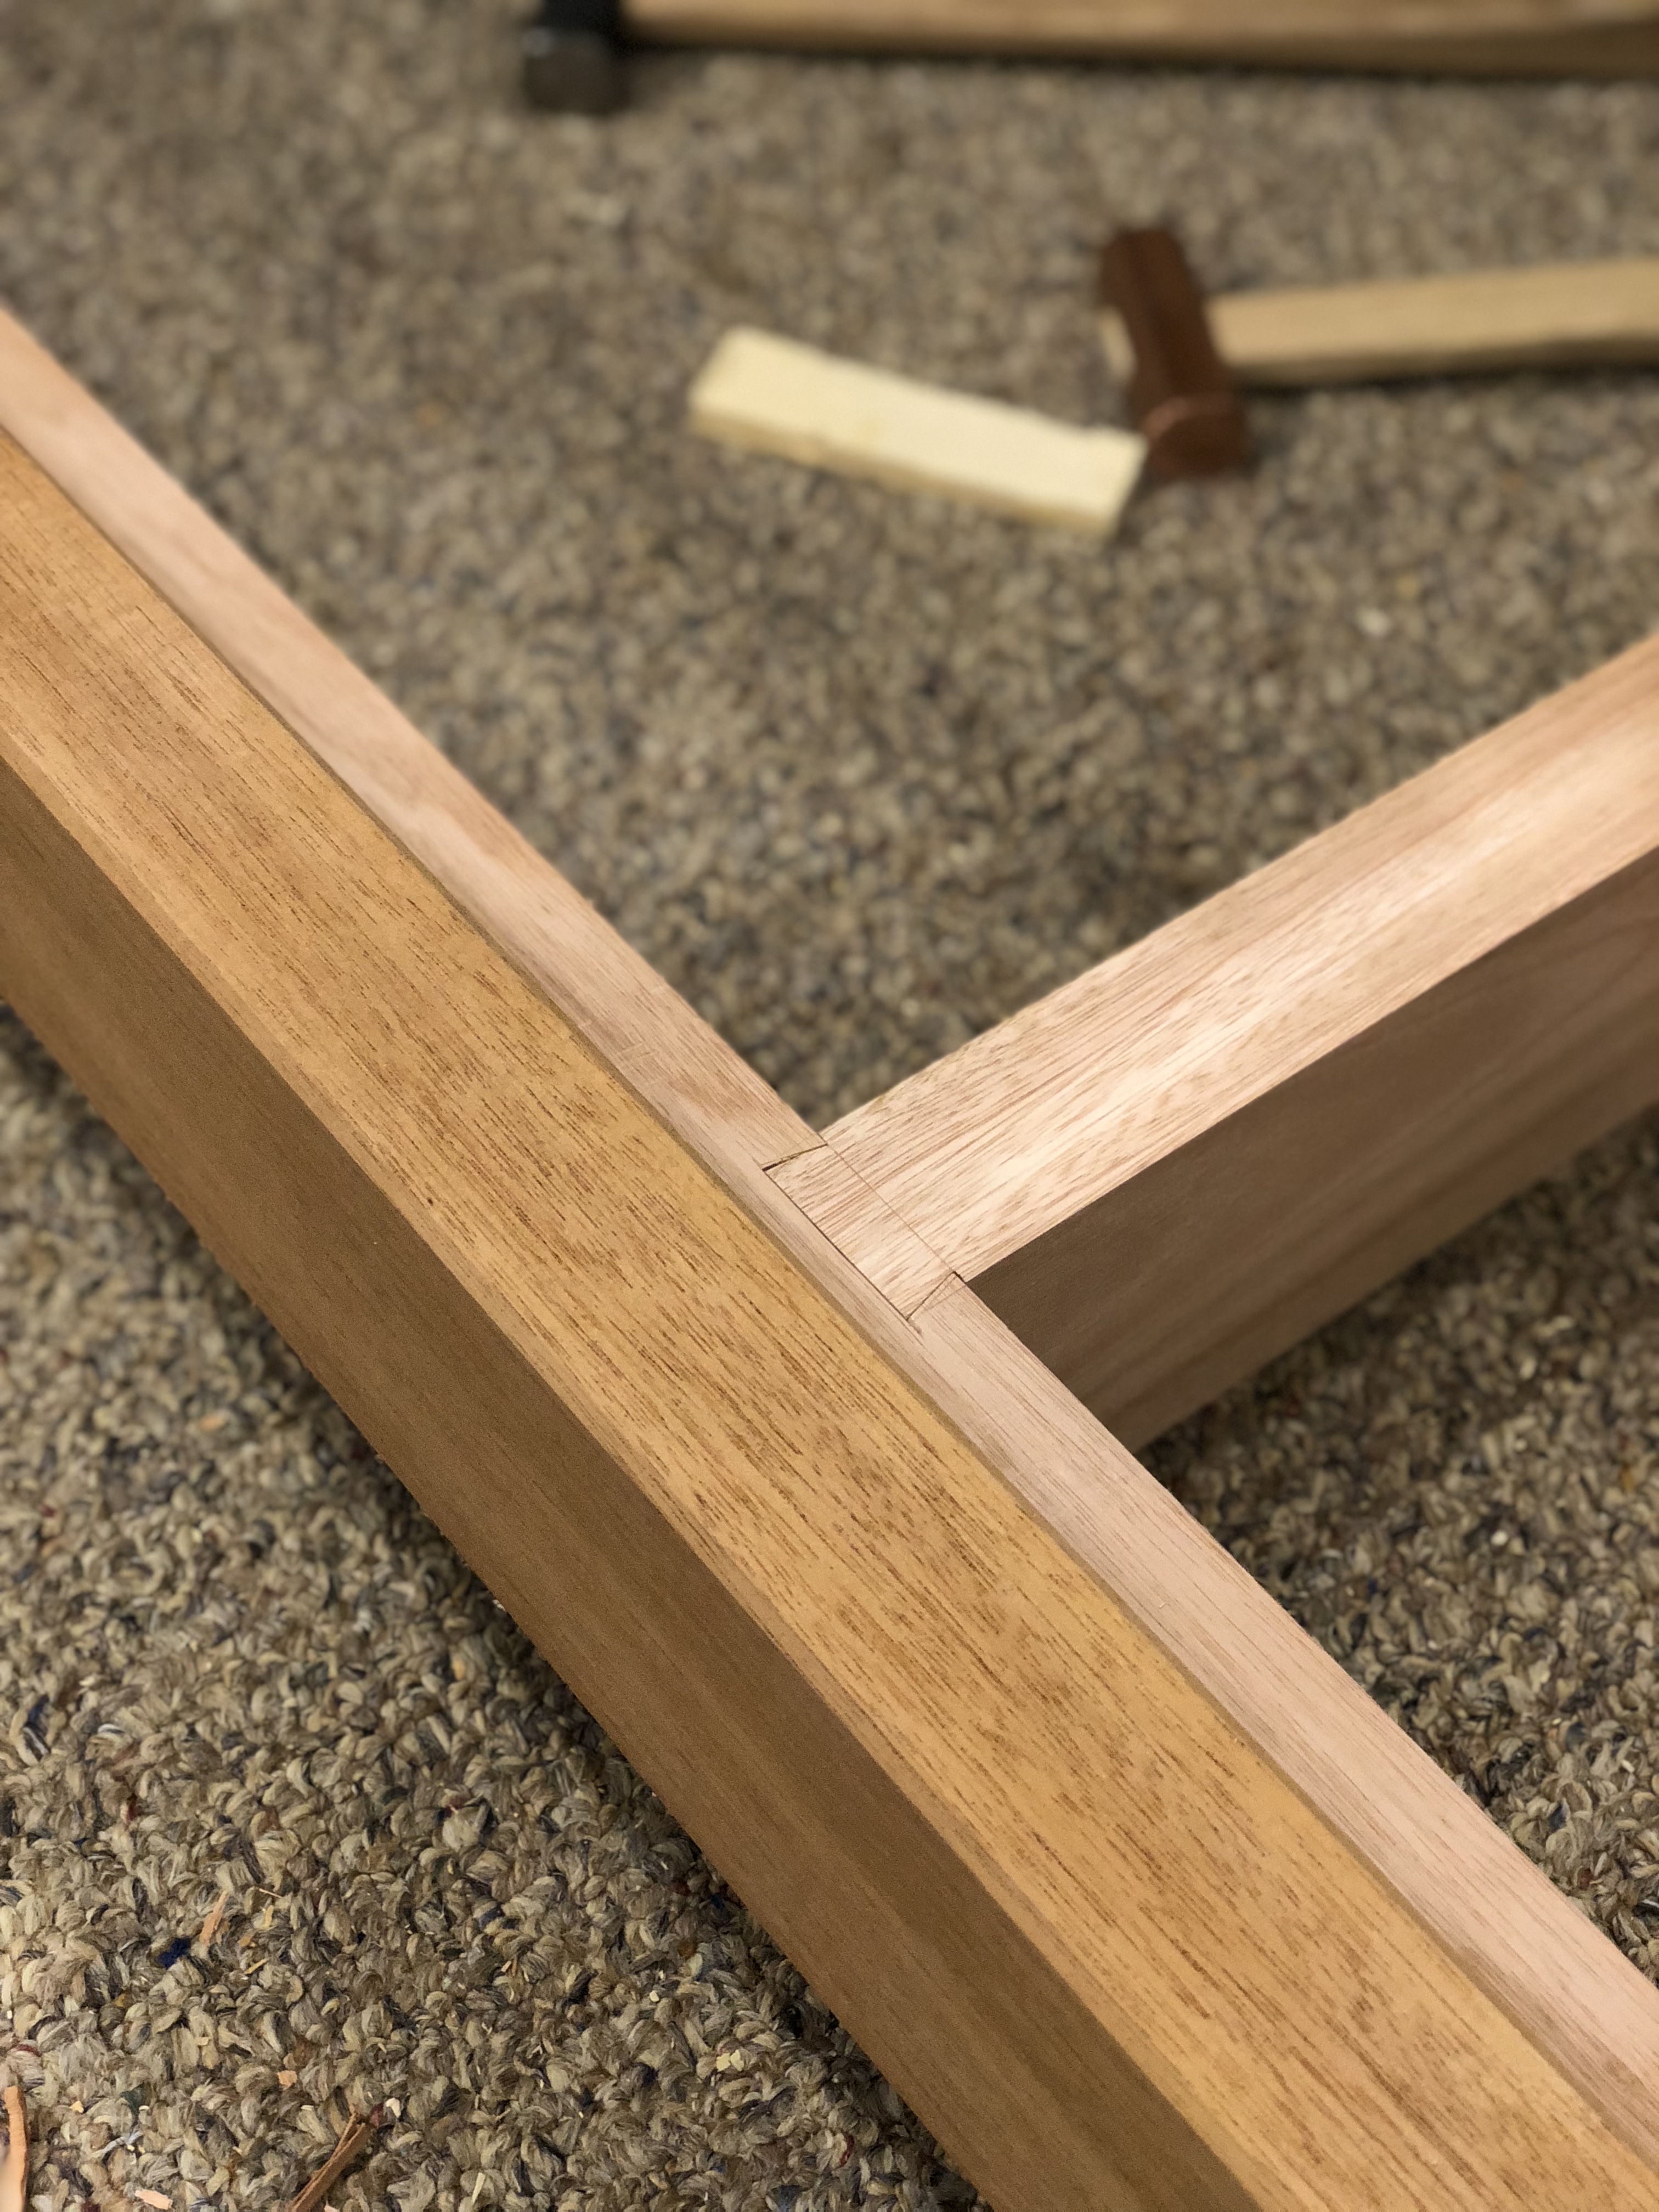

") ?) to cut through at the start and finish of your cut will leave a clean result. Here's a couple different examples cut with backers.
?) to cut through at the start and finish of your cut will leave a clean result. Here's a couple different examples cut with backers.