Page 1 of 2 12 LastLast
Results 1 to 15 of 19

Thread: Apothecary chest - part six

  1. #1
    Join Date
    Feb 2004
    Location
    Perth, Australia
    Posts
    9,492

    Apothecary chest - part six

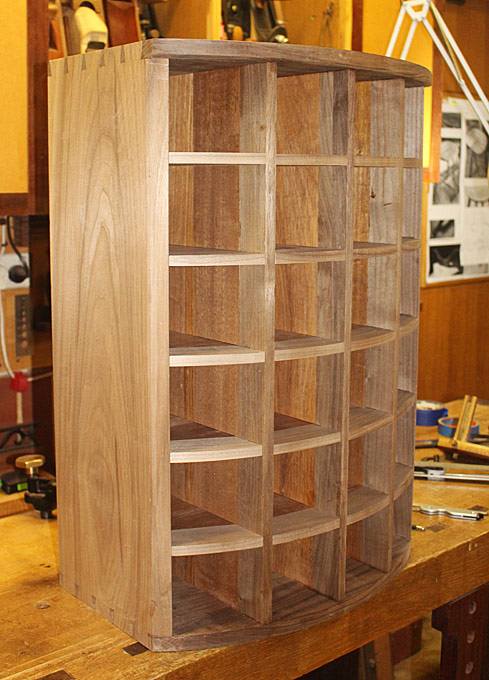
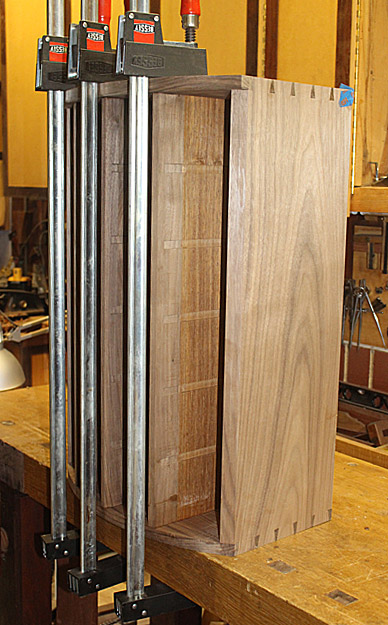
    Well the carcase was finally glued up, everything square as can be ... and I forgot to take a photo of this!


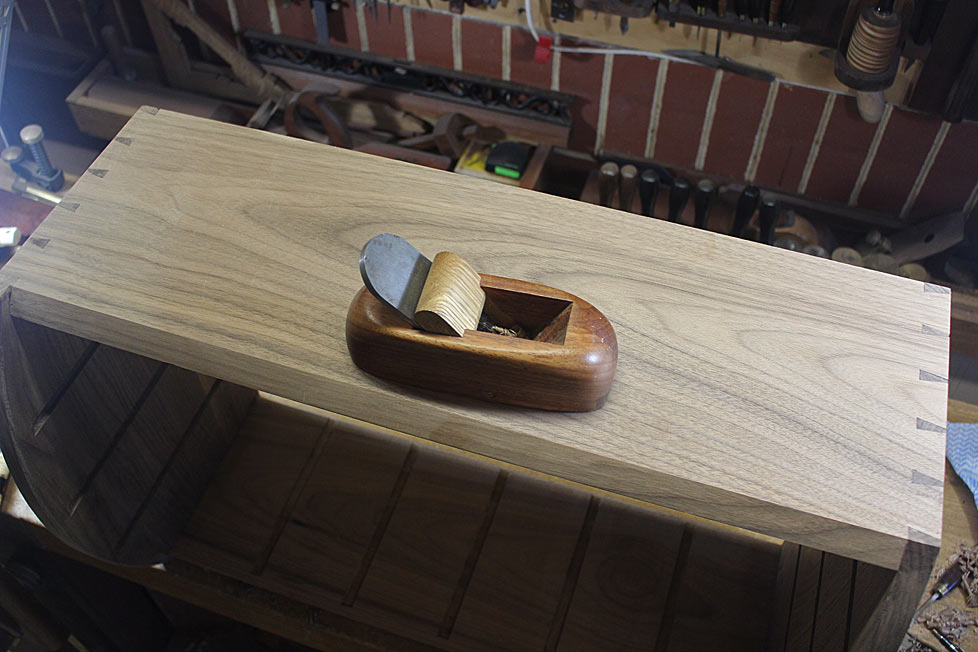
    However, while planing the outside, I discovered that the black walnut required nothing more advanced than a simple single-blade common angle plane. Many years ago I received a smoother from Steve Knight. This was the first occasion I got to use it.


    Just wonderful to work this wood!


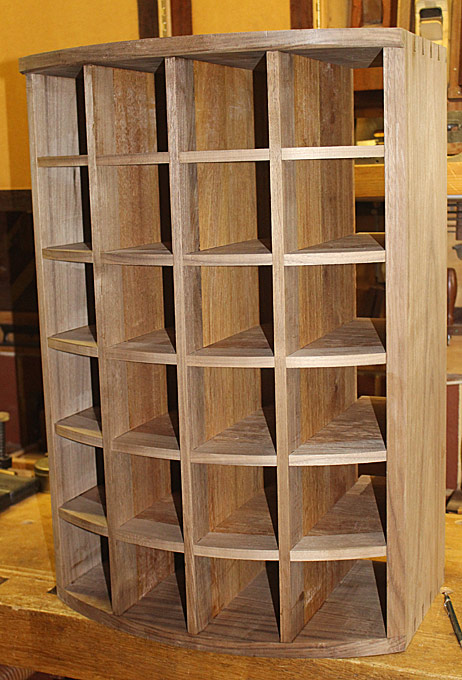
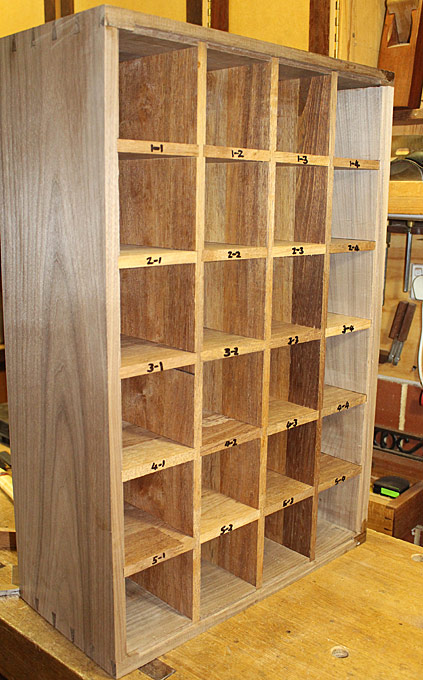
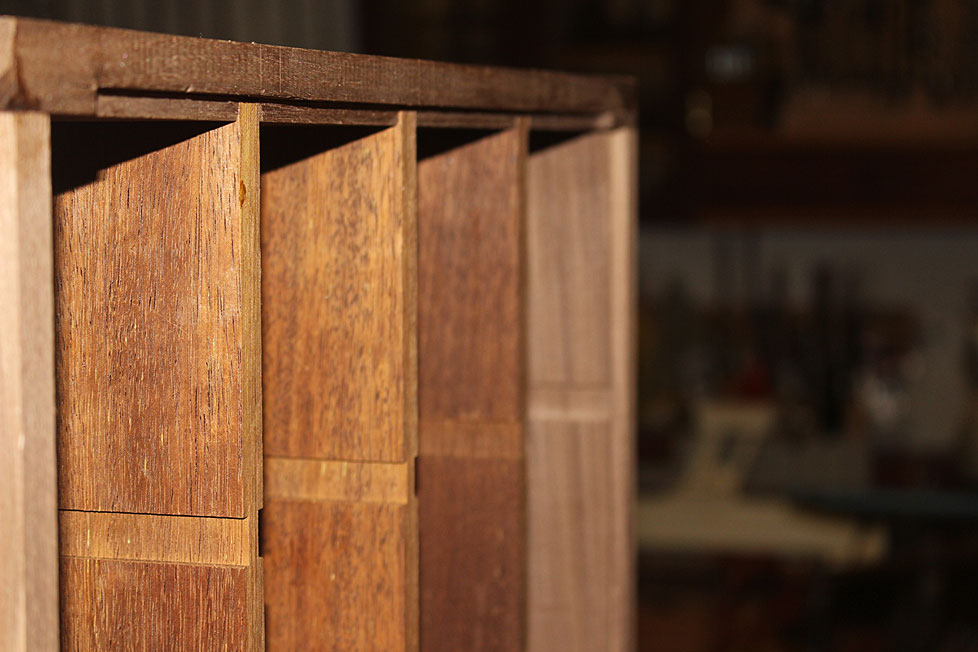
    The next step was to complete the vertical dividers. These were inserted and, with some relief, these were square as well. A reward for attention to detail?


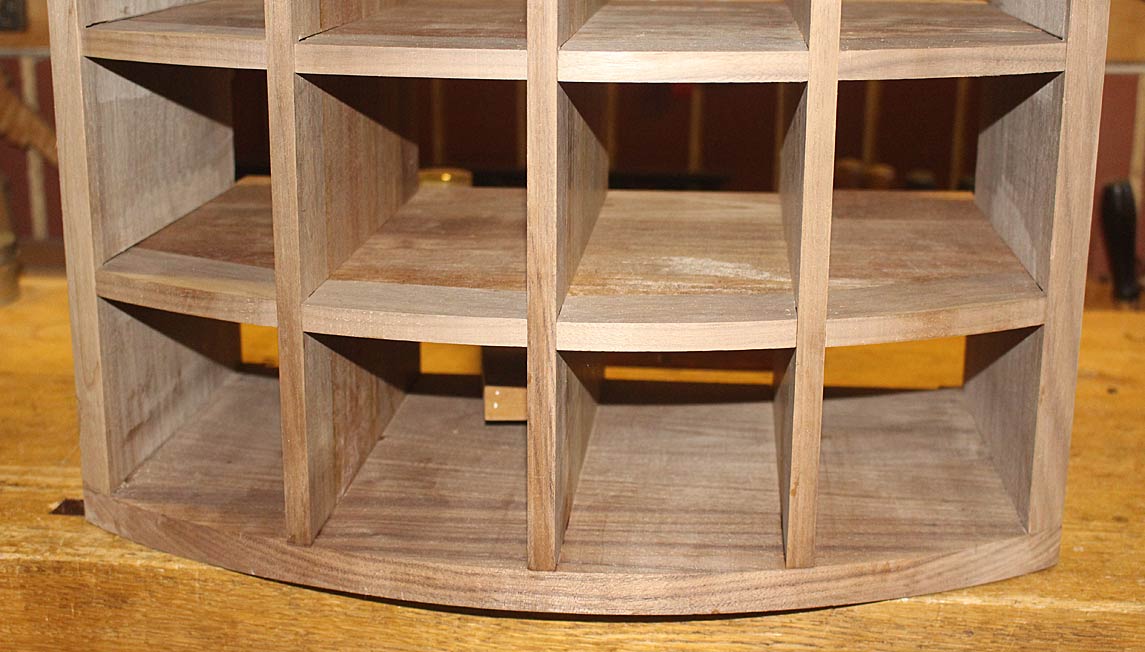
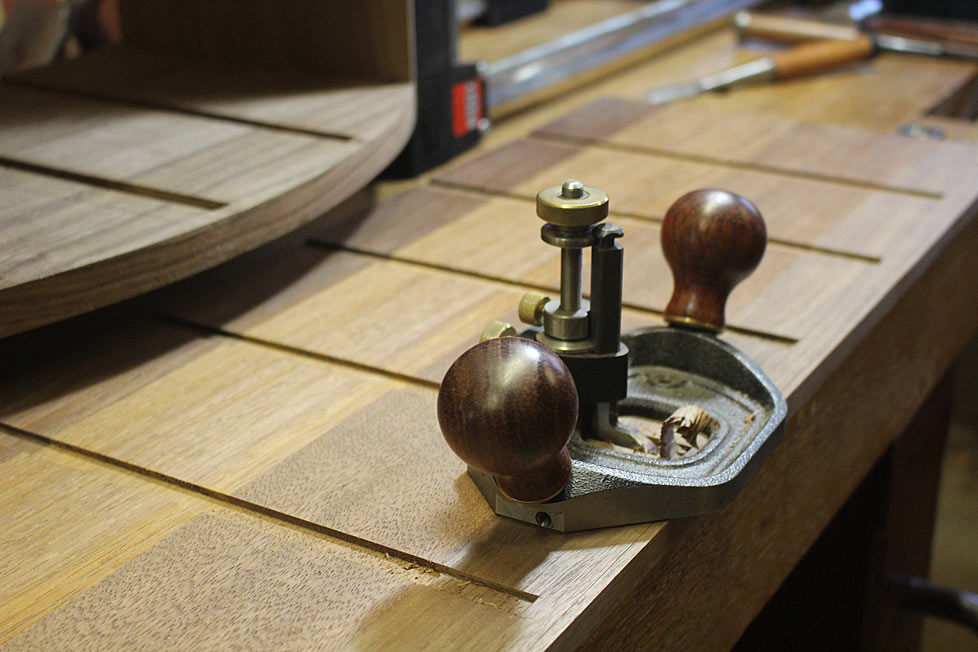
    The photo below shows the next steps: the stopped dados need to be extended, and the faces of the dividers need to be shaped to match the angles of the carcase.


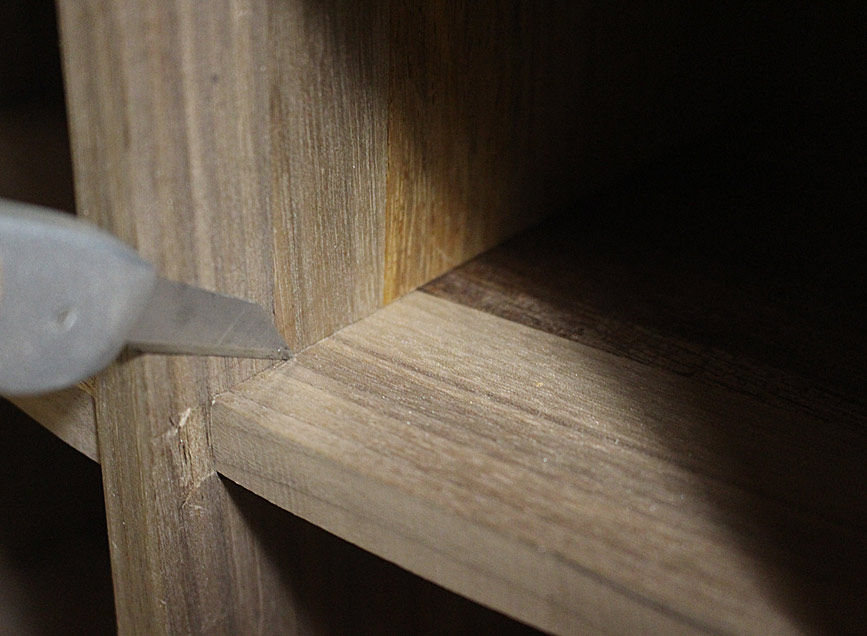
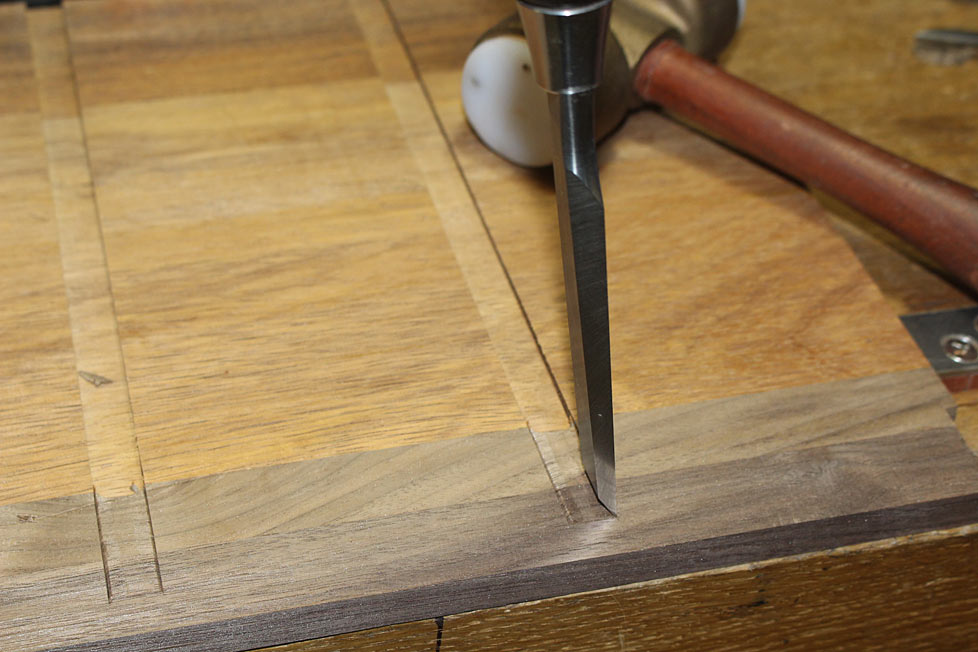
    The dados are marked to 12mm from the edge ...


    ... and chiselled and pared away ...


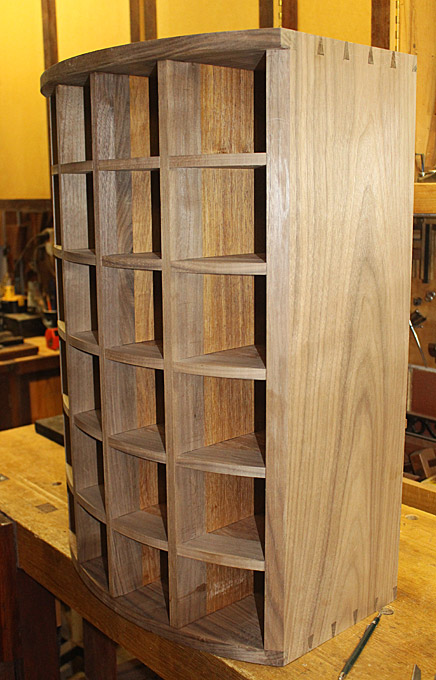
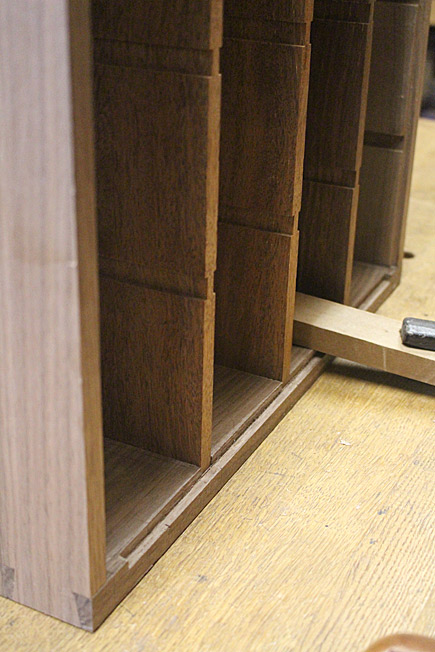
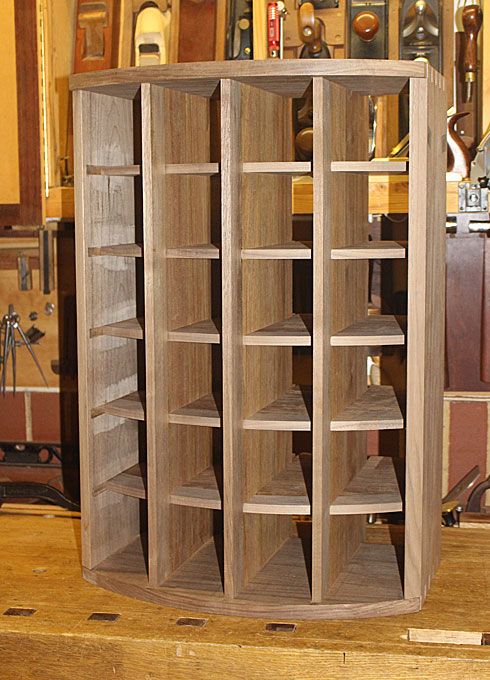
    These were then glued in place (yes, I got that one! ) ...


    During the dry fit I had been careful to fit them flush with the rear rebates, and then saw them parallel. This made it easier to ensure that they were glued square (since the fronts could be flush with the lower edge of the carcase, but not the upper edge, which has an overhang) ...


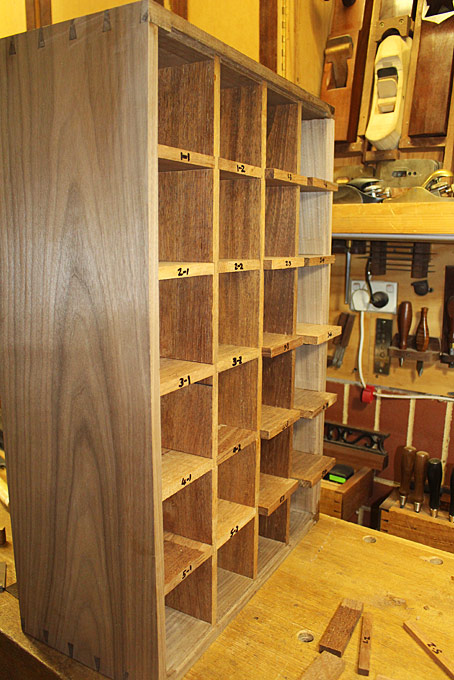
    Time now to install the drawer blades. These were positioned loose, as before ...


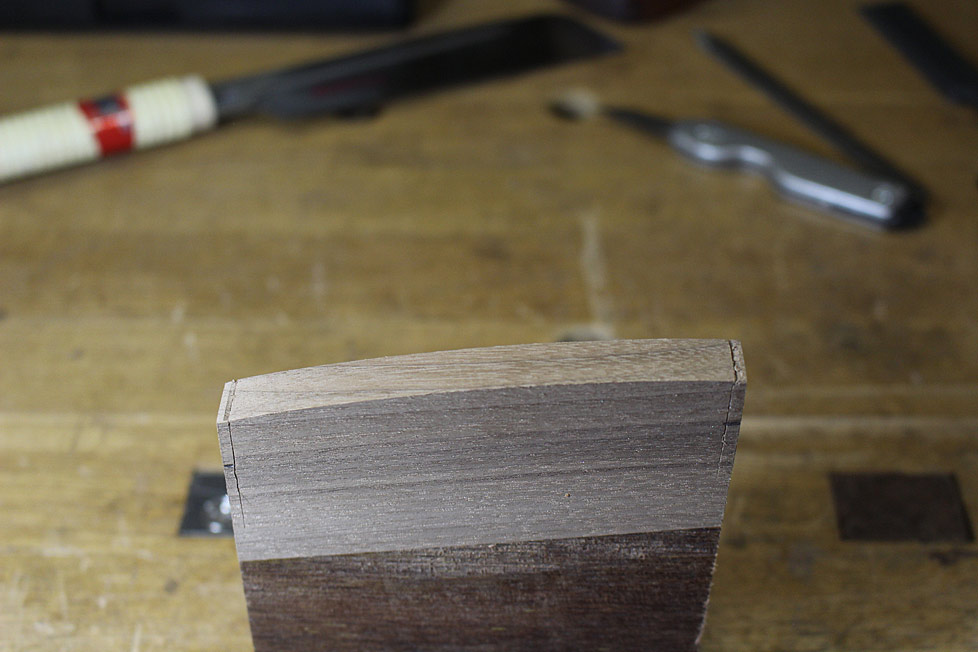
    To fit them to the stopped dados, the front was marked out ...


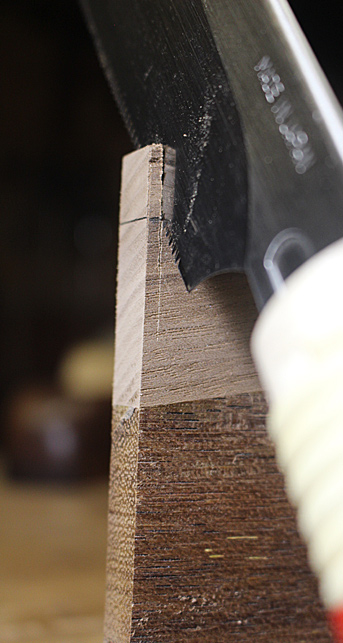
    Below the rebates are marked and knife walls cut ..


    The first saw cut is across the top to establish the face ...


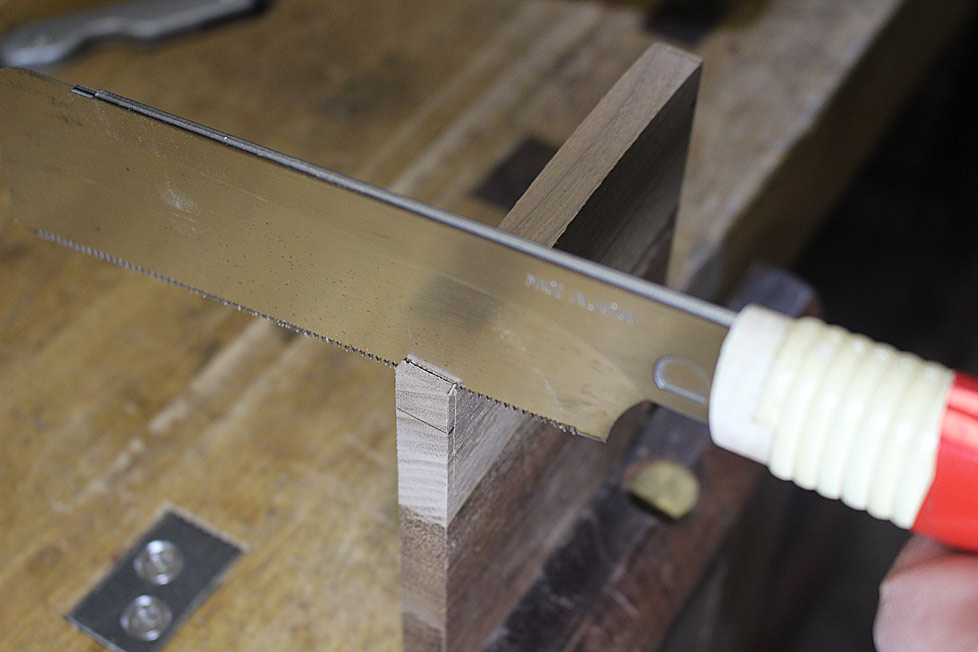
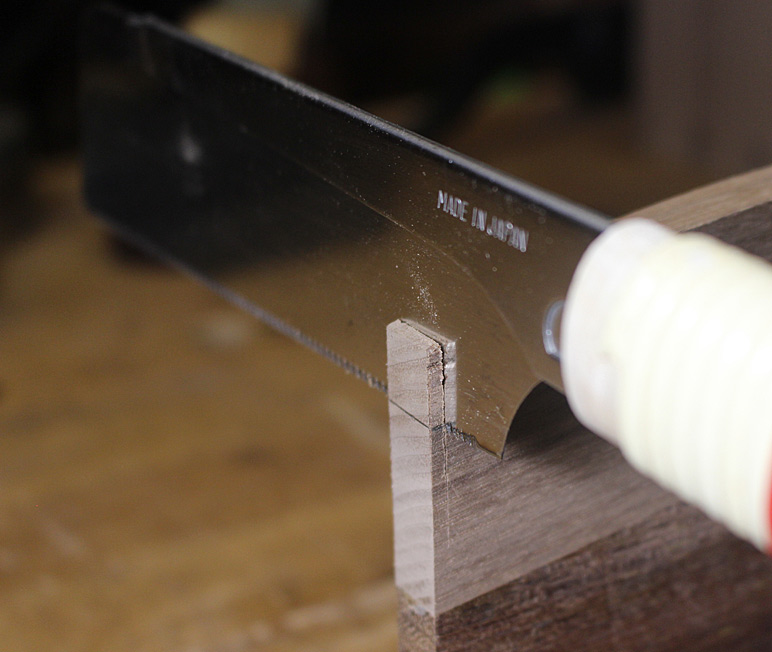
    Then saw diagonally along the vertical line ...


    .. before finishing on the horizontal ...


    This will maximise obtaining a straight saw cut.


    Last edited by Derek Cohen; 05-21-2018 at 12:19 PM.

  2. #2
    Join Date
    Feb 2004
    Location
    Perth, Australia
    Posts
    9,492
    This is the fit once all is done ...


    The drawer blades will remain loose until the drawers are completed, since they still need to be used as a template for each drawer.


    At the rear of the cabinet, the drawer blades are marked for length and sawn flush (in the photo below, half are flush, with half to go) ...


    All done. Each is marked for repositioning ...


    So that is it for this past weekend. The drawers are next. Curved fronts and compound dovetails. How much fun is that!


    Regards from Perth


    Derek

  3. #3
    Join Date
    Sep 2016
    Location
    Orange, CA
    Posts
    77
    Excellent! I've been following along every step of the way. Can't wait to see the drawers.

    Dennis

  4. #4
    Man, that looks soooo nice. You make it look easy...then I realize the front is curved.

    Also, cute plane. What type of iron?

  5. #5
    Join Date
    Aug 2010
    Location
    USA
    Posts
    5,582
    Your workmanship is stellar. Thanks for documenting your methods for the drawer blade fit. I really like the appearance of the cathedral grains on the side panels. I really admire your skills and the thinking you put into your projects.

  6. #6
    Join Date
    Feb 2004
    Location
    Perth, Australia
    Posts
    9,492
    Quote Originally Posted by Matt Lau View Post
    ...Also, cute plane. What type of iron?
    Thanks for the kind words, Matt.

    The iron is interesting, indeed. It is 1/4" thick and handmade, laminated ala the best Japanese irons by a master Chinese blade maker. Really wonderful iron. I use it much of the time in my HNT Gordon Trying Plane.

    Regards from Perth

    Derek

  7. #7
    Join Date
    Feb 2004
    Location
    Perth, Australia
    Posts
    9,492
    Thanks Pat and Denis

    Regards from Perth

    Derek

  8. #8
    Join Date
    Mar 2017
    Location
    Forest Lake MN
    Posts
    340
    This has been one of my favorite builds to watch.

  9. #9
    Join Date
    Feb 2004
    Location
    Perth, Australia
    Posts
    9,492
    Thanks Brandon.

    Regards from Perth

    Derek

  10. #10
    Join Date
    Sep 2008
    Location
    N. Idaho
    Posts
    1,621
    Thanks for posting Derek and that sure is a cute little plane. Reminds me of a bumper car

    Walnut sure is sweet stuff huh? I had to move my pile of it (for the second time) into my new shop this weekend. Your admiration for the wood is a good reminder that all the heavy lifting and stacking was worth it!

    Looking forward to seeing the drawers come together. Hope they don't throw you any curve balls!

    Best,
    Chris
    "You can observe a lot just by watching."
    --Yogi Berra

  11. #11
    Join Date
    Aug 2012
    Location
    Missouri
    Posts
    2,152
    Looking great Derek. Nice looking little plane the shape reminds me of those bumper car rides at the county fair. I bet it feels good in the hand. Walnut is a treat to work, it's right up there with good mahogany in my book. It will spoil both you and your tools.
    Jim

  12. #12
    Join Date
    Apr 2008
    Location
    Provo, UT
    Posts
    390
    This is coming together so nicely. I have loved following this.

  13. #13
    Join Date
    Feb 2004
    Location
    Perth, Australia
    Posts
    9,492
    Thanks Chris. Thanks Jim. Thanks Jeff.

    Jim the "bumper car" plane illustrates the difference in the workability of the woods from Western Australia and elsewhere, in this case, black walnut from the USA. It is such a simple plane - a single blade, and it is not bedded at a high angle. There is no chipbreaker - these are factors now seem foreign ... and it still cuts cleanly and without any signs of tearout. Why should this be so surprising?

    Regards from Perth

    Derek
    Last edited by Derek Cohen; 05-23-2018 at 1:41 AM.

  14. #14
    Join Date
    Aug 2012
    Location
    Missouri
    Posts
    2,152
    We have to amuse ourselves by finding the knarliest piece of pallet wood possible just to say we can plane it. Of course in order to do so we have to super tune a particular model of antique Bailey plane and set the chip breaker with a thousand dollar micrometer, have a Roubo bench at exactly the right height, etc. etc. Oh and not to forget eat our Wheaties so we can push the plane. And we do that for fun and leave all that great walnut and other wood at the lumber yard so they can ship it to you
    Jim

  15. #15
    Join Date
    Aug 2013
    Location
    Princeton, NJ
    Posts
    7,294
    Blog Entries
    7
    Nice work Derek!
    Bumbling forward into the unknown.

Posting Permissions

  • You may not post new threads
  • You may not post replies
  • You may not post attachments
  • You may not edit your posts
  •