Well..."Rasselled" a rail down to the shop...some how got it trimmed down for length....and width. notches were a tad too tight.. IMG_4349 (640x480).jpg
Little short "rail" is set up to just keep this heavy thing from falling over on to someone...namely me. Design changed....this is too heavy to be trying to slide dovetails together, and adding post to a rectangle...will glue and screw the head and foot board rails in place. Lags, two per corner, will attach the long side rails. counter-bored and with a washer. Counter-bored and plugged screws for the head and foot board rails. IMG_4347 (640x480).jpg
Clamping this monster up will be a bear...hope I have enough clamps...waiting on the plywood panel to get padding and fabric, so I can install it in this frame...may go ahead and complete the foot board.
Notches were for a 1 x 10 at 9-3/8" wide.....these boards seem to have gotten a tad fat..now are 9-1/2" wide. That short rail, is actually a cutoff...had to plane the excess off..to get it to fit.. shavings.jpg
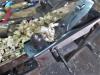
wasn't in the mood for see-through stuff.. jack plane.jpg
Millers Falls No. 14 jack Plane...no camber. took a while just the same...
Maybe Tuesday, I can try to haul another 2 x 10 x 8' to the shop, and trim it to size.....but, will simply notch as needed.
Been a long day...stay tuned...
Shopping today..Boss picked out the fabric, we picked out the foam boards that will go under it...priced a stapler....picked up a few #12 wood screws, and a piece of dowel rod. Wooden dowel will be to "pin" the tenons. Screws to attached the head and foot board rails...then cover those with a plug. Debate is also on how to "finish" the tops of the posts. There was even a suggestion about a copper cap......
May try to get the next plank to the shop..later today. Usually, shop is closed on Mondays....we'll see.
lag screws have been bought, along with the washers. Staple gun and a box of staples were bought, as well. Too tired today to haul a heavy plank to the shop..on a Monday.
Maybe tomorrow, I can get a bit more done.....waiting on a couple pay checks to come in, before the fabric and padding get bought. Been told to finish the cap as a bevel...So I have to figure out how to bevel all four edges around the top...no tablesaw in the shop...not sure IF the circular saws can make that cut.....router bit is too small...we'll think about that, for a bit...doubt IF I have room for the bandsaw to do those cuts.
Stay tuned...
Monday is gone ( I hope) Tuesday has arrived ( Good Morning, Captain!) and maybe after "Second Breakfast", I can get some saw work done.
Same Stanley hand-powered stapler that Wall E World had for $9.....found it's "twin" @ Menard's for $5....sold. Neither came with staples....both stores wanted the same price on those.
Once the Paychecks arrive this weekend, the Boss will buy the fabric and padding she wants....then I can get the head board assembled. Today will be the foot board. Will also work on beveling the top of the posts. Maybe a few other details will be added...we'll see. Will measure for the side rails....and try to cut them to size....IF I can get them to the shop.....too wet outside, to use the sawbench on the patio....same with that plywood panel.....it needs to go from 8' long to 67-1/4" long.....neither will fit too well on my workbench....
Stay tuned....Mountain Dew is kicking in, might get something done?
Lunchbreak! Sitting here with a bandaid on a finger.....bead cutter tested for sharpness....not the recommended way...
Ran a bead down the center line of the foot board posts. fence adjuster was having "issues" staying put....was set a bit too deep on the cutter...normal stuff...
Beveling the tops of the posts... IMG_4352 (640x480).jpg
Test cuts...first one wasn't too bad..that second cut.....turned out something else was loose... IMG_4353 (640x480).jpg
Lock for the bevel setting. Readjust to 22-1/2 degrees, square to guide the cuts ( when there was enough room, had to just follow a line, with the outside of the saw's shoe) IMG_4355 (640x480).jpg
Needs a little clean up.....I also beveled the foot of the posts.. IMG_4357 (640x480).jpg
Took almost as long, but.. IMG_4358 (640x480).jpg
Will have to do....one post "done" IMG_4359 (640x480).jpg
Three to go...well at least the other post for the foot board, today... IMG_4364 (640x480).jpg
Finally got things about done...noticed the beads weren't quite right....brought both posts back to the bench, and ran the Stanley 45 along the non-beaded sides....all four "faces" now are beaded. IMG_4360 (640x480).jpg
Cleaned things up..sanded everything to 180 grit...and cleared the bench off..
Needed it cleared off, to allow the 2 x 10 x 8' a place to lay, while I trim it to length....after Lunch...
I also cleaned the floor...twice. Forgot to turn the shop fan on...so now I am soaked....dry out during lunch, then try to haul the plank to the shop...
Stay tuned....
Last edited by steven c newman; 05-22-2018 at 1:39 PM.
Plank has been hauled to the shop....crosscut to length. Then notched on the ends...equally top and bottom on both ends. Drilled the counter-bored holes for the screws.. IMG_4367 (640x480).jpg
Hmmm, something didn't quite fit.....kept checking and double checking...yep post was the right one...notch was on the wrong side....Turned the post...need new holes drilled ( not a biggie, intend to plug all holes, just need three more plugs) IMG_4368 (640x480).jpg
Glue and #12 screws, clamp to keep things steady, while I work on the other end...double checked to make sure I have at least 60" between the posts.. IMG_4369 (640x480).jpg
Finally, I could set this aside... IMG_4371 (640x480).jpg
Yep, notches match the headboard's.....those saws? IMG_4372 (640x480).jpg
One set up for bevel cuts, the other for cross cuts...doesn't everybody?
Will let this set a while, waiting on the glue to cure.. IMG_4370 (640x480).jpg
Will clean it up tomorrow, and maybe plug the holes....have a bit of scrap that matches this pine...
Next? Maybe cut the side rails for length, and get them pre-drilled? Until the Boss get the plywood panel done, I can't do much else to the headboard.
Maybe a good time to start on that night stand she also wants? Or, knock the headboard apart, and do bevels & beads? We'll see...
Stay tuned ...(Am I boring anyone yet?)
Last edited by steven c newman; 05-22-2018 at 6:09 PM.
Footboard was taken out of the clamps, and hauled upstairs..needed the room in the shop.. IMG_4385 (640x480).jpg
Wanted to make sure it did fit the width of the bed....seems to.
Started taking apart the headboard...had some clean up to do, some beads to mill, and a few bevels to cut/plane... IMG_4373 (640x480).jpg
Cleaned up the tenons. Chin-powered chisel to cut end grain... IMG_4374 (640x480).jpg IMG_4376 (640x480).jpg
Set up a router to clean the rounded edges.. IMG_4379 (640x480).jpg
Ran the re-adjusted Stanley 45 for a few beads ( skates weren't inline...back end spread out a bit, binds) IMG_4381 (640x480).jpg
Them 2x 4 rails were a bit long, for the bench.. IMG_4382 (640x480).jpg
Got both rails done, and even got one post done... IMG_4384 (640x480).jpg
Beads on two edges, beveled the top. Bottom of the post was beveled like the footboard posts, with a block plane.
Suppertime! Not sure IF I will head back to the shop tonight...we'll see how bored I get.
Stay tuned
Always hear how plywood is always a little thinner than the listed size....well....plywood panel I bought for the headboard IS EXACTLY 1/2" THICK.......and, after I had milled all four grooves at 1/2" wide, too....
I brought up one of the 2 x 4 rails, to help size and cut the panel for length......thought I would at least see how loose the fit was going to be.........was a tight, almost perfect fit...without the fabric on the panel..not the way the plan was....( of course, IF I had gone with the next size cutter in the Stanley 45, it would have been too loose)
Sooo, now I get to cut the plywood to length ( I hope) and then run the Wards 78 around all the edges, to get enough clearance for the fabric to fit by.....one of those days, I guess...
May try to cut the side rails when I cut the plywood....if I have to make a mess on the floor, might as well do all three cuts...I can carry each to the shop, and work on them better, when they are cut to length..
May also assemble the headboard upstairs....much easier to move into the bedroom than hauling it up the shop's stairs, turn three sharp 90 degree turns to get it in place....it ain't the lightest thing, nor the easiest to cart around...we'll see...
Stay tuned...
Last edited by steven c newman; 05-23-2018 at 10:25 PM.
Had one more post to do, and the rail at the bottom to hold the mattress.....Bead work..
Two beads were done...then a smooth plane was used...
When shavings wrap around your wrist....set up for bevels.. IMG_4391 (640x480).jpg
"Powered by Mountain Dew"....First three cuts weren't too tricky.. IMG_4394 (640x480).jpg
Saw wanted to rock a bit...and fall into the dado.... IMG_4396 (640x480).jpg
Cleaned up well enough.. used a block plane for the bevel on the foot of the post.. IMG_4399 (640x480).jpg
Used the same plane to add a bevel to the ends of the rail...after a counter bore was drilled, and a pilot hole... IMG_4398 (640x480).jpg
sanded most of these two to 180 grit....had a couple spots that needed a little extra done.. IMG_4402 (640x480).jpg
Once both were done, I hauled them up the stairs....assembly will be where I have enough room to work in.
OK, who moved those two pictures down to "Thumbnail" status? I didn't...they WERE IN the post....and would have made it 8 pictures IF they had stayed put....what genius decided they should be moved? Not very happy....
Last edited by steven c newman; 05-24-2018 at 1:34 PM.
Reason: someone playing with the pictures, NOT me.
try this again...see if they move pictures again...
All that plane work made a mess on the floor.. IMG_4395 (640x480).jpg
Finally got things done..had to clean up after meself.. IMG_4403 (640x480).jpg
Even dusted things in the til.. IMG_4404 (640x480).jpg
At least I can tell which plane is which.. IMG_4405 (640x480).jpg
Laid out a drill bit, and the hardware, to connect the side rails to the head and foot board.. IMG_4408 (640x480).jpg
Counter bores will be on the mattress side of the rails.
Was a busy morning. Still have to cut the side rails for length, and the 1/2" plywood panel.
Stay tuned...
Placed the plywood panel right on the Dining Room Table....marked it for length, and made the cut....then repeat with the two 79" long rails that USED to be 96" long.. 2x scrap.jpg
The two cut-offs became a window seat..the scrap from the 1/2" Maple plywood.. plywood scrap.jpg
Will keep this around a while, may come in handy.....all the parts have been milled, and stacked up into the corner.. stacked up.jpg
Waiting on the rest of the supplies to be bought. May be by next week, I can get this bed done?
Still need to run the Wards 78 around the edge of the plywood, notch the ends of the rails, and drill the counter bores.
Will pre-finish what I can, when I can. Have already started the bedside table, tonight.....may or may not do a thread on that...
Stay tuned..
Head board is assembled...been a LONG day.. IMG_4433 (640x480).jpg
Gray fabric pulled tight over 1" thick foam panel.. IMG_4438 (640x480).jpg
Nailed in place, took two people to install the fabric...one pulling, one driving these nails.. IMG_4430 (640x480).jpg
Plywood needed a rebate all the way around..Wards 78... IMG_4437 (640x480).jpg
Even pinned the tenons...
Boss picked out the fabric...and the finish colour.. IMG_4424 (640x480).jpg
Fabric ( 2 yards worth) and IMG_4425 (640x480).jpg
"Weathered Gray"...Stain/varnish...her choice, not really mine..what can you do...
Garage sale while out and about..spent $4.. IMG_4423 (640x480).jpg
Pair of 3' clamps...
letting the glue sit overnight...will see how it goes...tomorrow....stay tuned.
Spent most of the day going Yard Sale shopping....I also trimmed the excess dowels off...
Brought up supplies to work on the side rails with....10" brace, and a few bits....Forstner bit was just too dull, even for Pine.
Will counter-bore two holes per end, then the pilot holes for the lags...may need some help assembling the frame in place....


 Reply With Quote
")


 ....and, after I had milled all four grooves at 1/2" wide, too....
 ..one of those days, I guess...