Results 1 to 10 of 10

Thread: Lessons from a box build

  1. #1
    Join Date
    Mar 2015
    Location
    SE Michigan
    Posts
    3,225

    Lessons from a box build

    In my on going quest to hone some skills in veneer and inlay/banding, a simple box can present a lot of learnings. I would put this box in the “ok” category. A few things to keep in mind for the next project:

    If the veneer isn’t flat, take the time and effort to soften and flatten it out.

    Jointing matters. “Close enough” isn’t good enough. The gap is going to get pretty magnified when finished.

    Never sand ebony. Funny thing is I watched a video that said never to sand ebony, right after I had done it. That ebony dust can not be removed and gets into everything. The top was completely redone with different material.

    I watched a bunch of videos with folks leveling veneer with a ROS. I won’t do that again. Take the time to hand sand. The burl veneer on the box has a few small cover ups where I went completely through it with a ROS. Or maybe the lesson is to learn to use the ROS more judiciously, or slow down the speed. I don’t know...I think it’s hand sanding from now on.

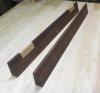
    Banding miters will not swell to perfection when glued in. What you see on a dry fit will be the finished appearance. Take the time to make them right. Don’t scrimp on banding. If it doesn’t fit right, cut a new one.

    Use magnifying glasses (if you’re old like me) to check fit...really makes a difference for me.

    As fellow creeker Mike Henderson recommends, put tape on the trailing edge when cutting veneer. It is very prone to tear out.

    A compact router is a great tool...but mistakes happen in the blink of an eye. Go slow. Practice the run with the power off first to make sure the board is secure.

    And on a somewhat different subject, french polishing is truly a learned skill. I admire those that know what they’re doing. I’m getting better, but still challenged to get a feel whether to add more shellac, more DNA, more oil or what, when the vapor trail stops, or the pad gets a bit sticky. More practice needed here.

    Oh, and related to all the above, french polishing will bring out every little defect in the surface. I will spend far more time and attention of this in the future.

    Anyway, good fun and glad to go down this path.

    D9E8E921-F938-4D5F-A6FB-4E40DDD2E589.jpg

  2. #2
    Join Date
    Mar 2006
    Location
    SoCal
    Posts
    22,510
    Blog Entries
    1
    That is some beautiful figure. Sounds like a good project with lots of learning built in. Boxes and other small projects are deceptive in that they look "simple" but, employ many of the techniques that other furniture projects involve. You landed on a couple things that improved my work; very careful inspection of your surface prep before finishing -and- if something isn't right, make another one. Inadequate surface prep is an easy fix, just keep going. Bad surface prep can most times be repaired but, I have learned to kinda "feel" when to stop spending time trying to fix something and "just make another one". This has saved me a lot of time and frustration as opposed to trying to repair something that is never going to look quite right ;-)
    "A hen is only an egg's way of making another egg".


    – Samuel Butler

  3. #3
    Join Date
    Sep 2009
    Location
    Putney, Vermont
    Posts
    1,044
    Looks a lot better then ok to me Phil. There is an awful lot going on in that box, and it looks really nice.

  4. #4
    Thanks for the lessons-learned Phil. I always get insight from such posts. I havent tried veneer, banding or inlay but I will bookmark this post for when I get to that.

    I think it's a lovely little box!
    Fred
    "All that is necessary for the triumph of evil is that good men do nothing."

    “If you want to know what a man's like, take a good look at how he treats his inferiors, not his equals.”

  5. #5
    It's a great little box. Complex and well executed. I would be very proud of it.
    Mike Null

    St. Louis Laser, Inc.

    Trotec Speedy 300, 80 watt
    Gravograph IS400
    Woodworking shop CLTT and Laser Sublimation
    Dye Sublimation
    CorelDraw X5, X7

  6. #6
    Join Date
    Mar 2015
    Location
    SE Michigan
    Posts
    3,225
    Thanks all. It was one of those “lets see how this goes” kind of projects using what I had on hand. Admittedly, it almost went in the trash can a few times, but I kept telling myself that this is about making mistakes. Finish wise, I should have “ambered” up the sides to get a better match, but all things considered, it will make for a better execution on the next one.

    Did I mention what happens when you sneeze while moving a compact router with a 3/16” bit?

  7. #7
    Join Date
    Dec 2004
    Location
    Cincinnati, OH
    Posts
    924
    Hi Phil,
    Many times when making boxes, the wood grain/patterns lead to their selection as well as dictate the overall finished dimensions. I wonder which materials that you used on your wonderful box was largely responsible for the overall design and construction. Also, what are the dimensions? Thanks for sharing.
    Rustic? Well, no. That was not my intention!

  8. #8
    Join Date
    Sep 2009
    Location
    Putney, Vermont
    Posts
    1,044
    That will teach you not to be wearing your dust mask.

  9. #9
    Join Date
    Apr 2013
    Location
    Issaquah, Washington
    Posts
    1,320
    Phil,
    Thanks for sharing some of your learned experiences.

  10. #10
    Join Date
    Mar 2015
    Location
    SE Michigan
    Posts
    3,225
    Hi David,
    The dimensions are 12 1/2” x 8 1/2” x 3 1/2” tall. This box was pretty much a frankenbox from materials I had at hand. I knew I was going to use the curly maple for the main box. It measured 1/2” by 48” x 3”. The dimension of this box is about the max I can get out of that length (I usually plan material need as length of box x2 + width of box x2 + 4” for the waste cutting four miters - 1”/miter). I like a continuous board so I can get at least the 3 corner grain match. The top is a small scrap piece of 1/2” birch ply that I framed with a 1/2” piece of hard maple I had as a cutoff from some other project.

    I then looked around for what seemed to be complimentary to the curly maple and chose the quilted maple and redwood burl veneer from a pack of mixed veneer I had. The banding (and originally used and botched ebony/maple stringing) came from a sale at Rockler...happened to walk in a few weeks back and they were heavily discounting their banding and stringing (like $3.50 per tube), so bought everything that wasn’t broken. Just picked through that and chose the pattern where I had enough to go around the box twice as well as outline the redwood burl (and looked reasonably decent to my eye).

    I’m in the process of doing a federalish style end table for my son, so this was my practice in veneer/banding/stringing.

    Thanks for the nice complement!

Posting Permissions

  • You may not post new threads
  • You may not post replies
  • You may not post attachments
  • You may not edit your posts
  •