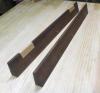
I've been attempting to build a workbench following the videos released by Paul Sellers in his master class series. I've noticed that while planing the legs, the ends tend to round off. The result is a slight arch in the legs as the center sits higher than the ends by several mm's. Despite my efforts to get the legs true and straight, I continue to get the same result. I am new to working with hand planes and can't seem to identify what I am doing wrong. Any advice would be greatly appreciated! I have been using a #7 and the pieces are about 32" long.

 Reply With Quote