Not sure if my terminology is wrong - correct me if so.
But imagine an oval shaped picture frame. I suppose a power router would the motorized way to cut a groove for the glass, how would it be done by hand?


 [OP]
Member
[OP]
Member
Not sure if my terminology is wrong - correct me if so.
But imagine an oval shaped picture frame. I suppose a power router would the motorized way to cut a groove for the glass, how would it be done by hand?
Member
You could get yourself a Stanley 196
It's a fair bit of coin though
Stanley196-2.jpg
 Contributor
There was also a couple Cooper's planes.....to mill a groove for the lid....can be adjusted to cut the rebate...
 Contributor
F2E2BCA0-8A73-4C8A-8B8D-527D82EB5BBB.jpgF2E2BCA0-8A73-4C8A-8B8D-527D82EB5BBB.jpgAlex, I have been making curved rabbets by hand two ways. The most straightforward method is to draw the border of the curved rabbet & then, using a (mildly curved - usually a number 3) carving gouge, carve into the border (using a mallet to drive the gouge in just about 1/16 inch) Do this for the entire border of the rabbet. This is a vertical cut. Now gently use the gouge by hand in a horizontal fashion to carve the layer of wood on the surface to the depth of the initial vertical cut. Repeat the whole process, starting with the vertical cut, until you get to the depth you wish.
Contributor
Alex, the second way to cut curved rabbets is to outline the curved border of the rabbet with scratch stock. I use a small piece of metal attached to a wood beam to act like a cutting compass. I learned to make these tools years ago with Steve Latta who uses them for inlay work. Lee Valley sells similar tools. The saw like teeth cut out a small trench and then I carve out the remainder with a gouge. In this case I used a number 6 gouge to have a sloping profile on the curved rabbet6CE41890-5283-4A68-827C-603B7F42ACC2.jpg
Member
Just curious - would this be an application for a coachmaker's rabbet? I've never seen one in the flesh much less used one so I honestly do not know.
 Contributor
A router plane should do it.
"Anything seems possible when you don't know what you're doing."
[OP]
Member
I think I understand. The scratch stock is not shown in the picture correct? (What's the name of the Lee Valley similar tool- purely for my own curiousity on this topic, seeing their tool might help me grasp the mechanics of it.)Originally Posted by Mark Rainey

Member
It is a very good question. Keep on coming with new ideas. I have an idea with the router plane too. No pictures though as I have not tested it myself.
 Contributor
Stanley made a #66 beading scratch stock.
My curved rabbet was convex:
Bucket Seat Underside.jpg
https://sawmillcreek.org/showthread....04-Bucket-Seat
For a concave cut it might be easier with a slitting gauge, chisels and a router plane.
There are likely a few ways to do it efficiently by hand.
jtk
"A pessimist sees the difficulty in every opportunity; an optimist sees the opportunity in every difficulty."
- Sir Winston Churchill (1874-1965)
 Contributor
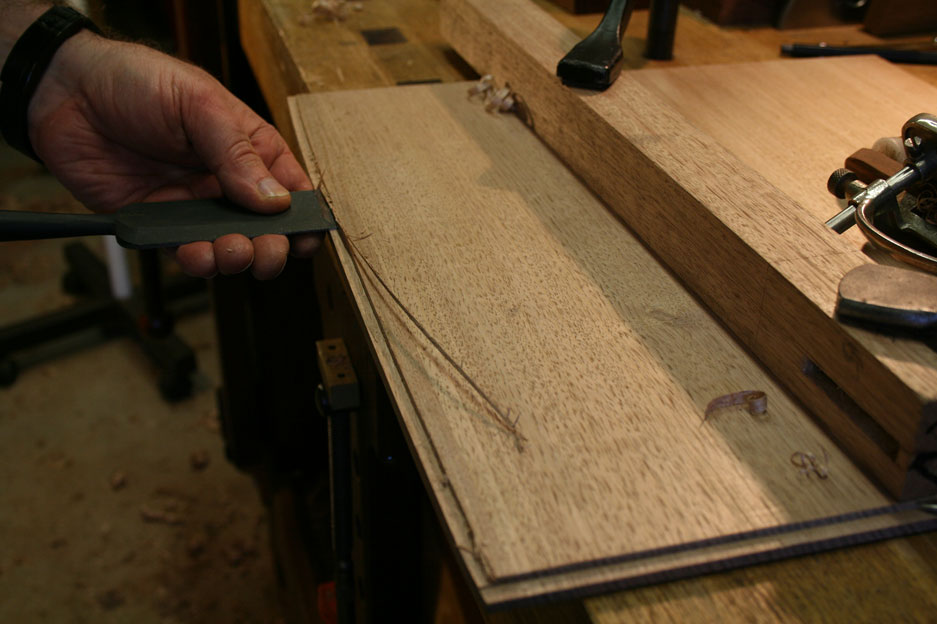
Alex, something similar to this was the curved front for a drawer bottom that fitted into the curved (bowed) drawer front. The work for this was (1) shape the curve with a plane, (2) score the outline of the rebate with a cutting gauge, (3) use a chisel to remove some of the waste, and (4) finish with a shoulder plane.
This is in a pictorial, here: http://www.inthewoodshop.com/Furnitu...heDrawers.html
pared back to the line
and then cleaned up with a small shoulder plane.
Regards from Perth
Derek
Member
@Derek
The shoulder plane wouldn't be much good in the OP's case as it sounds like an inside curve.
A circular plane (or spokeshave) for the shaping and swap the shoulder plane for a router plane for cleanup.
Contributor
Stu, you are correct! I misread.
I would use a scratch stock after scoring the edges with a cutting gauge and chiseling away some of the waste.
Regards from Perth
Derek
 Contributor
Another way would be a sash shave with a straight cutter in place of the molding cutter. search for "sash spokeshave" on the auction site, and there should be a number of them. I have used one for replacing parts in an old circular sash that had curved muntins.
Contributor
Correct. Look at Lee Valley site inlay tool, basic system video & they will show the compass cut and a template guided curved cut. The key to the curved rabbet is preventing tear out because you have long & cross grain. In my first example with the gouge my border is not clean but because it is in the inside & rarely seen I am OK with that. This may be sufficient for your mirror glass - the rabbet will never be seen. A perfect clean rabbet border is a challenge. I use the compass method to get me a clean cut and a little trench between my border and the waste. Derek uses a cutting gauge to define the border and at the end sneaks up with a chisel to prevent tear out. The video shows a templatguided knife cut. Then the fun of excavating begins. It can be laborious and tedious. I am certain this was done hundreds of years ago by hand and museum pieces do show evidence of handwork ( which appeared a little ratty to me ). But maybe Neanderthals like seeing evidence of the human hand.
 Posting Permissions

 Reply With Quote