-
I used to own one of those drills. It was old when I got it, and it lasted many years for me.
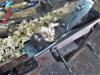
Puttered around the flea market today. Saw a Corsair plane, probably copy of a Stanley #7. It had cracked in half at the mouth and someone had either brazed or welded it back; couldn't tell for all the rust. $15, but there was no way I was going to take a chance on it for that price.
Bought an older Stanley coping saw, model #39-104. It was missing the piece on the far end of the frame opposite the handle that the pin on the end of the blade locks into. Cost me .50 cents, and I have another one at home that is complete. If I can find a cheaper coping saw I can steal that piece from, I'll have two. I tried to use the piece off of a really cheap one that broke on me a week or so ago, but it was made of pot metal and snapped while trying to tighten the blade. At the very least I go a spare handle for fifty cents.
That 5 & 1/2 is working good, I see.
-
Had the camera all charged up, and loaded......stomach flu ended that. Might get to the shop by Tuesday? Not even a "Honey-do" got done....maybe later?
-
Yeeesh! That is going 'round here, too.
Hope it travels through fast and doesn't tarry.
Get well!
-
Feeling slightly better,today....Yep, it traveled fast...was almost too much to keep up with. Camera was still ready, decided to at least get set up in the shop..
IMG_3957 (640x480).jpg
Laid out some toys for use..
IMG_3971 (640x480).jpg
Lay out stuff....got the shop stool cleaned off..
IMG_3960 (640x480).jpg
And a light adjusted..
IMG_3961 (640x480).jpg
Decided to at least try a little sawdust making..
IMG_3958 (640x480).jpg
Much easier to saw one board at a time, anyway. Too easy to make a mistake and have the board behind the first one "Amplify" the goof...DAMHIKT...
IMG_3962 (640x480).jpg
Saw need a bit of wax on the plate....doesn't take very long to make a cut..5-6 strokes, if that.
IMG_3963 (640x480).jpg
Set up a choping block ( doubt if a fancy coping saw could do this job) and had to duck as the chips flew back at me. Hate when the bounce off the glasses...
IMG_3964 (640x480).jpg
Used the completed pins to lay out the next section.....and the next, and the....
Out of picture space, continue this story as Part 2..
Stay tuned..
-
Test fit on the first corner..
IMG_3965 (640x480).jpg
Yeah, been a while since I made these, gets better each corner...
IMG_3967 (640x480).jpg
After the second side had been chopped, used it to lay out the second corner..
IMG_3966 (640x480).jpg
Tried to keep the saw cuts on the waste side of the lines. Chopped these out, and put the three sides ( so far) together dry..
IMG_3968 (640x480).jpg
And laid the fourth side on top....tried the bottom panel..
IMG_3970 (640x480).jpg
Will trim it to fit inside the box. Nails, no glue...
IMG_3969 (640x480).jpg
Need to do this end next. lay out the joints, saw the joints, and chop the waste.
I swept the floor, and called it a day.....for now...depending on how I feel this evening, may do a wee bit more...
Stay tuned...
-
Awesome.
Glad you are feeling a bit better!
-
Ok, spent maybe 2 hours in the shop, before the Boss needed to go to the store....Managed to get a few things done, and made a mess on my clean floor...
IMG_4005 (640x480).jpg
Must have done something, to make this mess?
Some of the mess may be a bit small to see...
IMG_3987 (640x480).jpg
Got the last corners made, and a dry fit done..
IMG_3988 (640x480).jpg
This one was the last of the corners. Seems I got better with each corner...Marked the bottom panel for a slip fit, cut the excess off, planed the saw marks smooth.
IMG_3989 (640x480).jpg
Put a couple clamps on to hold things still..
IMG_3993 (640x480).jpg
Then sized a piece for a center divider. Used a cut off to check for length..
IMG_3992 (640x480).jpg
While I jointed the edges of the divider with a small plane. Moved all this stuff off the bench....have some moldings to mill..
IMG_3995 (640x480).jpg
Out of this stuff....rather than mess this up, I used a scrap of plain pine, and drew a pattern to shoot for..
IMG_3996 (640x480).jpg
I can make a prototype from this, and use it to set up a couple planes...
That will be in Part 2 of today"s episode....stay tuned..
-
Ok, Part 2....
laid out a few cutters to make the molding with..
IMG_3997 (640x480).jpg
A straight cutter ( wasn't used) a bead cutter, and a custom ground cutter ( by me)....set up the blank on the bench so it won't be moving around. Set up the bead cutter first..
IMG_3998 (640x480).jpg
That's Step one. reset the 45 for the next step..
IMG_4000 (640x480).jpg
And made Step 2..
IMG_3999 (640x480).jpg
Getting there...I decided to use the old #78 for step 3..
IMG_4001 (640x480).jpg
Since this is the job it does best. Then I marked a line 3/4" in from the edge of the rebate..
IMG_4003 (640x480).jpg
Bandsaw to do a rip cut. Millers Falls to smooth the saw marks out..
IMG_4004 (640x480).jpg
Sand it a bit, and set aside....planes were all set up...needed to reset to make one out of the "good" stuff...
IMG_4007 (640x480).jpg
One done, have a few more to mill. These will wrap around the bottom of the box....may cut a foot pattern for the corners? Will use the mitre box to cut the 45 degree corners.
Divider needs to set in shallow dados...then maybe think about a couple trays? Then start on making a lid...IF I can get a little time IN the shop....
Stay tuned...
-
Nice! Like the molding.
Slip fit? Pretend I know nothing, which isn't far from true. :P
-
The fit is tight enough it just barely slips into place. Went back to the shop, after Supper had settled, cleaned up a pile of shavings from the earlier work...and promptly started making more shavings...
rebate.jpg
Rebates weren't too bad in this Fancy Grain Pine....the "Cove" cutter needed sharpened up, was having "issues" with the grain. Left thumb was getting sore, means I was holding this plane about right..
rebate plane.jpg
Full length shavings....even sounded better than an electric router..
Got all the sticks of molding done..
sticks.jpg
Swept up pile #2
piled up.jpg
Once the floor was cleaned, I called it a night....had enough fun for one day...
Will see what I need to make next...may get the box about ready for a glue up...stay tuned..
-
Thanks for the explanation.
When I work, I end up having to rake my entire back yard, lol. Bench is out back, outdoors.
I'm working on setting up a very small shop, hopefully in the next two or three months.
Will be a pleasure, I think, just to sweep up after.
I really love that "Fancy Grain Pine". If I ever run across any, I'll make sure to scarf it up if I can.
-
Dropping back here again, easier to find...more room, too.
Ok, the cussing has begun...enough to make a "Squid" blush
Started out decent enough, used a Millers Falls No.8 to flatten out the divider blank..
divider planed.jpg
Then got the box over to the bench, to make a dado to "house" the divider in...Box is 17" long, so the "middle" was...8-1/2" then mark a center point. Then lay out the dado for the divider..
laid out.jpg
Knifed in the lines. Chisel was ready, decided to backsaw to form the walls of the dado. sawed down until the teeth were below the surface..
chiseled.jpg
Then chiseled out the waste....then the "fun and the cussing began

Decided to test fit the divider, so dry fitted all the parts....assembly kept trying to fall over.....out came the glue and the clamps..grrrr.
Clamps needed cauls to spread the load a bit....F style clamp and a pair of cauls..vs ...two hands...Finally was able to get things almost clamped down....added a few nails to help hold the divider until the glue sets
Then added a c clamp to re-inforce the nails. I also drove a few nails to hold the bottom in the box...
cauls.jpg
kept checking for square...checking for square...noticed the one end had bowed in..c clamp and another caul fixed that...
Started to work on a tray
tray parts1.jpg
Two rails of plywood, two end pieces, two sides, and a center "handle"...need to cut a plywood bottom to size..
tray parts 2.jpg
Nail and glue to assemble? Nuttin fancy.
Looks like it will be friday, before the next excursion to the shop....tomorrow is all "booked up"
Maybe I can get the glue up out of the clamps, and cleaned up? Stay tuned..
-
While waiting on my ride to the Doctor's office this morning..puttered around a bit, before getting cleaned up to go....
Box is out of the clamps.....corners are cleaned up. Molding install......hmmmm...
IMG_4023 (640x480).jpg
Some corners weren't too hateful..others?
IMG_4022 (640x480).jpg
had a bit of gaposis going on.....
IMG_4026 (640x480).jpg
Need to make some feet...maybe "bun" style??
IMG_4024 (640x480).jpg
Top? May trim it down a smidge, and add a molding around the top? Make it a lift-out sort of thing..
IMG_4027 (640x480).jpg
Rails to hold the tray are being glued into place. Still need to build the tray.....then see about a second one.
Doctor visit? Not really a "good" day...4 types of pills to get....something is aggravating a nerve in the back of the neck....causing headaches, and a stiff neck. They want to get that under control, then deal with a "leaker" inside...May or may not be Parkinson's....find out more in a month...letting the pills work for a while...
Hour ride over there, hour at the place, hour to get back home...don't feel much like going to the shop tonight....maybe tomorrow?
Stay tuned...
-
Looking good. I like the moulding around the bottom, not certain about around the top. But it's your banana; you can peel it however you want.
Best wishes on your health. I have a good friend who was recently diagnosed with Parkinson's. Hope it is something much simpler than that. Will continue to pray.
-
Picked up some tiny hinges today.....Maybe a Hook & Eye latch? No woodworking today....spent half a day at an auction, and then ran around two counties, chasing yard sales and Antique stores. Rather tuckered out.
 Posting Permissions
- You may not post new threads
- You may not post replies
- You may not post attachments
- You may not edit your posts
-
Forum Rules


 Reply With Quote