Page 1 of 2 12 LastLast
Results 1 to 15 of 18

Thread: Mid Century Modern Coffee Table Build

  1. #1
    Join Date
    Feb 2016
    Location
    Edmonton, Alberta
    Posts
    350

    Mid Century Modern Coffee Table Build

    I 'started' building this coffee table in mid 2017 - worked on it a little bit on and off until recently when I was able to dedicate several hours over a week to complete it.

    A little bit of background - I really enjoy the mid century modern aesthetic, and some of my influences are Wagner and Eames. I played around with the design for this table for a long time, finally settling on the 'box' design of coffee table. I've seen this various editions of this 'class' of table throughout the years, and almost all of them looked a bit off to me - mostly due to the proportions of the box itself, or the box to the door, or the box to the base height/width etc. I decided to try and make my own version, and keep in mind the proportions of the various elements in relation to each other.

    At the outset I decided I would do this neander-only (no power tools). By the end of the project I regretted this decision, and used power tools to mill the stock for the divider panel and back, so it ended up being an around 90% hand tool build. In the future I will not be setting arbitrary constraints on myself and will just go with what's easier (ripping, resawing and milling rough stock by hand is just no fun).

    The materials used were Walnut, some exquisite quilted maple, and a little bit of brass.

    Here's my final design sketch (when I say final, I mean I changed some more designs as I went):

    IMG_0119.jpg

    And so it begins:

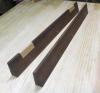
    I dressed one face and one edge of the boards to let me glue the panels for the box up before dressing them again after glue up. Needless to say these stages took a while.
    20170509_122604.jpg20170520_103521.jpg20170520_164851.jpgIMG_7262.jpg
    Last edited by Hasin Haroon; 03-13-2018 at 10:42 PM.

  2. #2
    Join Date
    Feb 2016
    Location
    Edmonton, Alberta
    Posts
    350
    Flattened one side, marked off final width, and repeated...(If any of you have tips on more efficient workflows, please do share)
    IMG_7278.jpg IMG_7279.jpg 20170612_160308.jpg

    Crosscut set up:
    20170630_142126.jpg

    And 'shooting' to final length and square:
    20170630_143106.jpg

  3. #3
    Join Date
    Feb 2016
    Location
    Edmonton, Alberta
    Posts
    350
    I decided to join the box using dovetails. I went with narrow pins, and an alternating pattern of a larger tail followed by two smaller tails.

    Marked out dovetails and used Derek's painters tape tip.

    20170811_211514.jpg

    Built a moxon wise in the mean time, which proved very useful:

    IMG_7657.jpg


    20170825_234302.jpg

    Chop chop chop:
    20171217_182609.jpg

    Using a variety of chisels, old and new.
    20171221_181457.jpg

    Dry fit:

    20171228_162324.jpg

    Tweaking all the edges:

    20171228_164412.jpg

  4. #4
    Join Date
    Sep 2008
    Location
    N. Idaho
    Posts
    1,621
    Hasin,

    Looking fabulous, as do all you builds. I completely agree about artificial constraints. Now. That I have recently done two desks nearly completely by hand. The knowledge and confidence gained were invaluable, but to repeat the process would be unnecessary toil

    Looking forward to following as this build is similar in many elements to one of my three (!) ongoing projects--a north bennett st. tool chest with similar carcass construction (new to me, at least at this scale). Thanks for taking the time to post.

    Best,
    Chris
    "You can observe a lot just by watching."
    --Yogi Berra

  5. #5
    Join Date
    Feb 2016
    Location
    Edmonton, Alberta
    Posts
    350
    Plowing the grooves for the front and the back. Placed these to miss the tails so the ugly ends of the groove don't show up. The groove is a bit deeper in the top to allow for seasonal expansion of the door.
    IMG_0225.jpg

    The corresponding groove in the sides need to be stopped for the same reason:
    IMG_0226.jpg
    Routing out the grooves for the divider panel:
    IMG_0251.jpg

    Here's the door being prepared. 50 degree frog made fairly short work of this exquisite quilting:
    IMG_0258.jpg

    Made and attached the pull:
    IMG_0365.jpg

    and wiped on some tung oil:
    IMG_0372.JPG

    Close up of the handle:
    IMG_0375.jpg

  6. #6
    Join Date
    Feb 2016
    Location
    Edmonton, Alberta
    Posts
    350
    Preparing the pieces for the base:

    IMG_0586.jpg IMG_0587.jpg
    The stretchers will have haunched tenons that are metered at 45 degrees to meet in the leg mortises.
    IMG_0667.jpg IMG_0691.JPGIMG_0675.jpgIMG_0676.jpg

    With the joinery complete, moving on to the aesthetics. I decided to angle the outside faces of the legs rather than the inside faces. That was a major design change.
    IMG_0677.jpg

  7. #7
    Join Date
    Feb 2016
    Location
    Edmonton, Alberta
    Posts
    350
    Thanks Chris. My wife has entertained my pointless delays for long enough, so I'm afraid I have little choice in the matter anyways!
    I look forward to seeing your three projects soon.

  8. #8
    Join Date
    Feb 2016
    Location
    Edmonton, Alberta
    Posts
    350
    Leg shaping complete. Happy with the lines on these legs. They angle in on both outside faces, if that makes sense.
    IMG_0678 copy.jpg

    Pinned the joints with two brass pins, more for aesthetic reasons than anything else:

    IMG_0680.jpg IMG_0683 copy.jpg IMG_0686.jpg
    Important to epoxy the front of the pins, and hammer them in from the back. That prevents squeeze out in the front.

    Mortising for the z-clips. Easy to forget this step before gluing up the base (I forgot to put in this photo till now, case in point)
    IMG_0679.jpg

    With that, the main build is complete, minus finishing.

  9. #9
    Join Date
    Feb 2016
    Location
    Edmonton, Alberta
    Posts
    350
    I finished the table with two coats of tung oil, followed by two coats of dewaxed blonde shellac sanded down, followed by four coats of General water based poly (The last photo is pre-finishing). I'm already not pleased with the durability of the General poly, and will probably sand it down and look into something else.
    IMG_0755 copy.jpg IMG_0757 copy.jpg Diapers.jpgIMG_0772 copy.jpg IMG_0762 copy.jpgIMG_0689.jpg

  10. #10
    Join Date
    Mar 2015
    Location
    SE Michigan
    Posts
    3,225
    Beautiful piece and very well done. Thanks for sharing!

  11. #11
    Looks great Hasin. I love the contrast of the brass pins and the quilted maple door.

  12. #12
    Join Date
    Nov 2007
    Location
    Goleta / Santa Barbara
    Posts
    967
    Hasin, beautiful piece. Love the walnut and quilted maple plus the brass, a LOT! Very much appreciate the build photos.

    still trying to decide about the 180 degree rotation of legs from design to finish; intentional aesthetic or did you pull a “Patrick” while mortising?

  13. #13
    Join Date
    Sep 2007
    Location
    Longview WA
    Posts
    27,427
    Blog Entries
    1
    Great work, the depth of the maple's figure is amazing.

    jtk
    "A pessimist sees the difficulty in every opportunity; an optimist sees the opportunity in every difficulty."
    - Sir Winston Churchill (1874-1965)

  14. #14
    Join Date
    Jun 2012
    Location
    Lubbock, Tx
    Posts
    1,490
    Quote Originally Posted by Phil Mueller View Post
    Beautiful piece and very well done. Thanks for sharing!
    What he said!

  15. #15
    Fabulous! And much better made than the midcentury furniture I've seen in person.

Tags for this Thread

Posting Permissions

  • You may not post new threads
  • You may not post replies
  • You may not post attachments
  • You may not edit your posts
  •