Page 1 of 2 12 LastLast
Results 1 to 15 of 19

Thread: Stanley low-angle block plane

  1. #1
    Join Date
    Feb 2018
    Location
    Elma ny near buffalo
    Posts
    20

    Stanley low-angle block plane

    I promised Jim Koepke I'd put up pictures of the Stanley low-angle block plane, my first plane purchased to try to help use with a shooting board to get truer miters for frame making. I have been having problems with the way the iron won't stay locked, it has lots of wiggle.

    I purchased this a year ago when I didn't know anything (and really still don't know) about how to make picture frame miters that are accurate. I had learned about using a shooting board and a low-angle plane to try to trim the end grain cut to fit.

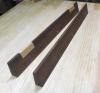
    These are the pictures of the plane I purchased. This is NOT a Stanley 60-1/2, but just a cheap low-angle block plane. It's not even marked anywhere, as if Stanley is ashamed of producing this thing.

    The lever cap screw is not movable/adjustable and the lateral adjustment lever easily wiggles and you just can't get the iron to lock firmly. It moves when making a shaving.

    I did sharpen the iron by hand with a wet stone and a tool purchased at rockler to help with that process. The iron is sharp. The problem is the plane won't hold the iron in place. And, when the blade sticks down out of the throat (using the depth adjuster, one side of the iron is lower than the other. So it's not just that the blade is not just square to the throat, one part of the cutting edge justs down lower first. And when you take a shaving, it only really grabs / cuts on one side. And the lateral adjustment lever will not allow the iron to be moved enough to square up so that the cutting edge is even across the throat. It just doesn't twist enough laterally to allow the blade to be square to the bottom of the block. So one side cuts, where the other side doesn't even touch wood. And if I push the depth adjuster further, to the point where all edge of the iron bite into the wood, one side of the shaving is thick, the other side, barely touching, is like tissue paper.

    So that's the main problem, I can't get the cutting edge of the iron to be equi-distant from the bottom of the plane...one side sticks down farther than the other, and it moves/wiggles all too easily. (I think the angle changes because it doesn't tighten, and when using, it's all to easy to put pressure on the lateral adjuster which sticks out on one side and is easily pressed by my grip.

    After watching a video today about how to fettle a Stanley 60-1/2, I learned to check the bottom of the body (that rides on the wood) for flatness with a square. There is easily .1mm or .2mm+ gaps everywhere in both directions.

    Honestly, in trying to make this post, I looked up Stanley low-angle plans and learned that this is just an inexpensive low-angle plane, 12-960....$35 bucks from Home Depot.

    I don't think this plane is worth any time or tinkering. Maybe a littile time. It may be fine for reducing / bevel and edge here or there, who knows. I just remember how frustrated I was with this because the iron just wiggled so much and easily changed angles, and one side bit deep while the other side wasn't on the wood . The cutting depth adjuster seemed to do it's thing, with the exception that the iron would have lots of wiggle and wouldn't really lock in place. I think that has more to do with the lateral adjuster design. But there's something wrong in that I cannot get the blade edge to be equi-distant in depth: One edge is far lower than the other. I just can't get the blade even (not just square to the throat, but even depth sticking past the bottom of the block. It makes left-side heavy shavings, and the right side of the cutter doesn't even touch wood.

    Perhaps Instead, I think I'm going to look for a Stanley #60-1/2 and then try to see if, after fettling, that it works better with the shooting board I made to trim the miter cuts I'm making by hand. But after buying this Stanley, I'm loathe to give them any more money with the exception perhaps of hunting for a version of a #60-1/2 that was pre-cheap chinese manufacturing days.

    IMG_1799.jpg

  2. #2
    Join Date
    Feb 2018
    Location
    Elma ny near buffalo
    Posts
    20
    PS. The name of the device i used to sharpen the iron was a "Rockler Honing Guide".

  3. #3
    Join Date
    Mar 2015
    Location
    South central Kansas
    Posts
    290
    Well the first thing to try would be tightening down the screw that holds the cap. Sorry if that is insultingly simple and you already knew to do that but this being your first plane I figured you may not. It does take a little bit of tweaking to figure out just where that screw should be. Too tight and it'll be difficult to use the depth adjustment knob or even put too much stress on the plane body and bend the iron (blade). Too loose and the plane won't hold its lateral adjustments, and it will chatter when you use the plane.

    If that doesn't work then I'd check the fit between the iron and the plane body. There's a sticky thread somewhere on this forum about fettling block planes. It's a good reference. It is possible that the iron does not mate well with the plane body and that could certainly cause an issue like what you describe. The solution would likely be carefully filing down the mating surface right behind the mouth.

    In the end I think you would find that an older 60-1/2 is worth it if you use the plane much but this one could certainly be tuned to work just fine. It'll likely just take more time and effort. And all the hand tool cool kids won't let you join their club because you're using a Stanley tool manufactured after the 1930's. But that's another matter.

  4. #4
    Join Date
    Aug 2010
    Location
    USA
    Posts
    5,582
    Are you saying that the silver slot head screw in the center of the plane can't be tightened down on top of the cap enough to keep the iron clamped?

  5. #5
    Join Date
    Apr 2013
    Location
    Stone Mountain, GA
    Posts
    751
    Yeah, that screw is the adjustment for the blade tensioning mechanism. If you can't get it locked down by tightening that screw then the plane is probably junk, but you could as a last resort try putting a shim of some kind under the "foot" that clamps the blade down. One way or another, that iron has to be clamped firmly in order to work.

    If you can get it clamped down, then take the tension cap off and check the iron bedding. The only part that really needs to be dealt with is the front landing just behind the mouth- the back of the iron needs to make contact all the way across its width. If it doesn't you will get chatter and nice end grain shavings aren't going to happen. Just apply finger pressure towards the tip of the blade and see if it wants to rock side to side. If it rocks, then figure out which side of the bed is high and file that a little bit, then re check. You could use sandpaper glued to a small block of wood if you don't have a decent file. But be careful and try to keep it flat.

    It sounds like the bed may also be on a slant relative to the length of the plane (not square). This is probably not fixable, but you could grind the blade to a skew such that the cutting edge ends up parallel to the sole within the range of the lateral adjuster. If everything else can be made to work, then this skew would not affect the function.

    If you get that far then you'll want to lap the sole. Luckily a block plane is small and not a big deal to lap. I like to use a granite surface plate and some 80 grit PSA. Lock the adjustable toe and clamp the blade in place, but retracted, then take the plane to the lap and take deliberate forward strokes over the lap, as though you were planing the sandpaper. Change the paper after a few minutes of lapping- it cuts much, much faster when fresh. When I am done with 80 grit I will take it up to 150 and then 220. No need to go any higher than that for a cheap plane unless you enjoy lapping. Honestly 150 grit would be fine.

    If you can get that far then the plane should work pretty well. I have the standard angle version of it and it's not a bad tool, it has decent enough steel.

    You could go another route and get a really well made block plane like the lie nielsen 60-1/2. A vintage Stanley would be good as well, but the prices I was able to find them for seemed a little high, so I just went with the LN, which is excellent.

  6. #6
    Join Date
    Jul 2015
    Location
    Broadview Heights, OH
    Posts
    714
    If the screw is too long and can't be turned further into the plane to get a good tight cap to iron fit, the easiest solution is to grind some off the end of the screw. 1/16" would take about one minute and would likely be more than enough. You can then adjust the length so it's perfect, no shims or other hi-jinx required.

  7. #7
    Join Date
    May 2011
    Location
    Bellevue, WA
    Posts
    297
    I have a very similar late model Stanley that has recently been superseded by an LV, but that is not the necessary solution to your problems. I used that Stanley for a number of years and came to the following method of adjusting it. My biggest problem was that the lever that is supposed to tighten the blade just wouldn't stay adjusted. One pass with the plane and the lever moved and released the pressure on the blade. My solution was to forget about that lever and tighten the cap iron screw enough to hold the blade, this often meant I had to adjust that screw to adjust the blade's angle and or depth. A pain, but that worked for me. I had squared up the iron's bedding, which for me wasn't all that bad. Of course the edges of the mouth weren't square to the sides of the plane, but once I realized that it was just visual.

    Looking at the picture of the plane, it appears that the dimple that engages the slots in the blade had been stamped at a significant angle to the longitudinal axis of the blade adjustment piece. (This may be an illusion due to the angles of the parts and the picture.) I think this may keep the blade from effectively engaging with this adjustment piece. Check it out. Not sure about a fix.

    The sole will need to be flattened, but I would try to get the plane working fairly well before trying to flatten it. For a plane as small as this, that is a lot of gap, but it should be able to work on some simple test cuts. Why work on that if other problems are not resolved.

    Hope these thoughts help.

  8. #8
    Join Date
    Sep 2007
    Location
    Longview WA
    Posts
    27,428
    Blog Entries
    1
    The sole will need to be flattened, but I would try to get the plane working fairly well before trying to flatten it.
    My thought is the sole may need some lapping, but save that for last.

    Here is my post on fettling a Stanley #60 series plane:

    https://sawmillcreek.org/showthread....05#post1246005

    One of the planes in this post is the same model as yours and works fine.

    There is a wealth of information in the Neanderthal wisdom/FAQs:

    https://sawmillcreek.org/showthread....al-wisdom-FAQs

    Bob Smalser also posted about fixing up old planes.

    One of my planes in the post had a similar problem of the blade not cutting all the way across its width. Looking at the blade ramp from the underside indicated an obvious problem of the ramp being angled from side to side and not just front to back. In my case a bit of filing fixed the problem. Stanley planes are made of cast iron and it files rather quickly so go slow and check every few strokes. If you do not have a small file, do like was suggested above and adhere some sandpaper, 200-400 grit, to a popsicle stick or other thin piece as a holder.

    At the time of my posting this the plane that was the same as yours had the lateral adjuster removed. My recollection is that it some how interfered with the lever cap tension screw. The lateral adjuster was kept in a small drawer and since then space was wanted in the drawer so it was returned to the plane.

    Try removing the lateral adjuster and see if the screw can be set enough to make the lever cap hold its position.

    One of the challenges of buying and maintaining old tools is the knowledge one must acquire on how to do a touch of mechanic work. Maybe that is why a century or more in the past woodworkers referred to as mechanics.

    jtk
    Last edited by Jim Koepke; 03-02-2018 at 2:23 PM. Reason: clarity & wording
    "A pessimist sees the difficulty in every opportunity; an optimist sees the opportunity in every difficulty."
    - Sir Winston Churchill (1874-1965)

  9. #9
    Join Date
    Jun 2010
    Location
    twomiles from the "peak of Ohio
    Posts
    12,165
    One area overlooked in fettling a block plane. Look under the cap iron.....These rarely get milled, anymore, and tend to be a little on the rough/ragged/ less than flat side of things. Before the sole...I'd lap the area of the cap that mates to the iron...just like on a bench plane. IF the two mate up without any gaps, the gap will grip the iron a lot better.
    I have a 60-1/2 from the late 1960s.....works nicely.

    Maybe a few pictures of what I look at on a block plane?

  10. #10
    Join Date
    Jun 2010
    Location
    twomiles from the "peak of Ohio
    Posts
    12,165
    Stanley No. 60-1/2 Cordovan Low Angle block plane..
    IMG_3353 (640x480).jpg
    late 60s model....keep an eye on that adjustable mouth piece...it tends to get packed with shavings and dust.....makes it hard to move, and knocks it out of flat with the sole....
    IMG_3355 (640x480).jpg
    Back of the iron is polished and flat. Make sure the bed where this goes..
    IMG_3356 (640x480).jpg
    Is clean, flat and free of junk/gunk/bits of wood This is where that polished part of the iron rest on. You want zero gaps.
    IMG_3357 (640x480).jpg
    Cap iron on the right is off of a late model 9-1/2....pot metal, relies on a "tab" to make it bear onto the iron at the edge....The 60-1/2 has a slight curve, light a bench plane's chipbreaker. Make sure the end where the curve meets the iron is gap free. Can be polished a bit. As long as it is flat across it's width, it will work..
    IMG_3358 (640x480).jpg
    Checking the edge for square to it's side. You also want to check an iron, to see if it IS indeed flat across it's width....some were bowed a bit ( ball pean hammer to flatten that problem out..)
    IMG_3359 (640x480).jpg
    Check the mouth opening for square to the side. Straightedge to check the sole for flat.
    IMG_3360 (640x480).jpg
    Set the depth of cut, and a mouth opening...and go to work.

  11. #11
    Join Date
    Mar 2015
    Location
    Virginia
    Posts
    1,211
    I have that plane. Mine works. The screw is supposed to turn.

  12. #12
    Join Date
    May 2016
    Location
    Northeast PA
    Posts
    527
    Just something simple to start, have you checked that the edge of the cutter is square to the sides? It's pretty easy to produce an out of square bevel with a honing jig if you're just going along sharpening and not paying very close attention to what's happening on the stone. I learned that lesson the hard way.

    I think Pete's suggestion to grind some length off of the lever cap screw will help with the lack of tension on the cutter. It's an easy fix, and if it doesn't work then it will save you a lot of time trying to fettle an otherwise unworthy plane.

    I have a Stanley 65 with a knuckle joint lever cap and I use it on pretty much every project I build. They are common beasts so can be had for 50 bucks or less if you watch the online auction giant for a few days. A very worthwhile investment IMO.
    Last edited by brian zawatsky; 03-03-2018 at 11:33 AM. Reason: Fixed typo
    ---Trudging the Road of Happy Destiny---

  13. #13
    Join Date
    Mar 2015
    Location
    SE Michigan
    Posts
    3,225
    Bob, lots of good fettling advice already. I have a plane identical to yours, albeit, probably an earlier version. The model number stamped on the side of mine is G12-020.

    84C58964-BA94-446A-BD43-5F5325E72FA0.jpg F6B64037-882E-4373-B178-C560949028A5.jpg

    It is one of my “go-to” block planes and works very well. Regarding the iron slipping issue. As others have indicated, it might be a situation of adjusting the slotted screw for the best tension. Assemble the plane with the tensioner lever all the way to the right (no tension). Turn the slotted screw to tighten. See if the tensioner lever will move to the left to tighten. If it won’t move with some pressure, lossen the slotted screw about an 1/8th turn and try again. Keep doing this until the lever tensioner will move completely to the left firmly. Then check and see if you can adjust the iron depth. If it’s too hard to turn the knob to adjust the iron depth, back off the slotted screw about another 1/8th turn (or less). You want the adjuster lever “firm”, but not too tight that you can’t adjust the iron depth.

    Also, the lateral adjuster is only a very minor adjustment. Make sure when you assemble the iron/cap iron initially, that the iron is square to the mouth before you lock down the lever cap. I have cambered my iron slightly, so a little mis-alignment of the iron doesn’t make a difference...something you could consider as well.

    Like yours, the sole on mine is a bit out of whack, but that has not caused any issue with performance. Unless there is something really different on yours vs. mine, it should work properly with a little fiddling.

    Give all these things a try and let us know if you still have issues. Would love to see you get yours working.
    Last edited by Phil Mueller; 03-04-2018 at 5:55 AM.

  14. #14
    Join Date
    Sep 2007
    Location
    Longview WA
    Posts
    27,428
    Blog Entries
    1
    Then check and see if you can adjust the iron depth. If it’s too hard to turn the knob to adjust the iron depth, back off the slotted screw about another 1/8th turn (or less). You want the adjuster lever “firm”, but not too tight that you can’t adjust the iron depth.
    This is an area where there are differences of opinion. Some feel the depth adjuster should not be made with the lever cap fully tightened. If you ever find an old block plane with the adjuster threads buggered it becomes apparent why some feel it best to release tension on the lever cap before adjusting.

    jtk
    "A pessimist sees the difficulty in every opportunity; an optimist sees the opportunity in every difficulty."
    - Sir Winston Churchill (1874-1965)

  15. #15
    Join Date
    Feb 2018
    Location
    Elma ny near buffalo
    Posts
    20
    I want to thank you all. I've got the plane out and I'm about to dig in deeper to see if I can figure out why the iron won't lay evenly across the throat and slightly extended past the sole evenly using the depth adjuster. I've not looked at the top inside of the sole (that the iron sits on top of) to see if there's any anomalies there.

    And, I like the idea of trying to remove the lateral adjuster. That is the thing that my grip keeps hitting and causing an easy shift of the blade. Last time I tried turning that screw, it wouldn't even budge. I don't want to try to put too much torque on it as I'm afraid that my experience with screws lately is that they are made of very soft alloy that can broken or chipped easily.

    Do any of you have any recommendations re: NEW Stanley #60-1/2 or buy antique and refinish?

    Doing some basic metal working is not above my capabilities and I've restored one old plane already. Just curious how much of a quality difference there is. This Stanley plane here in this thread leaves me far less than impressed. But for $40, I don't think I should expect much.

    One last question. Are planes like these, such as the 60-1/2, meant to be used with a shooting board for edging up a miter edge? Is this the right tool for that job? Cross-grain shaving a miter cut?

Posting Permissions

  • You may not post new threads
  • You may not post replies
  • You may not post attachments
  • You may not edit your posts
  •