Page 1 of 3 123 LastLast
Results 1 to 15 of 35

Thread: Greetings - Making Frames by hand woodworking.

  1. #1
    Join Date
    Feb 2018
    Location
    Elma ny near buffalo
    Posts
    20

    Talking Greetings - Making Frames by hand woodworking.

    Hi Friends:

    I'm the new kid on the block around here. Let me apologize ahead of time for a bit of length on this, my first thread. I thought i'd be better to combine my words into one post rather than spread them off over many.

    I'm a Director of IT by profession, but an oil painter, semi-pro, on the side. I am not an affluent man, just an average Joe trying to struggle and thrive in today's world.

    I've been trying to learn how to make frames for my own paintings. Mostly because I cannot afford to buy good quality 24 carat, water-gilded close corner frames. As an unknown painter, really, I don't make enough on the sale of a painting to even begin covering the costs of quality frames. And the cheap frames from Hobby Lobby or A.C. Moore are just that: Cheap, low-quality chinese imports.

    So for about a year, I've been struggling to learn how to make frames for my paintings. I have some power equipment: A Rigid Chop Saw, a Sears circular saw, a black & decker hand router/router table. I've made a couple frames, but learned pretty quick that the cheap power equipment I have is not meant to do fine woodworking, and my wife would leave me for the mail man if I went ahead and purchased quality power tools / wood working gear.


    My first foray into making a couple frames resulted in the realization that fine miters with rough-cut tools is not the way to make a great looking frame. And, after trying to make some corner splines, moldings, and half-lap joints with the power equipment...let's just say that my garage is covered in fine wood powder, and my wife is not a happy woman because of the wood dust covering everything!

    I thought to myself: "Self, you know...they've been making picture frames since before Jesus walked on this planet...well before power tools or even electricity was even a thought!"

    So here I am, looking to try and find some folks who might be willing to guide me to some tools and techniques on how I might use HAND woodworking tools and techniques to make some frames.

    The kind of frame I'd like to make is basically a "cassetta" style frame. This is roughly a 5/4" x 3 or 4" length of wood, where the molding is a groove down the middle, leaving roughly about 1/2" flat raised surface on the outer edge for hand decorating, carving, and an inside 1/4" or so raised surface for a bead, double-reed, or in some cases hand-decorating.

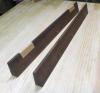
    Here's an example of a common "plein air" frame you might find in a professional art gallery today:

    Frame

    or

    Frame Like this

    So here's what I'm wondering:

    Can someone get say a combination plane (like the Stanley #45/#55 or a Lee Valley combination plane and:

    1. Groove out of a 4s basswood 5/4" x 3" (width) x 4' using the combination plane instead of using a power router?

    2. Make a rabbit (rebate) using the Stanley #45 / #55 combination plane

    3. Make a bead,reed on the inside edge using a combination plane?

    I wish I had a mentor in the area who I could study and learn from. But basically, I'm looking to begin the learning regarding how to make the molding using planes. How do you make a wide groove when most combination planes max have a 1/2" wide cutter? Can you somehow keep laying down mutlipe grooves down the length of the board to make the hollow portion of the frame (leaving a 1/4" inside raised edige, and 1/2" outside raised edge areas along the lengths?

    Why don't I stop here. I guess what I'm asking is if there's anyone who knows how to make the basic molding like this by hand, what hand planes/tools/hand routers would you recommend. I'm looking to be mentored a bit. I'm eager to learn, but at this point, I recognize I know nothing about how to do something like this by hand.

    Sad thing: My Grandfather, now 99, was a master carpenter. But family issues kept me apart from him. Man, what I wouldn't give to be his student, or a student of anyone else who can teach me.

    I'm not looking to become a master woodworker. Ideally, I'm simply looking to make my own frames, to hand-carve them and gild them to match my painting (as some of the artists did in the Arts & Crafts era), in order to make quality frames for my paintings.

    Thanks folks. Sorry again for the lengthy message and intro. But basically, I'm hoping theres someone here who would be willing to help advise me on some of the tools/techniques to get me going.

    I don't want to invest into combination planes or other tools now because I don't if that's what I need. But obviously, those moldings for those frames were made using some form of hand planes or hand routers. I'd like to figure out what I'd need to get started, then get some gear and begin the learning process. I'm not afluent at all and need to be careful with what I spent my limited $ on. Got a lot of time and a ferocious will to learn and practice, though!


    Please forgive me, I hope I'm not breaking the rules, but if you want to see some of my paintings, you can see them here. I'm just a poor guy with a dream of being full time professional artist one day. But for now, I'd be happy to simply learn how to make decent custom frames for my own personal enjoyment. (most of my paintings hanging in my house are hanging unramed because I refuse to put cheap chinese frames on them. So I hang them raw.

    But I'd love to surround them with a hand-made gilded frame!


    Thanks again!

  2. #2
    Join Date
    Feb 2018
    Location
    Elma ny near buffalo
    Posts
    20
    PS. I'm a 52 year old, happily married, guy who works for a Christian Men's/Boy's non-profit. I love painting and photography, reading, jazz piano, movies, and can't believe I'll be 53 in a couple months! It was just yesterday I was a young kid with a .22 pellet rifle having fun shooting pepsi cans and reading comic books! How did I get so old!

  3. #3
    Join Date
    Sep 2007
    Location
    Longview WA
    Posts
    27,437
    Blog Entries
    1
    Howdy Bob and welcome to the Creek.

    My dinner is awaiting, after that a few searches for some old posts that might be of help will be done.

    As to finding someone to mentor you many hear are willing to help in any way they can. But instead of waiting for everyone to go through the process of asking if you are in their area, it might be a good idea to go to your profile page and enter in your location. At the top of the page on the right there should be a "My Profile" link.

    jtk
    Last edited by Jim Koepke; 03-01-2018 at 1:03 AM. Reason: wrong word typo
    "A pessimist sees the difficulty in every opportunity; an optimist sees the opportunity in every difficulty."
    - Sir Winston Churchill (1874-1965)

  4. #4
    Join Date
    Feb 2018
    Location
    Elma ny near buffalo
    Posts
    20
    Thank you jk. Much appreciated. Updated my profile. I live in Elma ny a rural suburb of buffalo ny.

  5. #5
    Join Date
    Mar 2015
    Location
    SE Michigan
    Posts
    3,225
    Hello Bob, and welcome. Thanks for sharing your paintings...I like the work very much.

    After looking at the frame examples, I think I would look at it as an assembly, rather than a single piece of wood. In other words, get a 1/2” or whatever thick piece and glue a 1/2” x 1/2” piece to the outer edge. Then use your router to create the 3 bead profile in a 1/4” or so piece of stock and then glue it all together. I would create the 3 bead profile on the edge of a wide board (safer that way), and then cut it off with your skill saw against a guide.

    This would also allow you to carve or decorate the outer piece separately...so if some mistake were made, it could be redone prior to gluing it on.

    I guess what I’m saying is to think of it in components, rather than a single piece. Given you will be gilding the piece, any gaps or issues with the glue ups would be covered. And to that point, if the miters aren’t perfect, just fill with putty, sand well, and gild over it...no one will know. Something to think about anyway.
    Last edited by Phil Mueller; 02-28-2018 at 10:17 PM.

  6. #6
    Join Date
    Feb 2018
    Location
    Elma ny near buffalo
    Posts
    20
    Quote Originally Posted by Phil Mueller View Post
    Hello Bob, and welcome. Thanks for sharing your paintings...I like the work very much. After looking at the frame examples, I think I would look at it as an assembly, rather than a single piece of wood. In other words, get a 1/2” or whatever thick piece and glue a 1/2” x 1/2” piece to the outer edge. Then use your router to create the 3 bead profile in a 1/4” or so piece of stock and then glue it all together. I would create the 3 bead profile on the edge of a wide board (safer that way), and then cut it off with your skill saw against a guide.

    I guess what I’m saying is to think of it in components, rather than a single piece. Given you will be gilding the piece, any gaps or issues with the glue ups would be covered. Something to think about anyway.
    I hadn’t thought of that. That’s a good idea actually. Ps. Thanks for the kind words about my paintings.

  7. #7
    Bob, I enjoyed the paintings and will look at them again tomorrow.

  8. #8
    Join Date
    Sep 2007
    Location
    Longview WA
    Posts
    27,437
    Blog Entries
    1
    I've been trying to learn how to make frames for my own paintings. Mostly because I cannot afford to buy good quality 24 carat, water-gilded close corner frames.

    [edit]

    My first foray into making a couple frames resulted in the realization that fine miters with rough-cut tools is not the way to make a great looking frame. And, after trying to make some corner splines, moldings, and half-lap joints with the power equipment...let's just say that my garage is covered in fine wood powder, and my wife is not a happy woman because of the wood dust covering everything!
    Your paintings are enjoyable works and deserve a well made frame.

    Frames can be built up by making different parts of molding and then gluing them together. They can also be made by making long pieces of molding and then turning it into a frame, take your pick. One of the problems with frames assembled from multiple pieces is they can cause cracking if the pieces move different with changes in weather.

    To make a frame like the one in your link, you will need a few different skills and a few hand tools. The corner of the frame is carved, the rest could be done with planes.

    The Stanley #45 comes standard with a 1-1/4" blade. Not sure what the biggest blade is for the Veritas Combination Plane.

    Here are a few old posts that may offer some ideas for your framing set up:

    First is one on a shooting board of mine being rehabilitated. Part of the rehab was to make it an ambidextrous shooting board so things could be worked left or right handed. This can be helpful when working for tight miters:

    https://sawmillcreek.org/showthread....hoot&styleid=3

    Interesting in checking the link there is a scrap of molding cut for a different project. There is a funky video of it being made on Youtube:

    https://www.youtube.com/watch?v=apLzrpsdcK0

    Here is a short post on mine about making stopped grooves and beads:

    https://sawmillcreek.org/showthread....lane&styleid=3

    This is a little bit more difficult than just getting a combination plane to work which can be a challenge in itself.

    Another post that may help is on blind nailing:

    https://sawmillcreek.org/showthread....ing&highlight=

    This post involves using molding on a cabinet. To me molding and frames are very much alike. A frame is just some molding around a painting.

    My suggestion would be to start with some simpler designs and work your way up. You can also start with a much smaller investment that way.

    Some very nice frames can be made with simple gouge work accenting the planes work.

    It is fairly easy to turn a plane cut reed into a rope or a ball chain with a gouge of similar size to the plane blade.

    jtk
    Last edited by Jim Koepke; 03-01-2018 at 2:33 AM.
    "A pessimist sees the difficulty in every opportunity; an optimist sees the opportunity in every difficulty."
    - Sir Winston Churchill (1874-1965)

  9. #9
    Join Date
    Oct 2014
    Location
    Poughkeepsie, NY
    Posts
    207
    Here's an example of a chopped bead on an antique frame:

    corner.jpg

  10. #10
    A miter trimmer is something that you should look into. Lion was an old high quality maker that show up for sale often. I believe that Grizzly is selling one as well. It will give you the kind of corners that you see on pro made frames.

  11. #11
    Join Date
    Mar 2015
    Location
    Virginia
    Posts
    1,211
    Quote Originally Posted by Bob Britton View Post
    So here's what I'm wondering:

    Can someone get say a combination plane (like the Stanley #45/#55 or a Lee Valley combination plane and:

    1. Groove out of a 4s basswood 5/4" x 3" (width) x 4' using the combination plane instead of using a power router?

    2. Make a rabbit (rebate) using the Stanley #45 / #55 combination plane

    3. Make a bead,reed on the inside edge using a combination plane?

    I wish I had a mentor in the area who I could study and learn from. But basically, I'm looking to begin the learning regarding how to make the molding using planes. How do you make a wide groove when most combination planes max have a 1/2" wide cutter? Can you somehow keep laying down mutlipe grooves down the length of the board to make the hollow portion of the frame (leaving a 1/4" inside raised edige, and 1/2" outside raised edge areas along the lengths?
    You can do as has been suggested, and build up the frame, or you can simply cut all of the grooves and beads on one board. There are tradeoffs either way (a mistake at the end of the latter means you have to start over from the beginning).

    You can cut multiple grooves next to each other to make a wider groove. The combination plane has a fence, and by adjusting the fence, you can adjust where the groove is. A combination plane could work for rebates, I usually use my rebate plane.

    The 45 will work for beading. I do not believe it comes with reeding blades. The 55 probably does. Some here have posted about using a scratch stock. If you do a search for it that may be a solution for you. I think they usually work best along the edge, and not so much in the center of a board, but I have never used one so could be wrong. You could also look for a good wooden molding plane with the profile(s) you like. If you want to bead in the center of the board, you would clamp a guide. When I have done stuff in the middle of a board, I have used the combination plane.

    The mitre problem you have can be handled with a good mitre box, and a shooting board and hand plane. If you are making small frames, a low angle block plane may work. You may need something larger. I would probably try cleaning up the rough mitres you are getting off your power tools with a plane before buying a mitre box, since you already have the power tools. I don't know exactly what your problem is, but I have seen some folks use tape at the cut to help improve the edge of the cut.

    Be warned though, if you head into hand tools, it is hard to stop. You will also find it involves a lot of skills you may not have. A plane requires sharpening, which requires stones. You need to hold the work securely, so you need a good bench. If you buy used tools (which are cheaper) you end up having to rehabilitate them, which means learning more than you may be interested in. Lots of folks here who would be happy to help you though.

    You are a little far, but if you are thinking about doing this with antiques, the Patina Tools auction (you can find them on google) is next weekend in Maryland. Lots of dealers, random guys with tools on their tailgates, and old tool enthusiasts will be there, and it is a good place to get things (you can handle them, ask questions, etc., unlike ebay).

    My advice would be to maybe look for a good low angle block plane (you do not need to buy a Lee Valley or Lie Nielsen, there are plenty of good antiques out there cheaper), and try cleaning it up and sharpening it. That will give you a taste for what you can do with hand tools, and whether you want to go further or not. Then build a shooting board to help with your mitres, and try building a couple of simple frames without the decorative stuff. If all goes well you can go further, and if it does not you have not already laid out a bunch of money for stuff.

  12. #12
    Join Date
    Aug 2013
    Location
    Princeton, NJ
    Posts
    7,294
    Blog Entries
    7
    Depends on how far you want to take this, if you want to make a product near equal to a professional framing shop then you need a miter trimmer and a place to buy moldings. You can do the gold leaf yourself.

    Basically you can buy very high quality moldings that can be considerably more elaborate from someone who makes moldings on a commercial scale. Not box-store stuff, but a commercial business that supplies moldings for architecture and framing industry.

    Alternatively you can build a work bench, buy molding planes and learn how to make your own moldings. Start by buying Matt Bickford's book. You will want to venture into what would be known as joined frames, these are closer to historically accurate frames and rely upon joinery to remain in tact. These are what you see in museums typically in the historical galleries, probably impressionism and older, maybe post impressionism and early modernism. (not very usual in the modern galleries). These are the kind of thing you'd see made well prior to the existence of corrugated fasteners and so forth. They're easy to spot as the corner joints are seamless, the frame was made whole prior to the gold-leaf being applied.

    People still make these types of frames today but they're quite expensive. One shop near me makes historical replicas and I believe they start at a few thousand dollars.

    You will have to learn to be a competent woodworker to do this, there really is no short-cut that allows one to learn to make moldings and nothing else. As mentioned above, sharpening and general woodworking skills are required. Sharpening handtools is absolutely key to their function, and routinely required. For instance I'm sharpening my hand planes every 30-45 minutes of continuous use. They're completely unlike current day machine tools that stay sharp for a long while. Hand tools are powered by human hands and so must be very sharp to work properly because they do not have high speed or high force.
    Last edited by Brian Holcombe; 03-01-2018 at 8:04 AM.
    Bumbling forward into the unknown.

  13. #13
    Join Date
    Mar 2015
    Location
    SE Michigan
    Posts
    3,225
    I can certainly appreciate the caution of assembled pieces and wood movement. More of a concern combining different species of wood, however, I have 100+ year old antique furniture with applied moldings (even cross grained) that have held up fine. I don’t think you need to worry about cracking on an assembled piece particularely if using the same wood species and glueing long grain to long grain...which is what you would be doing.

    Looking at your example further, I think you could do the beading on the base board edge, and just applying the outside piece...so just a two piece glue up.

    This isn’t a frame, but an example of a profile cut on the end of the base board...then imagine a smaller piece glued to the outside edge...

    946326AD-8EC2-4461-8CDF-3B22459BD743.jpg 742678D7-D841-48A2-BA58-696976ED5A00.jpg

  14. #14
    Join Date
    Feb 2018
    Location
    Elma ny near buffalo
    Posts
    20

    Thank you.

    Quote Originally Posted by Phil Mueller View Post
    I can certainly appreciate the caution of assembled pieces and wood movement. More of a concern combining different species of wood, however, I have 100+ year old antique furniture with applied moldings (even cross grained) that have held up fine. I don’t think you need to worry about cracking on an assembled piece particularely if using the same wood species and glueing long grain to long grain...which is what you would be doing.

    Looking at your example further, I think you could do the beading on the base board edge, and just applying the outside piece...so just a two piece glue up.

    This isn’t a frame, but an example of a profile cut on the end of the base board...then imagine a smaller piece glued to the outside edge...

    946326AD-8EC2-4461-8CDF-3B22459BD743.jpg 742678D7-D841-48A2-BA58-696976ED5A00.jpg

    Hi Phil:

    Thanks for the guidance.

    All of my prior efforts to make the molding have been done using a single piece of wood, grooving it out with a 1" dado bit on a power router. But the more that I think about it, doing this as a combination piece might actually result in less work over all (and less wood waste and dust/shavings on the floor!)

    If I use my table saw to rip a ~1/2" strip, like you show above, and fix that to the main molding, I guess I wonder If I can hand plane the cut edge of the ripped piece to be square. (the Table saw I have is just a cheap sears model. the blade, while adjustable, will not move to 90 degrees perpendicular to the table top. The way it's assembled, it only goes to 89 degrees with a hard stop, no more tilt). And I wonder how secure it would be. Another person mentioned maybe doing a tongue/groove to secure a strip more in place.

    That piece, like you show above, would need to be strong enough to handle some chiselling. Basswood is pretty soft, so I'm not sure that it would take much in the way of pressure/pounds per square inch, on the board. But I wonder if the glued on piece would hold up.

    But this is some thing I'm definitely going to try (combination assembly of the molding).

  15. #15
    Join Date
    Feb 2018
    Location
    Elma ny near buffalo
    Posts
    20
    Now that's really interesting!

    I had found that frame shops sometimes use a "Miter guillotine", but the ones that are within my budget are just cheap chinese mfg and I just couldn't see spending the $ on them.

    I did try to make a shooting board and bought a Stanley low-angle hand plane from Rockler. That was a mistake right there. Sorry to be blunt, but that plane was just a piece of junk. the tightening screen would not lock the blade in place and the blade kept moving on me, swiveling. Again, welcome to the modern world of cheap mfg and cheap alloys and such.

    That's what started me down the path towards looking at antique planes when planes used to be made of iron and steel!

    I have repurposed one plane I acquired. Removed the rust, and spent hours with a grinding water stone/angle device and got a very good restore on it. The thing is, I didn't know at the time that there were different planes, and this one was not a low-angle edge plane that could be used with a shooting board to try to get a rough-cut miter.

    I also tried a miter box. First, the yellow plastic ones, then an older wooden miter box. There's so much slip in them, and the grooves where the miter saw fits has enough area to drift the blade, and I had trouble keeping the box/saw/molding from slipping around while dragging the saw to make the cuts. A lot of drift, and the end result was closer to 45 degrees in the angle cut, but the end cut was not 90 degrees, but like 88.5/89-ish. So when I went to align it up, it was off.

    I also watched a youtube video where a guy showed how to NOT use a short triangle to mark a 45 for cutting, but showed how to use longer length measures to increase the accuracy of a drawn 45 degree angle. (hard to explain, but if you measure out 1" x 1" (rise/run), you'll get a 45. but if you measure out 24" x 24", you'll find that the likelihood is that drawn 45 is far more accurate.

    Anyways, he then showed how by scoring with a razor knife the 45 degree cut mark, and then using a hand chisel to gently start tapping out a narrow slot along the cut mark, you begin making a groove for a dozuki or miter saw to fit. This was one of the most accurate 45 degree miter cuts I got, but the problem was the perpendicular was off...by a lot. When the corners were put together, wide gapes, a sixteenth or more, could easily be seen. But my digital angle measure had the miter at 45.1 or so...the closest I've been able to cut.

    That's why I think the miter trimmer you mentioned would actually be just what I need. But I'm not averse to figuring out how to use a low-angle hand plane /edge plane either. That might take some practice.

    I was looking at professional hand miter boxes. There's this:

    https://www.amazon.com/Stanley-20-80.../dp/B00005QVQW

    But see my comments RE: Stanley. I wouldn't give them one penny today.

    (it's funny, in my professional life, I do IT work for a company that is the US importer of RCA products. Most people don't understand that many major brands are no longer the same companies that used to make quality goods, as most brands have been sold off and products are being mass-mfg in Asia).

    Again, thats' why I started looking at some antique woodworking tools and techniques. I just refuse to support the current land-fill, make a quick buck selling chinese products method of capitalism today. (sorry to sound like I'm preaching. I just find it sad what garbage is being made and sold and quickly moved into landfills. What ever happened to companies making quality products? Make it quick. Make it cheap. Make your quick buck. Who cares if it breaks and it goes to a landfill immediately. They'll just buy another one. It's just not a sustainable model for our environment and ecology.)

    Been on ebay a bit. Looking at trying to find a Stanley 45 or 55, but now I'm trying to shop for this. It seems to me a miter trimmer, or learning how to use a shooting board with edge plane is probably the right route. Because it seems like it minimizes the accuracy concerns of the rough cut, and finishing off the miter with a trimmer or edge plane is the way to go.

    (Note: Please forgive me for my opinions RE: Cheap Chinese goods. I just find it so detestable how we no longer care enough to fight those aspects of what is affecting our ecology and environment. I don't know if you've seen or heard about the floating plastic island in the south pacific the size of texas, 2-3' deep of floating plastic waste. It breaks my heart to watch companies make a quick buck while the negative consequences are placed on society and our ecology and environment. I'd much rather find and re-use an antique tool because I know it's made better and will last, while also knowing I'm not adding to the land fills).

    Thanks Bob. That Miter trimmer really looks like what I need. After that, I need to play around a bit more with miter splines and half-laps. I learned really quick that gluing end grains together has absolutely NO strength or durability!


Posting Permissions

  • You may not post new threads
  • You may not post replies
  • You may not post attachments
  • You may not edit your posts
  •