First, a minor brag. I got lucky with this yellow pine.
IMG_5165.jpgIMG_5166.jpgIMG_5167.jpg
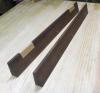
Six pieces that are over 2" thick, 72-76" long, mostly knot-free, and most of the pieces are close to quartersawn. About 66 board feet total. I'm not sure how much quarter-sawing matters with softwoods given that I never see it but it got me excited. The guy had a yellow pine slab that was 20 ft. long and pretty clear he wanted to sell me but I don't have the means to transport it nor the energy to break it down.
Anywhoo, I'm finally breaking down and building a real workbench. I've settled on a Moravian bench like Will Myers' because it's easily broken down for moving and it's the lightest design I've seen that will still hold up to the type of work I hope to be doing.
My main question is, how would you guys go about breaking down these pieces for the benchtop? Will Myers' plans call for a top that is 76"x13.5"x3.5" and these pieces I have are all about 2.25" thick and 8" wide. Would you laminate two pieces face-to-face to get the necessary thickness? Or would you rip pieces that are 3.5" wide, then turn them on their sides and laminate those face-to-face so that the benchtop is all edge grain?
Thanks!

 Reply With Quote