Toolcab9 copy.JPG
Magnets hold the blades in place.


 Contributor
Toolcab9 copy.JPG
Magnets hold the blades in place.
Member
Ken, you must have a VERY understanding better half. I would have heard "don't you already have chisels that do that?" when construction of the second rack started.
Brian, carpeting is probably kind to old bones and maybe even the unfortunately dropped tool, but isn't is a headache to clean?
Thanks to everyone for sharing.
 Contributor
If I lived in California I'd likely change them, but I like having everything right next to the tool/workbench that I use it at. it minimizes how often I'm digging through a toolbox. I'm guilty of buying things double for the fact that it's in a toolbox and forgotten about, this way that doesn't happen.Originally Posted by Patrick Chase

It may look fragile but it's actually pretty difficult to knock something off of most of these racks, especially the planes. I have a two year old who likes to visit the workshop (while I'm there) and so everything is increasingly made difficult for short people to get and increasingly sturdy. He's found a few things I've had in a toolbox and at which point they're immediately hung up on a wall where they're much harder to get. It's 'fun' for him to dig through some of the hardware I have in the bottom of one of my craftsman toolbox.
Last edited by Brian Holcombe; 02-12-2018 at 2:29 PM.
Bumbling forward into the unknown.
Contributor
IMG_1100.jpgThis is a wall hanging cabinet I recently made for my chisels. After it was done, I found that I had omitted the 7/8 chisel. Deconstruct and reconstruct. Handles sit in recesses, blades are tilted slightly and are held in place by rare earth magnets. I'm rather short so I needed the handles lower and thought this design might limit my opportunities for blood loss. Still working out what is going into the lid and how it will be held in place.
 Member
My setup is a wee bit different as it captures the chisels by the blades. I screwed together several layers of plywood with grooves for the blades in the appropriate layer. I screwed it together so I could add or change grooves as needed. I have yet to replace a row, but have added several new grooves over the years.
Chisels.jpg
Mike
From the workshop under the staircase, Clinton Township, MI
Semper Audere!
Member
Showoffs, my chisels are in a leather roll.
 Contributor
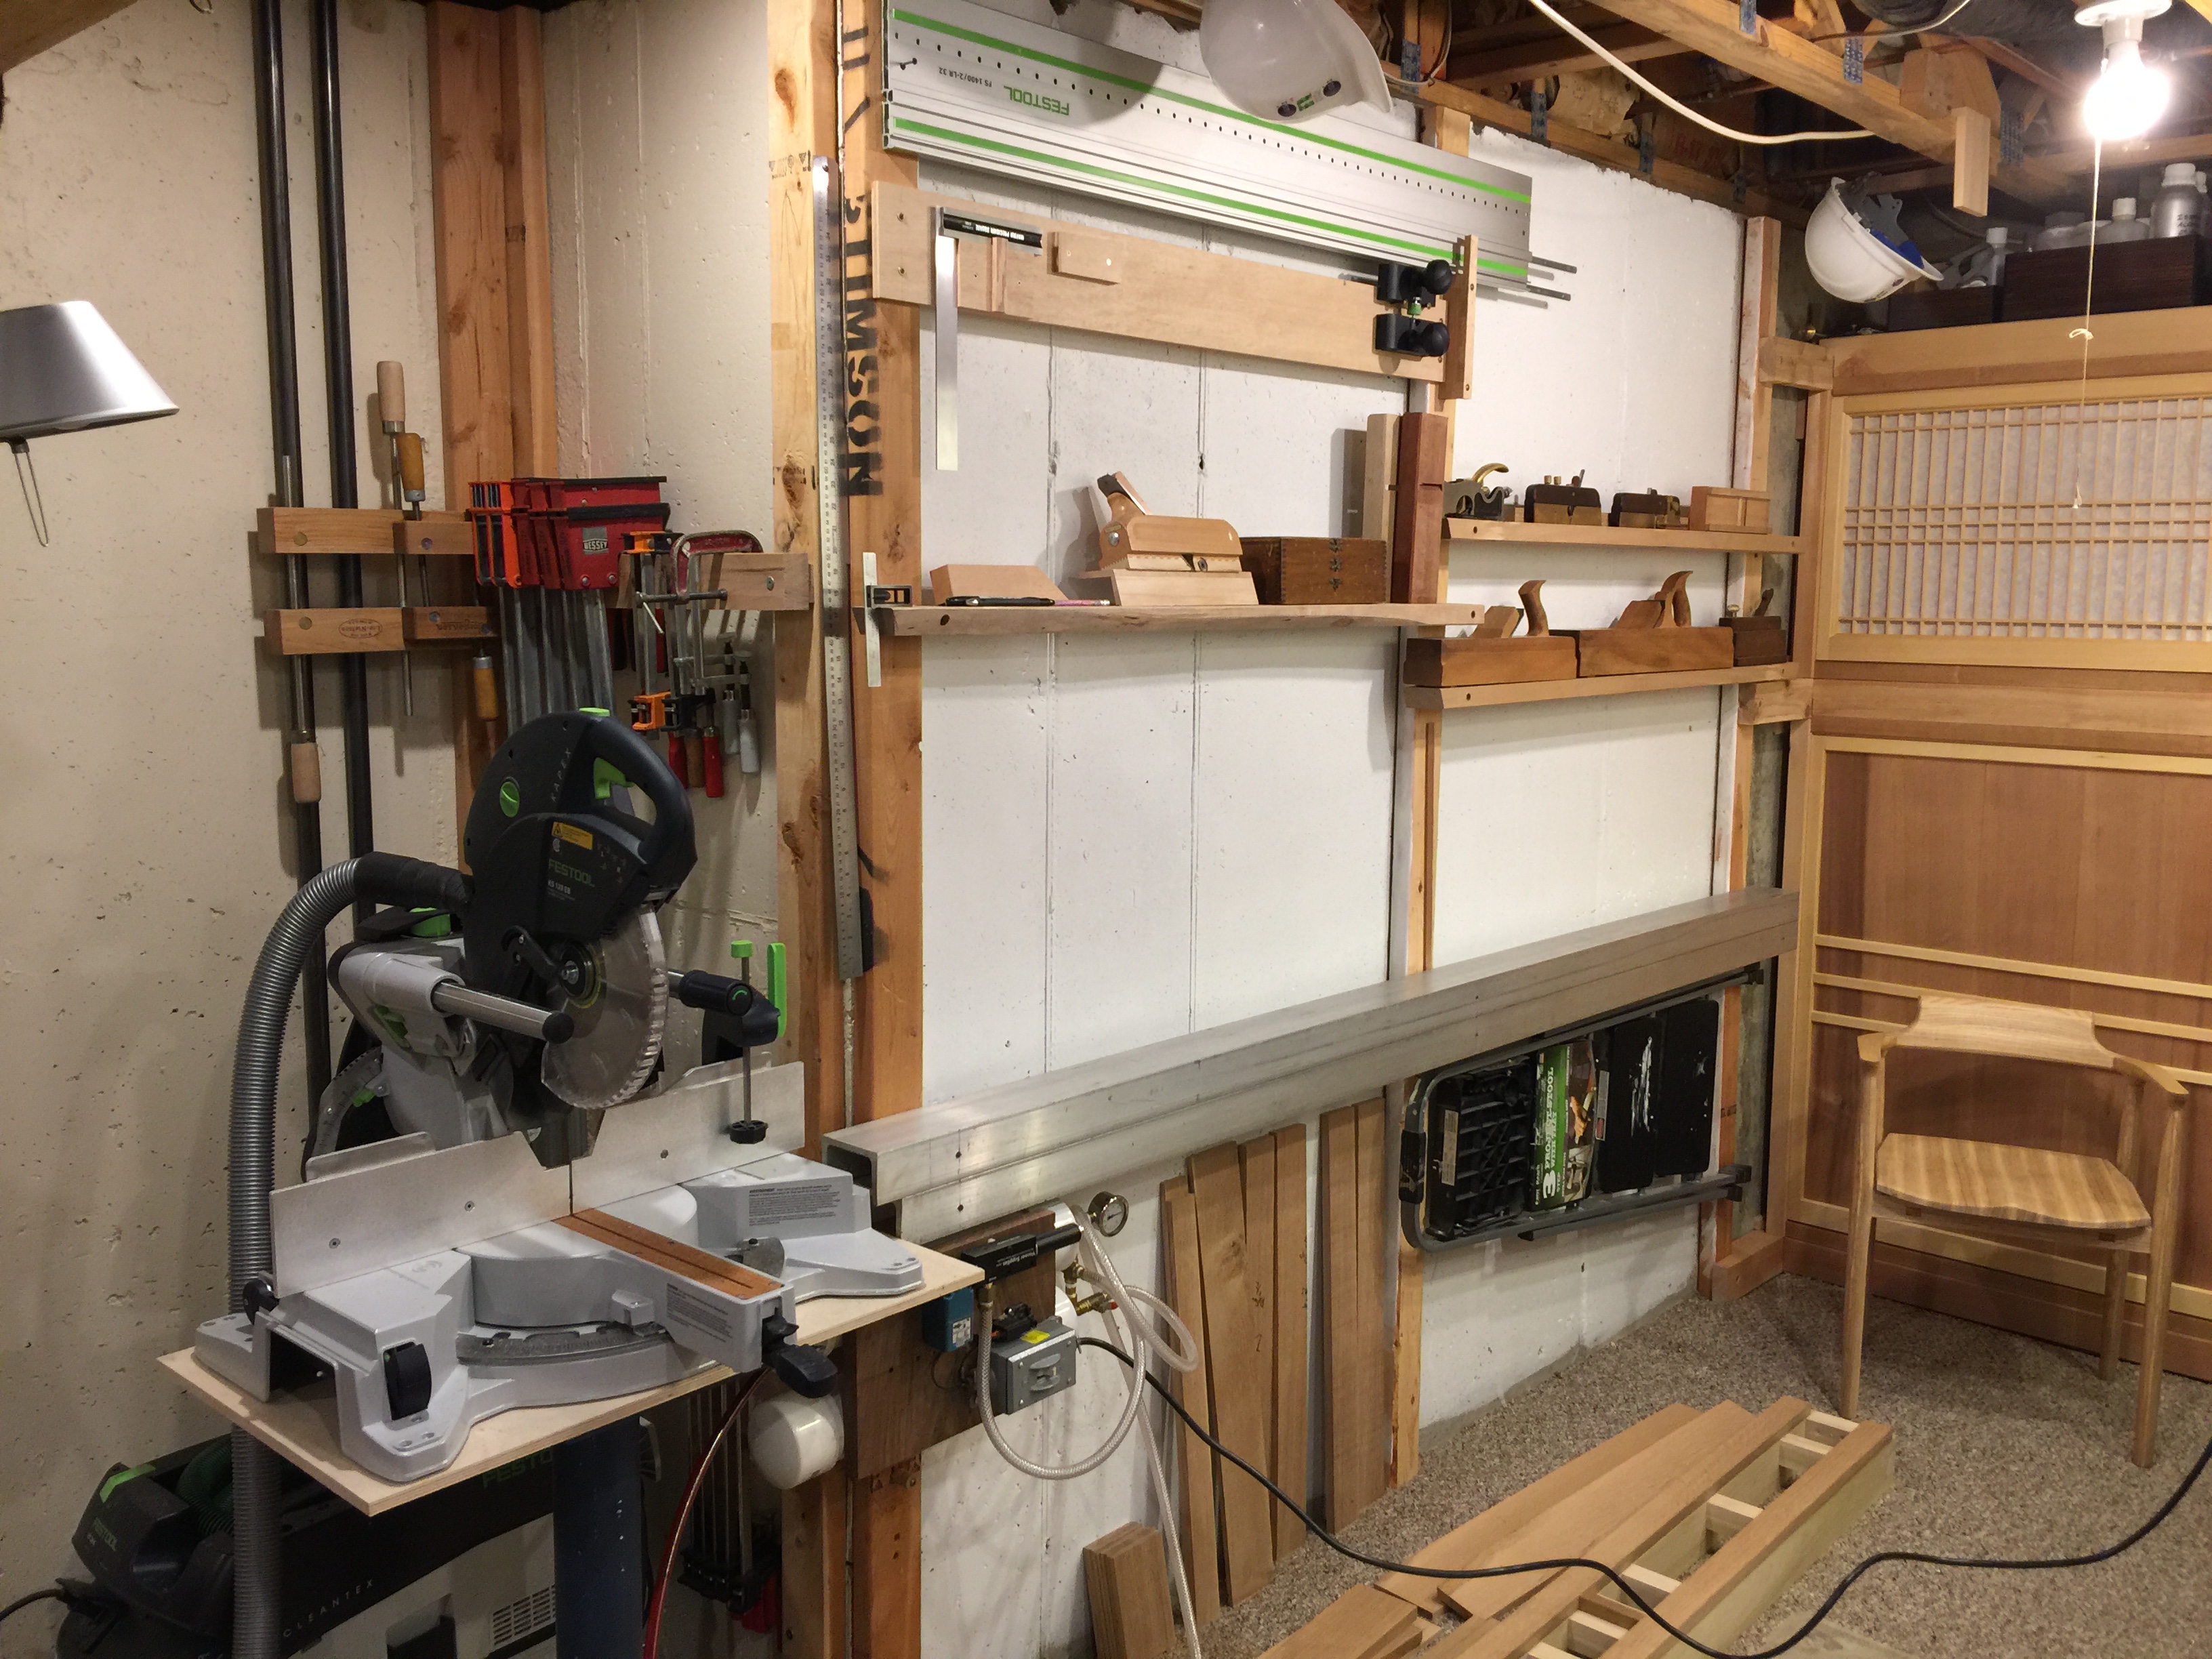
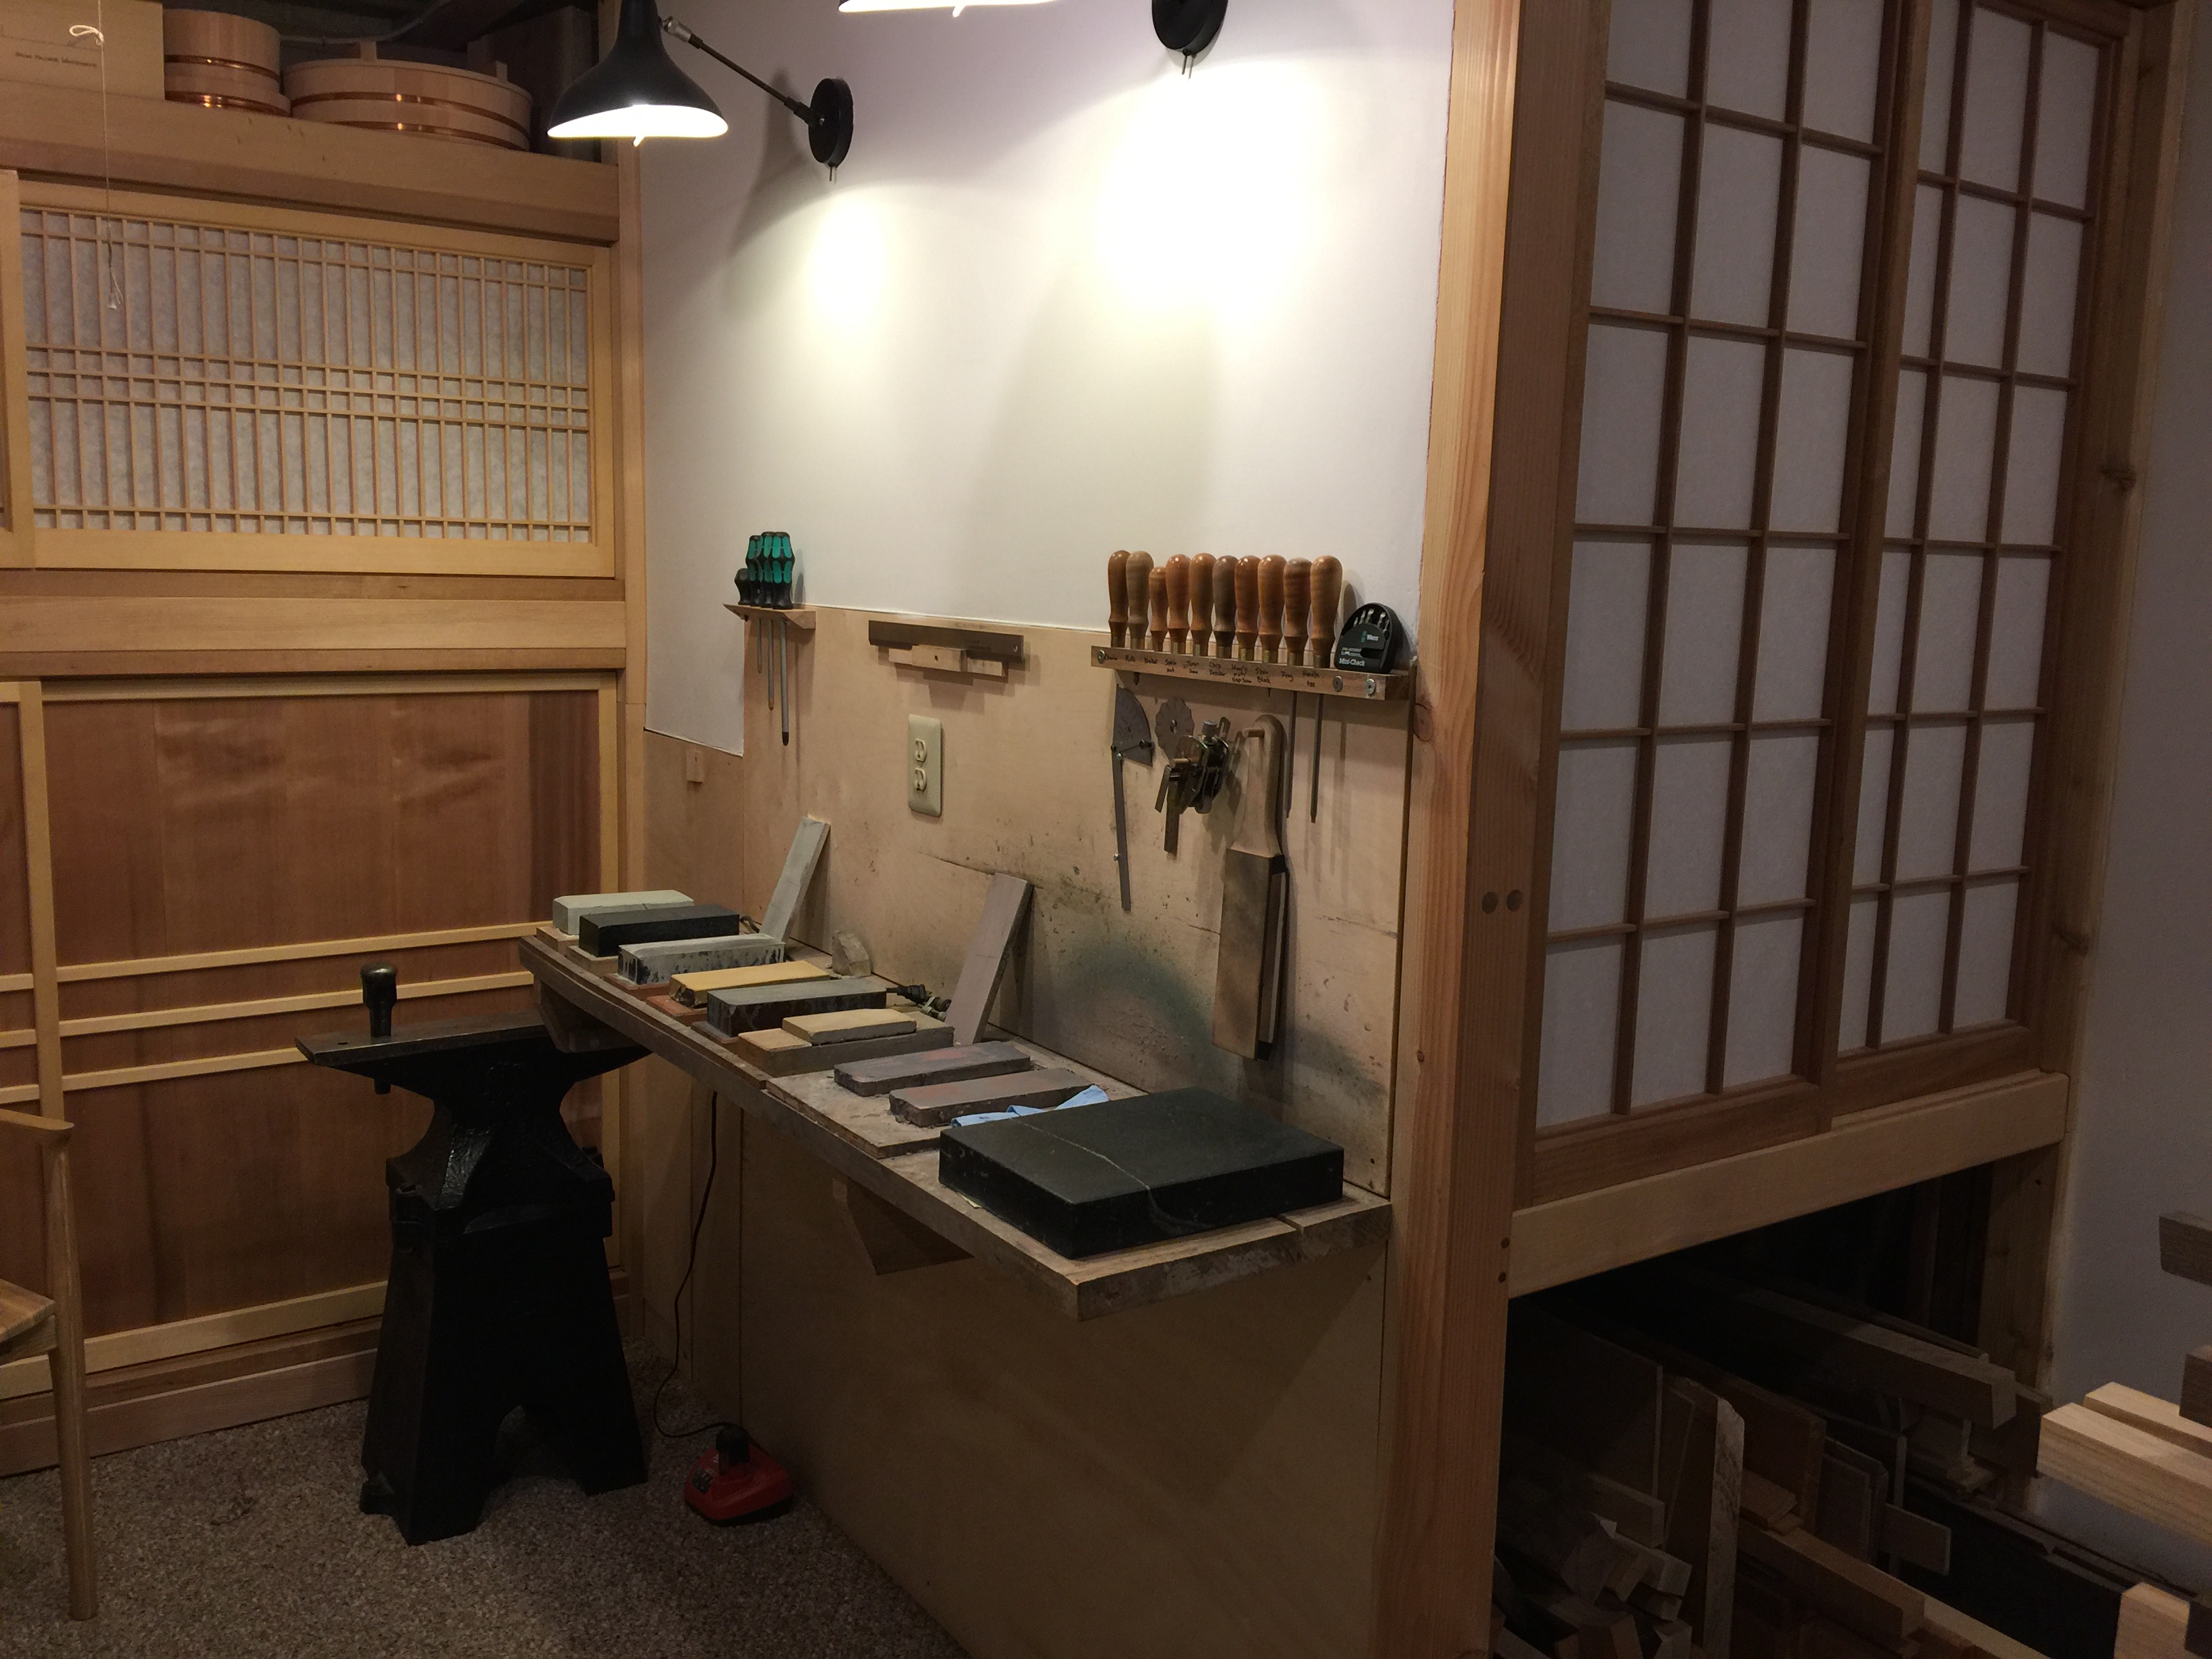
Love your shop! Please tell me that's a granite surface plate and not a giant natural waterstone, because I would die if that's a giant natural waterstone. :-)
Contributor
Mine too. Well, one leather and one canvas.
Contributor
Thanks Malcolm!
Hah, yeah that is a granite surface plate. I've seen a natural stone that size, but a bit beyond me i'm sure.
Bumbling forward into the unknown.
Member
Yeah, same here. That shop is a thing of beauty.
Contributor
Thanks Patrick!
Bumbling forward into the unknown.
Member
Here are (most of) mine. Not as elaborate as some others, but they were quick to build. It’s basically two strips of hardwood glued together with small spacers in between. The spacer is thicker to accommodate mortise chisels, thinner for regular chisels. For socket chisels, be sure to make the spacers thicker than the blades but less thick than your socket - that’ll prevent them from falling. The leather bit for the Ashley Ike’s is to prevent them from cutting me when I’m reaching for the chisels below them. I also use chisel rolls, as you can see. Just nail them in and they make excellent racks.
AA2EC38D-1382-4F14-9860-3371268080B6.jpg27671D3B-575A-43DA-851A-6A25EF325B7E.jpg
Last edited by Hasin Haroon; 02-14-2018 at 1:08 AM.
 Member
Barney,
LOL, I do get an occasional "side eye" when the UPS girl drops off a package, but I've learned to act like I didn't notice and start talking about what is in the package. Once I start "building the clock" she quickly loses interest. A man has to be quick on his feet.
ken
Guest
Brian:
You need to get a long level!
Member
Single piece of wood with back edge angle adjusted to tilt the tool blade into contact with the backing boards (2' x 4' 3/4' ply on horizontal ledger strips). The backer boards are peppered with old screw holds that speak to how often things have been rearranged, which is why I prefer this approach to cabinets or chests. The angle on the back edge of the holder is what keeps the socket chisels stable in a constant diameter hole, so no need to generate a reamer to taper. Second guard strip under the blade is there to prevent any issues when a careless student returns a tool to the board with bevel toward backing boards - looks like it is in contact with the handle, but clears by enough to prevent any interference. Trim head screws for the kicker strips and standard deck screws or drywall screws for the holders, countersunk as needed to clear the tool ferrule. I make make up the holder with a square back edge, then trim until all of the blades just touch the backing board, with cranked neck stuff set up to lie in contact with the backer.
IMG_6614.jpgIMG_6618.jpgIMG_6613.jpg
I've found that with students, closed holders are more likely to produce dropped tools (versus the lift-and-pull open racks), so other than the mortise chisels and floats, most are open. There's another board in the repair section of the shop that had some duplicates, but mostly my personal stuff that I prefer not to share. All of the specialty luthiery tools are in roll-arounds on the repair side, carving tools in drawer-stored rolls (I don't do enough carving - besides necks and bracing - to justify the wall space), and the boatbuilding and timber framing edges and saws live in site boxes back in the storage room.
Last edited by Todd Stock; 02-14-2018 at 7:50 AM.
 Posting Permissions

 Reply With Quote