
-
I need me a jointer, but I'm not in a hurry. One will come along eventually. Would like a bit nicer Block. That'll come soon, too.
Nice work. Now relax and pet those dogs; they look so poor and neglected. :P
-
Nice work on the beaded face frame Steven. I have some shaky problems at times. Have learned to keep hands away from each other when holding sharp objects, not fun. Be double careful until the doc works it out.
Jim
-
Well, top is out of the clamps...set it aside, and made a pair of wood runners for the drawer to slide on, then made a pair of guide rails, to keep the drawer centered as it slides. Install was easier with the top off. Had to head for the hospital for the CT Scan.....had to stop woodworking until I got back home...
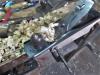
Passed this site on the way, though..
IMG_3441 (640x480).jpg
Brand new Amish Saw Mill....been up and running maybe a month, or so..
IMG_3442 (640x480).jpg
Hmmm, might have been a bit too big for their saw? Place hasn't even sided the new house, yet.
Next farm west of here (also Amish) takes this supply of lumber and builds pallets.
Maybe after awhile, I'll try soon shop time myself....stay tuned..
-
Doc just called, CT Scan did NOT show any sort of "mass"....if the symptoms get any worse..they will try an MRI....
Ok. Got tired of the arguements elsewhere...went to the shop to do something they are aren't....wood working..
IMG_3443 (640x480).jpg
Cleaned the glue joints....
IMG_3453 (640x480).jpg
Trimmed the ends square...saw IS a Vintage "panel saw"..
IMG_3454 (480x640).jpg
Smooth planed both the top and underside of the Top..
IMG_3456 (640x480).jpg
Marked the corner blocks for slots..
IMG_3451 (640x480).jpg
Used a Millers Falls drill to do the slots...
IMG_3452 (640x480).jpg
Drill a hole straight through, then rock the drill back and forth to make it a slot....gently, or the bit will snap..
IMG_3447 (640x480).jpg
Added a 1 x 1 runner for the drawer to ride on, and a 1 x 1 guide to keep the drawer centered...did both sides.
IMG_3457 (640x480).jpg
Sat the case onto the top, both upside down on the bench. Added a screw to each slot, roughly in the center of the slot. Then set the case on the floor, have other jobs to do...stay tuned, part 2 of toady's doings coming right up...
-
Smoothed top again....block plane to ease the edges a hair...needed a corner detail..
IMG_3460 (640x480).jpg
Used another vintage saw..
IMG_3462 (640x480).jpg
and cut away the waste..
IMG_3461 (640x480).jpg
Sanded the saw marks off, smoothed the curve. Set up the router with a cove bit..
IMG_3463 (640x480).jpg
And cut a cove on the front and both side edges...
IMG_3464 (640x480).jpg
Set the case aside..
IMG_3465 (640x480).jpg
As I need the room to build a drawer, next....noticed that I did have a few panel saws hanging on the til...
IMG_3466 (640x480).jpg
Debating on whether to do through dovetails on the drawer front....or 1/2 blind ones...
At least I don't have to lift this off the bench, again..
IMG_3459 (640x480).jpg
Just need to build the drawer for this case, then start the bookcase half....stay tuned...I'm plumb worn out....
-
Good news on the CT scan. Sucks though that all they can say is, "If it gets worse..." . Was hoping they might be able to treat it.
Love the panel saw.
-
Drawer is about done...had to run to the Blue Borg to buy a board for the back of the drawer....Have about 40-something in photos to process down to something post-able.....Test fits have been done...
IMG_3511 (640x480).jpg
Maybe later, I'll post a bit
-
Dropping back here, again. as this next "chapter" is a bit long....Was going along fairly well..until I came up a board short, today. had to go and BUY a 1 x 6 x 4' at the Blue Borg.....$5 and change? Ouch. It also had almost that much in staples...even had to pull another board off of the one I wanted....sheesh.
Ok, I had a fancy plank of pine, that I wanted held back, to make the drawer front something special...
IMG_3467 (640x480).jpg
Tried to center the knots in the middle of a piece....wasn't happening...maybe this will do?
drawer front.jpg
Drill a hole, lots of glue....hadi-a-knot?
IMG_3471 (640x480).jpg
Finally wittled down the 8' plank to this usable piece. Handsaw is my Disston D-112.
IMG_3472 (640x480).jpg
Ran this around, to try and flatten the board a little better.... Had two pieces from the other day, that I saved back as drawer sides...they needed a little work, too
IMG_3475 (640x480).jpg
Widths didn't quite match...we have ways...trimmed the blank for the drawer front, to where it would fit the opening..
IMG_3473 (640x480).jpg
Then started to get things set up for through dovetails..
IMG_3477 (640x480).jpg
And got the backsaw down from it's hook..
IMG_3478 (640x480).jpg
And a can of Mountain Dew....got the shop stool over to where I could USE it...
That is about it for this episode, stay tuned..BRB..
-
Part 2: Wound up working on the edges of the side pieces..
IMG_3480 (640x480).jpg
Until they were at least square..
IMG_3481 (640x480).jpg
laid these two out, side by side, marked a top (T) a bottom(B) an inside, and the front (F) and set one aside.
IMG_3487 (640x480).jpg
Pins first in this shop. I set the angle with a router bit, then set the sliding bevel to that angle...and layout some lines..then mark on the faces where to cut..
IMG_3490 (640x480).jpg
Then used the backsaw to make the cuts..
IMG_3493 (640x480).jpg
Trying to split the lines...didn't matter a whole lot, as I mark the tails from the pins..
IMG_3497 (640x480).jpg
Chopping toys..
IMG_3494 (640x480).jpg
tools for a knifewall...then chop a little on one face..
IMG_3495 (640x480).jpg
Then flip the board over..
But, out of picture space, again...bRB....
-
Oh yeah..flip the board over, and remove the rest of the waste..
IMG_3496 (640x480).jpg
Pins are done on this end. Transfer the lines to the other end, since the pins are on the drawer's front...but, after the other end of the front was done..
IMG_3499 (640x480).jpg
I could reset things, and mark out the tails..
IMG_3500 (640x480).jpg
A sharp pencil to mark where the pins will go..
IMG_3501 (640x480).jpg
Now, I have a terrible time cutting angled cuts with a handsaw,,so..a bandsaw does the next step, staying inside the lines..
IMG_3502 (640x480).jpg
Then a dry fit...
IMG_3503 (640x480).jpg
Rather a bit tight...anyway, then repeat for the other end..
IMG_3505 (640x480).jpg
Both are about 1/2 way assembled. Time for the next step..
IMG_3506 (640x480).jpg
Change out the bead cutter (#23) and install the #12 straight cutter..set up a little jig to hold things still..
Stay tuned for the next episode..BRB..
-
Jig wasn't all that complicated...a couple blocks, a couple screws..
IMG_3510 (640x480).jpg
And then run the 45 until a groove for the plywood bottom is done...reset the jig..
IMG_3509 (640x480).jpg
And groove some more...marked out what size plywood panel was needed, cut that to size...then assemble things for a test fit...
test fit.jpg
Just to see how close things were....started to set up to add the back....didn't have a board to use?
Closed the shop for now. Went out and bought a 1 x 6 x 4' board...decided I had had enough fun for one day
Maybe tomorrow, I can finish up the drawer? Stay tuned...
-
I need popcorn for these threads!
Nice!
The pine for the drawer front is lovely, and I like seeing you cut dovetails with a big backsaw. I have been looking for a "dovetail saw"; cannot find anything that looks even close to size. But there is an antique shop near me that has 3 or 4 backsaws that are a bit smaller than what you are using. Funds permitting, I think I'll pick one of those up. Right now I'm using a cheap Ryoba I bought from Harbor Freight; it works well, but you cannot sharpen it. Once it dulls I'll have to buy a new one. I prefer something that lasts a bit longer than that.
-
The big backsaw is just a Disston No. 4...filed rip, 9ppi I think. It takes 8 strokes to cut down to 3/4" depth. At one time, I did have a couple Gents saws..sold them as being too hard on my hands to grip...they also kept twisting in the cut. I tried a thinner saw for a while ( No.4 was out for a sharpening) it tended to flex a bit more than I liked.
I have 3 main users in the shop, right now....a Disston IMP 6ppi rip, a Disston D-112 crosscut, and the old No.4 Have a few others I can "rotate" through, except for the No. 4.
One little tip: Have a plain old candle handy....rub the saw plate along the tooth line, and maybe an inch above the teeth....and hang on. Works as well on the soles of my planes...reduces friction.
Last edited by steven c newman; 03-11-2018 at 8:59 AM.
-
Yep, I use the candle on my planes and saws. Works a treat.
You speak about the Gent's saws. I have considered them but scrapped the idea for the same reasons as you. I already have a Dozuku and Ryoba, which have the straight pull handles like the Gent's, although much longer. My arthritis does not like them. They cut and work well, but long term use is a no no for me. I prefer a Western grip.
I cannot imagine trying to use one of the Gent's saws with their short little handles. No thanks.
-
Dropping back here, yet again....working on that "IKEA" Drawer...
Brought that new board to the shop..
IMG_3512 (640x480).jpg
Lovely, ain't it? pulled the "hardware" out..
IMG_3513 (640x480).jpg
Once I got the size figured out, I crosscut the "better" part..
IMG_3518 (640x480).jpg
I somehow managed to avoid this lovely feature..
IMG_3519 (640x480).jpg
Ok, trimmed the plywood panel for a better fit. used that to figure the size of the back.
Set up the mitre box to do dados....about 3/8" deep. Marked the cut lines according the the back. made sure they were square. and ran the saw a bit..
IMG_3515 (640x480).jpg
Made a jig to help hold the sides while I use a few tools on the dados
IMG_3514 (640x480).jpg
dry fit?
IMG_3517 (640x480).jpg
I round the back corners on the drawers I make..helps when I slide them in.
Everything fits...time for glue and clamps...
IMG_3520 (640x480).jpg
First, some counter-sunk screw holes to attach the back....don't rely on just glue alone..
Hmm,ok...need one more "page"..BRB..
 Posting Permissions
- You may not post new threads
- You may not post replies
- You may not post attachments
- You may not edit your posts
-
Forum Rules

 Member


 Reply With Quote