Page 1 of 2 12 LastLast
Results 1 to 15 of 22

Thread: Cross grain dado technique

  1. #1
    Join Date
    Mar 2015
    Location
    SE Michigan
    Posts
    3,225

    Cross grain dado technique

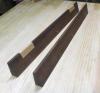
    This is probably second nature to many of you, but it was my first attempt at cross grain dados. These are dados in the sides of a drawer to accept spacers. It’s a long drawer and I wanted a few options so things wouldn’t just slide to the back of the drawer.

    Normally I would first saw the two sides and then chisel or router plane it clean. In this case, there was a stop required at the groove for the drawer bottom and I didn’t want to risk sawing through it.

    Any shortcuts or suggestions are always welcome.

    First up was to scribe the dado sides using a knife and square. I knifed one side, and then used my 1/4” chisel and marked the width for the other side then scribed that as well. I went fairly deep with the cut.

    C911A6F3-18D1-4303-9A23-5670F44D8116.jpg

    Next I cut small notches at both ends to try to avoid any blow out with the chisel (or later the router plane).

    F0FF5C01-6098-4C43-8EC4-2923E09FF3D1.jpg

    I then used the chisel to make multiple cuts down the length of the dado and cleaned it out.

    9170BE94-601D-4768-9984-F3AD006F26F6.jpg 4B5E8309-1CF9-43FA-AD70-C1F017B62616.jpg

    I actually knifed the walls a second time and repeated the chisel cuts and clean out a second time to establish a bit of a deeper wall. I found after the first one, that edge chipping was almost guaranteed unless I took the time to get the walls a bit deeper than the first chisel cut.

    Once the second chisel out was complete, I set up my router plane with the 1/4” blade. I also set up a stop for the router plane, so I wouldn’t accidentally blow out the groove from the drawer bottom panel.


    28487E87-0A6A-4856-B6FE-8B99BFB4978F.jpg

    To be continued....
    Last edited by Phil Mueller; 01-21-2018 at 12:09 PM.

  2. #2
    Join Date
    Mar 2015
    Location
    SE Michigan
    Posts
    3,225
    Next was the normal router plane work, taking thin shavings until the set depth was reached. I did sort of run the router plane blade up the down the left and right sides to clean up any fuzzies left.

    Pretty good results.

    D95D7DEA-106B-4E74-BB6F-74B117CD49D4.jpg

    But even my best, most patient attempts, resulted in a chip here and there. Being completely obsessed, I would keep the chip until after the dado was complete, and put it back in with a spec of glue. You’ll note, I have one more tiny little chip to repair (completely unneccesary I know, but what the heck).

    3D0FA797-CCCE-459C-B4DE-1277A0ED4D26.jpg

    Just thought I’d share...

  3. #3
    Join Date
    Feb 2014
    Location
    Rural, West Central Minn
    Posts
    218
    Because it's a stopped dado I would have used a Japanese pull saw and a scrap piece to use as a guide to cut the sides and a 3rd cut in the middle, then used just the router plane. All the pull saws I've seen don't have teeth that go all the way to the end of the blade but a Dremel with a cut off disc easily takes care of that problem. I'm sure others will have more suggestions. Good job on the dado.

  4. #4
    Join Date
    Apr 2011
    Location
    N Illionis
    Posts
    49
    good jos on the dado phil. i wont worry about the little chip out it's inside the drawer. jerry

  5. #5
    Join Date
    Sep 2007
    Location
    Longview WA
    Posts
    27,441
    Blog Entries
    1
    One way for making a stopped dado is to chop out about an inch or so of waste at the stopped end. This will allow the use of a saw to cut the sides.

    One way to avoid the sides chipping out is to use a chisel smaller than the dado. For a 1/4" dado this would mean either a 1/8" or a 6mm chisel. Though a 6mm chisel might still be a bit tight and catch the sides.

    Lee Valley has small inch size and metric blades for the router plane.

    jtk
    "A pessimist sees the difficulty in every opportunity; an optimist sees the opportunity in every difficulty."
    - Sir Winston Churchill (1874-1965)

  6. #6
    Join Date
    Aug 2013
    Location
    Princeton, NJ
    Posts
    7,295
    Blog Entries
    7
    I sent an azebiki to saw the sides, anytime you can saw the sides it’s considerably easier to make these dados and do so neatly. They can be difficult otherwise. Alternatively you can chop the sides with a wide chisel before you clear the waste. That makes it easier.

    Continuously knifing is messy.

    As a note: don’t plan stopped dados I have a dado plane and do very very rarely do I work with stopped dados.
    Bumbling forward into the unknown.

  7. #7
    Join Date
    Sep 2007
    Location
    Longview WA
    Posts
    27,441
    Blog Entries
    1
    As a note: don’t plan stopped dados I have a dado plane and do very very rarely do I work with stopped dados.
    Would you make a through dado on the sides of a drawer?

    That could cause problems when it comes to closing the drawer.

    To me things just look better when one uses a stopped dado for shelves:

    Through Dado Shelf.jpg

    A through dado isn't appealing. One could attach some molding to hide it.

    Curved Corner Stopped Dado.jpg

    To me this looks much better.

    jtk
    "A pessimist sees the difficulty in every opportunity; an optimist sees the opportunity in every difficulty."
    - Sir Winston Churchill (1874-1965)

  8. #8
    Join Date
    Dec 2015
    Location
    Dublin, CA
    Posts
    4,119
    So this is ridiculously nit-picky, but...

    "cross-grain dado" is redundant, because all dados are cross-grain. If it's with the grain it's called a "groove".

  9. #9
    Join Date
    Mar 2015
    Location
    SE Michigan
    Posts
    3,225
    Good point, Patrick. I guess if I’m going to be nit-picky enough to fix a few small chips, I should be nit-picky enough to use the right terminology.

    Anyway, thanks all! Leave it to me to find the most difficult, time consuming, and chip fraught method to do something. I knew a saw would be best, but just didn’t think through that I could have chiseled out enough room to use my pull saw. To think I did 12 of these

    Next time....

  10. #10
    Join Date
    Jan 2011
    Location
    Montana
    Posts
    157
    I'm wondering if the "blue tape" trick would be useful in helping to minimize cross grain chip out?

  11. #11
    Join Date
    Aug 2013
    Location
    Princeton, NJ
    Posts
    7,295
    Blog Entries
    7
    Quote Originally Posted by Jim Koepke View Post
    Would you make a through dado on the sides of a drawer?

    That could cause problems when it comes to closing the drawer.

    To me things just look better when one uses a stopped dado for shelves:

    Through Dado Shelf.jpg

    A through dado isn't appealing. One could attach some molding to hide it.

    Curved Corner Stopped Dado.jpg

    To me this looks much better.

    jtk
    Wrt drawers, I assume we’re talking about the bottom groove? I always make them through cut and just plan my dovetails to overlap.

    On shelves I might show a spear miter instead of a dado, but the miter would be used to cover the dado and provide a point at which all of the inside chamfers can meet.
    Bumbling forward into the unknown.

  12. #12
    Join Date
    Dec 2015
    Location
    Dublin, CA
    Posts
    4,119
    Quote Originally Posted by Randy Karst View Post
    I'm wondering if the "blue tape" trick would be useful in helping to minimize cross grain chip out?
    I doubt it. Both the adhesive and the tape itself are so weak that they don't add any significant resistance to chip out beyond what the wood already has.

  13. #13
    Join Date
    Sep 2007
    Location
    Longview WA
    Posts
    27,441
    Blog Entries
    1
    Quote Originally Posted by Brian Holcombe View Post
    Wrt drawers, I assume we’re talking about the bottom groove? I always make them through cut and just plan my dovetails to overlap.

    On shelves I might show a spear miter instead of a dado, but the miter would be used to cover the dado and provide a point at which all of the inside chamfers can meet.
    On drawers my thought is you wouldn't want a dado for a drawer divider going through the slot to what will be the drawer runner.

    A spear miter looks to be at least as difficult as a stopped dado. One's opinion on whether it looks better is up to the individual.

    jtk
    Last edited by Jim Koepke; 01-22-2018 at 1:53 AM. Reason: wording for clarity
    "A pessimist sees the difficulty in every opportunity; an optimist sees the opportunity in every difficulty."
    - Sir Winston Churchill (1874-1965)

  14. #14
    Join Date
    Jan 2010
    Location
    Lafayette, Indiana
    Posts
    1,378
    Brian posted a you tube video a few years back on this very topic. I found it very useful when helping my son on a project that required a blind dado:

    https://www.youtube.com/watch?v=9RGH...ature=youtu.be

  15. #15
    Join Date
    Aug 2013
    Location
    Princeton, NJ
    Posts
    7,295
    Blog Entries
    7
    Glad to hear you got some use out of that video!

    Jim, different strokes! I guess it's a bit odd that I avoid stopped dados but then put a spear miter on them. I am a complicated man.

    I see what you mean on the drawer dividers, I do certainly agree. I dont actually make a lot of drawer dividers, but when I have sometimes I've made them to join into the drawer front with a set of square mortise and tenon joints, and the same at the drawer back. The example I'm thinking of is a large drawer, so I wanted the extra strength of having an integral divider.
    Bumbling forward into the unknown.

Posting Permissions

  • You may not post new threads
  • You may not post replies
  • You may not post attachments
  • You may not edit your posts
  •