Page 1 of 2 12 LastLast
Results 1 to 15 of 18

Thread: Shoe Storage Build

  1. #1
    Join Date
    Feb 2011
    Location
    Carlsbad, CA
    Posts
    2,230
    Blog Entries
    2

    Shoe Storage Build

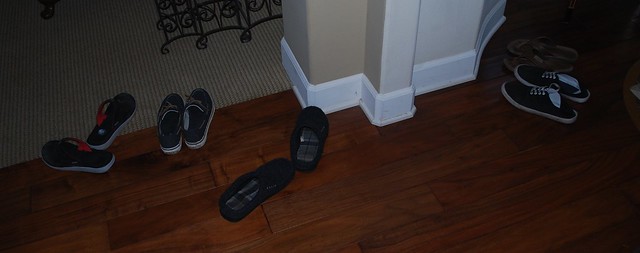
    Our two 20 something year old Boys always seem to be hosting some kind of "party" at our house – when they're home it seems like there's always a ton of their friends at the house. How I know this? – aside from the pile of empty beer bottles, there's always 1/2 dozen pairs of shoes scattered around the front door.


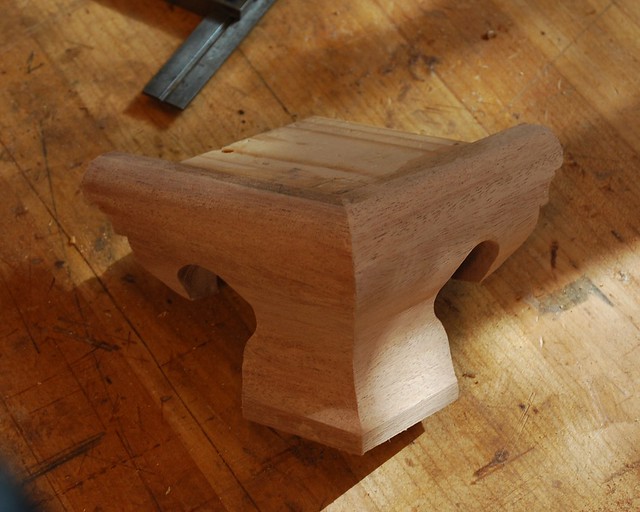
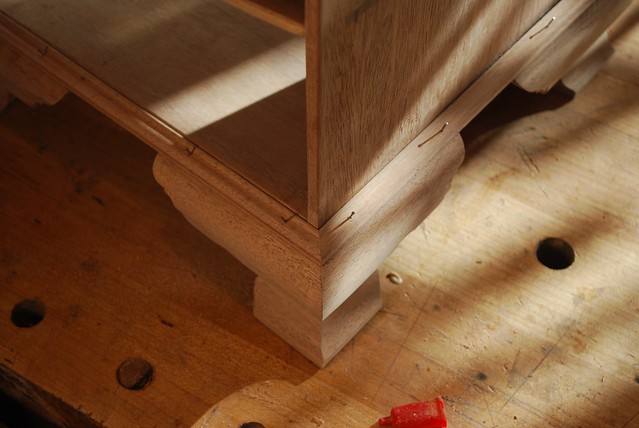
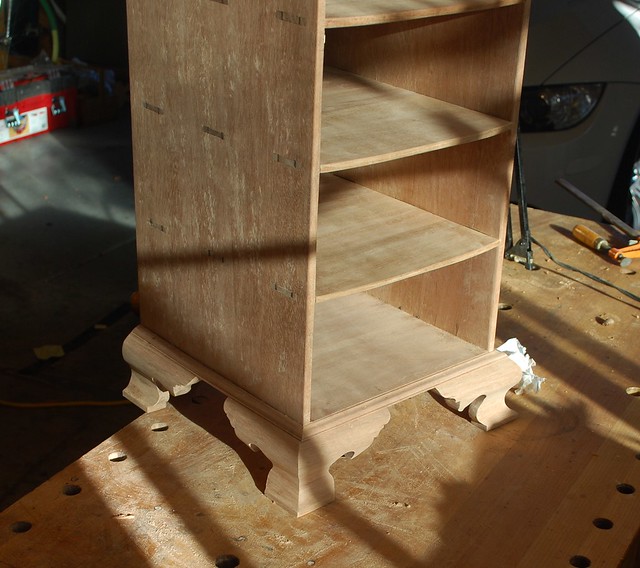
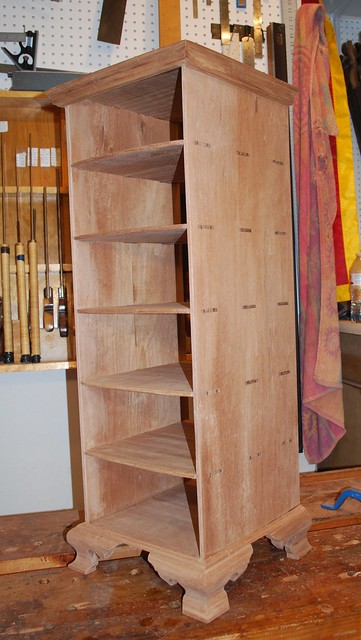
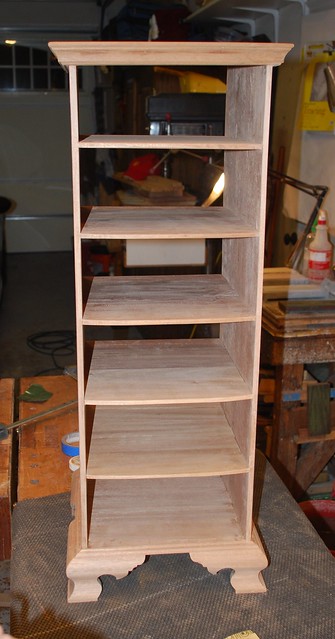
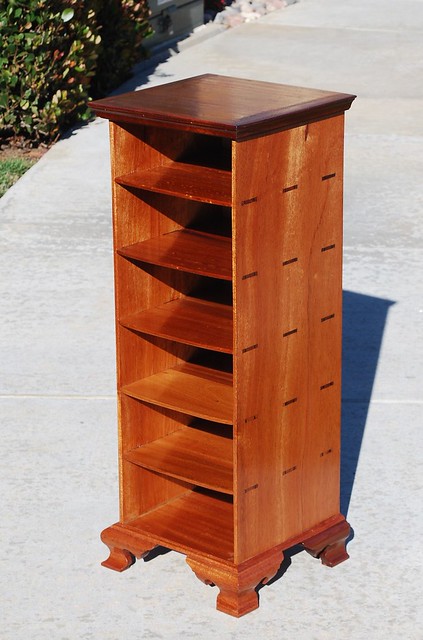
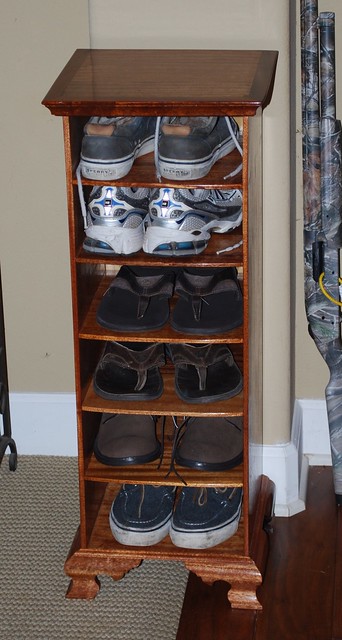
    This tends to be a problem for me because I'm up early and leave the house when everyone else is sleeping. To get out the door I have to walk through the minefield of shoes in the dark. I'm way too old and uncoordinated for that, so I decided to kill 2 birds with one stone by building a 12" wide x 12" deep x 30" tall vertical rack/box with shelves to hold the shoes out of some mahogany scraps I've been hoarding. The vertical shape is intended to fit against a small column in the entryway.


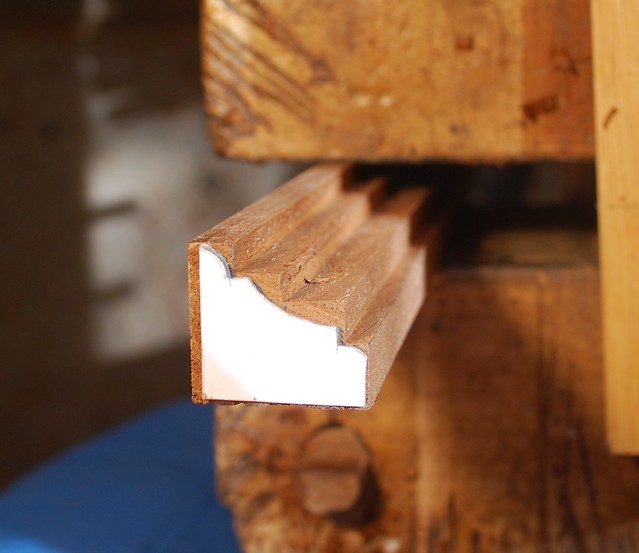
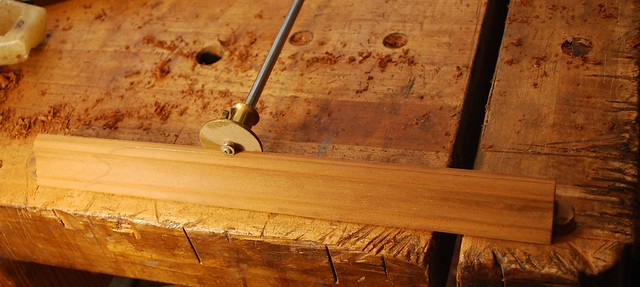
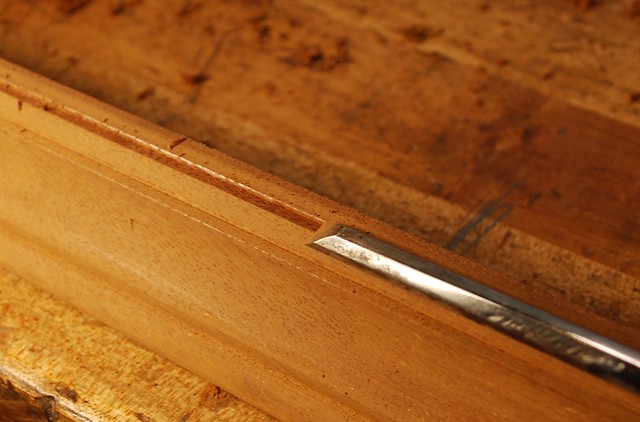
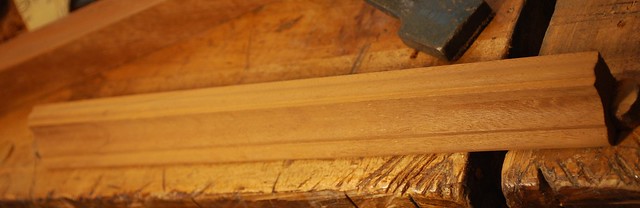
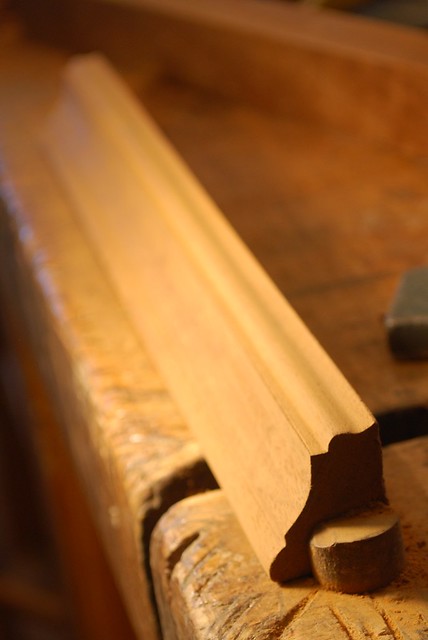
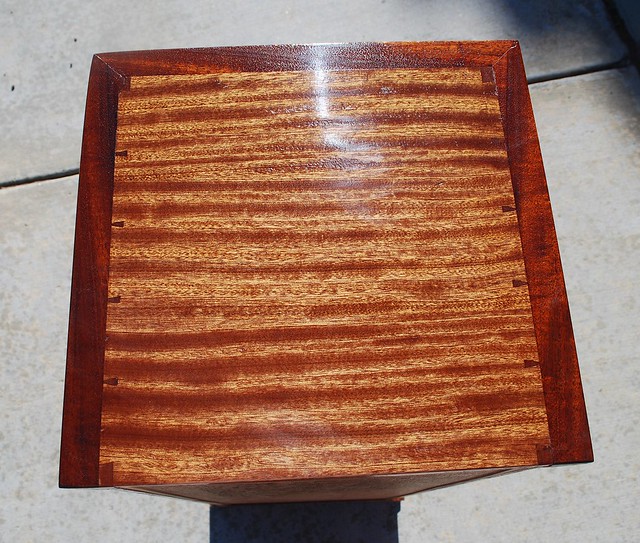
    This is going to be a simple hand tool build; dovetailed carcass, through, wedged M&T's to join the shelves to the carcass and and some moldings to set off the top and bottom of the box – maybe some simple marquetry images of shoes for the top, so the kids get the hint about what they're supposed to do with their shoes.


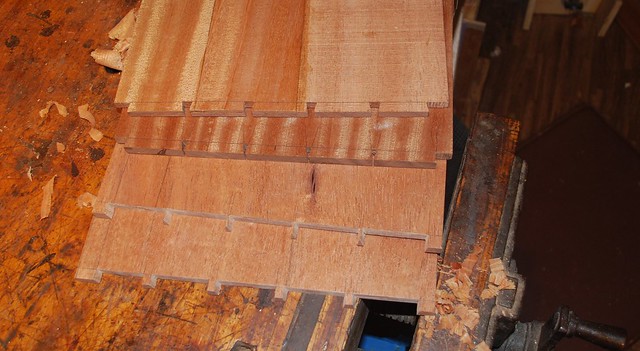
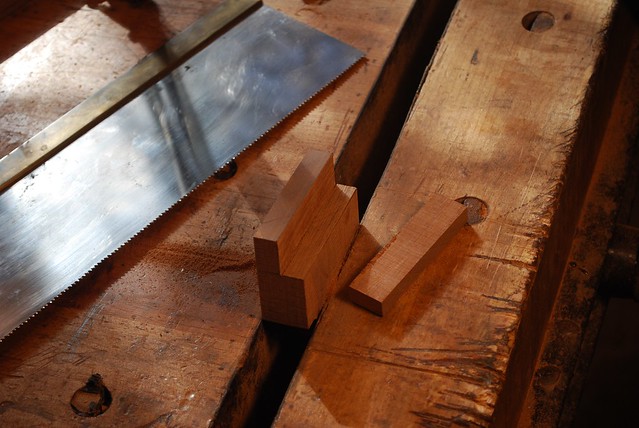
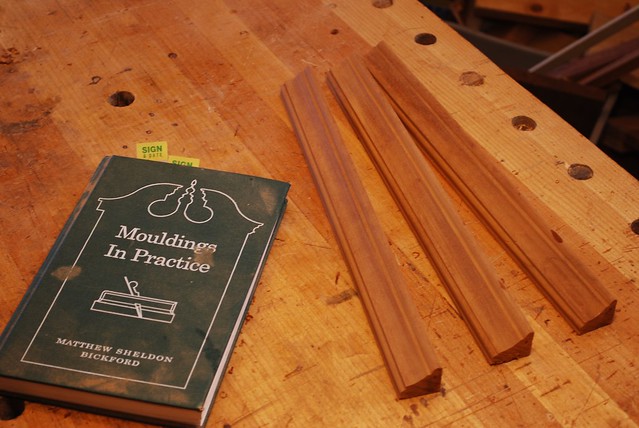
    Since I'm using scraps, I'm going to have to re-saw the glue up a bunch of small boards. Here are the pieces for some of the vertical shelves.


    2 by Mike Allen, on Flickr


    3 by Mike Allen, on Flickr


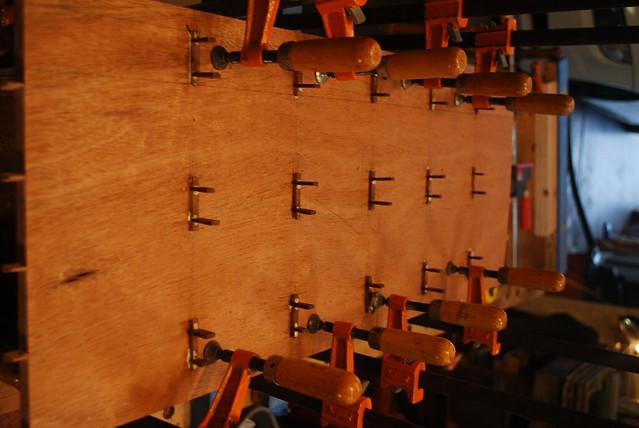
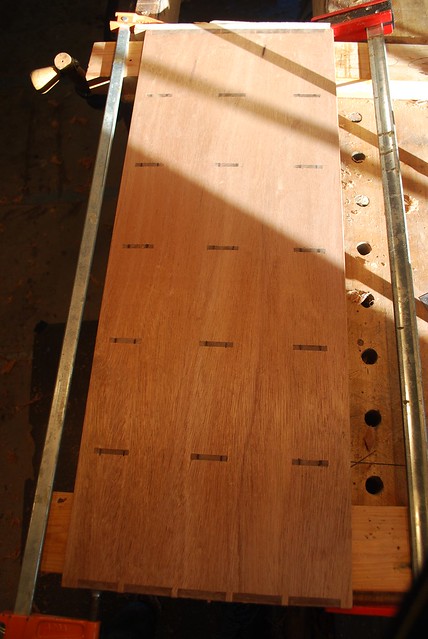
    This is a simple clamping table I built for gluing up panels – just plywood and aluminum from the Borg. It works well, particular for thin panels like this that need to be clamped down to avoid buckling during clamping for the glue up.

    4 by Mike Allen, on Flickr


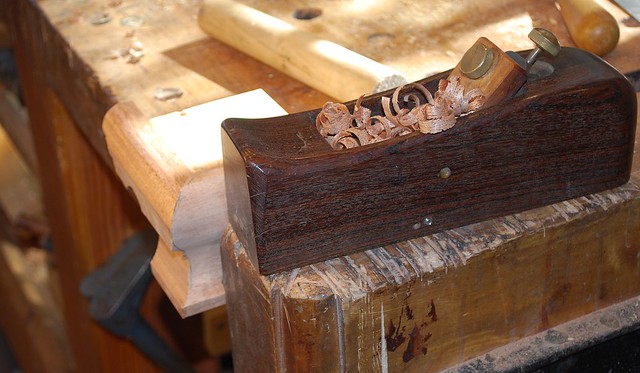
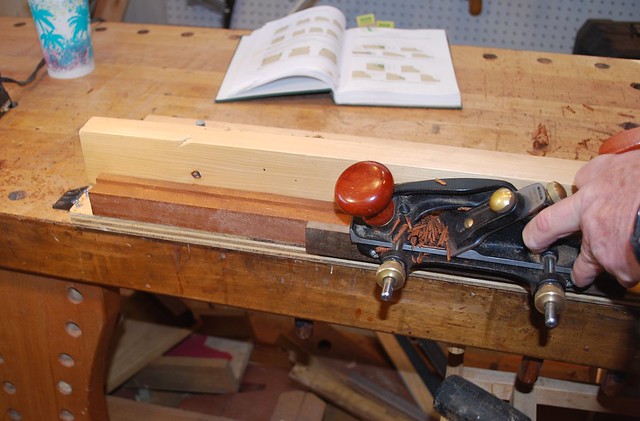
    I'm using a couple different types of mahogany scraps. Some of it is African mahogany with reversing grain that has a tendency to tear out. My Steve Voigt Jack plane is one of my favorites and works well for this job.


    5 by Mike Allen, on Flickr


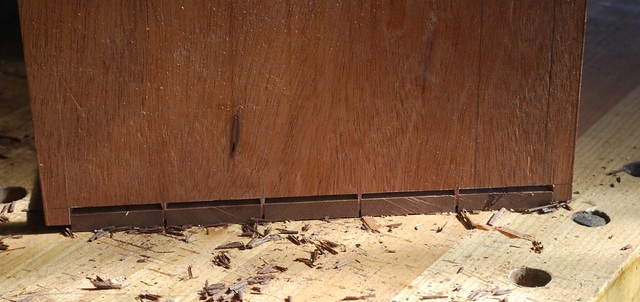
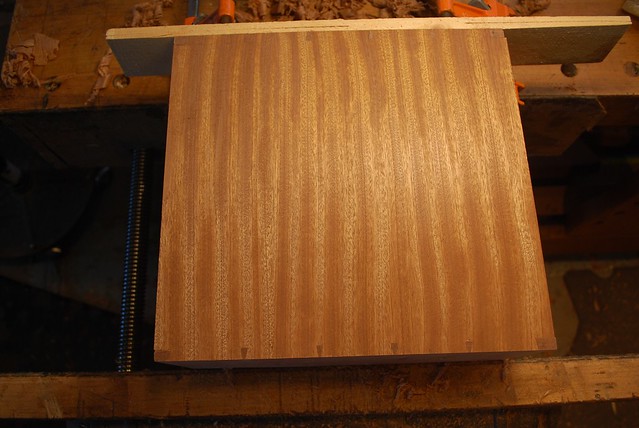
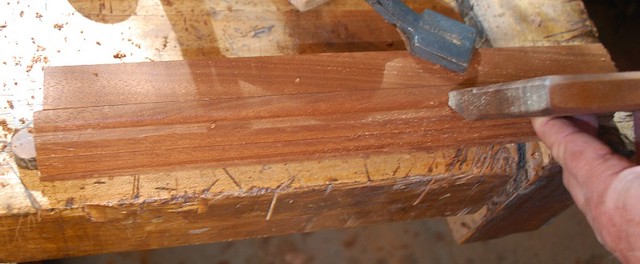
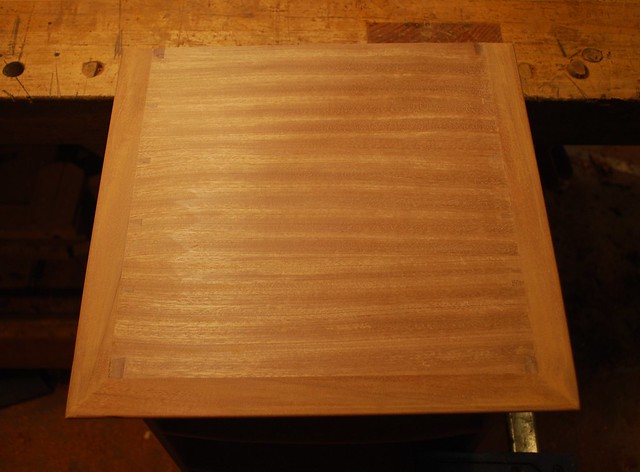
    I think this is a picture of some of the glued up 1/4" thick panels for the internal shelves.


    6 by Mike Allen, on Flickr


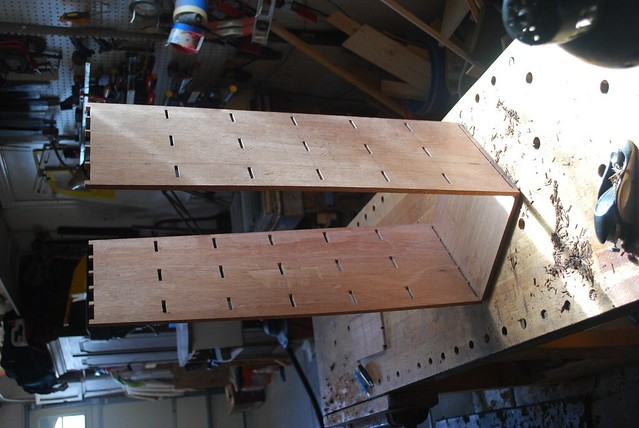
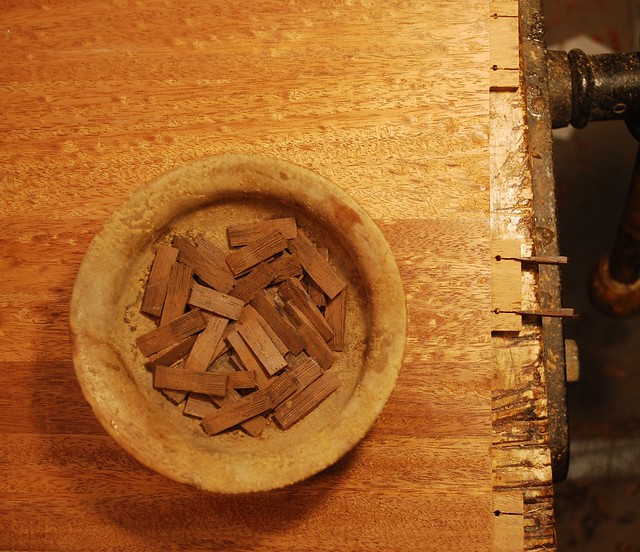
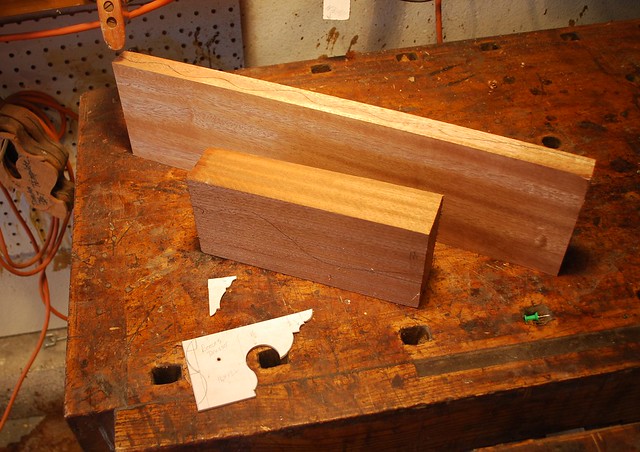
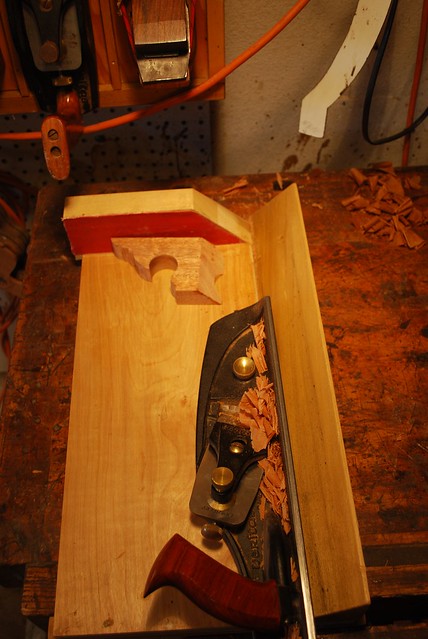
    I was too impatient to let the re-sawn scraps settle before glue up so the finished panels are far from flat. To keep them straight inside the case, I'm going with 3 through M&T joints per shelf. I plan to insert some contrasting wedges during assembly. I'm thinking something dark like ebony - wouldn't Holly look too busy?. I didn't really think about it before laying out the mortises, but looking at it now – that's a lot of exposed joinery which leads me think: A) I better not screw up the fit – gaps will be noticeable and ugly and B) it's probably going to look too busy no matter how well the joints fit.

    7 by Mike Allen, on Flickr


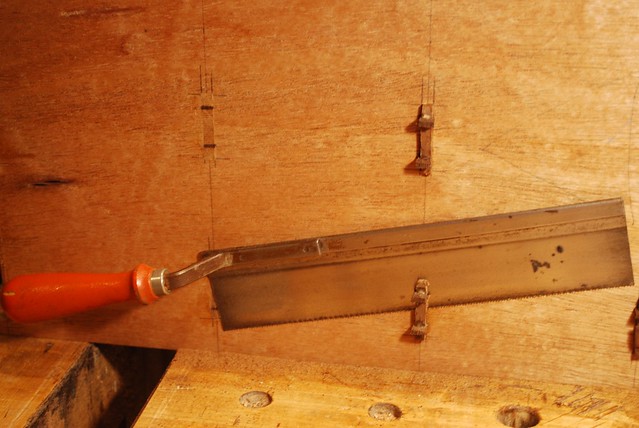
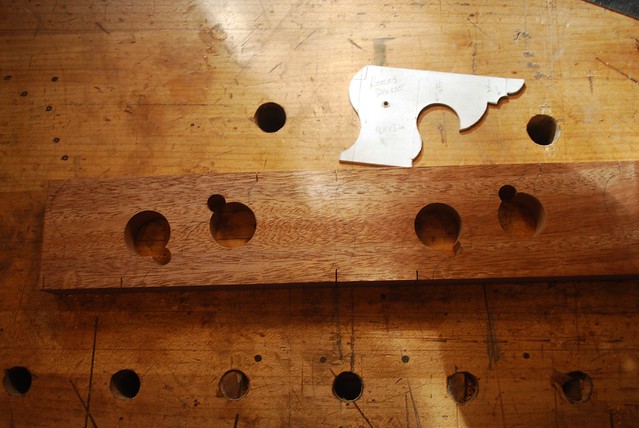
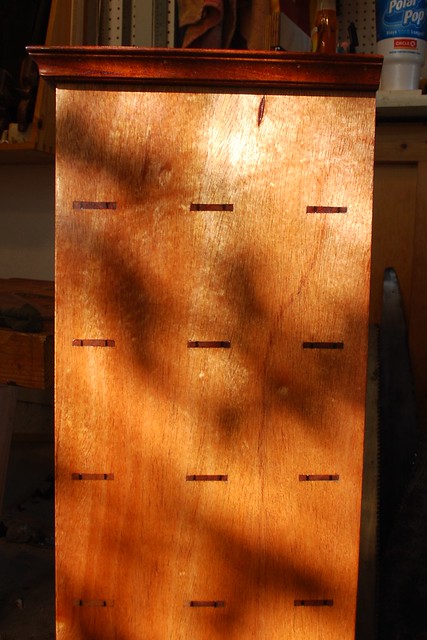
    I laid out the mortises on both the outside and inside of the carcass sides so that I could to chop in from both sides to avoid tear out. Once I got started I realize it probably did need to layout the mortises on the inside of the case because the holes I drilled to remove most of the waste give a pretty good idea of the mortise locations and I cut the walls of the mortise to slope – wider on the inside to help with assembly/glue up.


    One of the things I like about my Rubo bench is how "solid" it feels to chop the mortises directly over the legs -seems like more of the power of the mallet to transferred directly to the chisel/work piece. I use to put scrap underneath the work piece to avoid chopping through into the benchtop, but the scrap made for a less solid feel with the chisel/mallet and now I just try and be a little more careful.


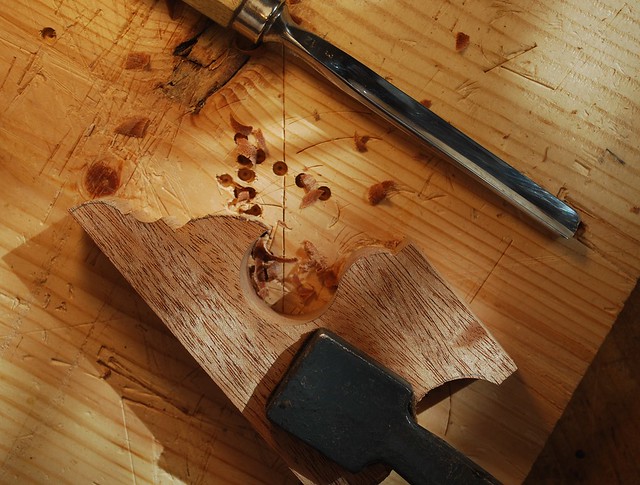
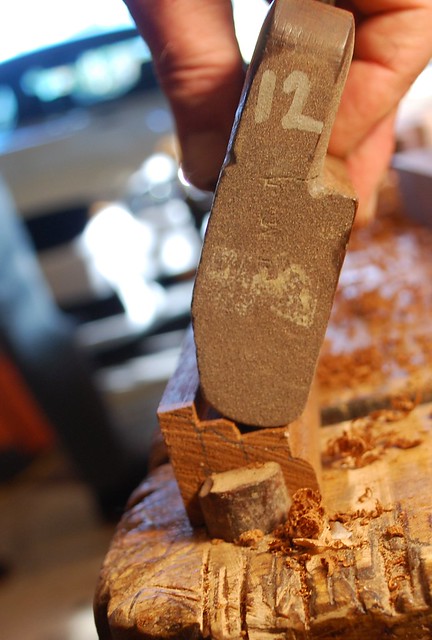
    Here are some finished mortises.

    9 by Mike Allen, on Flickr


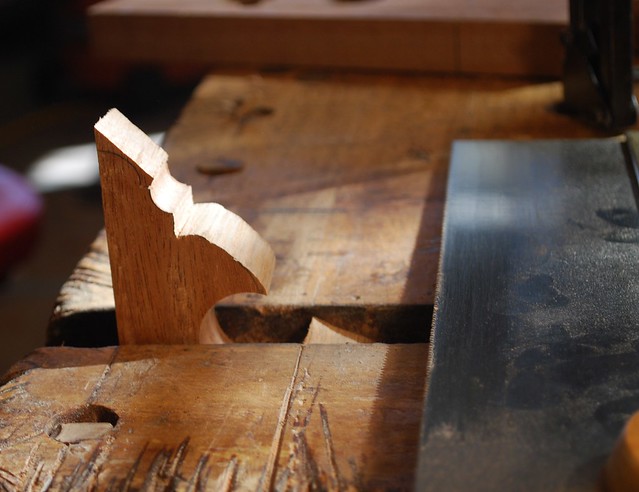
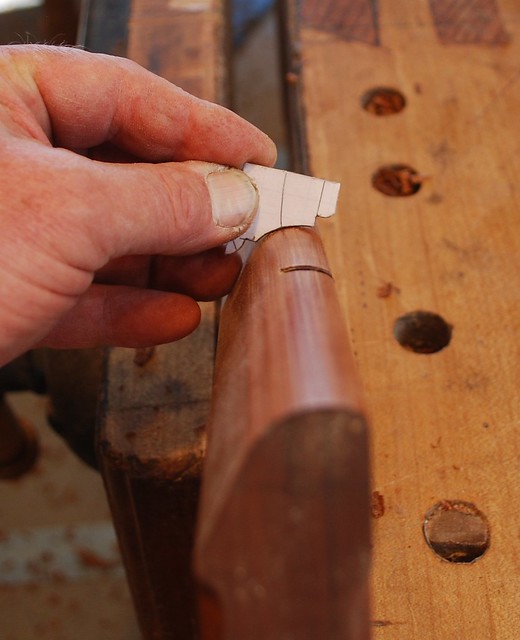
    I made the mortises little narrower than the width of the shelves so I could add a small shoulder on the top/show surface of the shelves in hopes of hiding some of the mistakes I made chopping the mortises. I tried using a rabbit plane to thin out the mortises but the bearing surface was so small it was easier to just use a paring chisel.

    10 by Mike Allen, on Flickr


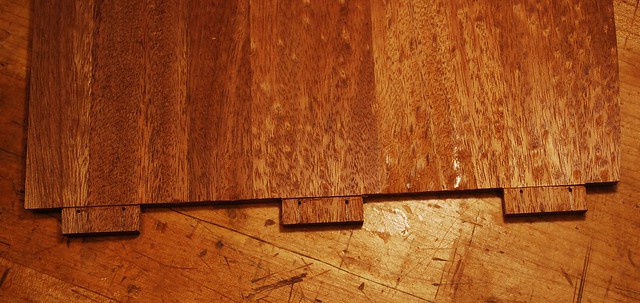
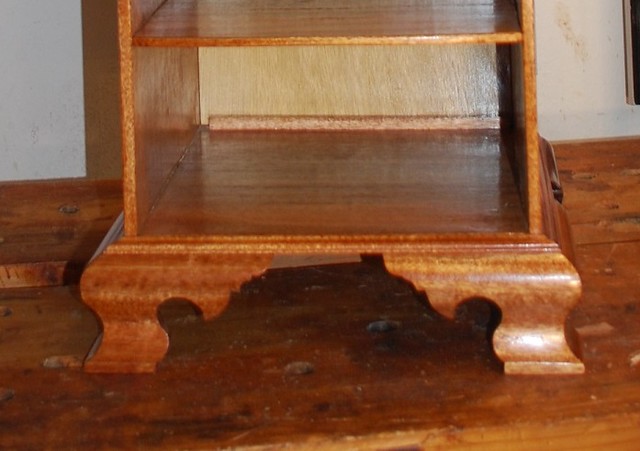
    Here's a picture of a trial fit. The key dimension is the height of the mortise. The width can be a little wider than the tennons as hopefully the wedges will spread the tennons the fit flush inside the mortise.

    11 by Mike Allen, on Flickr


    Thanks for looking, I'll try and post more pictures as the build progresses.


    Cheers, Mike

  2. #2
    Thanks for sharing Mike! I'll be following with interest. Really enjoying the build threads going right now.

    Jeff

  3. #3
    Join Date
    Feb 2011
    Location
    Carlsbad, CA
    Posts
    2,230
    Blog Entries
    2
    Shoe Rack Part 2

    As you may recall, the genesis of this project was the shoes left by the front door when our Boys are home and entertaining their friends. I’d be lying If I didn’t say Sherrie and I consider it a blessing that our Boys have so many friends. They definitely bring a sense of life and energy to the house that’s missing when they’re not here. That said, they still need to put their shoes away so I don’t trip over them when leaving the house at 0 dark hundred.

    1 (2) by Mike Allen, on Flickr


    Here are the dovetails that attach the top and bottom of the carcass to the sides. I normally don’t do a “test fit” of dovetails before the glue up. However, lately I’ve been sawing the tolerances a little too tight which is led to some embarrassing splitting of carcass elements after glue up so here’s a test fit.
    1 by Mike Allen, on Flickr


    2 by Mike Allen, on Flickr

    3 by Mike Allen, on Flickr

    I need to assemble the through, wedged M&T joints that join the horizontal shelves to the carcass sides first, before gluing up dovetail for the carcass top and bottom. There is probably a better way to do this that’s less chaotic but I can’t figure out right now.Before assembly I drill holes and saw slots in mortises and make a bunch of wedges that will be glued in after assembly.

    4 by Mike Allen, on Flickr

    5 by Mike Allen, on Flickr

    Here’s the assembly of carcass sides and horizontal shelves with wedges glued up and using flush cut saw to trim the excess. Shortly thereafter I glued up the dovetails for the carcass top and bottom.

    6 by Mike Allen, on Flickr

    7 by Mike Allen, on Flickr

    9 by Mike Allen, on Flickr

  4. #4
    Join Date
    Feb 2011
    Location
    Carlsbad, CA
    Posts
    2,230
    Blog Entries
    2
    Here is the top of the carcass cleaned up. I use my twin screw face vice with a backing board routinely for this operation.

    10 by Mike Allen, on Flickr


    Next will be the ogee bracket feet and the trim molding. This is the first time I’ve been able to reuse a bracket foot template from a previous project – hallelujah apparently these templates do have a practical application beyond the initial project!

    11 by Mike Allen, on Flickr


    I use forstner bits on the drill press to create some of the principal arcs in the bracket feet.

    12 by Mike Allen, on Flickr


    After drilling out the primary arcs, a coping saw issues for the remaining roughed curves. Again a 1 Ό” diameter Forstner bit establishes the concave portion of the outer cyma curve for the bracket feet prior to assembly.


    13 by Mike Allen, on Flickr

    I use hand saws to establish the vertical and horizontal fillets on the show profile of the bracket feet. After that gouges used cross grain refine the principal curves.

    15 by Mike Allen, on Flickr

    16 by Mike Allen, on Flickr


    Once the primary elements of the bracket feet profile are established, I saw the 45° miter for the 2 front feet. Many thanks to our fellow Neander Phil Mueller who graciously provided my first miter box and taught me how to use it – thanks Phil!

    17 by Mike Allen, on Flickr

    Here is shop built miter shooting board for cleaning up bracket foot minors prior to assembly. The Lee Valley shooting plane is one of my most extravagant tool purchases, unlike many of my other extravagant tool purchases, this is one I don’t regret at all as I use it all the time for one most fundamental tasks in joinery, getting square edges.

    18 by Mike Allen, on Flickr

  5. #5
    Join Date
    Feb 2011
    Location
    Carlsbad, CA
    Posts
    2,230
    Blog Entries
    2
    The bracket feet that adjoined the back of the carcass are squared off.Here is sawing out the rabbit that joins the visible side, rear bracket feet to the not visible back supporting foot.

    19 by Mike Allen, on Flickr

    Once the front mitered bracket back are glued up next step is a step is refiing the cyma curved show profile. I used a cove router bit to rough out the concave part and hand planes for the convex curve on the upper part.

    20 by Mike Allen, on Flickr


    Here’s some cleanup with curved scrapers – one of my favorite and most irreplaceable tools. The convex upper curve is shaped with a block plane.

    21 by Mike Allen, on Flickr

    22 by Mike Allen, on Flickr


    Here are the finished bracket feet and attaching the molding that transitions the feet to the carcass.

    23 by Mike Allen, on Flickr


    24 by Mike Allen, on Flickr

    25 by Mike Allen, on Flickr

    Pretty much all that’s left is the cornice molding for the top of the carcass, veneering some mahogany to plywood for the carcass back and if I’m feeling really ambitious maybe some kind of “shoe” marquetry I’ll add to the top.

    Thanks for looking, cheers,

    Mike

  6. #6
    Join Date
    Apr 2010
    Location
    Tokyo, Japan
    Posts
    1,550
    Mike:

    Beautiful work. I have never seen a shoebox in that style before.

    You may have already made provision, but don't forget to provide ventilation to prevent mold and mildew from developing on wet shoes. A constant problem here in Japan where every house has at least onee built-in shoebox.

    Stan

  7. #7
    Join Date
    Jun 2013
    Location
    Neither here nor there
    Posts
    3,840
    Blog Entries
    6
    Very nice work, and I love the feet. Thanks for taking time to document everything.

  8. #8
    Join Date
    Feb 2011
    Location
    Carlsbad, CA
    Posts
    2,230
    Blog Entries
    2
    Quote Originally Posted by Stanley Covington View Post
    Mike:

    Beautiful work. I have never seen a shoebox in that style before.

    You may have already made provision, but don't forget to provide ventilation to prevent mold and mildew from developing on wet shoes. A constant problem here in Japan where every house has at least onee built-in shoebox.

    Stan

    Stan I've made a couple of these shoe racks before and they're typically horizontal rectangles – kind of a more long/low form.


    Our entryway doesn't have space for that kind of design. This box is intended to go along a vertical column in our entryway – I think might be visible in the first picture. Really it's more just an excuse to use up some mahogany scraps that have accumulated over time.


    One thing I've noticed about the shoe boxes/racks I've made before is they always get used somewhere and filled up almost immediately – we've got a couple in the closets, the shop etc. We somehow seem to have waaaay more shoes than any 4 people could reasonably need (the LOML definitely skews the average!).

  9. #9
    Join Date
    Jun 2017
    Location
    Raleigh, NC
    Posts
    210
    Wonderful work Mike! One of the next projects on my list is shoe storage in the entrance area. I was thinking of just using corner shelving but your cabinet looks so nice...

  10. #10
    Join Date
    Feb 2011
    Location
    Carlsbad, CA
    Posts
    2,230
    Blog Entries
    2
    This is last part of the build for a small shoe rack that goes by our front door so that hopefully our Boys and their seemingly endless army of friends won’t leave there shoes on the floor so I trip over them.

    I’m adding this last installment of the build to the original thread as an experiment to see if my fellow Creekers prefer to have subsequent stages of a build project added onto the original thread or started as a new post? Personally, I sometimes wonder if I miss new content added to the original thread because I mistakenly thought I’ve already seen that – I would really appreciate you letting me know which you prefer?

    All that’s really left is cornice molding and finishing. “Shooting” my own moldings is something I have to confess has really grown on me over time. Initially the challenges associated with acquiring and correctly setting up H&R’s, workholding of narrow molding stock and my complete inability to visualize shapes in 3 dimensions, made shooting my own moldings more trouble than it was worth – if I had router bit that would work that was way for me to go. Over time I’ve worked through some of the fundamental problems and now I really enjoy being able to complete larger, more complex moldings with hand tools that I would never be otherwise able to make with a router bit.


    The following description of these hand tool moldings might be a little too “inside baseball” for those not interested in making their own moldings. With that as disclaimer, I’m going to error in favor of those who might be interested, to share what works for me (not that I am an expert by any stretch of the imagination!). I’ve learned that apparently a series of accurately position/sized rabbits is a first step in making your own moldings. I 100% rely on Matt Bickford’s Book (not only great instruction but also tons of sample profiles to use). I don’t own a table saw, but moldings is a place where a table saw and dado head would save a ton of time.

    First step is to create a cardboard template of the molding profile and draw in the outline on both ends of the stock. Probably should’ve mentioned first that straight grain stock, with grain moving in the direction you’re going to plane is probably more important with moldings and any other furniture components.


    1 (2) by Mike Allen, on Flickr

    I think the basic idea is to plow rabbits that terminate at the sharp angles of the profile and also in the middle of convex curves. Work holding can also be a headache. I built this “sticking board” with an adjustable fence - adjusted so fence on rabbit plane runs on the stock, rather than bench, shooting board etc.

    The shooting board can be clamped between bench dogs. I use a Lee Valley rabbit plane to plow the needed rabbits working from the top the profile to the bottom – ensures you have an intact reference surface for the fence to run against. The pros don’t bother with a fenced rabbit plane. Instead they use a marking gauge to establish a line and then carefully slide the corner of their unfenced rabbit plane into the marking gauge line and go from there. That’s way over my head.

    2 by Mike Allen, on Flickr

    Once the rabbit is established here is using a small hollow plane (as I think number 6) to create the first curved profile.

    3 by Mike Allen, on Flickr

    Using the molding template to pick the hollowing plane with the appropriate curve, and using a plane to begin establishing the Cove that’s a major feature of this molding.

    4 by Mike Allen, on Flickr

    .
    5 by Mike Allen, on Flickr


    Here is using a marking gauge and paring chisel to create a tiny half round that’s really too small for any molding plane.

    6 by Mike Allen, on Flickr


    8 by Mike Allen, on Flickr

    Some pics of the completed moldings.

    9 by Mike Allen, on Flickr

    10 by Mike Allen, on Flickr


    11 by Mike Allen, on Flickr

    Here they are installed – I kind of like the look of the dovetailed carcass surrounded by the moldings.

    12 by Mike Allen, on Flickr


    Here is the finished project in the white.

    13 by Mike Allen, on Flickr

    14 by Mike Allen, on Flickr

    Finish is Watco Oil/varnish, followed by polyurethane and paste wax. I generally prefer shellac but figured this project might be in for some rough treatment. A couple pics of the completed project.

    15 by Mike Allen, on Flickr

    16 by Mike Allen, on Flickr

  11. #11
    Join Date
    Feb 2011
    Location
    Carlsbad, CA
    Posts
    2,230
    Blog Entries
    2
    17 by Mike Allen, on Flickr


    18 by Mike Allen, on Flickr

    19 by Mike Allen, on Flickr


    20 by Mike Allen, on Flickr

    Thanks for looking- All the best,

    Mike

  12. #12
    Join Date
    Feb 2014
    Location
    Rural, West Central Minn
    Posts
    218
    Beautiful work Mike, I can't believe all those shelf slots you cut on the sides by hand. The top looks spectacular, great job! I vote to keep all the project post together, for me it's easier to follow.
    Chet

  13. #13
    Join Date
    Sep 2007
    Location
    Longview WA
    Posts
    27,441
    Blog Entries
    1
    Very nice, will six shelves be enough?

    jtk
    "A pessimist sees the difficulty in every opportunity; an optimist sees the opportunity in every difficulty."
    - Sir Winston Churchill (1874-1965)

  14. #14
    Join Date
    Aug 2013
    Location
    Princeton, NJ
    Posts
    7,295
    Blog Entries
    7
    Hehe! This is awesome Mike!
    Bumbling forward into the unknown.

  15. #15
    Lovely piece ,and the contrast with prosaic goods is interesting ....even entertaining. I'm thinking the top needs a pair of bronzed shoes.

Posting Permissions

  • You may not post new threads
  • You may not post replies
  • You may not post attachments
  • You may not edit your posts
  •