Page 1 of 3 123 LastLast
Results 1 to 15 of 31

Thread: Heron Jewelry Box Build

  1. #1
    Join Date
    Sep 2008
    Location
    N. Idaho
    Posts
    1,621

    Heron Jewelry Box Build

    Hello all,

    For the past several years, I've been exploring marquetry with shop cut veneers. A project that has been on my bucket list has been to make a jewelry box for my mom, who's totem animal is the great blue heron. Life and work and kids and years go by, and recently it became time to just make sure it got done.

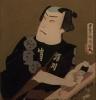
    The first step in my process is to design the top. One of the reasons I really enjoy marquetry is because it has to be quite restrained in both composition, level of detail and (especially) palette. In other words, I don't think just any design can be executed in marquetry successfully. Then again there is some work that is the exception to all rules:

    Screen Shot 2018-01-05 at 10.02.02 AM.jpg

    http://www.staffordshiremarquetry.or...john-jeggo.php

    Now that we've bowed to the master, we can humbly proceed...
    "You can observe a lot just by watching."
    --Yogi Berra

  2. #2
    Join Date
    Sep 2008
    Location
    N. Idaho
    Posts
    1,621
    I designed the top for this piece using a sketching program on an ipad. A similar approach can be taken with any computer sketching program, especially one that handles 'layers'. I started by finding a suitable image as the base layer and then tracing the outline and identifying areas with similar tones. In other words, the process is a bit like reverse engineering a paint-by-numbers.

    For the background of this piece, I envisioned a sunburst in cherry that evoked a sunset over water that was not purely representational. Here's what I came up with in the end while on family vacation in July:

    unnamed.jpg
    Note, the heron and background are separate layers that can be turned on an off, and both sit above a layer with the original heron image.
    "You can observe a lot just by watching."
    --Yogi Berra

  3. #3
    For the background of this piece, I envisioned a sunburst in cherry that evoked a sunset over water

    Some dog gone good evoking. In my initial long look I tried to analyze what was making the thing work so well. It's easier to notice there is something subliminal going on than it is to figure out WHAT. But one thing I found was that the light rays mimic the silkyness and striping of the heron's feathers. And of course the design is just .....inHERONtly good.

  4. #4
    Join Date
    Sep 2008
    Location
    N. Idaho
    Posts
    1,621
    Thanks Mel for both the kind words and for being a gentleman who appreciates a good pun!

    The exterior box is from a plank of cherry that was one of 4 or 5 I bought while a grad student in central New York. The planks were the very first "real" boards I bought for woodworking and have been hauling them around literally for 20 years. My folks helped move them a couple times and stored them for a couple years while I was working one job, so it has been really fun to pull this wood out of the stash for this project. I cut some of the same cherry for veneer to make the central sunburst.

    IMG_2311.jpg
    Nothing too fancy here; plowed grooves for the top and bottom panel with a Record 043

    IMG_2312.jpgIMG_2321.jpg
    and saw and cut the dovetails.

    Another fun element is the bottom panel, which was a tree in the backyard of the house we lived in prior to this house. There was a mountain ash that had to come down, and I hauled a small log around for only a half decade this time... Here is the panel during a dry fit with the sides. This was the first project where I really started using a LV shooting plane and am now not sure how I lived without it. About 50% of the work was also done on the (somewhat oversized) shooting board I use in my leg vise.

    IMG_2355.jpg

    And a cameo by a second set of sides and bottom that I did at the same time over Thanksgiving. These parts will sit until I've found inspiration to do another top panel and trays, etc. Which could be quite a while...

    IMG_2356.jpg

    My phone has been giving me fits and isn't talking well with my computer, so i'll stop there for now. Thanks,
    Chris
    Last edited by Christopher Charles; 01-06-2018 at 2:20 AM.
    "You can observe a lot just by watching."
    --Yogi Berra

  5. #5
    Join Date
    Aug 2013
    Location
    Princeton, NJ
    Posts
    7,294
    Blog Entries
    7
    Nice work CC!
    Bumbling forward into the unknown.

  6. #6
    Join Date
    Feb 2011
    Location
    Carlsbad, CA
    Posts
    2,230
    Blog Entries
    2
    Beautifully done Chris!


    I love the book matched, glued up panels you obviously carefully chose to optimally display the wood you selected, and also the tastefully designed and well executed half blind dovetails – very nice!


    I really look forward to seeing the marquetry progress. IMHO, your insights into the kind of images that work for marquetry are spot on. I know I personally wasted many hours trying to execute a marquetry image that was doomed to failure from the very beginning based on a fundamentally flawed design.


    With regard to design, my impression is that you not only created an original design but also somehow use some kind of newfangled "computer sketching program" to create your original design electronically? Who knew that was even a thing? Chris my friend, your ability as both an artist and a craftsman is in my experience a rare combination. I can't wait to see the rest of the build.


    Thanks for sharing the pictures!


    Best regards, Mike

  7. #7
    Join Date
    Sep 2008
    Location
    N. Idaho
    Posts
    1,621
    Mike and Brian,

    Many thanks for the kind words. Mike, you are correct about the computer program. I'll post more soon, but classes start tomorrow...

    Best,
    Chris
    "You can observe a lot just by watching."
    --Yogi Berra

  8. #8
    Join Date
    Aug 2013
    Location
    Princeton, NJ
    Posts
    7,294
    Blog Entries
    7
    Cleared out my inbox, so please resend your message when you have a chance.
    Bumbling forward into the unknown.

  9. #9
    Wow, that is some amazing marquetry. You have real artistic talent.

    Mike
    Go into the world and do well. But more importantly, go into the world and do good.

  10. #10
    Join Date
    Sep 2008
    Location
    N. Idaho
    Posts
    1,621
    Thanks Mike, but be clear, the sparrow is definitely not mine!
    "You can observe a lot just by watching."
    --Yogi Berra

  11. #11
    Join Date
    Sep 2008
    Location
    N. Idaho
    Posts
    1,621
    Hello again,

    Here's a couple more layers from the design, showing the first version of the full background and the layer with the heron tracing over the original photo (which I will admit I found using Google images but have lost track of the original photographer. My gratitude and apologies to them!).

    heron background.jpg
    heron forground.jpg
    For the background, you can see that I simply drew a circle and straight lines.

    For the heron, I traced areas of similar tone, and then just filled with a tone that was near the original so I could keep track when selecting individual pieces of wood. One trick was to limit the number of tones by not trying to match perfectly, but by paying attention to the tones and contrast with adjoining pieces. I used red lines to see the borders of pieces more clearly.

    I've done a bit of design with paper this way, but the ability to move layers, and especially, the ability to resize components and the entire final image using a drawing program is a huge boon. And is not difficult to learn on an ipad or similar.
    "You can observe a lot just by watching."
    --Yogi Berra

  12. #12
    Join Date
    Sep 2008
    Location
    N. Idaho
    Posts
    1,621
    There are only a couple of tricks that make double-bevel marquetry seem like magic. The big trick is to lay two pieces on top of each other and cut them at the same time and on a slight angle (giving them both a matching 'double-bevel' of 3-7 degrees). The trick is the angle of the bevel is adjusted to match the width of the saw kerf once the top piece is lowered by the exact thickness of the bottom piece, thereby filling the hole in the bottom piece.

    The foreground can be on top, dropping into the background, or vice versa. I build up by cutting with the foreground on top, and working from the outside to the interior. Here's a video with the concept, but with the background on top.

    https://www.youtube.com/watch?v=8iubcFj1CLQ

    Thus, the first task was to build up the the background sunburst. The outside ring is curly birch in the lower half and curly maple in the upper. The interior is cherry from the same boards as the sides. Happily, I knew the head of the heron would cover the center of the star burst, so didn't have to have all the points meet perfectly in the center.

    The LV shooting plane was a delight here, but the veneer is only ~2 mm, so any plane would have worked well. The protractor looks fancy, but was simply for estimating angles from the design onto a plywood template that I could use to get the approximate angles. In other words, no angles were precisely measured...

    This is also where I reveal my fetish for blue tape!


    IMG_2324.jpg
    IMG_2361.jpg
    IMG_2325.jpgIMG_2323.jpg

    I edge glued each ring together with liquid hide glue, 'clamping' with blue tape. This works well because the veneer is thick enough. Once dry, the rings are laid over each other and taped together on the backside.

    IMG_2362.jpg

    The packet is then flipped, the circle traced on the cherry and the circle cut. Once that was complete, I started the heron proper, which I'll post soon.

    Best,
    Chris
    Attached Images Attached Images
    "You can observe a lot just by watching."
    --Yogi Berra

  13. #13
    Join Date
    Sep 2008
    Location
    N. Idaho
    Posts
    1,621
    Not sure how that last picture got in there, but it did!
    "You can observe a lot just by watching."
    --Yogi Berra

  14. #14
    Join Date
    Sep 2007
    Location
    Longview WA
    Posts
    27,437
    Blog Entries
    1
    Interesting work Chris, looking forward to more.

    jtk
    "A pessimist sees the difficulty in every opportunity; an optimist sees the opportunity in every difficulty."
    - Sir Winston Churchill (1874-1965)

  15. #15
    Join Date
    Aug 2010
    Location
    USA
    Posts
    5,582
    Super interesting! Thanks for posting the detailed description and pictures.

    It seems that this is where practice and skill really payoff. ---> "The trick is the angle of the bevel is adjusted to match the width of the saw kerf once the top piece is lowered by the exact thickness of the bottom piece, thereby filling the hole in the bottom piece"

Posting Permissions

  • You may not post new threads
  • You may not post replies
  • You may not post attachments
  • You may not edit your posts
  •