
-
Weather is to be nice around here, the next few days.....may motor over and pick up a few planks of Ash, today....cashed in 17 pounds of cans, have a little extra cash in me pocket..depends on what the Boss decides to do....
-
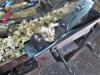
Before they were cut into 5' long planks, there were three 4/4 x 6" x 10' quarter sawn Ash boards...10' was a bit too long for the van...
new planks.jpg
So here is the 6 planks. $12.35 worth of Ash...
grain.jpg
About...15bf? Not too bad?
Letting these warm up to the house...been inside a cold barn for a while. I set up a machine...
router.jpg
With a small cove bit...
router bit.jpg
So I could add a small detail around the top's edge..
cove details.jpg
Then sanded and smooth planed the top, before adding another coat of shellac. I also added shellac to the last side..
last side.jpg
Waiting on this to dry, and a pair of strong backs to show up....as this can go upstairs, so I can have a bit more room IN the shop..
busy bench.jpg
Somewhere, there IS a bench under this.....maybe?
Stay tuned....Bookcase build may start in tomorrow...I hope.
-
Well, I suppose I should head to the shop....have a few rip cuts to do.....Need to do a couple glue-ups.
Film @2300 hrs,stay tuned
-
Hauled one plank to the shop. Cut it for length to match the side pieces. Left over section will be for other sections...
Ripped the plank down the middle....bandsaw wasn't tracking quite right, had to re cut a bit.....then slipped one piece into the leg vise
IMG_2921 (640x480).jpg
And ran the jointer along both edges....once that was done, I needed to joint the edges on the next piece..
IMG_2922 (640x480).jpg
Once that wide piece was jointed, did a test fit
IMG_2923 (640x480).jpg
Until things were nice and even....then spread some glue around..
IMG_2924 (640x480).jpg
Add a few clamps. And set this aside
IMG_2926 (640x480).jpg
Got the skinny add-on jointed, then worked on this wider board. Made a little jig to hold the far end a little better. One piece for the board to rest on, the second to keep it there.
IMG_2927 (640x480).jpg
Again, edges jointed, spread some glue, add some clamps. Will let this sit for a while
Need to mark out for shelf spacings....and see about how wide to make the shelves, and a top. Need that done, so I can figure out the door.
Nice Cardio Workout, this morning.....time for lunch, yet?
Stay tuned....
-
Meandered back down for a while...laid out for the three shelves....since that is what the spacing came out as..
IMG_2929 (640x480).jpg
And cut three blanks for the shelves. They will need an add-on strip, no biggie. Ploughing a sliding dovetail may get a bit rough..
IMG_2928 (640x480).jpg
Yep, there would have to be a knot, right there. Dried glue will get scraped down..
IMG_2930 (640x480).jpg
Happen to have a decent enough tool for that. Not sure IF I will do a glue up for the shelves two parts....may just slide each into place and call it good.
Maybe tomorrow, I can get something done....stay tuned
-
Thread IS getting a bit long, isn't it.....almost like a work bench thread? Anyway, got a bit of work done....before the chest said it was quitting time....
IMG_2932 (640x480).jpg
Trying the S4S the two sides, edges didn't quite match each other....scraped them flat...
IMG_2933 (640x480).jpg
There was work for a few other planes, too..
IMG_2936 (640x480).jpg
Trying to get a straighter edge. Goal was to get both side pieces close to the same size
IMG_2941 (640x480).jpg
Once one was straight, and square, I could trim the other to match....had a bit to trim..
IMG_2944 (640x480).jpg
Then work on the face grain a bit..Had the shelf locations laid out...needed to cut a sliding dovetail socket...
IMG_2937 (640x480).jpg
Same as the shelves in the lower cabinet. Just not as wide a cut. Got all of the sockets cut..
IMG_2940 (640x480).jpg
On one panel, then set up and repeated for the other. Nice part about the fence
IMG_2946 (640x480).jpg
I can set up to go in either direction. Visegrip finger clamps work nicely enough.
Next episode? Well, I have to do a rebate, and set up the router a bit differently....stay tuned...
-
Ok, once the sockets were all done, I can set up for pins..
IMG_2947 (640x480).jpg
Involves a different type of fence. Trying to cut with just 1/2 of the bit...
IMG_2948 (640x480).jpg
Might take a few tries, to get it set. Ok, set this mess aside, for now. Need a rebate milled, for a 1/4" plywood back..
IMG_2949 (640x480).jpg
Involves this plane, and a #17 straight cutter.
IMG_2950 (640x480).jpg
To make a couple of these things. I had a scrap of 1/4" plywood handy, to double check the depth
IMG_2951 (640x480).jpg
Got both rebates done...there will be a lip, to cover the edges of the plywood. Needed these milled, so I can mill a filler for the width of the shelves.
Made a big mess on the floor...several times
IMG_2953 (640x480).jpg
Finally swept the place, and called it a day....need to reset things, and cut some pins on the edges of the shelves. Maybe later, eh?
Stay tuned...
-
Today, being Monday...shop is normally closed for the day......decided to test out a set-up, anyway..
IMG_2954 (640x480).jpg
Wanted a stable platform to mill the pins...as the router does have a wide base
IMG_2957 (640x480).jpg
Hmm...one pass along the outside, switch the boards around to expose the other side of the pin..
IMG_2955 (640x480).jpg
Then a small file to clean things up..
IMG_2956 (640x480).jpg
Had errands to run,,,let this sit for a while....might feel "lucky" and finish milling the pins, today...maybe.
Stay tuned.. (file is a Vixen..)
-
Got all the pins milled....then it was "Hammer-time!"
back view.jpg
Still need to make the 2" wide filler strips. Main shelves were driven flush with the front..
installed.jpg
Not too bad...for a Monday?
Maybe tomorrow, I can get a little bit more done? Stay tuned....
-
Have a plank picked out, need to cut it to size, and make a glue up out of it......Bookcase does need a top shelf, after all.
Then work on making a panel for the raised panel door. Waiting to see what type ( if any) of face frame to use.
I can do a few glue ups today....after that, we'll see.
Stay tuned....
-
Ok....hopefully not boring anyone...
Hauled a plank to the shop this morning. Squared one end, then marked out to 26" and made a crosscut.....there was a huge knot out on the end,,,beyond the next 26" mark....lopped that off, and laid the two blanks side by side..
IMG_2962 (640x480).jpg
I'll square the ends, after I glue this up.....had a few spots to fix
IMG_2963 (640x480).jpg
Edges were a bit gappy...we have ways...
IMG_2964 (640x480).jpg
I also marked the "show" side..
IMG_2965 (640x480).jpg
And jointed both boards. Bottom one needed the most work....Was finally able to do a glue up..
IMG_2966 (640x480).jpg
All this, BEFORE Lunch? Let this sit a while...maybe after lunch, I can haul more lumber to the shop?
Anyone want to stop by, and help out?
Stay tuned....
-
Catching up - lots of progress. Projects like this take a while. Mine took about a year (I'm pretty slow)
- note: I like the detail you added to the top of the base. That is a nice feature.
-
Going to tack things onto about here....not so far to go to read up on this build. Getting a bit long-winded.
Ripped a few strips of 2" wide plywood....to act as a filler to the back of the shelves..
IMG_2967 (640x480).jpg
Then reset the jig to resaw some Ash at 1-1/2" wide......was almost done...had to stop, and work on the bandsaw. Pulley was loose, blade was dull, case was filled with dust.....got that taken care of....wound up with four pieces to build a face frame with..
IMG_2969 (640x480).jpg
Edges were too wavy, had to set up to joint the edges...
IMG_2970 (640x480).jpg
Long stiles were done, then
IMG_2975 (640x480).jpg
The two shorter rails were done....did some layout, and then cut a few tenons..
IMG_2976 (640x480).jpg
Then chop a few mortises
IMG_2978 (640x480).jpg
Finally, got to the point I could glue and clamp..
IMG_2981 (640x480).jpg
Legs were cramping, got a splinter under a fingernail...glue all over my fingers...I think I'll call it a day....IF you look into the background of the last picture...you will get an idea of how tall this thing is going to be....
Stay tuned
-
Not feeling too well, today.....taking the day off from the woodshop....will try again tomorrow....
-
Dry fit of the face frame to the case....was a bit off.....will need to add a strip along the outside of the stiles. Rip a 1/8" strip, and glue to the edges. Then trim for looks.
Seems to be just enough Ash left to build a raised panel door......that will be after I get the case attached to the base. And out of the shop....need the room.
 Posting Permissions
- You may not post new threads
- You may not post replies
- You may not post attachments
- You may not edit your posts
-
Forum Rules

 [OP]
Contributor
[OP]
Contributor

 Contributor

 Reply With Quote