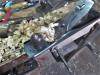
Seriously steven, is there a handrail on the dungeon steps? I can't tell if that black pipe looking thing is the handrail.


 Contributor
Seriously steven, is there a handrail on the dungeon steps? I can't tell if that black pipe looking thing is the handrail.
 [OP]
Contributor
[OP]
Contributor
Yep, look just below that Gas line black pipe.....
Third step from the bottom...unless you are under 5' tall, you had better DUCK! Low bridge....hits me right at ...jaw level. Got a concussion there a few weeks ago.....
Member
Hope your knee feels better soon.
Ever try wipe on poly?
[OP]
Contributor
Yep. May just BLO and see what turns out....hoping for something like this..
front view.jpg
We'll see...
[OP]
Contributor
Grooves have "happened" two pieces of poplar planed for a bottom panel......about 8 clamps used....
IMG_0850 (640x480).jpg
Grooves...didn't go as well as I wanted..too narrow of an iron....changed out to a slightly wider iron. Skates won't close up enough for the #12 cutter to work...will do a clean up later, and see what the problem is...
IMG_0851 (640x480).jpg
Hand planed some Poplar to fit IN the new grooves. Boards were tapered, thicker along one edge than the other..had to bring them back to flat..Millers Falls No.11 worked just fine..
IMG_0855 (640x480).jpg
At least it fits in the groove...one bad thing about a fan in the shop, and thin shavings....
IMG_0853 (640x480).jpg
They blow everywhere...
Clamps?
IMG_0857 (640x480).jpg
Yep, used a few....why is it, whenever I apply glue, I get almost as much on my fingers, as I do on the wood...
IMG_0858 (640x480).jpg
Need to make a filler strip, to support the middle of the panels...
Bench is now filled with this mess.....guess I'll just have to quit for the day...stay tuned...
Last edited by steven c newman; 07-09-2017 at 4:41 PM.
[OP]
Contributor
make a template..
IMG_0864 (640x480).jpg
Set up a saw and a guide..
IMG_0873 (640x480).jpg
Make the rip cut, using the template to set the bevel on the saw..
Going from this..
IMG_0865 (640x480).jpg
To this..
IMG_0874 (640x480).jpg
Need to finish trimming to size. About halfway done.
IMG_0877 (640x480).jpg
Decided against a breadboard edge. There will be a strip along the edge of the lid, to keep books and pencils from sliding off. Lot of Plane work to do....Tuesday. Shop is normally closed on Mondays...
[OP]
Contributor
I usually don't open the shop on Mondays. Too many "bad things" tend to happen.
Tuesday, I can get to the shop.....maybe by late afternoon-ish? May have to haul GrandBRATS back home...
I made a full sized template out of 1/4" plywood. Just marked the angles the side was using. Then lay a board of the same thickness along those lines, and mark a second line. Where the lines cross each other is where I set the bevel gauge to. Then I cut the two pieces of Pine scrap, and check THAT against the side of the case. Then I can use those to set the bevel needed on the saw. Set up a guide fence and do the rip cut. Will still need the plane, but just to joint to line, and smooth the saw marks. Not too bad a day.
Road trip today, came back home with a bit of Walnut.....might be for another project?
Stay tuned.....
[OP]
Contributor
Got bored, just sitting around....ran the jointer palne around tonight..
IMG_0885 (640x480).jpg
Jointed a few edges with the Old No. 0-7. Ran a couple other planes around a bit..
IMG_0886 (640x480).jpg
Block plane for the end grain, No.9 to smooth out the faces on the lid and shelf..
IMG_0882 (640x480).jpg
Shelf looking spiffy, even the bevel
IMG_0883 (640x480).jpg
Got a Book Rest sized, jointed, and glued in place..
IMG_0881 (640x480).jpg
Had to recheck this set up...Murphy being Murphy and all..didn't want the book rest on the underside of the lid.....I looked at the bevel to make sure...yep, for once I got it right.
Had a LOT of these floating around, tonight..
IMG_0884 (640x480).jpg
This one came from that old jointer plane....
[OP]
Contributor
Maybe I should meander back to the shop..have that lid's lip to finish up. Then plane all them dovetails smooth...then see what other kinds of trouble I can get into....
Looking like the "Top Shelf" will get a few screws, and then some square plugs of Walnut to cover the screws.
[OP]
Contributor
Ok, spent a bunch of time in the shop today, almost done when I remembered to turn the fan on....Clamps came off the lid, needed to plane the edge smooth..
IMG_0887 (640x480).jpg
Tried the Millers Falls No.8 for a bit...was doing a decent enough job, but was a tad too narrow, sooo
IMG_0890 (640x480).jpg
Went with a Stanley No.4c.Type 20.....did a little better job, too
IMG_0891 (480x640).jpg
Will just have to do for now....
Set the lid aside for now, had a hole to patch..
IMG_0892 (640x480).jpg
First off, I chopped out a spot in the groove. Made a thicker Poplar panel to fit in the space..
IMG_0896 (480x640).jpg
Glued and nailed at the ends..
IMG_0897 (480x640).jpg
had to adjust the fit before the nails and glue,,we have ways..
IMG_0895 (640x480).jpg
Until it fits.
Next? well..it involves hanging the case in the vise..
IMG_0900 (640x480).jpg
And a couple planes...next episode is coming right up...
[OP]
Contributor
Now, why hang the case in the vise? well I had these to work on
IMG_0902 (640x480).jpg
Getting there...plane is that English No.4c, again. seemed to work nicely on the end grain areas, too
IMG_0899 (640x480).jpg
I had to keep rotating the case to get to 8 parts of the corner dovetails...
IMG_0901 (640x480).jpg
Once they all looked like this, time to "adjust" the stand a bit.
IMG_0903 (640x480).jpg
Hmmm, about like Ohio...high in the middle. Stand was also clamped into the vise, the high spot scrubbed and smooth planed down....once this end would sit flat, I could rotate the stand..
IMG_0904 (640x480).jpg
Mark the high spot, plane that down level. I do not need to do the middle of the stand's top..
IMG_0905 (640x480).jpg
As this will be all you see.
Fans...need to remember to turn them ON..
IMG_0907 (640x480).jpg
Otherwise, I was just dripping all over the floor....Cardio is done for today.
IMG_0908 (640x480).jpg
Igor, clean up in Aisle #1...
Awaiting hinges, and something to apply as a finish....maybe this weekend? Stay tuned, almost done...
Member
Here's the caliper that has served me well for fifteen years, it looks suspiciously similar right down to the Made in Taiwan stamp.
IMG_2800[1].jpg
[OP]
Contributor
yep.....also had a smaller orange one...til it fell apart. Too cheap..er...frugal to buy a good metal one....someday?
Contributor
Hi grade plastic - love it. I have a similar one. Downside is I can't measure very thin shavings with it.Originally Posted by Rick Malakoff

Contributor
Looks good steven. A couple soakings with BLO first, then dry and a few coats of Waterlox for a nice satin finish?
 Posting Permissions

 Reply With Quote