Page 1 of 2 12 LastLast
Results 1 to 15 of 20

Thread: Busy day in the shop

  1. #1
    Join Date
    Jun 2010
    Location
    twomiles from the "peak of Ohio
    Posts
    12,206

    Busy day in the shop

    This afternoon. Swept the steps to the shop, as Igor is on strike (again?) Cleaned the tool well on the bench ( starting to move on it's own?)
    cleaned tool well.JPG
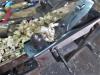
    And, to make it easier the next time around, I added that ramp
    DSCF0007.JPG
    Angle cut at each end, and notched to fit. nailed in place.
    Found an old screwdriver handle, and an old Drum Brake adjuster......got to thinking..
    Spent awhile at the grinder, and beltsander, and had a pint of water on hand...Refined the one curved end into a curved chisel. The other curved end was straightened out and reshaped into a tang..
    chisel.JPG
    Not too hateful. I think I can use this to clean the bottoms out in the mortises I chop. Had the narrow the width down to 1/4", so I can use it more.
    goose neck.JPG
    Bevel is under the curve. Kind of makes it a "Bevel down" tool?

    That piece of metal on the bench?

    Well, I had a few thin boards to plane down, thinner than my normal dogs, so..
    plane stop details.JPG
    Last year, I made this plane stop. Just a wooden dowel as a dog, with a piece of old saw plate attached with a screw. Teeth engage any wood item clamped to it by the end vise.
    plane stop use.JPG
    Works when I have a few of these to do..
    4boards.JPG
    Getting ready for more of these.
    corner joint.JPG
    Now have two such corners done....not too bad a day

  2. #2
    Join Date
    Dec 2016
    Location
    South West Ontario
    Posts
    1,505
    Have you built the carcass already?
    How old is your well used bench?

  3. #3
    Join Date
    Jun 2010
    Location
    twomiles from the "peak of Ohio
    Posts
    12,206
    Making a box to stash more extras from the tool supply....

    Bench I think was built around 2014.....Sept. or Oct that year...

  4. #4
    Join Date
    Dec 2016
    Location
    South West Ontario
    Posts
    1,505
    So its not two years old yet

  5. #5
    Join Date
    Jun 2010
    Location
    twomiles from the "peak of Ohio
    Posts
    12,206
    I'd have to go back and look at the date stamp on the bench project pictures.

    Building a box at the moment. More of a how to for hand cut box joints/finger joints.

    Got the rest of the corners chopped. Laid all four sides out in a line...
    laid out.JPG
    Shows the importance of have a SHARP pencil. Joint closest to the camera was with a no-so-sharp pencil. Test fitted another corner
    long fingers.JPG
    I rather they be a little long, easier to tune than when they are too short.....Board Stretcher is down at the moment, anyway...

    Set this up to plough a few grooves...
    groovy plane.JPG
    Rigged up a way to hold the parts..
    cutting a groove.JPG
    Better view?
    groovy.JPG
    Then test fit, to see how the grooves line up..
    test fit grooves.JPG
    I have one more goove operation to do, before I glue the sides together. Need to mill a narrow groove to help split off the top for a lid. Later, I can mill a groove around the outside of the glued up box to separate the lid.

    Not sure what will be stowed inside this latest box.....depends on how things turn out.

  6. #6
    Join Date
    Jun 2010
    Location
    twomiles from the "peak of Ohio
    Posts
    12,206
    SDC15843.jpg
    Under construction picture of the bench, way back when...
    Just checked...this fall it will be four years old...time flies when you are having fun...

  7. #7
    Join Date
    Jun 2010
    Location
    twomiles from the "peak of Ohio
    Posts
    12,206
    Nothing much got done in the shop today....might sneak down there later, and see what trouble I can get into.....

    Intend to cut two more grooves on the inside of this box project. One for the lid's panel, the other to split the lid off, after the glue up. Maybe...3/4" apart....with the lid's panel groove just below the top edge. After the box is all glued up, I can cut a groove around the outside of the box, and the top/lid can then be removed. In theory....that is. Last time I tried this, I got in a hurry, and didn't use the second groove.....we'll see how it goes this time around.

    That work bench is just that, a WORK Bench, never meant to be a Fine Furniture piece.....it is there to be worked at/on. It was also built to fit a spot in the shop, not the other way around. It also would have to navigate a steep, narrow path just to get in, or out of the Dungeon Shop. Anyone feel like restraining a HEAVY bench sliding on it's top going down a set of steps? Not me.

  8. #8
    Join Date
    Jun 2010
    Location
    twomiles from the "peak of Ohio
    Posts
    12,206
    Ok, spent a bit of time today, milling the grooves into the sides of this box. Had to adjust the hold down jig a bit, as the second line of grooves was a bit close to the jig..

    Got to the point I could cut some plywood to size, and do a dry fit..
    DSCF0001.JPG
    Not sure IF this was the top, or..
    DSCF0002.JPG
    This was the top...had to "open" it back up..
    DSCF0003.JPG
    There are three grooves milled into the sides. One for the top and one for the bottom panels..
    DSCF0004.JPG
    But, what about this third groove? After the box is assembled and glued up, I'll come back with this plane..
    DSCF0006.JPG
    And plane a groove around set just offset from the inside groove. The lid can then be split off. I had to mark where the outside groove will go..
    DSCF0007.JPG
    Now I had to remember NOT to sand those marks off...

    Maybe tomorrow, I can round up some glue, and a forest of clamps, and get this glued up? Stay tuned...

  9. #9
    Join Date
    Jun 2010
    Location
    twomiles from the "peak of Ohio
    Posts
    12,206
    Well, today was Monday....means the shop is usually closed for the day....

    Errands were run, wound up with a set of brass hinges for this box, a latch to keep the lid closed, and I am now sitting here, wearing a 48 hour Heart Monitor. Issues with a few new meds....they are trying to see what happened. For today, at any rate, I will just takes things a bit easy. The Boss had a plant stand she wanted assembled.....had enough trouble doing that little job, more or less said I'll just sit for awhile. I'll get back to the shop, maybe on Tuesday. Mondays are always a bad day in the shop.
    BTW: I also picked up a saw file today, as a 7ppi No.7 Disston could use a little "dental work"....

  10. #10
    Join Date
    Jul 2014
    Location
    Edmond, Oklahoma
    Posts
    1,753
    Steven,

    Glad to see you took it easy. Don't push yourself, take care of the heart.

    Stew

  11. #11
    Join Date
    Jun 2010
    Location
    twomiles from the "peak of Ohio
    Posts
    12,206
    May try a glue-up today.....not much else going on right now...might have gotten 1" of that white stuff last night...sent the rest up towards the northeast.....

  12. #12
    Join Date
    Jun 2010
    Location
    twomiles from the "peak of Ohio
    Posts
    12,206
    Well, glue up is in the clamps right now..
    clamps.JPG
    Takes up most of the bench..
    clamping up.JPG
    That I even had to clean the bench up, before the mayhem could start..
    work spaces.JPG
    And, since this is where 95% of any woodworking gets done....I guess I can take the rest of the day off.

  13. #13
    Join Date
    Jun 2010
    Location
    twomiles from the "peak of Ohio
    Posts
    12,206
    Ok, the second half of today's Follies.....let the box sit in the clamps for maybe 5 hours. Got the box out of the clamps without any undue problems.....set it in the vise, with a helper...
    clamp helper.JPG
    Before the sander trimmed the long finger down, I had to set the fence on this plane..
    45.JPG
    THEN I could sand them fingers flush. Took the box out of the clamps, and used a block plane to round over the outside edges of the lid..
    bottom edges.JPG
    Dog and helper, plus a dog in the end vise. Plane is a Cordovan Stanley 60-1/2. Seemed to work. Then I flipped the box over, and tried the same with the bottom edges.....
    round over time.JPG
    Was almost done...CRACK!!!!, then a piece hit the floor....Grrrrrrr. Picked it back up, seems the panel had snapped out the bottom edge on the short end. More glue, and back into the clamps it went..
    re-clamp.JPG
    But the F style clamps were fighting me. Grabbed the "helper" trimmed it a bit. slid it under the two C clamps, and redid the F clamps. Stomped back up the stairs, and called a night.....cussing the entire way to my chair.

    Will see how it turned out in the morning, IF I feel like it. Get the Heart Monitor off about..noonish......along with a bit of hair. May not be in the mood to fight the thing. Stay tuned...

  14. #14
    Join Date
    Jun 2010
    Location
    twomiles from the "peak of Ohio
    Posts
    12,206
    Repair is done, and cleaned up..Set up the vise to hold the box still, long enough to run the Stanley 45 around..
    DSCF0002.JPG
    Plan was to go along all four sides, offset from the inside groove....
    DSCF0004.JPG
    Annnndddddd. right about here, the batteries in the camera...died. Will have to wait until I can get some new ones...
    Anyway, once all the sides were done, then a utility knife to complete the job. Lid soon was split off from the box.

    Test fits....had to get out the Ohio Tool Co. shoulder plane, and pare back the lip around the box's edge. Suppose I could have gone a bit deeper with the 45, but this way, the lid stays on until the knife work.

    Box now has the lid where it will close. Added a couple small brass hinges, using the smallest bit the North Brothers #41 had. Then added a latch to the from. IF I can a few AAA batteries later tonight, I'll post a few more pictures.

  15. #15
    Join Date
    Sep 2007
    Location
    Longview WA
    Posts
    27,497
    Blog Entries
    1
    Anyway, once all the sides were done, then a utility knife to complete the job. Lid soon was split off from the box.
    Thanks Steven.

    Your separating with a #45 has given me ideas.

    jtk
    "A pessimist sees the difficulty in every opportunity; an optimist sees the opportunity in every difficulty."
    - Sir Winston Churchill (1874-1965)

Posting Permissions

  • You may not post new threads
  • You may not post replies
  • You may not post attachments
  • You may not edit your posts
  •