Page 2 of 3 FirstFirst 123 LastLast
Results 16 to 30 of 32

Thread: Replace Lower Wheel Bearing on Sears 12" #113.24200 Bandsaw

  1. #16
    Join Date
    Jun 2010
    Location
    twomiles from the "peak of Ohio
    Posts
    12,171
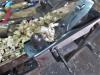
    OK, dug the parts out....was also missing one key stock.
    IMG_4774 (640x480).jpg
    Blade side is "ok" but the belt side?
    IMG_4775 (640x480).jpg
    Bearings seem to be good....shaft may be the problem
    IMG_4775 (640x530).jpg
    Belt side on the mounting hole has a snap ring.....blade side has a pair of bolts. Did not see any sign of a groove for the snap ring, either.

    May go to the TSC Store, and see IF they might have a shaft....and a bit of key stock. IF I can find that snapring pliers, I might be able to tear this down a bit more....

    bearings are 6203 RS..

  2. #17
    Join Date
    Feb 2003
    Location
    McKean, PA
    Posts
    15,637
    Blog Entries
    1
    Quote Originally Posted by steven c newman View Post
    Belt side on the mounting hole has a snap ring.....blade side has a pair of bolts. Did not see any sign of a groove for the snap ring, either.

    May go to the TSC Store, and see IF they might have a shaft....and a bit of key stock. IF I can find that snapring pliers, I might be able to tear this down a bit more....

    bearings are 6203 RS..
    McMaster-Carr has keyed shaft in various lengths and diameters for reasonable prices. Any machine shop can cut your snap ring groove for just a few dollars.
    Lee Schierer
    USNA '71
    Go Navy!

    My advice, comments and suggestions are free, but it costs money to run the site. If you found something of value here please give a little something back by becoming a contributor! Please Contribute

  3. #18
    Join Date
    Jun 2010
    Location
    twomiles from the "peak of Ohio
    Posts
    12,171
    OK, here is what I have got...
    IMG_4779 (640x480).jpg
    Blade side, no groove found..
    IMG_4783 (640x480).jpg
    It uses these two bolts to hold the bearings in place ( may get a washer and add it under the bolts...
    IMG_4781 (640x480).jpg
    A snap ring IS on the pulley side, the metal "cup" swings up and is held by three bolts..
    IMG_4782 (640x480).jpg
    I did find my pliers..
    IMG_4784 (640x480).jpg
    Both wheels used a key way piece..
    IMG_4785 (640x480).jpgIMG_4786 (640x480).jpg
    And each used one set screw. Will take the shaft assembly to the Tractor Supply store, and see what they say....
    upper wheel's bearings are in great shape..
    IMG_4780 (640x480).jpg
    Doesn't make a sound, and will coast until I stop it...no wiggles or noise. Needs a good clean up, though..

  4. #19
    Join Date
    Jun 2010
    Location
    twomiles from the "peak of Ohio
    Posts
    12,171
    Ok..tried a Machine Shop I know about....can't seem to find when he is open.....Located the part online...need to save up the cash to order it. Bearings are fine. Shaft...not. Having trouble finding a snap ring plier that actually FITS the holes....even bought a new set today.....along with the key way stock to replace the missing one.

    For now, I bought a washer, ID was just enough to go over the snap rings. Then ground the OD until the washer matched the oD of the bearings......bolts to hold both the bearings and the washer in place....can't really torque things down...aluminum body would strip out.

    Also having motor issues....needed hand starts....give the wheels a spin, then hit the on switch. Finally, took the v belt off, and ran just the motor by itself...about 10 minutes or so....saw a few chunks of crud drop out....motor started running better.

    Adjusted the wheel and the pulley....minimum tension on the blade....test run.....will do...for now. Worked on the table's locking bolt....so NOW I can even tilt the table and lock it. Locking arm was 90 degrees off from where it was supposed to be.


    Saw came to me as FREE, just had to haul it home. Budget in the shop is such that I need to fix this saw, can't just go out and buy another...new or used...have to even save up to get the $40+ for the new shaft. When this saw IS running the way it is supposed to....it does everything I need to do. Have no need for 12" of resaw, nor a 3/4" wide blade......not enough room in the shop, to add a "riser" block, even if this saw could.

    Will just get by, for now.....until I can save enough to order the new shaft...

  5. #20
    Join Date
    Jun 2010
    Location
    twomiles from the "peak of Ohio
    Posts
    12,171
    A new shaft is on the way...will try to get by until it arrives

    Air hose to the motor.....Still a hand start, taking less "cranks" now....taking the snap ring pliers back...and find better ones. Maybe one will actually FIT those small holes? All so far have been way too big.

    IMG_4788 (640x480).jpg
    Washer in place. Can't torque things too much...Aluminum body, after all. Had the wheel on too far, had to back it out a bit, to let the blade run closer to the center..
    IMG_4789 (640x480).jpg
    Same here...belt was rubbing the housing. Pulley also has a new key stock...old one was MIA.
    IMG_4790 (640x480).jpg
    And this is the motor. Took the air hose and blew out a lot of dust, dirt, and general crud....will see how it goes. No "Magic Smoke" yet.

    Will baby this along, until the new shaft gets here.....snap rings may get replaced in the process...

  6. #21
    Join Date
    Jun 2010
    Location
    twomiles from the "peak of Ohio
    Posts
    12,171
    Was able to get a better "read" on the model Number....113.24350.....with the cast iron table. Hope I do not need to replace the motor, as well....maybe run the belt a tad looser?

  7. #22
    Join Date
    Feb 2003
    Location
    McKean, PA
    Posts
    15,637
    Blog Entries
    1
    [QUOTE=steven c newman;2825904Also having motor issues....needed hand starts....give the wheels a spin, then hit the on switch. Finally, took the v belt off, and ran just the motor by itself...about 10 minutes or so....saw a few chunks of crud drop out....motor started running better. [/QUOTE]

    You may need to replace the capacitor on the motor. It should start on it's own.
    Lee Schierer
    USNA '71
    Go Navy!

    My advice, comments and suggestions are free, but it costs money to run the site. If you found something of value here please give a little something back by becoming a contributor! Please Contribute

  8. #23
    Join Date
    Jun 2010
    Location
    twomiles from the "peak of Ohio
    Posts
    12,171
    May just replace the motor, too..
    Attachment 389114
    The wire wheel thing is removable....Just needs a better cord. Oil filled bearings. frame seems to match...may need a different pulley to fit the shaft....this one has "flat" instead of a keyway. 1/2" shaft, instead of the 5/8" on the Craftsman motor....

    IMG_4916 (640x480).jpgIMG_4918 (640x480).jpgIMG_4914 (640x480).jpgIMG_4915 (640x480).jpg
    I don't think the cord will be too safe...
    IMG_4917 (640x480).jpg
    Will see about a new one...
    Last edited by steven c newman; 07-05-2018 at 5:52 PM.

  9. #24
    Join Date
    Jun 2010
    Location
    twomiles from the "peak of Ohio
    Posts
    12,171
    Missing a picture here, too?

    Anyway, the new-in-the-bag shaft for the bandsaw just arrived today! May have to wait a few, until I am allowed to work in the shop again...next week is out. No cash, and the 18th-20th is for the Ablation stuff..then allow that huge hole in the leg to heal up...again. will be the third time they have gone up to the heart via that spot.....hope they use a different one, this time...

  10. #25
    Join Date
    Jun 2010
    Location
    twomiles from the "peak of Ohio
    Posts
    12,171
    Bandsaw motor shaft is a 5/8" with keyway slot......"new" motor has a 1/2" shaft, with the flat...."D" shaped shaft.....Will try to find the correct pulley this coming weekend. Along with the new cord, and hopefully it has a ground wire. Have re-ground the tips on my snap ring pliers....might still get new rings.

    Motor is a 1/2 horse, dual voltage, 1725 rpm. Hoping it rotates the correct direction. Bolt up to the bandsaw's stand looks like it will work. Just have to line things up during the installs

    Had an issue last night, lower/drive wheel wants to "walk off" the end of the shaft......and, IF you slide it too far onto the shaft, it will bind. Maybe when I get the new shaft installed, I can see about that binding?

    Will baby this along, until I can get a full day to work on the saw...with the parts I need on hand. A roll-around floor jack may get used, to remove one motor and install the other.

    Haven't found the "Tracking Knob" on this saw, yet....113. 24350 saw.

  11. #26
    Join Date
    Jun 2010
    Location
    twomiles from the "peak of Ohio
    Posts
    12,171
    Found a new three prong cord, that should work..
    IMG_4986 (640x480).jpg
    Opened up the "box" to check on the wires..
    IMG_4985 (640x480).jpg
    After pulling off about a 1/2 roll of tape ( so far!)

    Appears they connected two wires to each side of the plug...
    IMG_4987 (640x480).jpg
    Not sure what I'll find under there..
    IMG_4988 (640x480).jpg
    or here...dug a bit more, as the tape wraps were loose...
    IMG_4989 (640x480).jpg
    That don't look too good. I could wire nut each pair of motor wires to each side of the new cord? Need to get a conduit clamp where the wires leave the box.
    Have also put a few dribbles of 3in1 oil down each tube. And, gave the shaft a few turns....

    So....wire this back up? Suggestions? Motor is for both 110v and 220v .....all I have in the shop is 110...

    Depending on what diameter pulley I need, price at TSC is ~ $11.99 to $16.99......thinking MAYBE a 3" should do the trick.....kind of hard right now, to measure the old one,....new one will be a 1/2" bore, no slot, 3" diameter. Costs more than the motor did, LOL....

    Will dig into that mass of black tape a bit further.....may even find a couple wire nuts? May just use new, though. And some new tape.....

  12. #27
    Join Date
    Jun 2010
    Location
    twomiles from the "peak of Ohio
    Posts
    12,171
    Talking to meself? Oh...well.

    Removed the old cord...
    old cord.jpg
    Underneath all that tape? was two wire nuts...way too large, and way too loose. Was a good thing they were taped up.
    Went a little longer than the bare spots on each pair of wires. Found better wire nuts, and a ground lug...
    new wires.jpg
    A self drilling screw, goes through the box, but NOT into the motor's case.
    ground lug.jpg
    Crimped the green wire, then installed. Still need to tape the wire nuts, more to keep them from rubbing against each other.
    Also need a clamp for this opening, to hold the cord in place..
    large hole.jpg
    Other than a cordless drill, to drive that screw..it was a "hand tool" project..
    hand tools.jpg
    May not be Kleins....but they did the job needed....

  13. #28
    Join Date
    Jun 2010
    Location
    twomiles from the "peak of Ohio
    Posts
    12,171
    OK..decided last night to test drive this motor...Left it sitting right there on the table. Brought over an extension cord to plug the motor into ( and be able to unplug in a hurry, if need be)

    Motor made a little burp-like sound.....and nothing else in the way of noise.....put a hand on the motor's case..yep, running at full speed. There is a flat on the shaft....could not see it...spin was going good.

    As it wound down ( after I pulled the plug) I checked which wat the shaft was turning.......it was going the correct direction I need for the bandsaw!

    So far,....have invested $3 for the motor...$0 for the cord. Needs a $12 pulley bought, and a Romex wire clamp for where the cord comes out of the box. Sounds like a win, to me.

    Tried it a couple more times....case of the motor did not even get warm....might just work out.

  14. #29
    Join Date
    Jan 2007
    Location
    Orange County, CA
    Posts
    274
    Quote Originally Posted by steven c newman View Post

    Haven't found the "Tracking Knob" on this saw, yet....113. 24350 saw.
    No tracking knob. Tracking is adjusted with the slotted screw in the end of the shaft for the top wheel. Your picture - IMG_4780, the screw head is hidden under the sawdust.

    Bandsaw manual page 18 - https://www.manualslib.com/manual/48...?page=8#manual
    Last edited by Joe Kaufman; 07-14-2018 at 11:57 PM.

  15. #30
    Join Date
    Jun 2010
    Location
    twomiles from the "peak of Ohio
    Posts
    12,171
    I'll look it over.

    Unable to find any "Romex Clamp" like thing, that actually fits the opening for the cord......went back in, and taped it all down, until nothing touches a thing. Once the motor is hung onto the bandsaw, I'll make a strain relief with a few wire/cable ties. May see about a rubber gasket of some sort to seal the hole.

    May work on the shaft, first....then when I am able, I can switch out motors.

Posting Permissions

  • You may not post new threads
  • You may not post replies
  • You may not post attachments
  • You may not edit your posts
  •