Dan; as they say, there is only 1 clear way of finding out.Originally Posted by Dan Duperron

regards Stewie;


 [OP]
Member
[OP]
Member
Dan; as they say, there is only 1 clear way of finding out.
regards Stewie;
 Friend of the Creek
Count me in as well. I have a similar "patient" waiting for me to get the motivation to do this.
[OP]
Member
Its time to install the rear tote within its mortise. Its fairly important that even contact is made between the bottom of the mortise floor and the underside of the tote itself. The mortise floor was lightly worked with a hand router to insure its flat surface. The underside of the tote was then checked for flatness on a flat bed of 220 grit. The original fit of the tote was well below the top surface of the main stock. With the removal of the old hide glue, there was a need to fit a 2mm thick dais to raise the top surface of the tote. A piece of thin scrap timber was chosen, that was around 4mm in thickness, This was temporary adhered to small board of mdf using double sided tape, and then flat planed to its targeted 2mm thickness.
The dais was then cut to shape to fit snugly with the mortise floor, then glued in position.
The mortise and tote were then taped off to restrict unwanted hide glue contact, and the hide glue was then applied to the full internal surface of the mortise and the below glue line areas of the tote. The tote was then tapped into position. Any small areas around the glue seam that were noticeable low were then topped up with hide glue to insure the joint was sealed correctly.

The masking tape was then removed, and any small unwanted areas of hide glue were then removed with a scraper blade. The instructions provided with the hide glue recommend the use of water and a rag to clean up any build up. In this circumstance that approach tends to impede the top of the hide glue seam, so I personally would not recommend that approach in this application.
The hide glue will be left to harden over the next 24hrs, before progressing to the final stages of this Jack Planes refurbishment. That will entail 2 coats of Garnet Shellac over the main stock of the plane (minus to sole), as well as the wooden wedge. Then its left to test this jack Plane out for performance.
It should be noted that some of the practices I employ within my work wont likely be found in any historical literature.
Stewie;
Last edited by Stewie Simpson; 01-27-2017 at 9:41 PM.
 Contributor
Count me among those who appreciate the thread. I have 3 woodies in a box, all of which will need a rehab.
 Contributor
Thanks Stewie.....Very good thread
Jerry
[OP]
Member
At 6.30pm I checked on the progress of the hide glue hardening, and made the decision that it was good enough to proceed with the 2 coats of garnet shellac. After application, the shellac was then buffed to a pleasant sheen using a cutting paste. All done by 8.00pm. The refurbishment has now been completed. I will hopefully get some time tomorrow to post a couple of photo's of wood shavings from this Jack Plane.
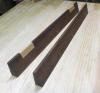
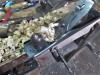
In 1 1/2 hours of work, I was able to go from this;
to this;
regards Stewie;
Last edited by Stewie Simpson; 01-28-2017 at 4:29 AM.
Contributor
Another fine job on the refurb Stewie. Thanks for sharing.
[OP]
Member
I was in the workshop early this morning to test out this Jack Planes performance. The wood chosen was to work was Australian Blackwood. A moderately dense hardwood by Australian standards, with characteristic pockets of reverse grain. http://www.wood-database.com/australian-blackwood/
The double iron was set to take a reasonably heavy cut. Loads of curly shavings were soon exiting the throat of the plane, with no backlog of shavings apparent at the mouth opening. Excellent results.
The following shows the planed surface of the timber worked. A couple of areas of reverse grain tear out, but heck, the focus is not to end up with a perfect finish using this Jack Planes cambered iron set up. That's the follow up role of the Try and Smoothing Plane.
The final photo shows a size comparison between this Jack Plane, and the Mathieson & Sons Try Plane I recently refurbished.
regards Stewie;
Last edited by Stewie Simpson; 01-28-2017 at 8:08 PM.
 Contributor
Nice work Stewie!
Bumbling forward into the unknown.
Member
You've got yourself two damn nice planes there Stewie!
[OP]
Member
Thanks Michael, Brian, & Kees.
Hopefully others will now understand the benefits of refurbishing and using a wooden bodied bench plane.
regards Stewie;
Last edited by Stewie Simpson; 01-29-2017 at 4:09 AM.
Member
Stewie,
Thank you for your post. I recently bought a 26" wooden plane with a Baldwin co Cast butcher iron. The plane seems to be original to the iron dating it somewhere 20200615_153845.jpgbetween 1830-1860??
Contributor
Stevie, I also have a Canadian version of this tri plane which Ive tweaked and trued, but not in the systematic way youve described. I didnt have the same issues with the double iron, since mine was original.
While I have a few other wooden planes, and mostly steel ones, this woodie of mine is a prized possession and I use it on almost every project.
I enjoyed to series as well, thank you.
Young enough to remember doing it;
Old enough to wish I could do it again.
 Contributor
Question: why would a "jack" plane really NEED a tight mouth?
Sargent No. 3416...
Sargent 3416, side view.JPG
Sargent 3416 end view.JPG
This just needs a good sharpening, is all...
Last edited by steven c newman; 06-21-2020 at 12:23 PM.
Contributor
Might have mine about ....done?
Sargent 3416, with the grain.JPG
Even has a better rear handle....
 Posting Permissions

 Reply With Quote


