Results 1 to 12 of 12

Thread: Advice on adding new switch to Rockwell bandsaw

  1. #1

    Advice on adding new switch to Rockwell bandsaw

    Good Afternoon everyone,
    I recently bought an old Rockwell 14" band saw and I am in the process of upgrading it with some new parts. I am building a new stand for it and want to replace the light switch on the old base with a paddle switch mounted on the saw frame. My saw has the open frame support which is making me overthink how to mount my switch. I have come up with a couple of ideas but see potential drawbacks to all of them and I do not have time to troubleshoot various methods as I need the saw to start on a new project. I have looked online for information but have not found anything helpful on how people mounted their switches and most photos do not show the switch in detail.

    I'm sure this saw does not have much value historically, but I would like to minimize the number of holes drilled into the frame if possible.

    I am hoping some of you experienced creekers can provide some suggestions or examples of how to mount the switch securely.

    Thank you
    Ryan

  2. #2
    Join Date
    Feb 2007
    Location
    Moscow, Idaho
    Posts
    294
    Ryan,

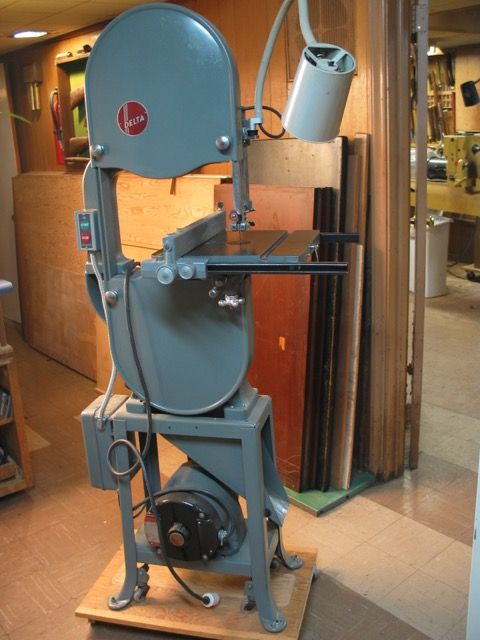
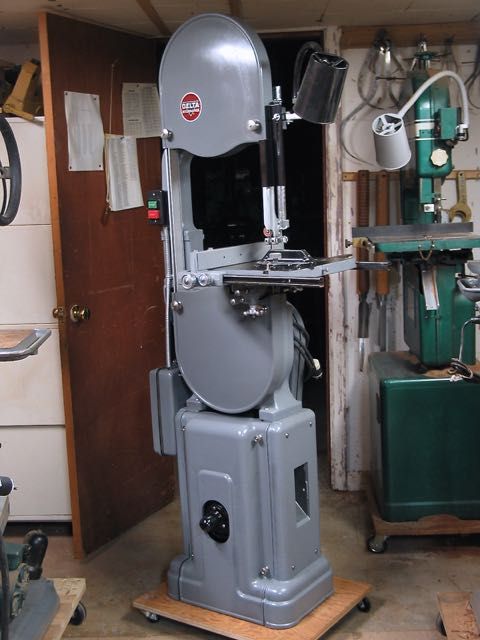
    Delta eventually did mount the switch on the upper arm. You could check a parts diagram for a newer model of that saw and see what you find. I think it's just a switch mounted in a shallow box screwed to the upper arm of the saw. You could probably buy the parts you need by looking at the repair parts available for a grizzly 14" bandsaw. Here's a photo of how Delta did it.
    DeltaX514Bandsaw001.jpg

    --Geoff

  3. #3
    Geoff, thanks for the idea to check the delta parts diagrams. I looked at a number of them for new models with the switch mounted to the support and it looks like they added tapped holes to the casting for the switch to screw into. My casting does not have anywhere I could tap into. I have added an example of what my band saw looks like I found online, mine does not have the metal base. Good idea about getting the parts from Grizzly, beats a handy box from the BORG.
    Bandsaw.jpg

  4. #4
    Join Date
    Oct 2005
    Location
    Camas, Wa
    Posts
    3,856
    Epoxy or silicone some wood triangles into arm and screw the box to it. Get a paddle switch from Grizzly

  5. #5
    Join Date
    Aug 2007
    Location
    Dickinson, Texas
    Posts
    7,655
    Blog Entries
    1
    switchbox.jpg
    I mounted a switch box similar to this on my Delta table saw. I put a double pole switch in it . That way both conductors are off when you throw the switch.
    It is a heavy duty switch that can take the starting load of the motor that I have wired as 220 volt.
    The original switch gave up the ghost after about a year. This set up is about 12 years old and it has never had an issue.

    I like the fact that when the switch is off, there is no connection to the motor. I also like the fact that the switch will handle the starting load of the motor.
    Of course there is a cover plate on the switch box. You can get boxes that are top or back conduit connections. You can put romex clamps on the conductors to secure them to the box. This takes all the stress of the switch mounting screws.

    I can photograph the switch if you want to see it.
    Last edited by lowell holmes; 10-27-2016 at 5:09 PM.

  6. #6
    Join Date
    Jun 2006
    Location
    The Hartland of Michigan
    Posts
    7,628
    Not much historical value eh? Re-think that. It's a better 14" saw than you can buy anywhere else.
    As for the switch. Mount a box on the frame, and put a 20 amp light switch in it. Done.
    Here's a historically valueless saw for comparison, with switch.

    Img_0396.jpg
    Never, under any circumstances, consume a laxative and sleeping pill, on the same night

  7. #7
    As to where, on the column is best. As to what switch, that can be debated for years with no clear resolution. Cheap switches have relatively tiny internal contacts that can constrict current flow on startup. This is hard on capacitors in the long run. Mounting a NEMA size 1 starter on the back and the remote on the column is the best way I've found, but that's not for everybody.


  8. #8
    Myk,
    I am not saying this is a valueless saw, I am aware the older rockwells are great saws which is why I bought this one despite it's initial condition. I am just not sure how valuable a late 60's/early 70's Rockwell would be compared to other Rockwell/Deltas and whether drilling holes into the column would impact the overall value. The 40's/50's saw I would imagine would have a higher historic value than my saw.

    I have already bought a paddle switch and based on the stand I have designed, mounting a switch to the stand will put the paddle below my knee, which while not the end of the world, kind of defeats the point of it. That said, mounting to the stand is my back up if I cannot find a suitable way to mount to the column.

  9. #9
    Bob, I will keep the remote and starter in mind when I eventually upgrade the motor.
    If you were to mount the starter on an open column like I posted an example of above, how would you go about it?

    Thanks
    Ryan

  10. #10
    Drill and tap into the web part of the frame, then install a switchbox using long machine screws with a tube around the projecting screw. The tubes serve as a 'stand-off'.

  11. #11
    In my opinion, a few small screw holes in the frame or stand will not reduce the value of the saw. Any future owner who didn't like them could easily fill them and paint over them. Happens all the time.

  12. #12
    Join Date
    Jul 2003
    Location
    Winterville, NC (eastern NC)
    Posts
    2,363
    On a recent bandsaw restoration, I had to build a stand for it to sit on. I just mounted a paddle switch to the new stand, where the motor resides.

Tags for this Thread

Posting Permissions

  • You may not post new threads
  • You may not post replies
  • You may not post attachments
  • You may not edit your posts
  •