Results 1 to 15 of 15

Thread: Help with Millers Falls No 34 Brace restoration

  1. #1
    Join Date
    Aug 2015
    Location
    Wentzville, MO
    Posts
    166

    Help with Millers Falls No 34 Brace restoration

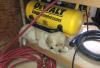
    I started working on a MF 34 brace resto and can't get the head off. I've seen a few resto examples where it comes off exposing the bearings. I pulled the c-clip off the end, but it doesn't come off. It may not come off. It would be nice if it did so I could clean it out. I attached some pics for your reference. thanks

    IMG_5327.jpgIMG_5325.jpgIMG_5320.jpgIMG_5323.jpg

  2. #2
    I have the whole 30-34 series and I can't get the head off of any of them.

    I'll watch this thread.

  3. #3
    Join Date
    Mar 2015
    Location
    Virginia
    Posts
    1,211
    I have two millers falls, a craftsman, and a pexto, all with that ball bearing style head. I have had all of them apart to clean, lubricate, and replace the bearings. I do not have a 34, but I really think it will come apart. Try supporting the head in your vice, and "gently" tap on the center rod (a scrap of wood on the rod maybe, and hammer on the wood). All of mine were gunked up with 100 year old grease that turned hard and stiff, and that is probably what is making it difficult to get it off.

    Be warned: the bearings are just sitting there under a little collar, and this is one of those projects that has a tendency to come apart all at once with little bearings flying everywhere. Sometimes they are in good shape, sometimes they are all corroded up. There is a place on eBay that sells small bearings at a reasonable price in little zip lock bags if you need to replace ones that are damaged or missing.

  4. #4
    I also have a killer source..Axman. Local surplus everything store, sells bearings by weight!

  5. #5
    Join Date
    Sep 2007
    Location
    Longview WA
    Posts
    27,454
    Blog Entries
    1
    Bicycle shops also often carry spare bearings.

    Sometimes a groove can wear into a shaft and cause problems with disassembly.

    jtk
    "A pessimist sees the difficulty in every opportunity; an optimist sees the opportunity in every difficulty."
    - Sir Winston Churchill (1874-1965)

  6. #6
    Join Date
    Aug 2015
    Location
    Wentzville, MO
    Posts
    166
    I should have mentioned it turns ok now and I haven't oiled it or done anything to it. It's definitely not smooth, which is why I want to take it apart and clean it out. I tried to gently tap the head off, but was afraid to hit it too hard. Baring any other revelations I'll try putting it in the vise as suggested by Nicholas.

  7. #7
    Join Date
    Mar 2015
    Location
    Virginia
    Posts
    1,211
    Just don't hit the shaft with a hammer directly, unless you have a plastic mallet or something. A piece of scrap between the shaft and the hammer will prevent peening that shaft, which would be a problem. They are pretty simple, but if you get stuck, PM me, and I can take one of mine apart and post pictures or something to help you.

  8. #8
    Join Date
    Aug 2015
    Location
    Wentzville, MO
    Posts
    166
    Quote Originally Posted by Nicholas Lawrence View Post
    Just don't hit the shaft with a hammer directly, unless you have a plastic mallet or something. A piece of scrap between the shaft and the hammer will prevent peening that shaft, which would be a problem. They are pretty simple, but if you get stuck, PM me, and I can take one of mine apart and post pictures or something to help you.
    It worked, not perfect and with a bit more effort than it should have. It came out part of the way and the top part started to separate. I took some wood wedges and managed to get it the rest of the way without damage. It looks like the c-clip formed a nice burr that was catching it. I couldn't see it (or get to it to trim it) until the head was off. Once past the burr it pull right off. thanks for the assist. Now on to filing, sanding and polishing.

  9. #9
    Join Date
    Aug 2015
    Location
    Wentzville, MO
    Posts
    166
    Thanks again for the tip on removing the head. Attached are some pics of the completed resto along with the before pic. The brace is incredibly smooth operating.
    IMG_5327.jpgIMG_5330.jpgIMG_5332.jpgIMG_5339.jpg

  10. #10
    Join Date
    Mar 2015
    Location
    Virginia
    Posts
    1,211
    It looks great Robert. And they are a pleasure to use.

  11. #11
    How did you clean out the knurlings? I have that exact model, it looks better than what you started with, but far from what you turned yours into.

  12. #12
    Yes, inquiring minds need to know. I have never gotten a rehab to look that good. Great work!!!!!

  13. #13
    Join Date
    Mar 2015
    Location
    Virginia
    Posts
    1,211
    What has worked best for me is WD-40 and a stiff brush. If you go at the knurling from both directions on the diagonal, a lot of that crud will come right out.

  14. #14
    Join Date
    Aug 2015
    Location
    Wentzville, MO
    Posts
    166
    Quote Originally Posted by Jeremiah Chamberlin View Post
    How did you clean out the knurlings? I have that exact model, it looks better than what you started with, but far from what you turned yours into.
    I struggled with them for a while and ended up with a brass wire wheel in my drill press. Hit it from all different angles and they clean up real nice. I always start with an overnight soak in Evaporust (greatest stuff ever). Make sure to do the knurling first since it can leave some scratches in the adjacent areas. They aren't deep and easily sand out during the polishing. For the rest of the brace I simply used thin strips of sandpaper long enough to work it like shining shoes. I start with the highest possible grit (for this one I started with 220 due to some pitting) and work up to 2000 grit. I finish off with some metal polish (Blue Magic in a tube is my choice). I've done a number of hand drills and find all different ways to chuck up parts in my drill press, but the only thing I could in this case was the quill. It's obviously a time-consuming job, but the results are worth it.

  15. #15
    Join Date
    Apr 2013
    Location
    Issaquah, Washington
    Posts
    1,320
    Robert,
    You did a truly gorgeous restoration! Very impressive.

Posting Permissions

  • You may not post new threads
  • You may not post replies
  • You may not post attachments
  • You may not edit your posts
  •