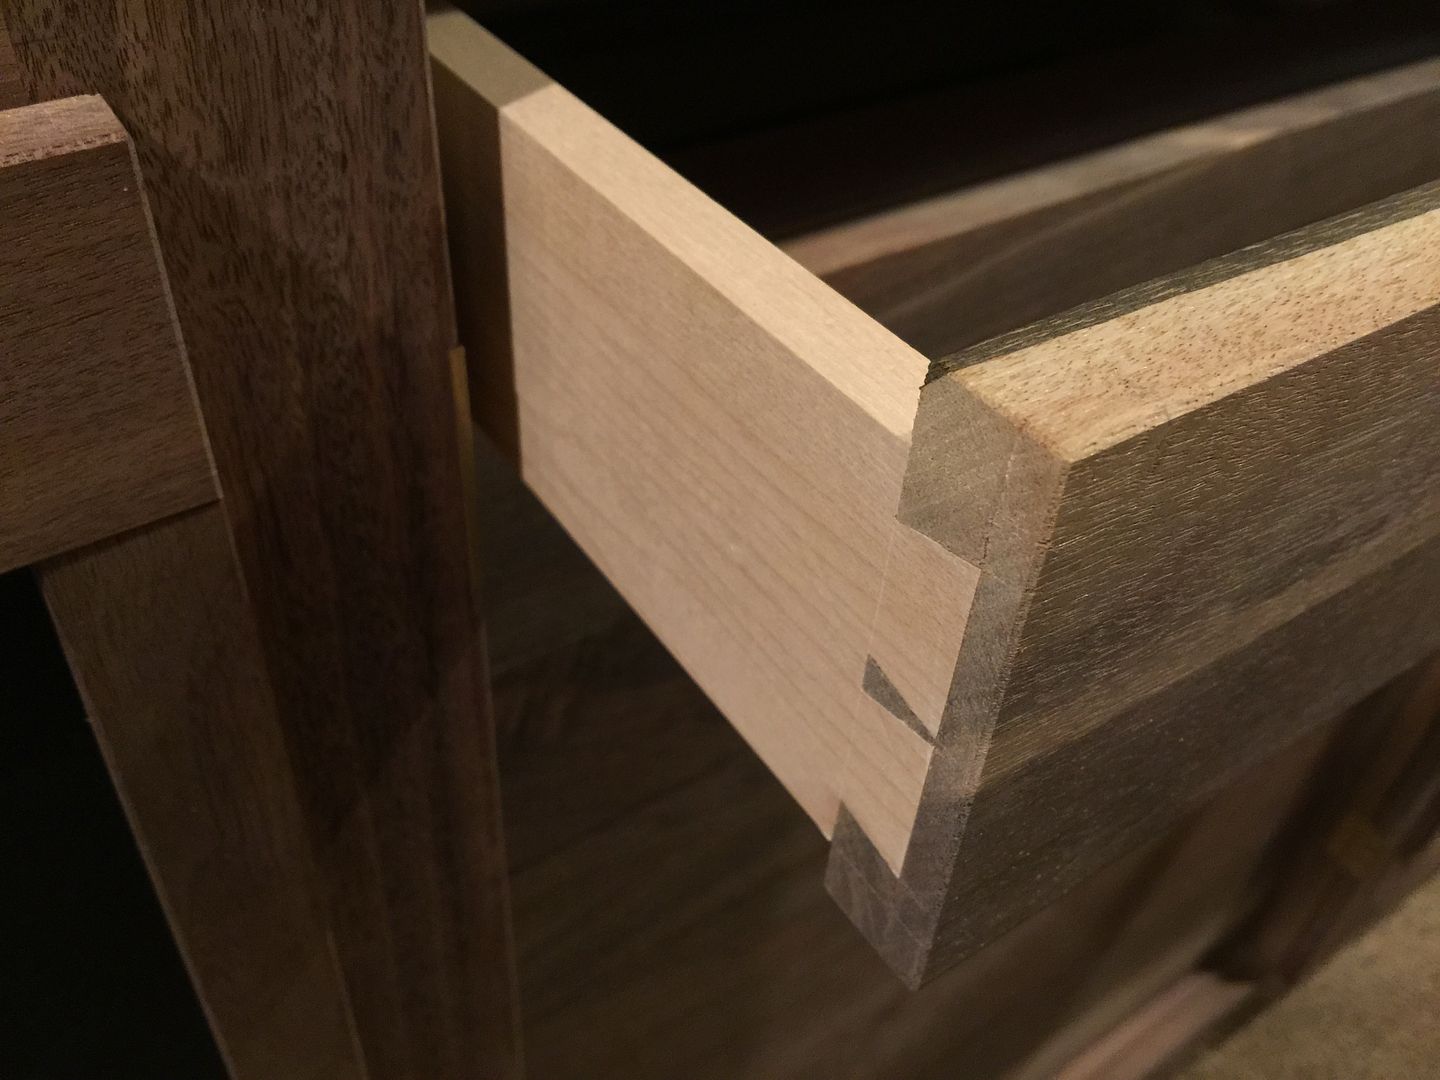
Nothing spectacular but my first set of dovetails cut by hand...
2015-10-19 20.06.57.jpg
It's going to take a lot more practice before I'm ready to use this in a project.
Cheers,
Aaron


 [OP]
Member
[OP]
Member
Nothing spectacular but my first set of dovetails cut by hand...
2015-10-19 20.06.57.jpg
It's going to take a lot more practice before I'm ready to use this in a project.
Cheers,
Aaron
Contributor
Had to start sometime and the learning curve for dovetails is not that bad. It's more sawing practice than anything. Looks good from here.
David
 Contributor
Aaron, they look pretty good, nicely done.
Couple suggestions. You can layout tails with a pencil, but transfer them to the pin board with a knife. Don't cut the knife line, cut so that the saw brushes up against the knife life.
Bumbling forward into the unknown.
 Member
Arron,
I agree with Brian, for a first go they are not bad. Your 1/2 pins look pretty good. Your center pin looks like you sawed on the line or even on the "save" side with a little "opps" on one side. Just remember the pin "line", pencil, pen, or knife line, it makes no never mind the line is in the "save" area and you need to saw on the waste side of the line.
ken
Last edited by ken hatch; 10-20-2015 at 7:52 AM.
 Contributor
They look better than many of my early dovetails.
Keep practicing and the advice above is good.
jtk
"A pessimist sees the difficulty in every opportunity; an optimist sees the opportunity in every difficulty."
- Sir Winston Churchill (1874-1965)
[OP]
Member
Thanks guys. I marked everything out with the knife then went over the line with a pencil so I could see better. I'll be sure to "save" the line next time. Fairly happy with my saw cuts but need a lot more practice with my chisel work. Hoping to take another run at it tonight.
Aaron
[OP]
Member
PS: Do you guys use a low angle block plane or #4 for smoothing the joint once assembled?
Thanks,
Aaron
Member
Aaron,
First let me state the "As with all things wood....YMMV". In your photo I see what appears to be a marking knife with a short, stiff, spear point blade. I expect others find that style of marking knife the bee's knees but I've had trouble getting good consistent tail transfer with that type of marking knife as my pins become smaller. Again see first statement, what works better is a marking knife with a longer thin flexible blade. My favorite is a pfeil Swiss made Chip Carving Knife #13 but for a spear point the Lee Valley Veritas Workshop Striking Knife for less than $11 USD is one of the best. Sometimes cheap is better.
Just read your question: I seldom use a block plane for anything so take that into consideration, depending on the size of the box, cabinet or whatever and what plane is at hand could be #3. #4, or a #5.
ken
Last edited by ken hatch; 10-20-2015 at 8:49 AM.
 Member
Great job Aaron! I did my first tails this weekend and ran out of time for the pins. I've got the same Veritas saw - such a good value.
Contributor
Apologies, I managed to miss your marking knife when looking over everything.Originally Posted by Aaron Conway

After marking with the knife I will make a notch in the inside corner of the 'waste' side of the line and I find that helps let the saw fall beside the line rather then fall into the line. The difference can often be the difference between a hand tight fit (literally able to press it together by hand) which will still glue up tight and what I prefer which is a slightly friction fit, requiring just some light taps to assemble.
You wont want a heavy friction fit in my opinion since it will often risk cracking the board (DAMHIKT).
I use a #4 to smooth the assembly. Put a light miter on outside corners to prevent blowing out the end grain when you plane over it.
Bumbling forward into the unknown.
Member
Brian, can you illustrate this? I've been having terrible blow out when crossing end grain with my #4.
Moderator
Your FIRST looks great. You'll be surprised how good they'll look once they're glued and (gasp alert) sanded. When practicing, I'd go that extra mile and actually glue up your test boards so you can see how it'll really look.
I will offer some contradictory advice to what I believed when starting. Don't over-analyze it. Mark tight and clean, saw straight and flush, and pare minimally with sharp chisels. I am finding dovetail fitting (and tenon fitting for that matter) to be like bike riding. It's more a function of practice than analysis.
[OP]
Member
Thanks all for the great feedback. I'll echo Matt's comment and ask Brian to give a little more detail on how he prevents blowout.
Another question while I'm at it. To remove major waste between pins/tails are you using a fret saw, coping saw or drilling out? I've seen all done.
Brian...yes, that saw is a great value. Never really appreciated a hand saw until using that Veritas. Look forward to seeing your results.
Thanks,
Aaron
Contributor
A sharp blade helps the most, but this helps as well;
Bumbling forward into the unknown.
Contributor
Either work for me. A low angle block plane tends to make a smoother cut on the end grain. Working from the outside going over the end grain first helps to avoid and blowout of the end grain.Do you guys use a low angle block plane or #4 for smoothing the joint once assembled?
For me this has changed over time. My early work was all chopping out the waste with chisels. Over time my skill with a fret saw has improved. A fret saw is my preference as it has a thinner blade. A coping saw is fine. They also tend to have a deeper throat.To remove major waste between pins/tails are you using a fret saw, coping saw or drilling out?
For me the most difficult part of creating a dovetail joint was the relationship between the marking and the sawing. In the example of cutting tails first, The line transfered from the tail to the pin board is all in an area that needs to be saved. With a pencil, there may be a small gap between the edge of the tail guiding the pencil and where the actual pencil line is marked. This area is also to be saved. The same marking/sawing relationship occurs when pins are cut first.
When you get that bit sorted, your dovetails will start fitting together much better.
jtk
"A pessimist sees the difficulty in every opportunity; an optimist sees the opportunity in every difficulty."
- Sir Winston Churchill (1874-1965)
 Posting Permissions

 Reply With Quote