Wow, how cool, we have almost the exact same stuff............NOT!
Just a little late night jealousy poke.chisels.JPG
Keep the updates coming (just keep the tool porn to a minimum, will ya?)


 Friend of the Creek
Wow, how cool, we have almost the exact same stuff............NOT!
Just a little late night jealousy poke.chisels.JPG
Keep the updates coming (just keep the tool porn to a minimum, will ya?)
Contributor
Phil, you made me laugh .. almost spilled my tea - well played!
 Contributor
Brian you do some very nice work. The joinery is great and you work to very tight tolerances. Some of those things I don't think I could do. The wedging action of some of those joints has to be very well done. I would most likely blow the web out of a mortise if I wedged the haunch. I did take note that you use a feeler gauge to check the fit. I am glad you share these builds. It encourages me to step up my own game. Enjoy your new tools, very nice.
Jim
 [OP]
Contributor
[OP]
Contributor
Thanks for the kind words fellas! Mike, I'll certainly keep the secret best to keep the Lool's (loves of our lives) in the dark about many craft related abilities, otherwise the que can get quite long.
phil, it's hard to keep a tool addiction under wraps,
James, it's Definetly important to mind how much short grain you have when wedging, as ideally you'd want as much as possible, but often that is tough when trying to meet certain forms. I think that it's important to always make an incremental increase in difficulty when doing these projects. it can be just as much about maintaining interest as it can about the end creation.
Bumbling forward into the unknown.
Friend of the Creek
"I think that it's important to always make an incremental increase in difficulty when doing these projects. it can be just as much about maintaining interest as it can about the end creation."
Well said.
[OP]
Contributor
I ended up using one of my 3" wide boards for the center rail, hence I had to build another with rough stock on hand.
Flattened the first reference face and have my winding sticks out to check.
This beam level is one I straightened myself to within .003" it's used as a check on beams.
Final thicknessing next time.
Finished one side, I'll walk through with detail photos of the cut out on the next round of photos.
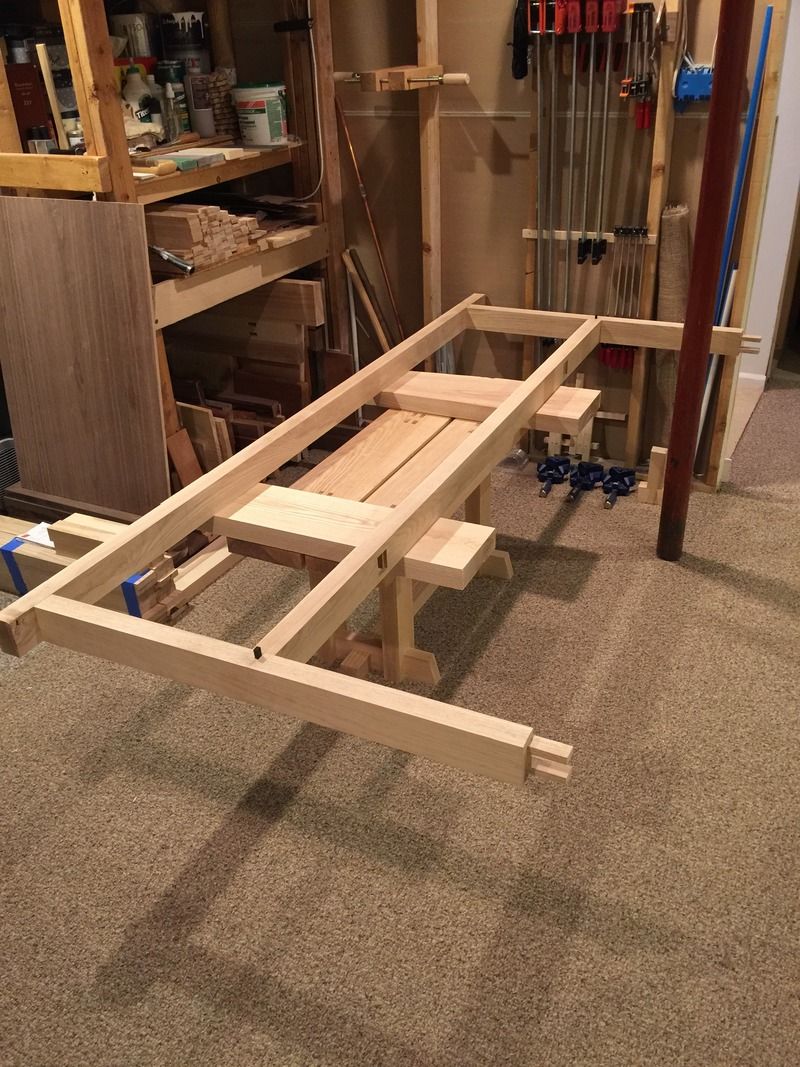
Half of the frame is now together, and I have removed the center supports to facilitate the side rail fitting. The will be cut to length and test fitted after the legs are installed on the frame.
Last edited by Brian Holcombe; 06-25-2015 at 9:32 PM.
Bumbling forward into the unknown.
[OP]
Contributor
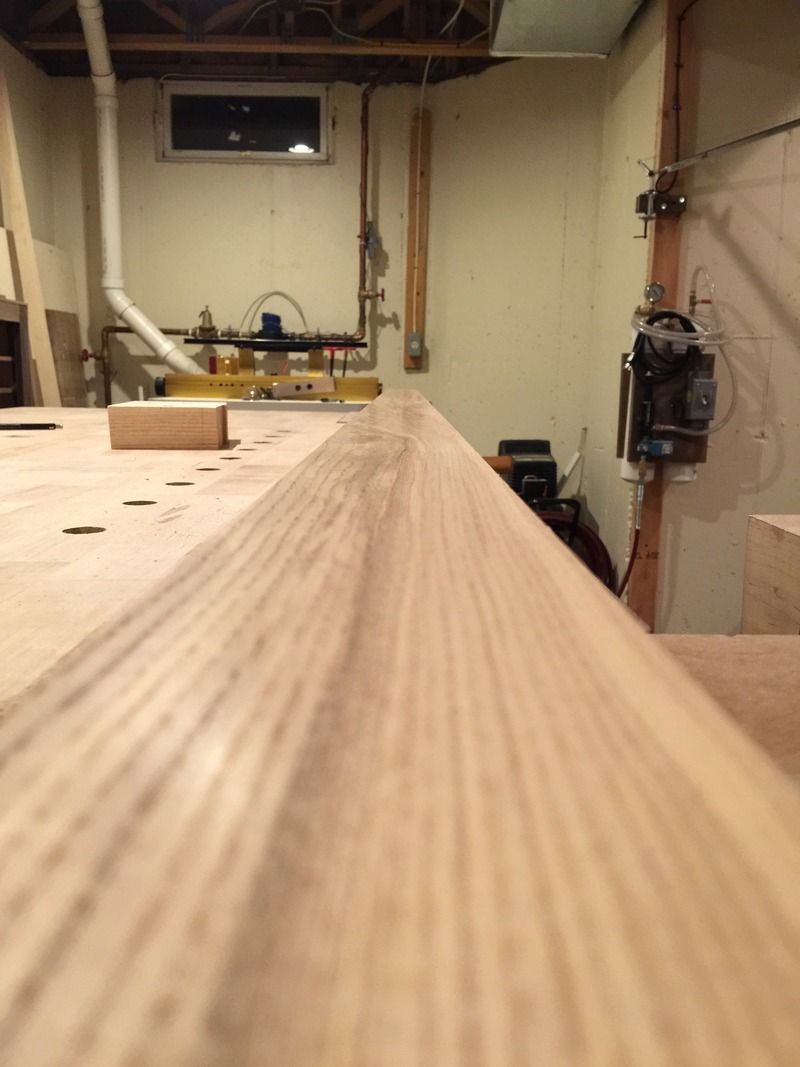
Had a chance to do some finish planing and see what kind of surface is turning up;
Bumbling forward into the unknown.
Contributor
Brian, are you sure you are planing in the correct direction? With my boards I am able to get a LOT more divots, chingers, scratch marks, etc. I like to think it gives the finished product a certain "patina", but I won't know until I actually finish something . . . . .
On on a more serious note, always enjoy your posts, especially the craftsmanship demonstrated therein.
OTOH, you have cost me some $$$$$, as some of your posts compelled me to start sending money to Stuart in Japan . . . And worse yet, the appetite is just starting . . . . . You are a BAD influence, sir.
best regards , patrick
[OP]
Contributor
LOL! I think I'm as much a victim of the siren song as I am a provocateur...enjoy the song, just don't crash the ship
Glad you're enjoying!
Bumbling forward into the unknown.
[OP]
Contributor
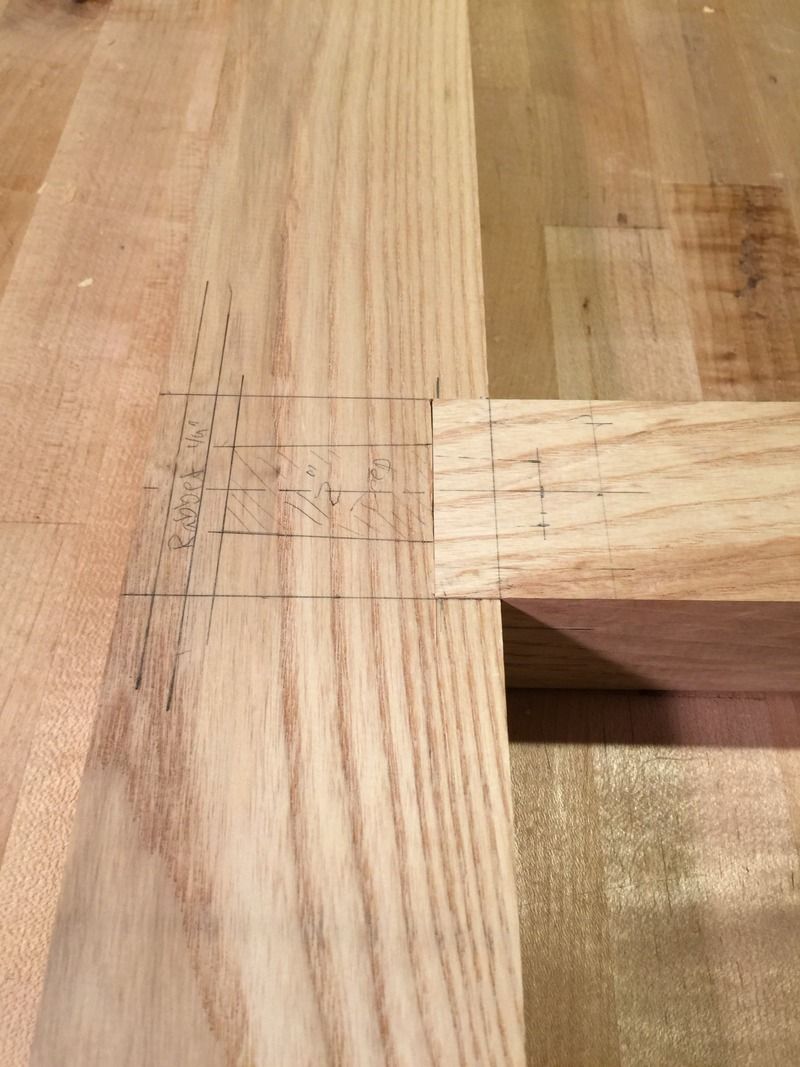
Mock up to check square and mark out the tenons. I used the cut side as a template to mark out the opposite side, then double check that I'm going to hit my marks once the center crossmember is tightened up. All looks good and the frame is square.
Also very important to keep an eye out for twist. These outside joints are square solid and square, but before they're wedged it is quite important to make sure the frame does not have twist in it. That can be done very similarly to how one would eye-ball winding sticks since these outside frame members are also consistent in thickness and height.
Starting square
And on the exit (inside of the board) within the requisite boundaries.
Bumbling forward into the unknown.
[OP]
Contributor
Not as far along as I was hoping at this point. Ended up spending most of the day chasing a leak that presented itself in my workshop....and removing a good portion of my ceiling...which I will be replacing later this week...sigh.
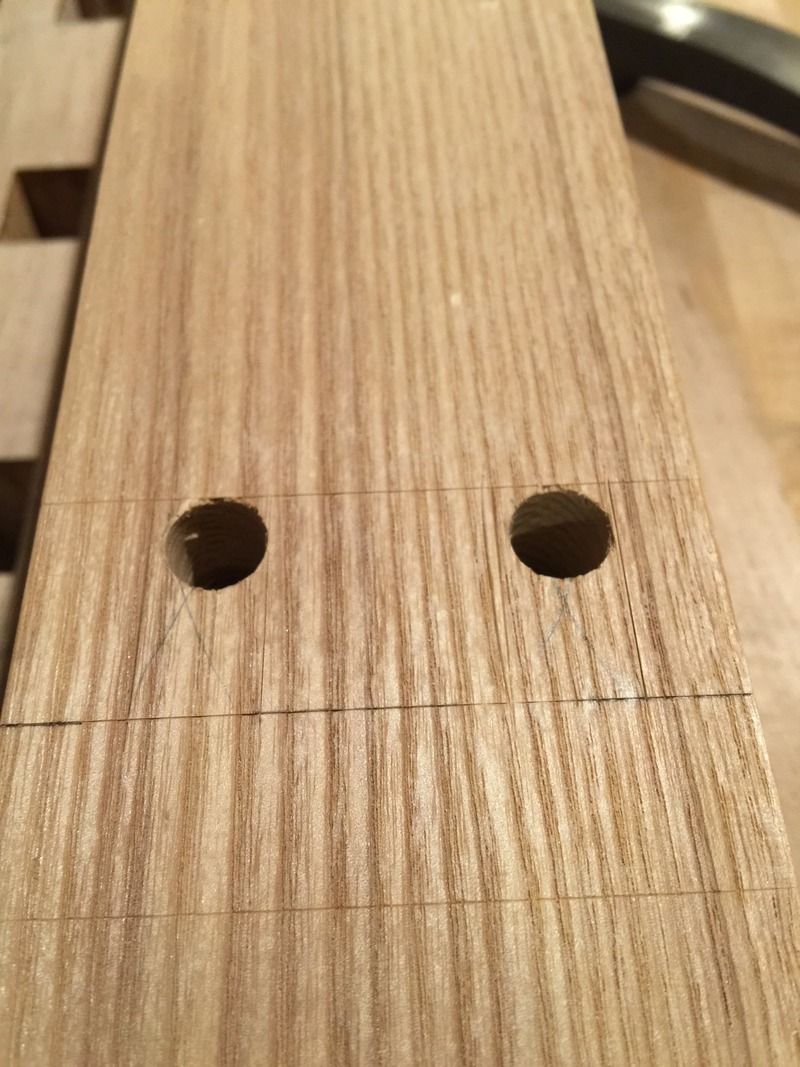
I did manage to get some mortising done and I detailed my approach;
First round of chopping toward the hole, these steps get progressively smaller as I approach the opposing edge
I then move to the opposing edge of the hole and chop, this is usually two chops and the bevel is facing the hole.
Scoop out the waste, I use a smaller chisel to do so, the entire bit of waste comes out in one scoop; I believe also that a bottom clearing chisel will work for this.
Here is the result at this point
Next I cut the slope, bevel toward the hole, At this point I'm beginning to check my work for square and ensure that my eyeball is well tuned.
Rinse and repeat to lower the floor further and then I flip it around to cut the opposing side. This will leave a triangle of material jutting out from the wall....now I chop this out in larger cuts because I want the material to remain supported and do not want to break out a portion of the wall. The final cut might be 3/16"~ or so this cut is tough but it will shear the material clean from the wall if done correctly;
That is before and here is after;
Notice how all of my lines are still intact. My next step is to cut the slope in the sides of the mortise which allow room for wedges. I do this with a Chu-tataki nomi because the handle is longer, giving me a better look at whats happening near the bottom exit. I do not chop clear through, but leave a small ledge and then follow up with a paring chisel. I pare the slops flat and then pare the sides flat and to my line.
If you chop clear through you run the risk of making the mortise wider than planned, the tenon will be loose in the hole and when the wedges are driven in you will run the risk of splitting the tenon.....so, don't do that.
Here is the leg joinery, this is a modified version of the dovetails Roubo details for his workbench. I've always disliked long plain sliding dovetails because I find them to either be too tight or too loose, and so I've decided to cut a slope on these for a wedging fit.
So far, without glue these are rock solid, I've clamped them into a vise and used them as a lever and they're strong, resisting my prying attempts very well.
Here is the back side, please ignore the layout on the leg, but the layout on the beam will be cut soon. Those will be receiving the crossmembers with shachi pins. The legs will be so short that they do not require additional support to resist splaying, instead the long side beams are in need of support to resist twisting when a load is applied to the center of the bed, that is the goal of these crossmembers.
Last edited by Brian Holcombe; 07-01-2015 at 8:51 AM.
Bumbling forward into the unknown.
 Contributor
Bummer about the distraction!
"You can observe a lot just by watching."
--Yogi Berra
[OP]
Contributor
Indeed! One those things... the seal around the kitchen sink needs repair....drained down the cabinets and then through a hole in the floor for wires then down the wires then onto the drywall. It stopped dripping when I shut the water for the house, and so my original assumption was that it was a pipe....rather then the cabinet above. Either way wet drywall doesnt do well, so I cut it out.
All fixed now with exception to the patch needed in the ceiling, but I figure I'll let it dry out a few days before proceeding.
Bumbling forward into the unknown.
Contributor
Looking good Brian. In watching your progress and the accuracy of your layouts, I was wondering what you use for your measuring. Story pole, yard stick, wood rule, tape? It is just of interest to me. I use wood rules and story poles for larger work and for smaller things I just work off of one major piece like the top of a box and then what looks good to me for heigth. Unless of course something has to fit in a specific place. We all have those things that distract us from the fun stuff, don't we. Sorry about your leak. I don't mind most household repairs but gypboard or roofing cement can ruin my day.
Jim
[OP]
Contributor
Thank you!
Funny timing on the leak, if i weren't neck deep in the current projects I'd use this as an excuse to tear out the ceiling and replace with something that offers much nicer lighting and include the wall as well. I've been itching to frame out the wall and build out a real wall system for hanging tools.
I digress, for marking I typically transfer measurements off of a reference piece. In this case it's the center beam, I transfer everything off of that. A story stick works fine as well, I just never think to set one up.
On the initial layout I work from the center and use a steel square for as much as possible and a tape for long measurements. I dislike tape measures but they come in handy on occasion.
Last edited by Brian Holcombe; 07-01-2015 at 11:40 PM.
Bumbling forward into the unknown.
 Posting Permissions

 Reply With Quote


