Page 1 of 3 123 LastLast
Results 1 to 15 of 31

Thread: Intro and First (Very) Large Project, 10ft Cherry Countertop

  1. #1

    Intro and First (Very) Large Project, 10ft Cherry Countertop

    And by "Very Large" I meant for a total greenhorn rookie like me.


    I have to start off by saying that I completely love this site. The experience and knowledge is frankly so vast that it's hard to wrap your head around. I've been building up my capabilities on smaller projects and have recently been redoing our rather large finished basement. I call it my test lab as I can take a few more risks with projects down there than I would consider in the upper floors!

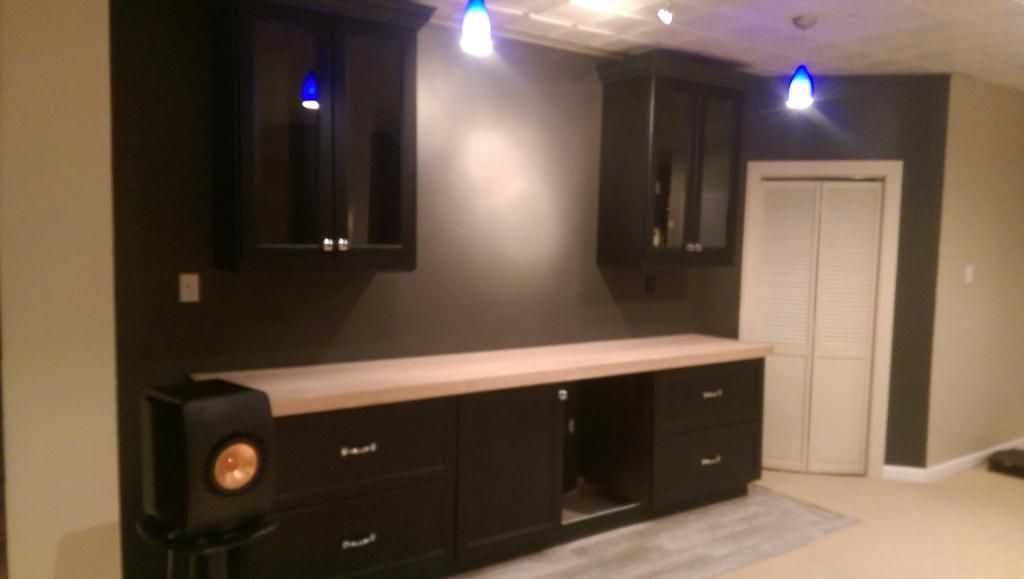
    We recently ripped out a large terribly built and absurdly heinous bar and have been turning it into a more built in kitchenette type area. For the counter, I decided to go way above my skill level and build one out of hardwood. The dimensions are roughly 25" deep and 126" long. Luckily I live in New Hampshire and am close to a great lumber source, http://highlandhardwoods.com/

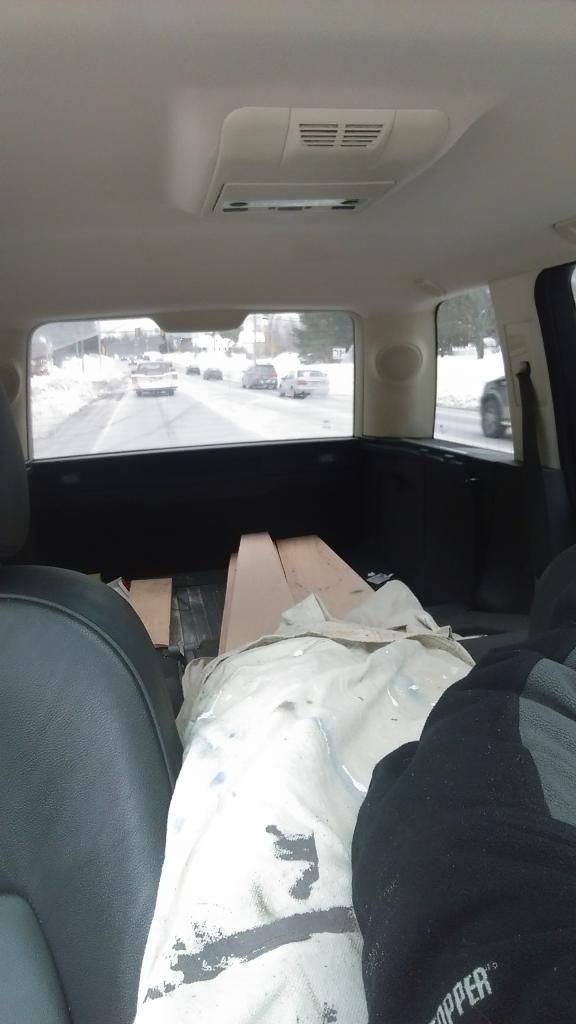
    I had a few different wood species in mind but after looking through the current stock, ended up with S3S 6/4 Cherry boards. From past projects I know just how long they could be for me to fit in my SUV , phew!


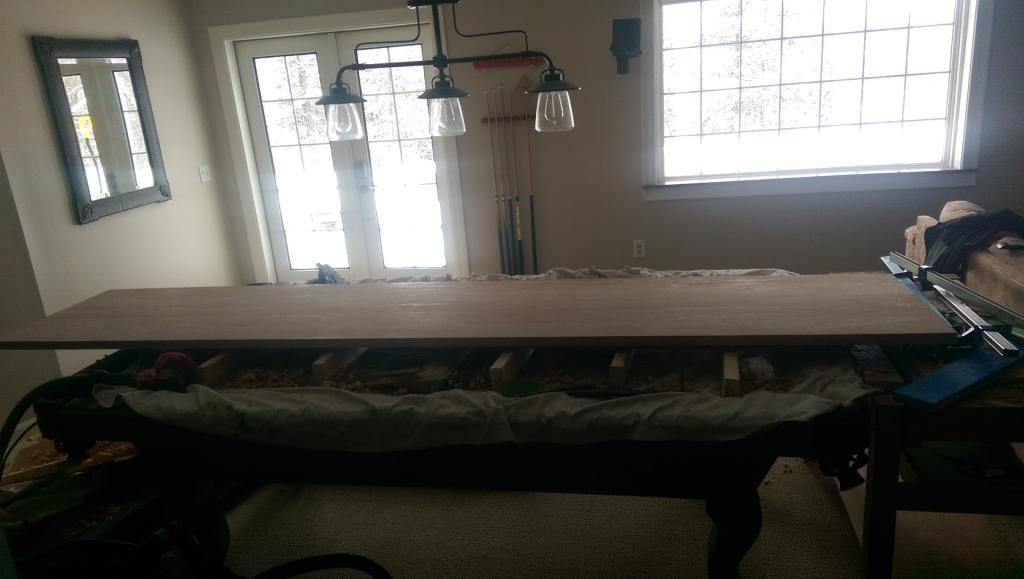
    As a budding woodworking enthusiast, I didn't have the proper tools to rip the unfinished edges and joint the boards properly. You will see that in fact this project was a great excuse to by alot of new equipment. I'm also using my poor pool table as my work table, but I promise no harm was done duering the making of this counter. First up was drinking the green cool aid and picking up a Festool TS55 and Mini Vac.

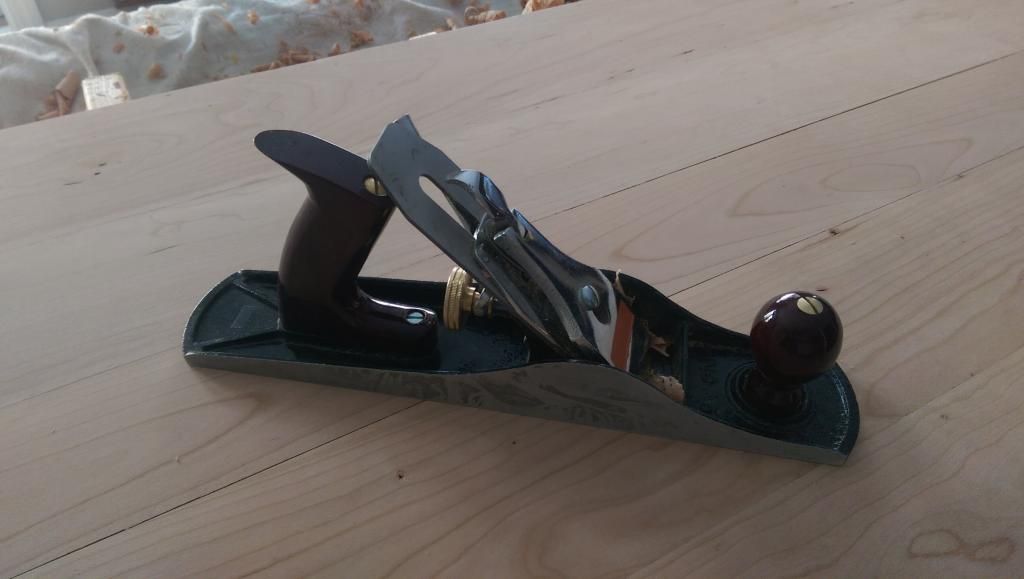
    After making the straight cuts, I also procured a jack plane to begin leveling the boards with the hopes of a good glue up. I'm not a pro at grading wood and learned a lesson since one of the boards was pretty crooked. It took alot of time with the jack plane to get it close.


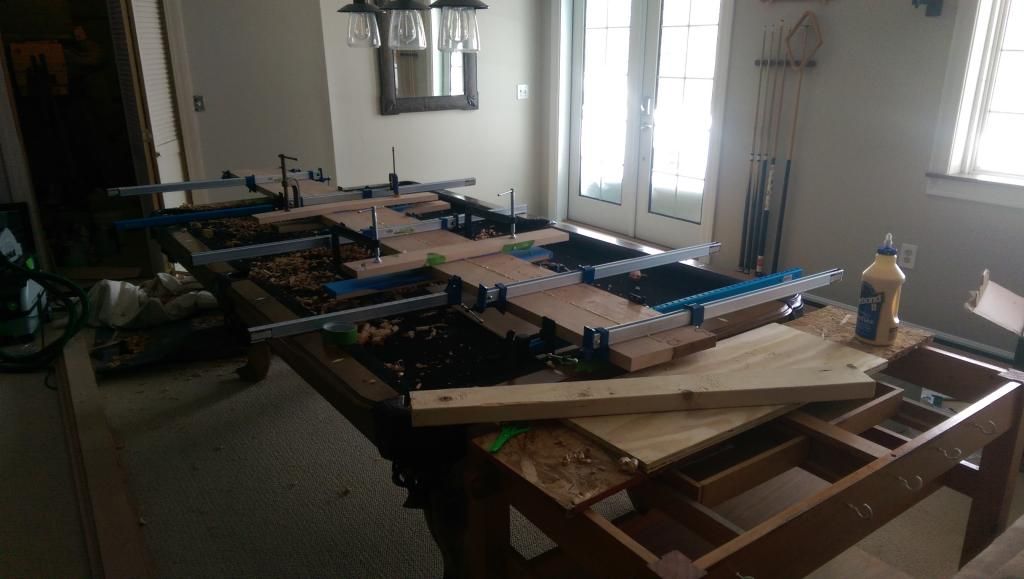
    No another purchase was needed, a whole buncha clamps. Based on some reviews here, I picked up a bunch of cheapo's from Harbor Freight. I also grabbed a few from my local Rockler. Following additional advice from this board, I used Titebond 2 and did my first glue up with only 2 boards.


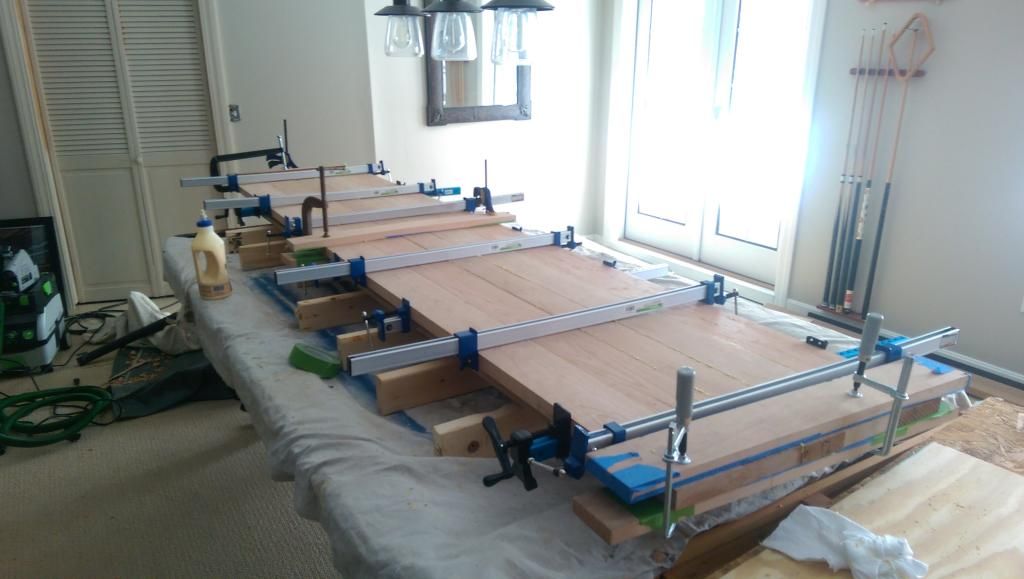
    Then the rest all at once (of course 24 hours later to be safe).


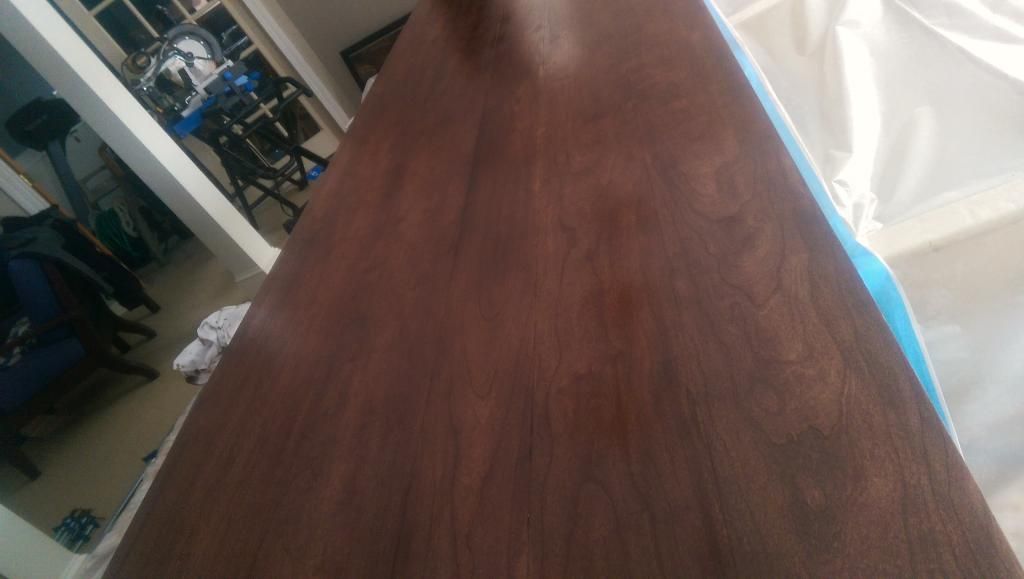
    The nice thing about the Festool vac is that with an adapter it hooked up nicely to my Rigid Random Orbital. Its such a treat to be able to work on things in the house with basically zero dust. After glue up, planing and sanding


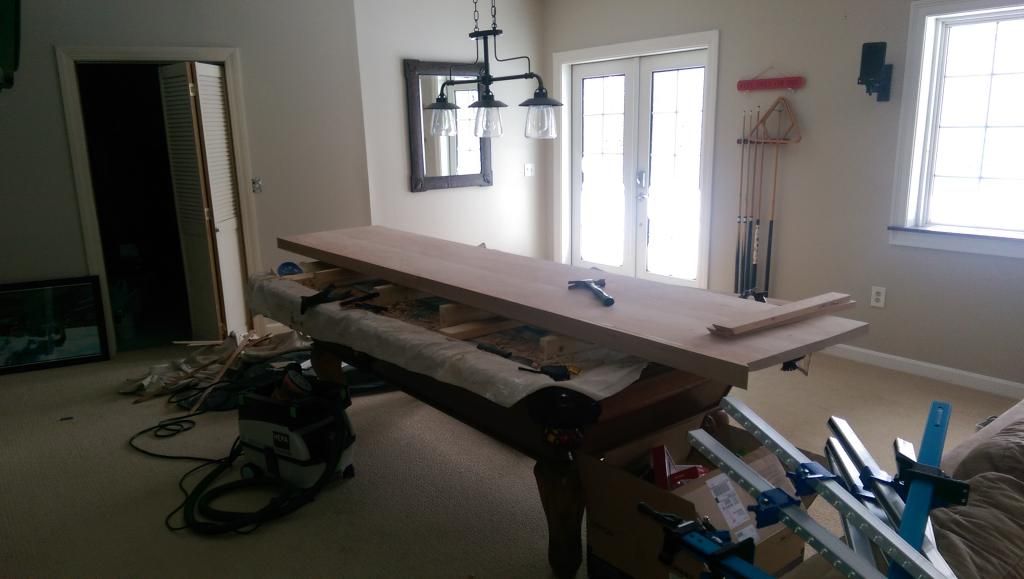
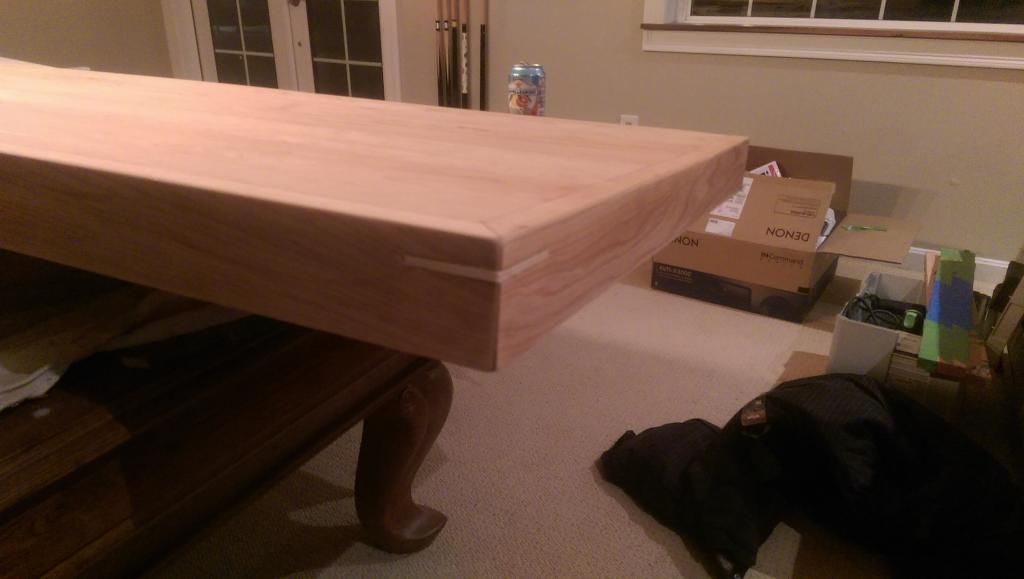
    Then I trimmed the edges and did a test fit. I like it, but the wife "suggested" it would look even better (dont you like how they frame it this way) if the edges were built up. Sooo.....I went out, and grabbed more Cherry. Now I'm no pro, and I'm sure you've figure that out by now having already seen close to 100 mistakes in this thread. I decided to rip it to 2.5" wide boards and glue them to the front and 2 sides with mitred *gasp* corners. I probably shouldn't have, but it seemed like a good idea at the time.

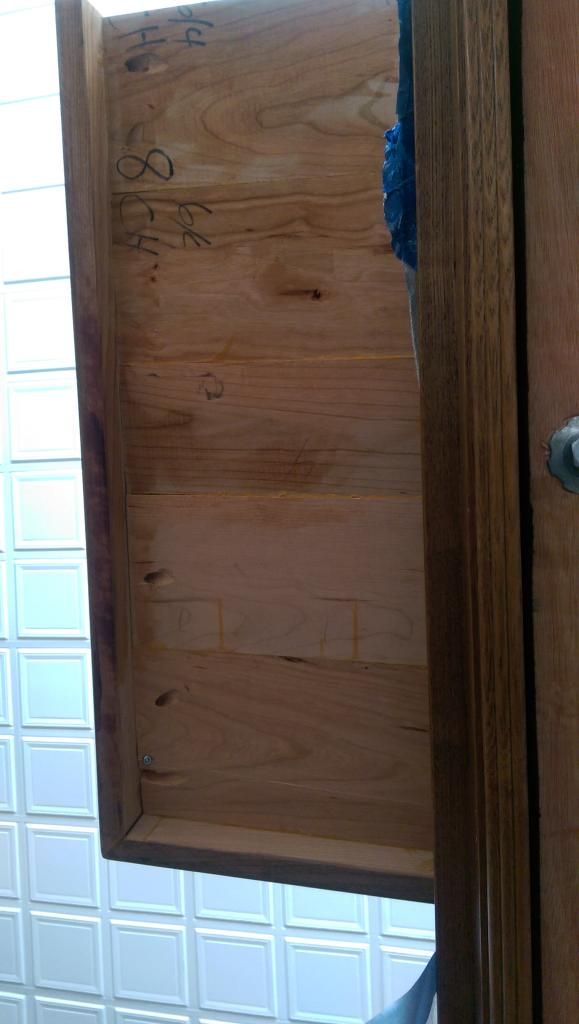
    I first clamped and glued the front. Then I added the sides, but also added pocket screws to them.


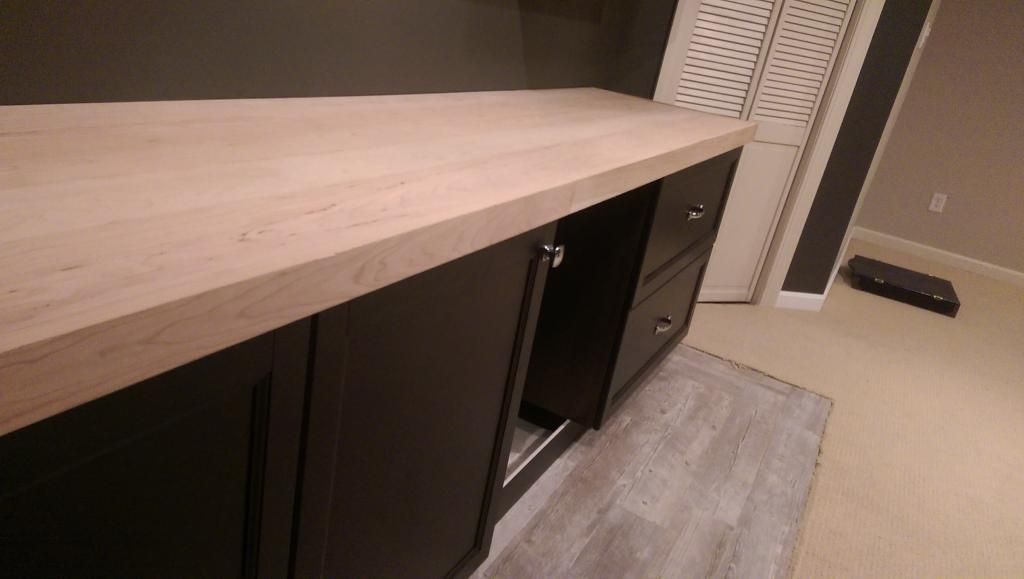
    Here it is being test fit
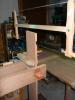
    Terribly blury pic
    Slightly less terrible pic


    Before finishing I wanted to put some extra detail into it (which I really had no business doing). I love the look of mitre splines and read about ways I could add them in after everything had already been glued up. I decided to use some white oak and acquired a Mini Dozuki, a chisel and a prayer.


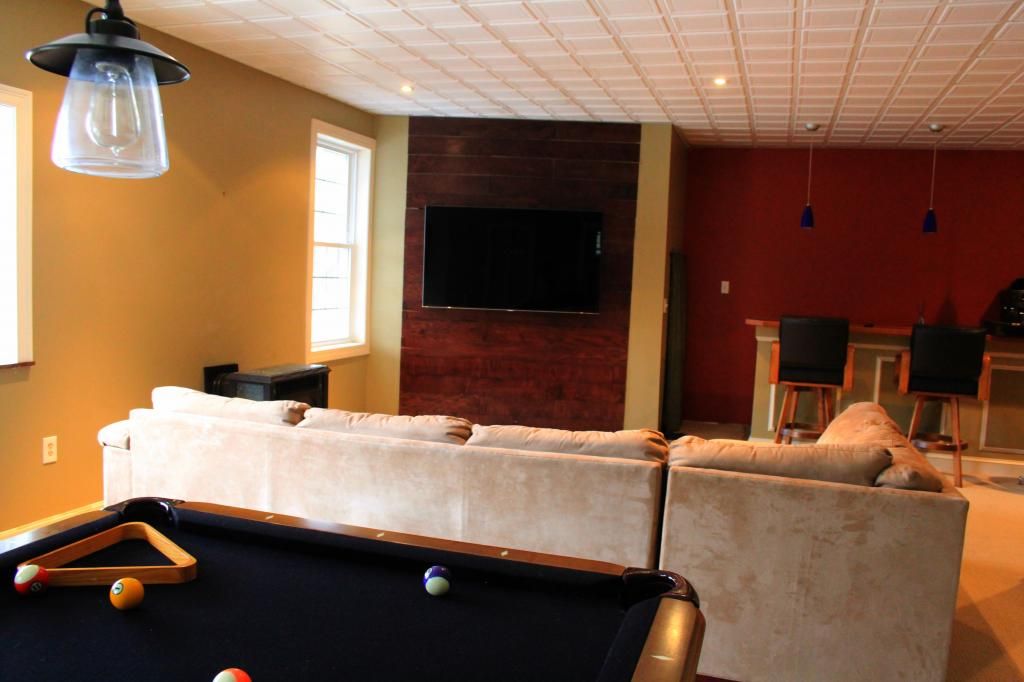
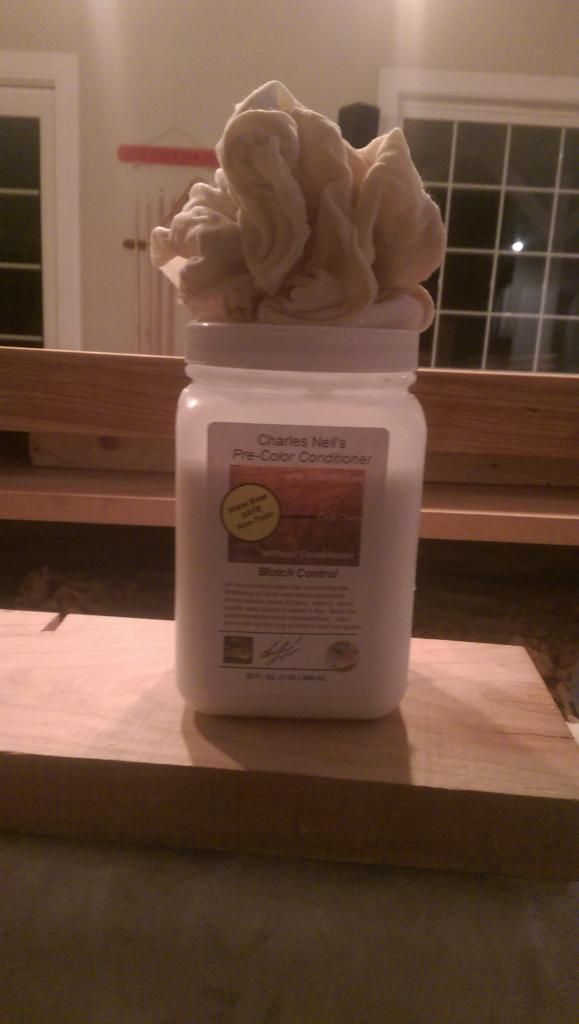
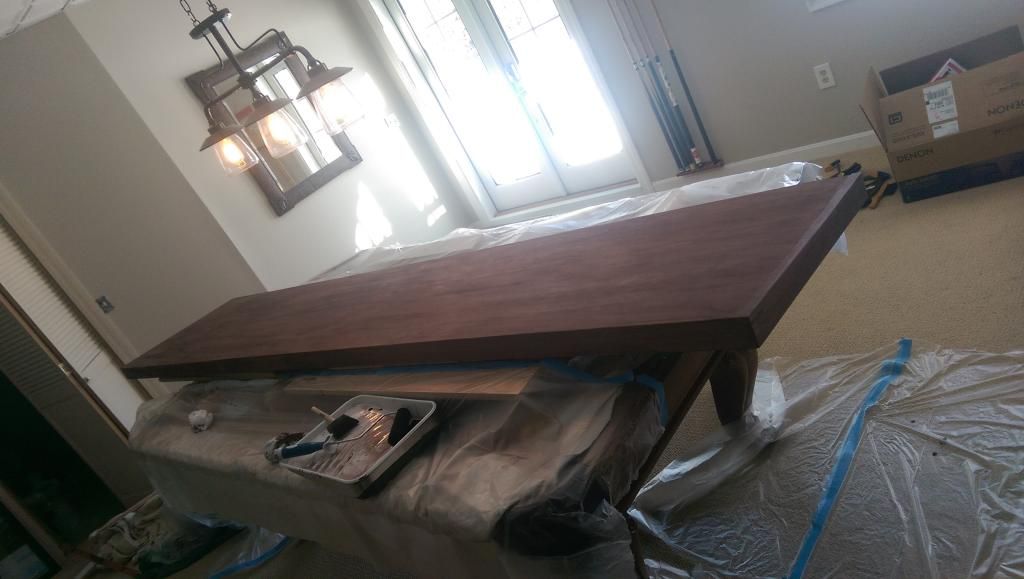
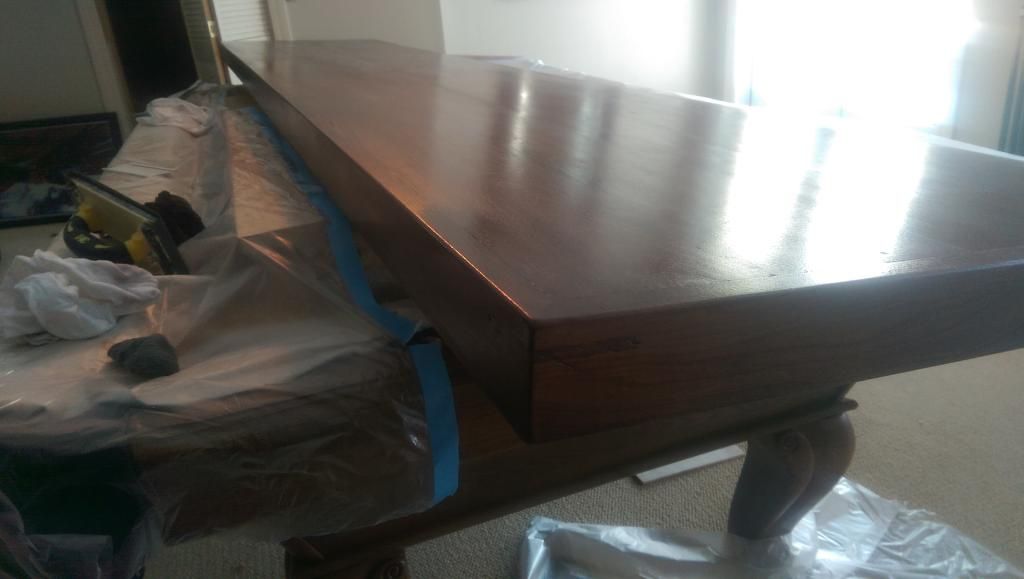
    So last night I've started finishing and will update this further. It involves Charles Neils Blotch Control. I'm also afraid to mentioned that I did need to use tint on the cherry, as it hard to at least come close to matching another feature I did down there, which is a wood plank accent wall with a flat screen mounted to it. I know, and I've been hesitant to post such an atrocity :-/.
    Last edited by Travis Bochenek; 03-07-2015 at 5:48 PM.

  2. #2
    Join Date
    Feb 2003
    Location
    McKean, PA
    Posts
    15,635
    Blog Entries
    1
    I hope you allowed for seasonal wood movement and didn't glue those end boards directly to the ends. The 25" width will move quite a bit and it is likely that the glue will fail or the top will cup.

    Your best bet if you did glue it is to finish all surfaces with equal amounts of finish. This may not stop the cupping or glue failure. Or remove the end board and allow for wood movement. Do a search for breadboard ends to see what should be done with your edging.

  3. #3
    Join Date
    Jun 2008
    Location
    So Cal
    Posts
    3,765
    I like wooden counter tops.I removed something similar in my house.The wife wanted granite to match everthing so I didn't get my way.The cherry will look great ESP after it darkens over time.
    I don't know if the long grain on the ends was a great idea,Mother nature doent like it when you break her laws,She may let you slide on it for a little while.But something gonna happen someday.
    you may want to consider changing that detail before all the finish work is done?Good luck Aj

  4. #4
    Thanks guys, I had a feeling it could be an issue. I have indeed begun to layer my finish on, and have put it on all sides of the piece. I'm think it may not be enough considering your comments. The sides are indeed glued, and I had expected some movement so there are 2 pocket screws going into each side from the table. I used them almost as clamps when gluing and then backed them off afterwards so they weren't holding them tightly. I suppose if they move even a little though, the mitred corners will be out of whack regardless of the spline. Darn you mother nature.

  5. #5
    I have also yet to install it on the cabinets. Would it help if I at least gave space for movement at the wall? I am also planning on installing using large washers, keeping the screws loose. Anyway, here are some finish pics, at least it will look good until I have to redo it

    As mentioned, I actually built an accent wall using oak ply cut into strips. The bottom 2/3rd'd are attached to a base on wheels which allow that portion to roll away. I did it this way because the hot water heater is behind it along with other pipes I need access to. The top portion is attached to drywall. It's secured with several turnbuckle fittings. This is an older picture, since then I've repainted all of the walls.


    So my better half and I "agreed" to commit blasphemy and match the counter close to it. I used transtint Cordovan on that, then several coats of dewaxed shellac and gf poly. I made up a few test pieces and also utilized a little dark mahogany. Last night I eased the edges by hand using a rigid sanding block hitting them from a few angles followed by hand. I then put two coats of the Charles Neil blotch control on it. This stuff ROCKS. In my test pieces, blotches were very very obvious. As you can see by the pics below, it really worked well.


    After dye


    After shellac before sanding


    And finally after sanding and the first coat of Arm-R-Seal (top and bottom)


    And this one is without the pool table light on.

    I'm very happy with the color and how beautifully the blotch control worked. I love using these dye's and seeing the gorgeous grain. This is my first time using Arm-R-Seal and I also really like it. I'm using Gloss and will keep that finish, applying several more coats. I applied it ala WoodWhisperer style using tshirt rags and it went on very nicely. The depth and clarity of this combination of products is just awesome, and I know will get even better before it's done. Once its cured for a few weeks following the final coat, I'd love anyones recommendation on a wax. It's not a wet bar but will certainly see moisture and while nothing will prevent real damage, I assume wax will help. I was also hoping that the splines would resist the dye a bit but alas it didn't which is not a big deal to me. If and when issues arise from my bonehead move with the sides, I will certainly be able to reproduce the finish.
    Last edited by Travis Bochenek; 03-07-2015 at 8:25 PM.

  6. #6
    Join Date
    Dec 2010
    Location
    WNY
    Posts
    9,712
    I think you are in for a very unpleasant surprise down the road, probably next Summer if your house isn't air conditioned, a little longer if it is. Too bad after all that hard work. It'll be a hard learned lesson, but I bet you won't do that again. The next time you have some light colored accents that you don't want the dye to color, seal them first with something the dye won't wet. Shellac will work when using Transtint in water. As for wax, it won't add any protection and will show water rings, etc. There's no benefit. Arm-R-Seal is one tough finish all by itself.

    John

  7. #7
    Join Date
    Apr 2009
    Location
    Lasalle,Ontario
    Posts
    299
    1st big project came out nice looking. We all learn something the hard way. Doesn't mean you didn't do a nice job.

  8. #8
    Join Date
    Dec 2010
    Location
    South Coastal Massachusetts
    Posts
    6,824
    Sweet. That's an advanced skill, getting a deep finish in fresh Cherry.

    I've got a nice set of planes to trade for
    your KEF LS50, when you're ready.

  9. #9
    Join Date
    Nov 2014
    Location
    West Granby CT
    Posts
    777
    Quote Originally Posted by Jim Matthews View Post
    Sweet. That's an advanced skill, getting a deep finish in fresh Cherry.

    I've got a nice set of planes to trade for
    your KEF LS50, when you're ready.
    Good eye Jim. That's one of my favorite parts of the forum when people pick out small background details of a picture that has nothing to do with the main focus. When I post a picture now I try to zoom in on it and study it like a piece of fine art to see what is in the background "just to make sure."

    I can't comment on the OP wood movement but the fresh cherry finish and dye looks even and deep. The whole project looks real nice, what an addition to the already beautiful kitchen. I have trouble working with large stock like that, keeping It straight, jointing, joining etc. Awesome job on the key doing it by hand.

    I am getting ready to make a small raised "bar" on a short countertop. I'm going to use cherry as well, I have a bunch from a couple of trees I milled a few years ago. I love the trim and key's on your top but I guess I will pass on it based on the comments here.

    I will have to "stage" a bunch of treasure's in the background of picture if I post. Hopefully I have something that will peak Jim's interests. He is a great one to barter with!

  10. #10
    Beautiful. I would address the expansion issue now. You can score the seams on the ends and pry them enough to release the glue bond. Then you can attach them from underneath using loose pocket screws.

    if that is daunting, then you can cut relief kerfs on the end boards with your dozuki. It is not ideal, but a little suboptimal damage control now may help a bigger fail later.

  11. #11
    Quote Originally Posted by John TenEyck View Post
    I think you are in for a very unpleasant surprise down the road, probably next Summer if your house isn't air conditioned, a little longer if it is. Too bad after all that hard work. It'll be a hard learned lesson, but I bet you won't do that again. The next time you have some light colored accents that you don't want the dye to color, seal them first with something the dye won't wet. Shellac will work when using Transtint in water. As for wax, it won't add any protection and will show water rings, etc. There's no benefit. Arm-R-Seal is one tough finish all by itself.

    John
    Thanks for the tip on the spline, I will definitely go that route next time. While the basement is a full walkout, it always stays cool year round, unless the gas fireplace is going. I know this wont stop normal seasonal humidity swings though.

    Quote Originally Posted by mike mcilroy View Post
    1st big project came out nice looking. We all learn something the hard way. Doesn't mean you didn't do a nice job.
    Really kind words, very much appreciated

    Quote Originally Posted by Jim Matthews View Post
    Sweet. That's an advanced skill, getting a deep finish in fresh Cherry.

    I've got a nice set of planes to trade for
    your KEF LS50, when you're ready.
    Hah, thanks, but I simply credit the people on here who've paved the way and taken the time to educate the rest of us. Great eye on the speaker! I picked those up a few months ago after listening to them just once. They sounded so transparent and brought so much emotion that I felt like someone punched me in the gut!

    Quote Originally Posted by Jebediah Eckert View Post
    Good eye Jim. That's one of my favorite parts of the forum when people pick out small background details of a picture that has nothing to do with the main focus. When I post a picture now I try to zoom in on it and study it like a piece of fine art to see what is in the background "just to make sure."

    I can't comment on the OP wood movement but the fresh cherry finish and dye looks even and deep. The whole project looks real nice, what an addition to the already beautiful kitchen. I have trouble working with large stock like that, keeping It straight, jointing, joining etc. Awesome job on the key doing it by hand.

    I am getting ready to make a small raised "bar" on a short countertop. I'm going to use cherry as well, I have a bunch from a couple of trees I milled a few years ago. I love the trim and key's on your top but I guess I will pass on it based on the comments here.

    I will have to "stage" a bunch of treasure's in the background of picture if I post. Hopefully I have something that will peak Jim's interests. He is a great one to barter with!
    Haha, yep it's great to see how often people share more than one hobby or rather obsession. Really appreciate the great comments, I did everything in there myself with the awesome wife actually setting the tile. She's much more patient than I am with that task. Taming the large stock was indeed a task. I do plan on getting a jointer and planer at some point, and not having them now made me learn how to throw that jack plane. The upside is that I saved all of the cherry shavings in a huge box and will use it in the outdoor fireplace for kindling.

    Quote Originally Posted by Prashun Patel View Post
    Beautiful. I would address the expansion issue now. You can score the seams on the ends and pry them enough to release the glue bond. Then you can attach them from underneath using loose pocket screws.

    if that is daunting, then you can cut relief kerfs on the end boards with your dozuki. It is not ideal, but a little suboptimal damage control now may help a bigger fail later.
    Thanks Prashun, I've read a bunch of your other posts on here so I appreciate you stopping by my humble thread. You're right, it needs to be addressed. I'm thinking through the options here and like your ideas. The main body of the table is made up of 5 boards, then the edges are the front piece and 2 side pieces. If I'm understanding correctly, the side pieces are the culprit, and since they will prevent the wood from expanding and contracting towards and away from the wall (because their ends are glued), the only other option is for the boards to flex up or down, ruining the flatness.

    Is that more or less correct?

    One idea of course is to remove the glued sides and if I want to keep the mitered corners I've made, attach them only with pocket screws or some other mechanical method. I do have 2 pocket screws currently in, and could add more while it's still glued so that they hold it in relatively the same position.

    I also think that the kerf idea could be plausible. Here is a picture of the underside, its not pretty, and you'll see where I utilized a few pocket holes which were abandoned.


    What if, instead of removing the glue, I cut kerfs possibly even all the way through the side boards which mirror'd the joints between the boards. I wouldn't need to mess up the mitres in the front as they're basically contained in that fairly wide board. I've read about flexible caulk type material used on boats and could maybe even use that in the kerfs, or just leave as is, sanding and dying a bit. Does that make any sense?

  12. #12
    Join Date
    Jan 2010
    Location
    Saturna Island, B.C.
    Posts
    327
    Quote Originally Posted by Travis Bochenek View Post
    Thanks guys, I had a feeling it could be an issue. I have indeed begun to layer my finish on, and have put it on all sides of the piece. I'm think it may not be enough considering your comments. The sides are indeed glued, and I had expected some movement so there are 2 pocket screws going into each side from the table. I used them almost as clamps when gluing and then backed them off afterwards so they weren't holding them tightly. I suppose if they move even a little though, the mitred corners will be out of whack regardless of the spline. Darn you mother nature.
    It is not mother nature but the knowledge of how to work with solid materials that are derived from mother nature.
    there is only one way to do it and get the problem out of the way and to feel confident and that is to fix it now. it will involve stripping and redoing the finish. it is going to be a lot easier to do it now than later;as later you will also have to repair the cracked boards and then do the ends properly. and you won't have to live with people pointing and picking at the problem and crushing your ego on the job. also make sure how you mount it to the cabinet so that it also has allowances to move. all those pocket screw are just reinforcing the glue.
    the end boards are not required to hold your boards in place as long as you did a decent job of joining the boards and gluing them up; they should not flop up and down.
    ron
    Last edited by ron david; 03-08-2015 at 9:45 PM.

  13. #13
    Join Date
    Jun 2008
    Location
    So Cal
    Posts
    3,765
    Hello Travis, I think if the glue bond was broke and the screw hole were a bit over sized you may have a good chance of keeping your miter closed.
    Hopefully you work will hold out I think being in basement is in your favor.
    If you do Sneek by on this one it's not good practice in the future esp if you make something for family or friend that lives some place else.My referance to Mother Nature is my way of saying wood is both Mysterious and Amazing.Aj

  14. #14
    Travis, thinking more about this I don't think you should kerf. It will solve the problem and is the easiest, but won't look right. If you do it I would only do one around the middle. Doing more would be overkill and trying to make it look like a design feature wouldn't look right on imho. You would do this only as damage control and accept it looking substandard from the edges.

    if it were me, I would try to pop the edges loose. You have a lot of surface underneath against which you can strike a mallet. Remove the pocket screws, tap the edges loose and then widen the leaving hole of the pocket screw and re attach. You don't need to remove the piece entirely, you just want to break the glue bond over the rear 2/3 of the edge. You can leave the littered spline in tact.

  15. #15
    Quote Originally Posted by Andrew Hughes View Post
    Hello Travis, I think if the glue bond was broke and the screw hole were a bit over sized you may have a good chance of keeping your miter closed.
    Hopefully you work will hold out I think being in basement is in your favor.
    If you do Sneek by on this one it's not good practice in the future esp if you make something for family or friend that lives some place else.My referance to Mother Nature is my way of saying wood is both Mysterious and Amazing.Aj

    Thanks Andrew, I agree. If the mitre's spread, I can deal with it. I could always put a metal corner guard like this on it.

    il_340x270.547815942_a1xw.jpg

    My biggest concern is that the main boards will bow/buckle from being locked in on the edges. My question to you and everyone else, is that If I do relief cuts all the way through the side border pieces so that they were still glued to the individual boards (4 cuts in total on each side) but not connected to each other, would that still allow for movement? I would mirror the joints of the boards on the top basically leaving several separate side pieces connected individually to their respective planks. With those side pieces connected individually by glue still prohibit movement?

    I did a test cut on one of the cherry scraps that has a test finish on it with my mini dozuki to see how obvious it will be on the finished counter. I love that saw, it leaves a very clean and thin cut, and I could turn those into a subtle design cue. The cut is so thin I could barely slide a piece of 600 grit sandpaper in it. Of course if a single piece glued to the end of a single board does indeed hinder movement, then my only option is to try and remove each entire side board , clean them up and reattach with only screws as mentioned. I want to ensure that this countertop does last, staying as straight and flat as it is today. I'm willing to sacrifice perfection and aesthetics to do this.

Posting Permissions

  • You may not post new threads
  • You may not post replies
  • You may not post attachments
  • You may not edit your posts
  •