Results 1 to 4 of 4

Thread: Trying to get into the corner

  1. #1
    Join Date
    Jun 2010
    Location
    twomiles from the "peak of Ohio
    Posts
    12,217

    Question Trying to get into the corner

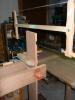
    Cutting a few of these miter dovetails. Seems there is a spot in every corner I just can't seem to get to. I do have an old "beater" 5/16" chisel, wonder if I could re-grind the sides to a knife edge? Also, would i need a skew type tip on it, or make two? Maybe these might fit a bit betterIMAG0002.jpgIMAG0004.jpgStill needs some fine tuning at the bevel areas. The third one of these does look a bit better. As in...the third mitered dovetail I have ever tried to do. Wood is Black Walnut. All the scrap i had that was close to the same size.

    Be nicer if I could clean out them corners, though.

  2. #2
    Join Date
    Dec 2010
    Location
    South Coastal Massachusetts
    Posts
    6,824
    In the back, at the bottom?

    I use a little undercutting there.
    It's the sides of the pins and tails that have mechanical strength
    and glue surface. If you've got debris in the back,
    you can chamfer the mating tail some, too.

    If you're talking about the long miter, a shooting board makes that more reliable
    than sawing. That way you can "sneak up" on the proper fit.

    When I saw, I leave it a little proud and plane to the final dimensions.
    Plane - test - plane again, until it fits.

    The Big Dogs might get this right in one pass, but I respect my limitations on a tricky joint like this.

  3. #3
    Join Date
    Jun 2010
    Location
    twomiles from the "peak of Ohio
    Posts
    12,217
    Ground down the sides of an old beater chisel, until the prfile looked like a triangle. Wound up with a bit of a skew to the edge, too. Just an old wood handled China type that you see at Harbour Freight. Chisel WAS 1/4'' or so wide. Still have a second one of these old beaters @ 5/16' or so wide. Might turn it into the opposite skew.

    tried the "New& Improved" chisel on the inside corners of those mitered Dovetails. Clear back in the back corners. Could clean out by going straight down, and coming in from the outside. Cleaned a bunch of waste out. Corner now is a clean and sharp corner. The joints even fit better now!. Was able to get the mitered areas to meet each other.

    Long miter, either on the sides, or across the edge of the joint was done with just a sharp 3/4" wide chisel. Saw the waste away, leaving the lines. Chisel to the line. Seems to help if I cuss a lot while doing these things, too......

    Wood being used is Black Walnut. Happened to have a few off-cuts sitting around after the Tool Chest build. The tool chest also made a nice seat. I could clamp the work to the bench top, sit down on the chest, and saw away. Better viewing angle? It was easier on this old back, though...

  4. #4
    Join Date
    Jun 2010
    Location
    twomiles from the "peak of Ohio
    Posts
    12,217
    Ok, ok, pics or it didn't happen, right? IMAG0005.jpgLike the "Miter Joint"? Another look at the miterIMAG0006.jpgHowever, there is more than meets the eye going on hereIMAG0007.jpgThat groove was done with old G. Roseboom's 1/4" Plough plane. Oh, the dovetails?IMAG0008.jpgYep, that "New & Improved" chisel can get back into them corners, and clean them out. Not too bad for the first three joints i've ever done this way, this being joint "C". Just old cut-offs of scrap to practize on. Might make this a box of some sort. Still needs a bit of fine tuning...
    Last edited by steven c newman; 04-03-2014 at 3:34 PM.

Posting Permissions

  • You may not post new threads
  • You may not post replies
  • You may not post attachments
  • You may not edit your posts
  •