I will not go over the safety side of the tool nor the politics as those have been beat to death.
Well Ive been lusting for a SS since they first came out, but being out of my budget started a savings fund. My Grizzly 1023SLX had served me well but I wanted to upgrade and really like the safety feature. With the last project providing a significant bump in my $$, I bit the bullet and ordered it back in early Feb. It supposed to be delivered on a Friday and it dumped a foot of snow. Long story short 4 separate appointments later (all delayed due to weather) It arrived last Friday! A special thanks to the Tom Temple and The Downing Town PA Woodcraft Store. He was great to work with.
IMG_0824.jpgIMG_0829.jpg
Packaging
Unlike the PCS, the ICS arrives in an all wood crate and a second box for the rails, and the extension top. Eight or so big screws removed and the top of the crate lifts off the base easily. The Saw is not bolted to the packing crate but is well packaged and wrapped. We removed the boxes and the saw was easily removed from the packing crate.
First step was getting the beast on the industrial mobile base. The powder coat on this is fantastic and very thick. I was extremely pleased with the quality of the wheels on the base. It blows my old shop fox mobile base out of the water.
Putting it in the Mobile Base
It took three of us to do four quick lifts to get it on the base. There are two main support bars underneath the base. We lifted it over the first one with a grunt (this sucker is heavy), lifts two and three got it close to the second support and the final lift got it situated on the last support bar. At that point it moved like it weighed a couple pounds. If you get one accessory for your saw this is it! When assembled, I can move it around with a pinky.
The ICS has great assembly documentation. I had watched a lot of videos on you tube about the ease of assembly with the color coded parts packaging. This is not the case for the ICS. Its one bag of bolts washers and screws. No big deal, I just dumped them into a magnetic bowl I have and all was ok.
IMG_0833.jpg
Documentation is strait forward and easy to follow. Out of all the nuts bolts and washers, there was a single lock washer missing for the rail. It was not an issue I had a nylon locknut that was substituted and better anyway (Love my bolt bucket). Table was assembled and level in a flash. This thing is machined well. One wing is attached already and you have to put the second on.
IMG_0827.jpg
Installing the Rails for the Fence
Rail and fence assembly was a tad of a challenge due to its weight. The front and back rail are really heavy. Its a Biesemeyer style fence similar to the one I had on my Griz except much better quality and the powder coat is thick and nice.
I used roller stands to support it and align to the top.
IMG_0835.jpg
The counter sunk machine screws takes out any need to align the rail to the table top. You cant get it wrong. I remember the slots in the shop fox version of this style fence and the up and down adjusting to get it just right. Next step was assembly of the legs to the table top. The brackets have predrilled holes for the screws. Assembly was easy.
IMG_0836.jpgIMG_0838.jpg
Another change from the videos Id seen on the web. The extension top for the 52 fence is just in a plastic back and its own box. In a lot of videos it shows a plastic coating that is peeled of the top to protect it. They must have stopped that or its not on the ICS. Not an issue I just removed enough from the bag to get the legs on and then flipped it over and pulled the plastic bag off and installed in the rails. It was a piece of cake.
I used some bit and blade cleaner to remove the oil on the tube to support the fence. Again very nice and finish was perfect. The only adjustable part is the distance from the steel tube to the side of the SawStop rail which is 1/16th of an inch. I did both ends and put the fence on the table and first try the fence was .005 out of perfect to the blade. A quarter turn of a machine set screw and it was perfect. The fence was a perfect 90 to the tabletop.
Using the saw and cut quality
Miter Slots were perfectly aligned to the blade and arbor is running true. I put the supplied 60T SawStop blade on and inserted the riving knife, it locked easily in place. I removed it and put the dust guard insert and that was not as tight as I would like. It was slightly thinner (.005) than the riving knife. I found the documentation on adjusting the tension on that and it was fixed in a jiffy to my liking. They really designed this so you would be willing to easily use the safety equipment. Love it.
Time to Fire it up! It requires a 30A circuit. Being forward thinking I purchased 10/4 flexible wire to get from saw to outlet. Id like the capability to have 110 at the saw to support a light or future addition, since it is about 8 away from anything. The grommet opening for power hookup was only ¾ and the cable would not fit! So I went back and bought 12 of 10/3 for now to get it running and Ill take care of that latter by adding a junction box at the saw and wire from the JB to the saw and have a 110 outlet. Cost me an extra 25$ for the wire but just an inconvenience.
So, wiring was done and time to start it for the first time. I flipped the switch on and no lights? I checked the wiring and all looked ok. Pull the cover on the power box and have 240 at the saw? I was scratching my head and remember the ICS has the disconnect switch for lock-out/tag-our support. It was in the off position. Fixed that and it took about 10 seconds to go through the self-test and was ready. I have to admit, I felt like Chevy Chase in Christmas Vacation and the Christmas light scene.
Pulled the paddle and she fired right up. I love the bumping the paddle with the knee to cut it off. It flashes green while it spins down and you cannot touch the blade during spin down or it will trigger the brake. However, I dont know why anyone would want to do that.
The stock blade is not a bad blade. I cut 4/4, 5/4, and some 12/4 stock. I had a 3hp saw prior to this and can say the 5hp is sweet. It cuts like butter and you really see it on the thick stuff.
Test cuts were all square and clean on the edges. The only drag I see on that blade is cutting the thick stuff. I had a piece of a bedpost that was a little over 2 5/8 thick. Did some cross cuts and it was square and a pretty decent cut. However it did show saw marks on the end-grain. I have not used the stock miter gauge except to put in in its holder on the saw. I will check it later and report on it. I used my Incra 1000se for miter cuts because thats what I will be using going forward anyway and not the stock miter gauge.
Ive got two Forrest blades on order and will switch when they arrive. ( I sold my old thin kerf ones). I will state that all the cuts are usable with the stock blade and I would use that blade with no reservation. However, after being accustomed to Forrest cuts, I just want that quality. So I give the blade a B+ and will keep it for an emergency blade.
Dust Collection and the over arm attachment:
Dust collection is fantastic. With the ICS, the shroud around the blade is heavy duty cast iron with a plastic side gate that opens for easy access to the blade area. Dust is directed down to the rear of the saw via flex pipe. The exit to the rear of the saw does present a challenge for me. I liked using my bench as an out-feed table for my Table saw. With the location of that DC port that will not be possible without building a bridge section. Ill have to come up with either a new solution, i.e. dropdown hinged table, or build a small bridge to my workbench.
My only screw up is remembering to close that plastic door when I open it to change the riving knife or blade. Its magnetic and nothing to it, but twice I forgot and got a bit of dust into the cabinet. That was totally my fault not the saw.
The over arm attachement comes with an adapter that joins its hose to the main DC at a 90 degree angle. I did not like that setup. I replaced that with an elbow (I know thats not optimal) and Y joint, and it improved flow. I have a 2hp DC and the length of trip from saw to DC intake is 20.
If I were going on a start basis for like Id give it 6 stars out of 5. (Thats not a misprint). They took a great safety feature and built a truly great saw around it. From the blade brake to the power interconnects to the lockout tag out features its top notch. I figure it will be up to my sons to deal with it when Im gone as its the last saw I will buy. I really struggled with the cost but no buyers remorse now that I have it.

 Reply With Quote
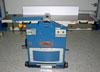

")