Page 1 of 2 12 LastLast
Results 1 to 15 of 28

Thread: Newbie Notes - Lessons learned while flattening my workbench

  1. #1

    Newbie Notes - Lessons learned while flattening my workbench

    As you know from earlier posts, I just flattened my bench. It was a learning experience, for sure. So I thought I'd jot down my thoughts and observations in an effort to help another newbie, some day. I know it won't help you "old hands", but every one of you helps me, every single time I ask. So this is kind of a "pay it forward" thing. I hope no one will mind, and I won't mind if anyone more experienced corrects my thinking. The idea is to help the next newbie.

    1. I found it far harder than Rob Cosman (RC) or Christopher Schwartz (CS) made it look. (I spent most of a weekend doing this.) In hindsight, that shouldn't have been a surprise. Experienced guys always make things look easy, because they've been practicing for years. I'd surely fail miserably if I watched a Baryshnikov video and then tried to dance ballet. (Probably hurt myself too.) Why should using hand planes be any different?

    2. Don't try to hog off material using your arms. I'd planed small pieces, but hadn't tried to flatten a long wide surface before this. My technique was horrendous and I was ready to give up hand tools after 4 hours of this punishment. Then, the guys told me "This is more like judo than weightlifting" - use your hips, legs and body - not your arms. Once warned, I think I finally got into a crude rhythm for doing that. Far more practice is required. This is probably not something one can learn (well) by reading it in a book. Better to find a good video or call someone at the local woodworking club to develop a more refined technique. (Judo - I liked that.)

    3. If the edge on your bevel-up plane iron is chipping, try increasing the angle of the microbevel. I was using a LV BU Jointer for the basic flattening. (CS said to use a 7. RC said use an 8. Hence my choice.) My bevel was 25 degrees plus a 2 degree microbevel - 27 deg total. But the edge kept chipping and it was causing me to take more time re-sharpening than I wanted to - I had to keep going back to 600 grit, then 1200 grit, then finally honing on my 6000 grit Shapton. When I increased the microbevel from 2 degrees to 5 degrees (30 deg bevel, total), the chipping stopped. I wouldn't have believed that 3 degrees made such a difference until I tried this myself.

    4. Don't get too hung up on tolerances. I started off trying to make the bench 0.004" flat over 38" (the length of my LV straight edge). I got nowhere near. But I did get down to 0.02" - 1/50th of an inch - using just my jointer plane. Being a hard-heard, I then set a goal to make it 0.01" - but no more than that. You can drive yourself nuts chasing close tolerances - especially in wood, a material that changes daily. So I switched to my Smoother and started working the highs and lows after making the "topo map" described later. As a valuable side lesson (for me, anyway), I got real insight into why it costs more money to work to closer tolerances - simply because it's a whole lot more work to hit 0.01" than it is to hit 0.02". You have to keep checking and tweaking and re-checking and re-tweaking. I knew that intellectually, but now I know it from experience. Experience is hard to beat.

    5. To get it really flat, make a topographical map on your benchtop. Get out your straight edge and a pencil. Put the straight edge on the left end of your bench, parallel to the end (perpendicular to the length). Check for flatness with a feeler gauge. Mark the low spots and high spots. Then move the straightedge 1 or 2" to the right and repeat. When you get to the right edge, you're done. Now, turn your straight edge 90 degrees and place it along the back edge of your bench, parallel to the length of your bench. Repeat the feeler gauge work in this direction. Now you know where to take off material. (Thanks Chris Fournier!)

    All-in-all, this was a painful but valuable experience. Now that it's done, I'm glad I attempted it. Now I just need to go work on my planing technique.

    Thanks,
    Fred
    "All that is necessary for the triumph of evil is that good men do nothing."

    “If you want to know what a man's like, take a good look at how he treats his inferiors, not his equals.”

  2. #2
    Join Date
    Jan 2014
    Location
    Loveland, CO
    Posts
    418
    I'm the newbie that you're aiming this post toward, and I really appreciate the insights you've put down here. It may be a while until I build my own bench, but these thoughts will be helpful in getting me down the right path as I start using hand planes.

    I have to ask. Did you hit your goal of being within 0.01" over your 38" length?

  3. #3
    Join Date
    Aug 2013
    Location
    Melbourne, Australia
    Posts
    39
    Awesome, thanks for sharing. I hand the some problem when I started using hand tools. I couldn't plane for more than 30 minutes with out getting really tired because I was only using my arms and not my whole body. Besides dull tools I think that's the biggest issue people have with hand tools when they're starting out. Using the correct technique makes a huge difference when planing and sawing. It's sad that so many people get turned off using hand tools because their saw isn't sharpened right or they just need to change they way they're working a bit.

    I just oust checked my bench and it's flat within 0.02". When I flattened it a while ago it was a bit better but I've never hand any problems with it. Looking at some the benches I've seen professional and old time woodworkers using I don't think it's as big of an issue as people make it out to be. I've seen professionals that just use and old door on saw horses who produce some very nice stuff.

  4. #4
    Join Date
    Apr 2008
    Location
    Dayton Ohio
    Posts
    964

    Good post

    I have also found that using a tooth blade knocks down high areas quickly. Wax helps too. Even a small fan to keep you cooler. A bench brush and dustpan to keep things clean. A jig to drill 3/4" dog holes. When you are done and start using the bench is when the fun begins. Enjoy.

  5. #5
    Join Date
    Jan 2008
    Location
    Silicon Valley, CA
    Posts
    989
    Heavy cambered #5 is *much* faster than trying to gross flatten with a jointer.
    Your advice to make the topo map (i.e., figure out where you need to remove material) is right-on.
    And I also found a toothed blade to be very useful, especially if you have areas with knots or reversing grain that might otherwise result in really ugly tear-out.
    (my bench top still has a little texture from this toothed planing)

    Matt

  6. #6
    Join Date
    Sep 2007
    Location
    Longview WA
    Posts
    27,461
    Blog Entries
    1
    I know it won't help you "old hands"...
    Even us "old hands" might learn something new or have the old reaffirmed.

    This is probably not something one can learn (well) by reading it in a book...
    Reading and watching supplies the intellect with which we can step up to the bench and provide the muscle.

    [QUOTE]I knew that intellectually, but now I know it from experience. Experience is hard to beat...

    Putting the muscle into what we know intellectually is what provides experience.

    Now I just need to go work on my planing technique...
    It just takes time and repetition, lots of repetition.

    jtk
    "A pessimist sees the difficulty in every opportunity; an optimist sees the opportunity in every difficulty."
    - Sir Winston Churchill (1874-1965)

  7. #7
    Quote Originally Posted by Eric Schubert View Post
    I'm the newbie that you're aiming this post toward, and I really appreciate the insights you've put down here. It may be a while until I build my own bench, but these thoughts will be helpful in getting me down the right path as I start using hand planes.

    I have to ask. Did you hit your goal of being within 0.01" over your 38" length?
    Im glad it will help. I wanted it to!

    I did hit the 0.01, within the tolerances on my measuring devices! At least until that wood expands/contracts.

    Fred
    "All that is necessary for the triumph of evil is that good men do nothing."

    “If you want to know what a man's like, take a good look at how he treats his inferiors, not his equals.”

  8. #8
    Thank you for sharing I know this will be helpful when plane my first large area.

  9. #9
    Thank you for the kind words and encouragement, folks.Fred
    "All that is necessary for the triumph of evil is that good men do nothing."

    “If you want to know what a man's like, take a good look at how he treats his inferiors, not his equals.”

  10. #10
    Join Date
    Apr 2013
    Location
    Wild Wild West USA
    Posts
    1,542

    What the heck. I like talking about this stuff so will add my bucket to the brigade.

    using a LV BU Jointer for the basic flattening
    See I would have used a scrub cross or diagonal TO FLATTEN.
    and
    my big old straight edge.
    Jointers are for JOINTING. If that.
    Point it down THE EDGE of a long board and walk along.

    They are too heavy to go back and forth with a few thousand times. (more like a few ten thousand times). Unless you like exercise and as you say "punishment".

    Then a jack to smooth but not to take off much thickness for flattening and then finish plane to make pretty and smooth.

    I wouldn't have believed that 3 degrees made such a difference until I tried this myself.
    Thank you !
    Not so much physics but
    GEOMETRY.
    The importance of proper 'FACET" geometry is huge in some situations.

    LV straight edge
    If your LV "straight edge" is like both of mine you were fighting an unwinable battle.
    They have to be straight to make a flat surface. AND when JOINTING and checking TWO boards that will be glued together . . . . the error can be twice the error of the straight edge. Must have been how the questionable practice of a "sprung" joint got popular. People couldn't make em join right so they called the gap "beneficial".

    Hence my suggestion to all to buy real straight edges.
    or
    have experiences like yours with butt joints in thick wood glue ups and bench flattening.

    It is possible to Fettle the cheep straight edges
    IF YOU HAVE A REFERENCE TO CHECK IT WITH
    which I do.
    They'er not flat/straight. At least mine were not and lead to perplexing results until I started checking them out for accuracy.


    You can drive yourself nuts chasing close tolerances - especially in wood
    Nooooooo
    Wood is easily planed to fantastic tolerances. (try planing steel Ha, ha).
    You can drive yourself nuts chasing close tolerances -
    WHEN YOUR TOOLS AREN'T MADE TO CLOSE TOLERANCES ! ! !

    A material that changes daily.
    Here in Colorado my ebony straight edge (winding sticks) that I made hardly changes year to year. I can't detect much of any change checking it on a Starrett pink granite surface plate.

    Get out your straight edge
    Now you'er talking
    but
    loose the pencil
    use a lumber crayon. It is wax and lubes the plane sole to a small degree as it travels over the marks and is far easier to see

    and more fun to play with.

    Mark the low spots and high spots.
    For the most part take the straight edge over the surface and where ever it pivots on a high spot mark that and plane it after you go over the whole bench.
    The low spots will take care of them selves.

    I use winding sticks FOR ACROSS the bench , see "ebony" above.
    Plane until the whole bench is slightly hollow, no pivoting of the straight edge or winding sticks and the winding sticks parallel all along the length. I use three winding sticks. One on each end and one traveling the middle.
    Once all is ever so slightly hollow then plane the perimeter with the finish plane to get to that elusive what ever you are aiming for.

    Sharp blades are HUGE for this. Once your blade gets dullish DO NOT ADVANCE it to get it cutting again. That throws off the surface you are trying to keep flat.

    planing technique
    I would think after all that work you have perfected your planing technique.

    Go have a beer and pat yourself on the back.
    Last edited by Winton Applegate; 03-04-2014 at 1:33 AM.
    Sharpening is Facetating.
    Good enough is good enough
    But
    Better is Better.

  11. #11
    Join Date
    Apr 2013
    Location
    Wild Wild West USA
    Posts
    1,542
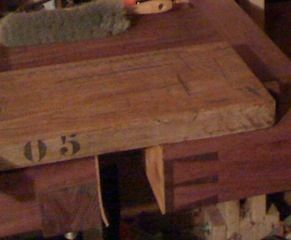
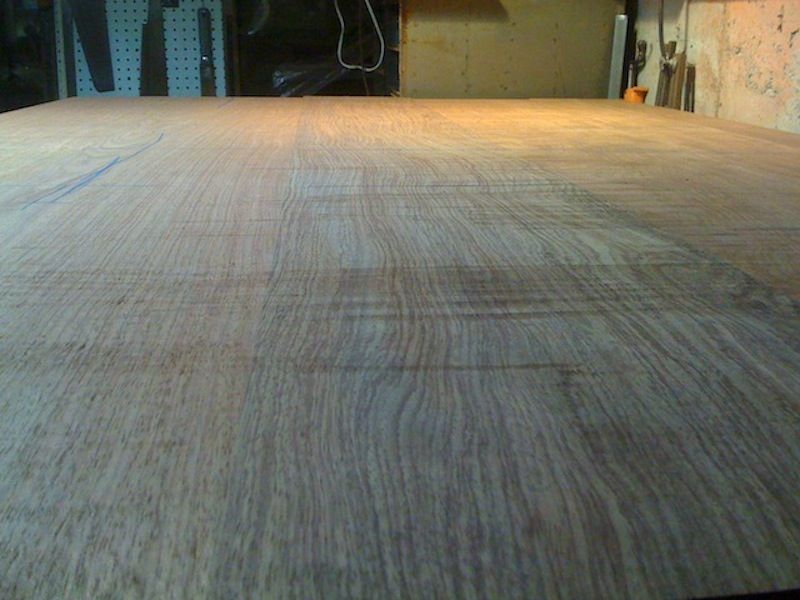
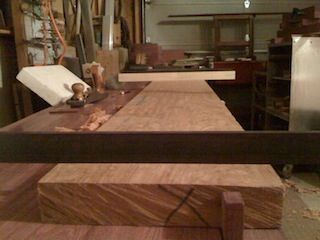
    You can easily see blue lumber crayon in these two photos.


    I used to use red for the low spots but I don't think it is really all that important to do looking back.


    Ebony winding sticks / straight edges


    Sharpening is Facetating.
    Good enough is good enough
    But
    Better is Better.

  12. #12
    Join Date
    Sep 2011
    Location
    Berkeley, CA
    Posts
    173
    Blog Entries
    1
    Yes, thanks for posting this. I'm a bit behind you. It is this side of woodworking that pleasantly surprises me.... People share what they've learned just to help others in what is generally an essentially solo process.

    1) they make it look easy through practice and editing. Wow, he built that whole thing on the time or took the dvd to play? Well, not really.
    I was watching Tom Figden videos and was surprised that some things he did were not all dance like smooth motions. He would have the plane stop and have to push through it, for example. Considering what he makes I really doubt it showed any lack on his part, rather that my expectations of what it should look like to see a real expert work was misinformed by all the videos and still photos that don't show that. I found it encouraging.
    5) I also resorted to the topo map approach. On my case the 13x66 boards are very wavy and twisted because they were test scraps by a guy with a new to him, quite used portable lumber mill who was making a log cabin. The band saw blade was NOT tracking. I used a scrub plane for most of the heavy lifting. I found I had to focus on the diagonal much more than others because of the twist with the wave of the face distracting me I had a hard time understanding the real overall shape of the surface. Turned out it had a saddle shape, only with the saddle rotated so the high points were at opposite corners. I'll try the lumber crayon next time instead of pencil.
    Posted from phone so pleases ignore any crazy word choices etc.
    I can't understand how anyone could plane without wax, especially with an iron plane! I just have to find a better easy to apply it than paper towels.
    Thanks for sharing what you're learning.
    Last edited by Fitzhugh Freeman; 03-04-2014 at 2:41 PM. Reason: noticed phone was trying to sneak in hidden messages by altering words.

  13. #13
    Join Date
    Sep 2007
    Location
    Longview WA
    Posts
    27,461
    Blog Entries
    1
    Quote Originally Posted by Fitzhugh Freeman View Post
    Yes, thanks for posting this. I'm a bit behind you. It is this side of woodworking that pleasantly surprises me.... People share what they've learned just to help others in what is generally an essentially solo process.

    [snip]

    I can't understand how anyone could plane without wax, especially with an iron plane! I just have to find a better easy to apply it than paper towels.
    Thanks for sharing what you're learning.
    There are likely as many reasons for "sharing" as there are people who share.

    There is always the "just in case of karma" approach. The teaching goes around then comes around...

    There is the "to learn a little, teach a little" school of thought. "When one teaches, two learn." (not sure who said that)

    There may even be the "thumping on the chest and look what I did" principle.

    Then again, friends share with friends. That is what friends are.

    No matter we all benefit.

    There are also many ways to apply wax.

    Mostly there are pieces of candle wax around my shop that are used for this. Just remember to go from heel to toe when applying. There is also a rag saturated with furniture wax. This is used to rub down the planes after use or to rub on the blades as the last step after sharpening on water stones. It is also sometimes used on the sole for a quick speed boost.

    You could always make a wax box secured by a dog hole to sit on the bench for dragging the plane over. Some use a rag like a wick for the same purpose.

    jtk
    "A pessimist sees the difficulty in every opportunity; an optimist sees the opportunity in every difficulty."
    - Sir Winston Churchill (1874-1965)

  14. #14
    Join Date
    Dec 2010
    Location
    South Coastal Massachusetts
    Posts
    6,824
    I have a round "puck" of wax left over from my hockey days.

    It's easy to find, if I drop it.
    I don't like having liquids on my bench,
    but I'm a slob.

    A little paraffin really works, and it's oh so cheap.

    No smell, and my dog won't eat it if I drop it on the floor.

    ********

    The making of a bench is a huge undertaking.
    I value my time too much to expend the effort required to build a proper bench.

    While I admire the determination of those that laminate, straighten, flatten and outfit benches
    I cannot fathom why someone would go to all the trouble. Even if you value your time at minimum
    wage, it's cheaper to just buy outright.

    But whadda I know?

  15. #15
    Join Date
    Dec 2010
    Location
    Burlington, Vermont
    Posts
    2,443
    One of the first things I learned from my first attempts at large flattening by hand -

    Check often.

    It's great to identify what needs to be worked, but until you get a feel for things, it's really easy to go from wind in one direction to wind in the other, or a board that's a little thick on the left to one that's real thick now on the right, and sooner or later you've got 1/4" lumber and a shop full of shavings . . . Stopping to check more frequently than you think you need to lets you figure out how much further to proceed and how the layout has now changed.

    I think my first flattening jobs took much longer than needed not because it was long, hard work, but because I basically had to do it all over again (and again . . ) because I was little overzealous and enjoying the physical aspect of it more than I was paying attention.
    " Be willing to make mistakes in your basements, garages, apartments and palaces. I have made many. Your first attempts may be poor. They will not be futile. " - M.S. Bickford, Mouldings In Practice

Tags for this Thread

Posting Permissions

  • You may not post new threads
  • You may not post replies
  • You may not post attachments
  • You may not edit your posts
  •