Results 1 to 12 of 12

Thread: Getting Started - Milling Boards for the First Time

  1. #1

    Getting Started - Milling Boards for the First Time

    Hi, all -- I am new member (obviously), with about a year's worth of experience in woodworking and a small shop in Massachusetts. I am starting to work on building a proper bench, based on the Not So Big Workbench plans from FWW (http://www.finewoodworking.com/item/...-big-workbench), and sourced my raw lumber from a local sawyer this weekend. As of yesterday, I have a decent number of board feet of ash and some red oak, destined for use in the bench:

    1392027_226746824155710_1582531702_n.jpg

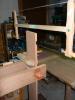
    My question is where to begin with the milling process, specifically with the ash, which has bark on the edges and is currently in 7-9' long pieces, stacked in the shop. The wood is fairly dry, having been in a solar kiln for most of the year, but it needs to be converted into S4S lumber before I can begin working on the bench, obviously.

    For context: I've built a few pieces (an 8' long farm table, and a queen-sized bed with a T&G headboard, mortise-and-tenon rails, and knock-down joinery), and have a relatively complete hobbyist-level shop (table saw, 6" jointer, 12" planer, 14" bandsaw, mortising machine, compound miter saw, router and router table, random orbital sander, and the usual mix of hand tools.) My understanding of the milling process is that I'll joint a face on the jointer first, then plane the other face parallel to the first, joint an edge on the jointer, and then rip the other edge using the table saw. A couple of things have me scratching my head, though:


    • Can I reasonably start by cross-cutting the longer boards with, saw, a circular saw or on the crosscut sled, to reduce the length of the pieces I'll be working with?
    • Similarly, can I do a rough rip for the wider boards using the bandsaw, so that I can joint the initial face on my measly 6" jointer?
    • What do I do about those thin strips of bark? Bandsaw? Awl? Draw knife?

  2. #2
    You are on the right track. You can cut the boards to rough length, add a couple of inches to length and cut them to final length later. Make sure you account for any checks in the boards. The same applies for the width. The thin strips of back could be removed when you cut to rough width. You can cut a little from both sides to get to your rough width. Jerry

  3. #3
    Join Date
    Mar 2006
    Location
    Austin Texas
    Posts
    1,957
    Question 1 - Yes, easier with hand saw or circular saw due to length. I would have a look at the boards and plan which board will be used for what piece(s) and cut to length(s) accordingly. Avoid knots, splits, cracks, etc. If you have the length available, leave an extra 1"-2" on each end to account for snipe if you are going to power plane. Your final length cut after closing in on assembly can be the "good cut" with the crosscut sled, circular saw/straightedge, etc. Question 2 - Yes if you want, but you can also hand plane to save having to re glue the widths back together for the bench top. The legs, stretchers, etc can be ripped down with the band saw. Another method that also falls into Question 3 territory, is to fab up a "sled" (typically a full-length sheet plywood "drop off") to temporarily attach the bark-edged, irregular board to ride on. Run the sled's straight edge then against the TS fence and allow the rough edge of the board to get ripped off in a straight line by the saw blade. Then you have a straight edge to use to rip the remaining rough edge off from. Backing up to Question 2 again, you can position the board anywhere on the sled if you want to use the sled to rip to a width. The BS will work, but many shops are better set up for the TS to handle the length for ripping due to the dimensions of the TS table compared to the dimensions of the BS table and that lots of TS have a :Catch table" positioned directly behind the TS.
    David

  4. #4
    Join Date
    Dec 2010
    Location
    South Coastal Massachusetts
    Posts
    6,824
    Breaking down stock to smaller sizes is the logical first step.

    It's just easier to handle boards that are under 4 feet in length.
    I recommend marking out with a lumber crayon and roughing out with a jigsaw.

    With a straightedge and fresh blade, you can get really close to your desired dimensions.

    A jigsaw will allow large pieces as you've shown to release internal stress without risk of kickback or trapping the blade.

    If you have a 6" wide power jointer, that's the widest board you can handle and your limiting dimension.
    There's no reason why you can't join boards together again, during glue-up.

    A drawknife is an excellent choice for peeling bark.
    I would just use a jigsaw, as mentioned above.

    This video is comprehensive in showing the steps for milling.

    If you're doubtful about your skillset, try Matthew Dworman at the Worcester, MA Archangel Co-op.
    That's really nice ash, and it would be good to get things right, the first time.

  5. #5
    Join Date
    Sep 2013
    Location
    Connecticut
    Posts
    362
    One problem you run into with rough sawn lumber is that it's easy to taper boards on a jointer because you have to make so many passes. What I do is take my #5 Jack plane with the iron ground slightly rounded and make one face reasonably flat by hand, checking progress with a straight edge and winding sticks. You can get it close enough with reasonable effort to lie flat on the table saw or even to allow running the other side through a planer.

  6. #6
    All excellent ideas -- much appreciated.

    My hand skills are lacking; learning how to plane properly without using power tools is the next major step in my development. I've just recently picked up a c. 1892 #4 bench plane, and plan to tune it up and get familiar with it as a means of doing so. I have a low-angle jack plane, but not a regular #5.

    In the interim, I'm comfortable using a jigsaw to rough out my boards; nothing in the final cutlist is over 4", so bringing these down to size and then gradually finishing them with the power tools isn't terribly intimidating. I'm apt to give Matthew a call or email, regardless, as having a local resource for improving and learning from is terrifically valuable. Thanks!

  7. #7
    Join Date
    Dec 2010
    Location
    South Coastal Massachusetts
    Posts
    6,824
    If you do take a refresher course, try to have the training directed toward the tools you have at home.

    I once took a course with industrial-size jointers and planers in the curriculum.
    Those tools are battleship sized, and stable like a house foundation.

    That's a far cry from the rickety things I can roll around my garage.

  8. #8
    Join Date
    Oct 2008
    Location
    Columbus, OH
    Posts
    3,064

    rough lumber - manage the moisture content

    Quote Originally Posted by Kevin M O'Brien View Post
    The wood is fairly dry, having been in a solar kiln for most of the year, but it needs to be converted into S4S lumber before I can begin working on the bench, obviously.
    Hi Kevin, welcome to the Creek. A bench build is a great project. I'm not sure what your experience is working with rough lumber. Judging by your questions about the milling process, I thought I'd throw in a few suggestions about working with rough lumber aside from the basic steps to milling.

    I haven't researched this thoroughly but IMO, I don't think solar kilns will drive bound water from wood cells as well as a heated kiln will. I view solar kilned wood more like air-dried lumber, where the free water in the wood is pretty well gone, but a significant amount of bound water in the cells remains. I give air-dried lumber plenty of time to acclimate in my shop before I work with it. I give kiln-dried lumber some time to acclimate as well, but not quite as much.

    Wood dries from the outside in. So, as you cut and open up boards exposing fresh faces, the interior of those boards will have higher moisture content than the surfaces. You don't want to invest a lot of effort milling faces on fresh lumber and then 2 days later not have a square edge in the lot. So, as you work with this lumber, you should give it time to rest and come to equilibrium.

    I would recommend this schedule:


    1. cut to rough length or not (your choice)
    2. stack/sticker 2-3 weeks
    3. rough dimension, rough surface*
    4. stack / sticker 2-3 days
    5. mill to final dimension (and use as quickly as possible)


    * I try to remove about equal amounts of material from each opposing face when rough surfacing so that the moisture content is roughly balanced on opposing sides of the board. I think it helps the board to come to equilibrium better.

    Have fun with your bench build!
    Brian

    "Any intelligent fool can make things bigger or more complicated...it takes a touch of genius and a lot of courage to move in the opposite direction." - E.F. Schumacher

  9. I have worked a bunch with rough cut. I have a small sawmill in fact.

    If I am cutting a "cheep" wood, I will generally square all 4 sides and rip boards out of that. This produces wood that is square on all 4 sides.

    If I am cutting an "expensive" wood, I will generally square two edges that are adjacent to each other, leaving one live edge. The live edge can be ripped off with a table saw later on. The advantage of this is you can cut each board a bit wider, but it si still fast and easy to trim them down.

    If I am cutting an "exotic" wood, I will only rip slabs out and leave two live edges. This gives you the widest possible board, but it is a lot more work. I will snap a chalk line down one side as far in as I want the board to start than cut that with a hand circular saw. Than from that side measure in as far as I can, and rip the other side with my table saw. This gives you the very best yield out of any given board.

    Each step is progressively more work. And as stated before, these are rough dimensions, but having one end ripped with the table saw gives you a good guide for ripping the other side to the final dimension you want.

    The above also assumes that you don't care about the absolute width of the boards. Much of what I do the board width does not really matter.

  10. #10
    Kevin-
    Let those boards sit for as long as you can stomach in your shop before you do any milling. Once they've acclimated, I'd rough mill them a little wide and a little long. Your pieces for the bench don't need to be s4s; they just need to be flat and parallel. Once they're glued up, you can flatten the top; you don't even have to touch the bottom surface except where your leg pieces might meet.

    You might consider taking all the rough milled boards to a shop, though, and having someone do it for you. For me , that $50 spent is well worth the end product, and the savings in dust/wear on your tools. If you're keen on developing your hand plane skills, flattening that top after glue up will give you plenty of experience.

  11. #11
    For the inexperienced, jointing frown side down will avoid tapering. This will joint equal amounts off of both ends.

    I face joint, edge joint, then rip on the band-saw or table-saw. This avoids machining a lot of what will eventually be waste. If had your machinery, I would glue up two 12" blanks and plane them to final thickness. These can then be joined, carefully, for a perfectly flat top. No time wasted hand flattening.

  12. #12
    Join Date
    Jan 2004
    Location
    Fredericksburg, TX
    Posts
    2,576
    Breaking the large boards down releases a lot of stress and can induce warpage that is easier to handle with the smaller cut boards. Twists can also be often worked out with the smaller boards. Just make sure that when you break down the boards that you leave extra width to allow for any bends that may develop and have to be straightened out on the jointer. Using some templates to mark out the original boards will help you work around any knot or damaged areas and also get the bet grain match for the surfaces that will show.

Tags for this Thread

Posting Permissions

  • You may not post new threads
  • You may not post replies
  • You may not post attachments
  • You may not edit your posts
  •