Results 1 to 13 of 13

Thread: Forgive me, gods of shellac -- help in fixing a botched shellac finish

  1. #1

    Forgive me, gods of shellac -- help in fixing a botched shellac finish

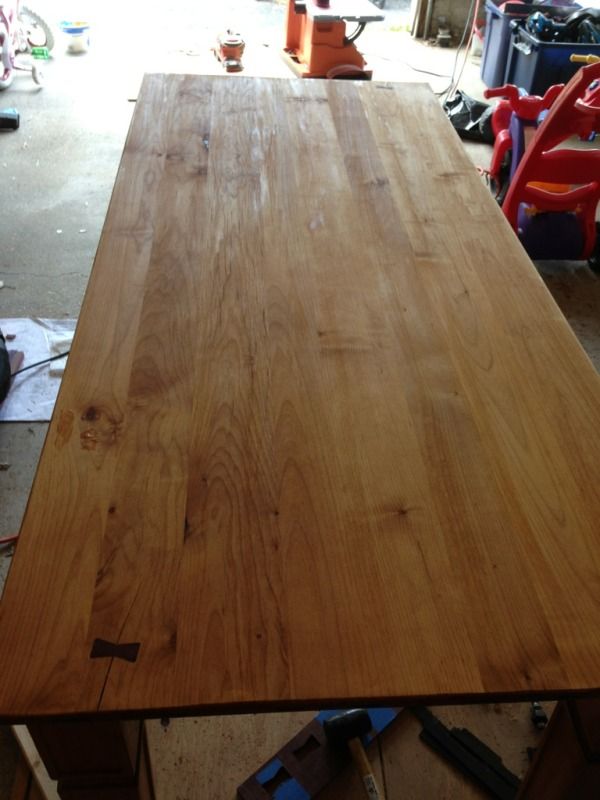
    Ok, so my shellac skills when shifting from small furniture to big items like desktops fall far short of where they need to be. I'm using a 2 lb pre mix cut of amber (Zinsser in a can, etc.), pretty fresh stuff. I'm working on a 68" x 30" desk top, and the speed at which shellac dries on this large a surface area caught me off guard. Basically I was left with puddles, some drips, but lots and lots of brush strokes where I reversed brush direction (yes, I know now that was a no-no. Mistakes are learning tools ). I applied alcohol to smooth things out, and of course... that got me no where. I've taken 80 grit via the random orbital to it, and I've gotten to this point:


    I've removed the problem areas, but off course the shellac that has settled in areas where I over-sanded originally post glue-up is proving much more challenging to remove. Here's my question:

    if I use a modified French polish technique (not aiming for glossy build up but otherwise using the technique) should I be able to hit the sanded areas and blend in the entire desktop to have a finished, single nice shade of amber? Or do I need to take the entire table top back to 100% wood?

    Thanks! By the way, something about the amber shellac really brings out the purple in purpleheart... once I'm done the butterflies will get an anti-uv dose of poly to preserve the purple.

    Thanks much in advance,
    Scott

    I got restless... I stripped it to the wood with CleanStrip, the orange citrus stuff. Next time I'll skip the sanding step, was really easy. Am going to let it dry, clean it with mineral spirits, then will try again. Actually, the wood is left with a bit of the amber color, nicely and evenly spread through the tabletop, even though the shellac is all gone:

    Last edited by Scott Nicholas; 09-21-2013 at 3:53 PM. Reason: Update

  2. #2
    Join Date
    Sep 2008
    Location
    Agusta, GA
    Posts
    397
    I'm far from a God of Shellac, but in my experience, the Amber Zinsser is way too thick to do much with straight from the can. If I'm not mistaken, I think the amber and blonde Zinsser shellacs are both a 3lb cut. The Sealcoat product is a 2lb.

    For a top that size I'd thin the shellac down a bunch, down to as near a 1lb cut as you can guestimate. Also if you plan on topcoating the keys, or any other part with poly, you need dewaxed shellac. The amber and blonde are both waxy shellacs which can cause adhesion problems if poly is applied over the top.

    You can also try thinning the shellac with Bekhol, which will give you a bit longer open time than denatured alcohol.
    http://www.woodcraft.com/Product/200...l---Quart.aspx

    The trick to shellac is many thin layers. I'd be inclined to pad on a 1lb cut and apply probably 3 or 4 coats, if I was going to topcoat it, more if staying shellac only.

    Looks like you'll have a nice looking table by the way!

  3. #3
    Join Date
    Apr 2007
    Location
    Columbus, Ohio, USA
    Posts
    3,441
    Like your butterfly

    This might be of help

    http://www.woodworkersjournal.com/Ez...llac-5593.aspx

    If you plan to over-coat, then use dewaxed. It is easy to mix your own flakes. I have never used Behlen's solvent, but, for a table top, it is probably a good idea since I have heard it claimed that it will slow the evaporation (although I don't see how if it is just a blend of alcohols, but I did not look into it so it might be more than that). I have seen it stated that you cannot use "shellac Wet" if you plan to top coat with something else, so just verify that before you use a product.

    Another interesting idea is mentioned in the link above

    Use a lamb's wool pad, like those used for hardwood floor finishing, and an old ketchup bottle full of 1.5 pound cut shellac. Wet the wool pad very well with shellac, set the pad down on the large flat surface, and, as you slowly drag it along the surface, squirt shellac from the bottle onto the surface in front of the wool pad. This will do two things for you: put finish on the surface quickly, and help to keep the wool pad loaded, preventing you from wasting time going back to the container for more shellac.

  4. #4
    Join Date
    Feb 2003
    Location
    Shoreline, CT
    Posts
    2,923
    Different alcohols evaporate at different rates. Bekhol contains some of the slower evaporating alcohols. Many of the big box denatured alcohols include quite large proportions of methanol which is a relatively fast drying alcohol, as well as being more toxic than ethanol.

  5. #5
    I shoot dewaxed shellac as a sanding sealer prior to applying a water borne finish. I've found that applying shellac almost any other way does not give a smooth surface.

    Mike
    Go into the world and do well. But more importantly, go into the world and do good.

  6. #6
    If you are intent on a shellac finish, then I suggest you switch to Zinsser Sealcoat (a thinner, blonder, dewaxed shellac) or thin your Bullseye with ethanol or isopropyl alcohol. It will make it much easier to brush. To make it even easier, switch to a rag and wipe on very thin coats (practice first).

  7. #7
    Padding thin coats is the only way I've seen to get it to be level. If there is pronounced grain and it's not filled, you basically have to keep padding and sanding until the surface is smooth. I like lay it on heavy it on with a brush (fine haired brushes are the only thing I've ever seen that's any good, like the TFWW ox brush or a true fine badger brush) for interiors of things where surface finish isn't top of the order of importance (bookshelves, cabinets, etc) but I always pad it on show surfaces until I have something that's ready for spray (or if it's not a piece where spray finish is appropriate, apply a wax).

    Haven't been a fan of any of the tinted WB shellacs. I have a gallon of WB shellac at home that I have no clue what to do with. I wish I could spray it shellac, but I really don't have an appropriate setup for it.

  8. #8
    Spraying would be easiest .But it's brushable if you thin it. Old timers used to put it on fast and not worry if they missed a spot...."catch that next trip". I agree with others ,it's too thick. Some of the DNA sold now has a lot of water in it ,so I would thin just a small amount of your shellac and test it before thinning whole batch. If it clouds up or doesn't dry well,the alcohol is low grade and no good.

  9. #9
    Join Date
    Mar 2006
    Location
    SoCal
    Posts
    22,512
    Blog Entries
    1
    Shellac seems to be something you develope a relationship with. I have the best luck when padding; even large surfaces. To your issue, (before any sanding but, let's continue from where we are) I would use a grey syntho pad, rags and/or paper towels and lots of denatured alcohol to scrub/wipe/scrub/wipe that surface until the rags or paper towels come away clean. At that point I would touch sand. I then use a squeeze bottle to load a pad and use a circular motion to apply squeezing more shellac ahead of the pad as I go if the load in the pad runs low. Let that dry for about 30 minutes (dry to touch) and then load the pad and lightly apply, with the grain, to finish.

    Things that work for me:

    - Do not use too thick a mixture; 2lb cut is about the maximum I ever use.
    - Do NOT go back over an area you have already padded; come back to repair after the coat is dry to touch, shellac is very repairable.
    - Remember that shellac does not build like a varnish; the thinnest coat you can get away with is best.

    If you want a thick film coat, seal with shellac and then apply a varnish. Too much shellac just makes a mess.

    Helpful video: http://www.finewoodworking.com/how-t...ellac-pad.aspx
    Last edited by glenn bradley; 09-23-2013 at 3:29 PM.
    "A hen is only an egg's way of making another egg".


    – Samuel Butler

  10. #10
    Join Date
    Apr 2010
    Location
    Ft. Wayne, IN
    Posts
    1,453
    I make my own shellac from flakes. First of all, I use BT&C Tiger Flakes which IMHO are top of the line. Second, use Everclear when I make shellac. And no I don't mean make a batch of "Trashcan Punch", drink my fill, and then make shellac. I mean I make the shellac WITH Everclear. In fact, I make it with a 3-1 mix of Ethyl Alcohol (Everclear) and 99 percent Isopropyl Alcohol.

    Methyl Alcohol has an evaporation rate of 6.3 (ether is 1.0, other solvents are multiples), Ethyl is 8.3, and Isopropyl is 11.

    My mix works great for me. I usually mix it 2lb cut batches and then thin by half what I plan to use. Actually my first coat, or as a sealcoat or blotchcoat, I thin it by half again.
    "I've cut the dang thing three times and it's STILL too darn short"
    Name withheld to protect the guilty

    Stew Hagerty

  11. #11
    Pretty much everyone nailed it. Zinser Shellac is far too thick to work with directly. 1lb cut works nicely for brushing and spraying...thin a bit more to spray a tack coat....maybe a little thicker for brushing. I like to pad on a thin sealer coat. Maybe a .75lb cut. That just seals the wood a bit and stiffens the fibers. Then I give a quick, light, wipe sanding with maybe P400 or P600 to knock off any wood fibers and anything else that is still standing up. Then spray/brush/whatever, and Bob's your uncle

  12. #12
    Wow, thanks everyone. This has been extremely appreciated.

    As suggested, I switched to the de-waxed sealcoat, and I'm using a pad (a wad of cotton fabric wrapped in cotton fabric). I slowed my process *way* down. Took the top 320 grit on the random orbit, then to 400 by hand (perhaps overkill). I spent 2 hours working 4F pumice into the top, then switched to the French polish method for application of the shellac. I've put about 5 hours into the technique, definitely requires a) patience and b) comfort with a zen-like "wax on, wax off" (or rather 'de-waxed on...') activity. Given the large surface area and the lack of complete table top smoothness (in leveling the top post glue-up, my belt sander got away from me in a few spots), I do not plan to take this to the point of shine French polish can deliver, but I will put several more hours into it.

    Here's a side pic, showing one of the two purpleheart butterflies and purpleheart splines. The top is moderately reflective now, and you can see the imperfect flatness in the 'curve' of the broom handle reflections.


    Now the question is... once I have the polish built up, I need to tint it. I had been thinking of going back to the Zinsser amber (the tint I need) assuming the presence of wax would be 'ok' for the final coats, but now I'm thinking the risk is too high. If I build too much wax up without getting the right tint, it'll be too hard to finish the coloring, and I wont be able to remove imperfect amber layers without destroying the current finish (I am *not* going back to raw wood on this one again. Once, to learn how to do it right (or at least *more right* ) yes, but not twice. French polish is tough on the fingers and shoulder! So.. current tinting plan is to buy amber transtint and tint my sealcoat to the right color, then continue applying via French polish until I color match the legs and apron.

    Again, thanks to everyone for the thoughtful responses. I'll send more pics when completed.
    - Scott

    P.S. don't think I mentioned this elsewhere, the tabletop, legs and apron are all alder. One of my favorite woods to work with, relatively inexpensive, easy to manipulate in a home shop (read = light!), and generally forgiving (much easier to work that my other favorite... purpleheart) though it is softer so it requires a bit more care in handling than hard maple or cherry.
    Last edited by Scott Nicholas; 09-27-2013 at 10:49 AM.

  13. #13
    Not to necro this thread, but nice work!

    As for shellac, you might want to try playing with the real stuff.
    IMHO, using some Kusmi Amber shellac flakes would give it a hint of nice warmth.

Tags for this Thread

Posting Permissions

  • You may not post new threads
  • You may not post replies
  • You may not post attachments
  • You may not edit your posts
  •