Page 1 of 2 12 LastLast
Results 1 to 15 of 17

Thread: Building a Strike Block Plane

  1. #1
    Join Date
    Feb 2004
    Location
    Perth, Australia
    Posts
    9,497

    Building a Strike Block Plane

    Over the past few weekends I have been busily building planes for the forthcoming Perth LN Tool Event. In past years I have demonstrated joint-making with handtools (OK, in the land of the blind ...). This year I shall be demonstrating plane building.


    I thought it pertinent that I take along some new planes (some for demonstration and a few to sell). To this end I have so far completed 11 planes (it sounds grander than it really is - there are 5 router planes, 2 Krenov smoothers, and 3 Krenov block planes). I am just waiting on a few parts, plus have one more to complete (a solid body coffin smoother), and then I shall post pictures.


    This is a solid body strike block plane. Why did I choose this particular plane to build? It is not as though I am low on planes for shooting. However I wanted one to dedicate to my ramped shooting board. Plus I enjoy using woodies, and my eventual plan is to fill a tool cabinet with planes I have made.


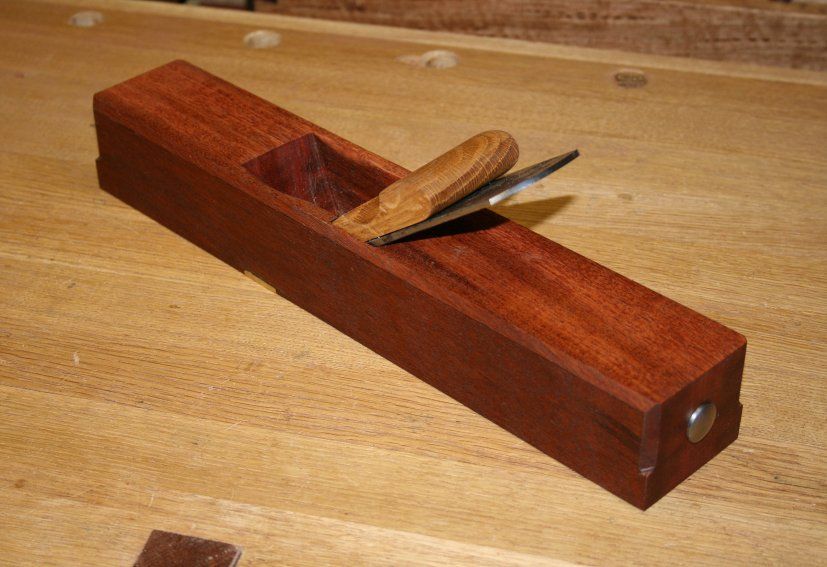
    The strike block is a bevel down plane with a low cutting angle designed for shooting end grain. It is an alternative to a mitre plane, which achieves the same cutting angle from a bevel up orientation.


    Were we discussing metal planes, there would be no question that the bevel up plane has the advantage of achieving a low cutting angle. Take for example both the Lee Valley and the Lie-Nielsen BU Jack. Built in strong and durable ductile iron, there is no difficulty in building in a 12-degree bed. Add a 25 degree bevel, and the result is a 37 degree cutting angle. This is great for planing end grain.


    Wood is not a strong enough medium for low bevel planes. A 12-degree wooden bed is vulnerable. Building a 20 degree bed, while stronger, does not offer any advantage over a common angle (45 degree) bevel down plane. The strike block plane provides the low cutting angle by having a bed between 35 – 40 degrees.


    Larry Williams (Old Street Tools) suggests that strike block planes fell out of favour in the 18th Century owing to the casual sharpening techniques of the day. His view is that it is imperative to maintain a clearance angle of a minimum of 10 degrees. Consequently, unless the bevel is maintained at about 25 degrees, a strike block plane may run out of clearance angle and stop cutting.


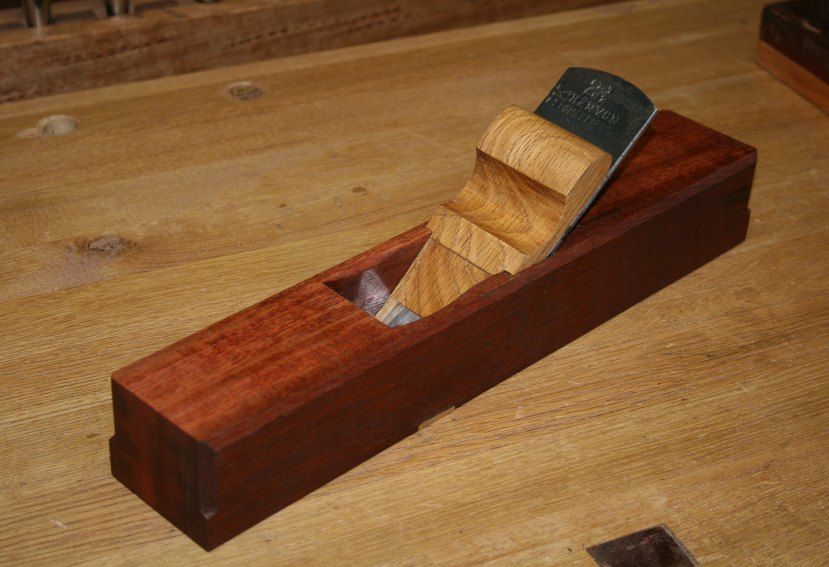
    The plane build here is based on a bed of 38 degrees. This should provide the same performance as a low angle bevel up plane with a 12 degree bed. The overall dimensions are a 14” length (that comes from the Old Street version), with a 2 ½” wide x 2 1/8” high body. The blade is 2 1/8” wide, tapered and laminated high carbon steel.


    I have used Jarrah for the strike block plane, mainly as it is a dense and heavy wood, and I have a good supply of dry, salvaged roofing trusses. The wedge is White Oak.


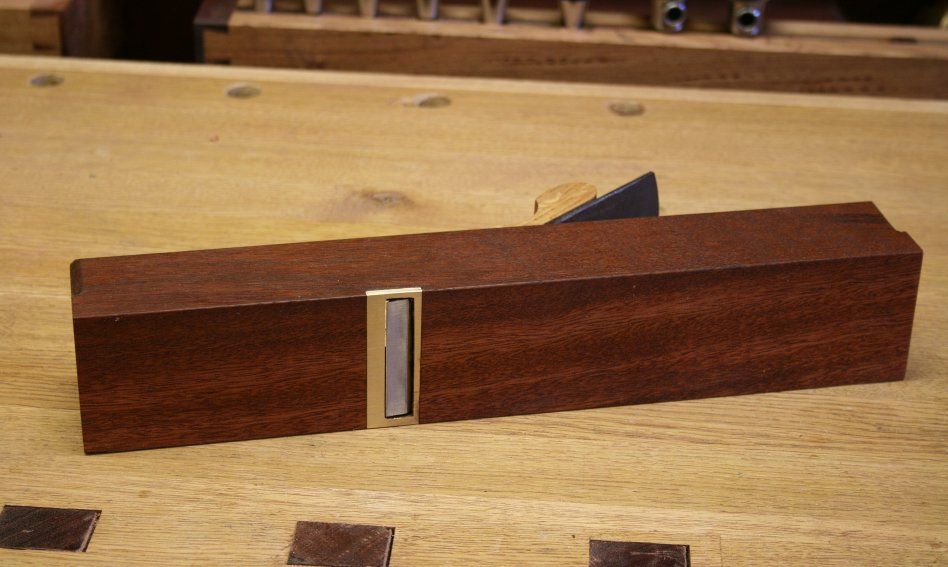
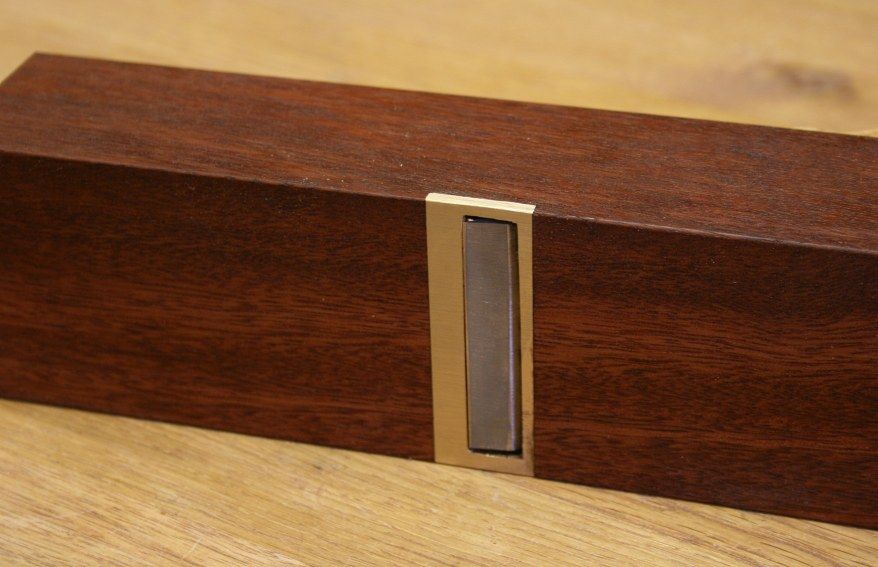
    There is a steel strike button (more durable than wood) ...


    The underside shows the brass mouth ...


    A close up (because someone will ask anyway ) ...


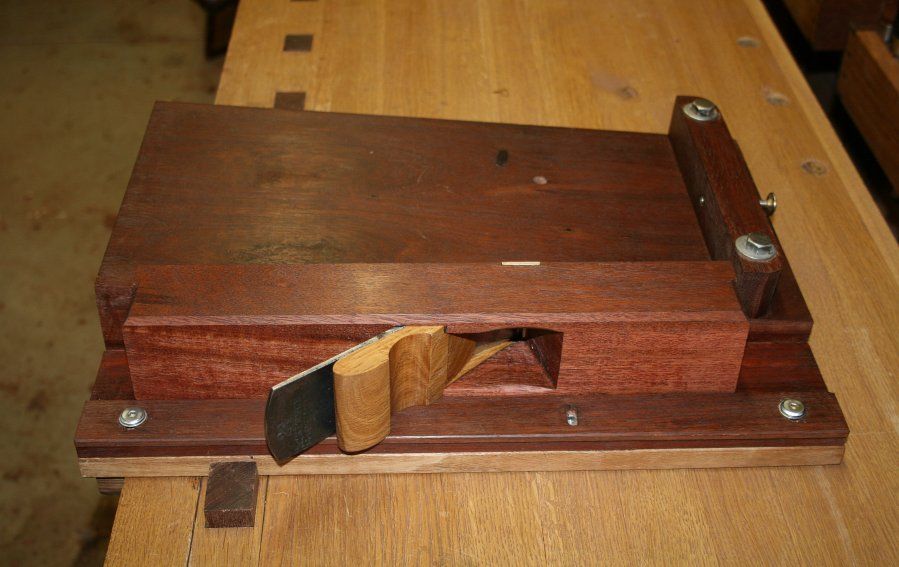
    This is where it will work (although it will also be useful for cross flattening panels) ...


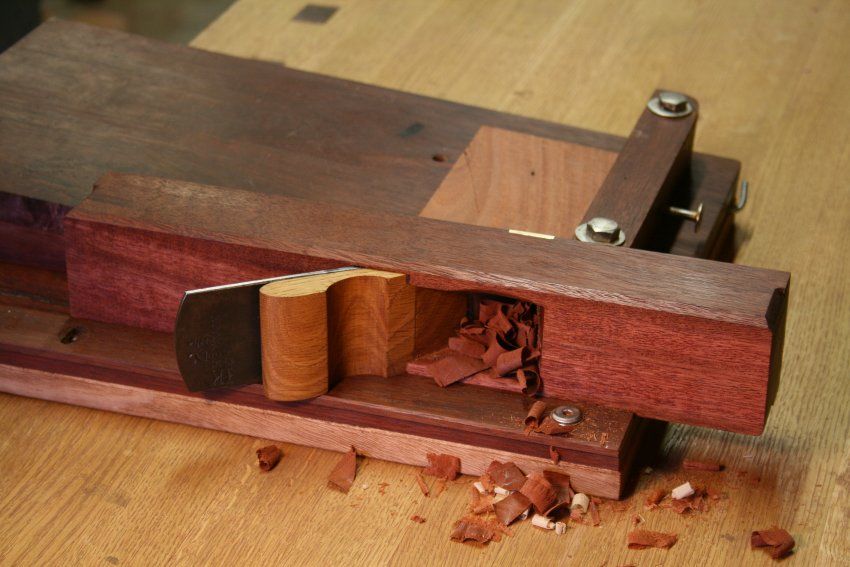
    And .. yes .. it works very nicely. Easy shavings in 1/2" Jarrah endgrain ...


    There is a step-by-step record of the build on my website: http://www.inthewoodshop.com/ShopMad...lockPlane.html


    Regards from Perth


    Derek

  2. #2
    Join Date
    Sep 2007
    Location
    Longview WA
    Posts
    27,486
    Blog Entries
    1
    Nice set up.

    Does the orientation of the slant on shooting board lift the work at all?

    jtk
    "A pessimist sees the difficulty in every opportunity; an optimist sees the opportunity in every difficulty."
    - Sir Winston Churchill (1874-1965)

  3. #3
    Join Date
    Feb 2004
    Location
    Perth, Australia
    Posts
    9,497
    The ramp on the shooting board creates a little skew on the blade, just a little but enough to reduce the impact and smooth the cut. I've never experience the ramp lifting the workpiece. The piece is aimed "downhill", so gravity and pressure is enough to keep it firmly against the fence.

    Regards from Perth

    Derek
    Last edited by Derek Cohen; 04-01-2013 at 7:38 AM.

  4. #4
    Join Date
    Dec 2010
    Location
    South Coastal Massachusetts
    Posts
    6,824
    In reply to Jim's inquiry - I manage the "lift" I sometimes see shooting on my ramped board
    with a clamp. I believe that our man in Perth has mentioned application of sandpaper
    at the stop end of the shooting board.

    In practice, any lift on the workpiece indicates that the blade isn't quite so sharp as I thought.

    Tico Vogt recommends getting low to the work surface and pushing your plane
    with a very straight arm, to get your body weight behind the cut.

    His method is very deliberate, using a slow steady "drive" through the cut.

  5. #5
    Join Date
    Feb 2004
    Location
    Perth, Australia
    Posts
    9,497
    Hi Jim

    Those new to a shooting board tend to slam the plane into the workpiece. This loses both control and accuracy.

    One should not need any plane speed when shooting. What is necessary for control is minimum run up. Place the plane with the blade nearly touching the near edge of the board, and then simply push the plane forward, with even and firm pressure. Since the shaving removed is very fine, a plane with a sharp blade will cut without much effort. A low angle blade will cut more easily and more cleanly.

    It is even easier to push a shooter and achieve accurate results when you add a side fence to the runway to capture the plane (ala the Stanley #51/52).
    http://www.inthewoodshop.com/ShopMadeTools/RunningFencefortheShootingBoard.html

    Regards from Perth

    Derek


  6. #6
    I am in the midst of doing a low angle, bevel down, infill shoulder plane and wasn't sure if it was a wise concept. Seeing you do a plane with similar angles, etc. validates my assumption that it should work. Lovely plane, by the way!

  7. #7
    Join Date
    Jan 2006
    Location
    Schenectady, NY
    Posts
    1,501
    Beautiful and well thought out plane Derek. My question is how and where do you hold it while in use ?
    Happy and Safe Turning, Don


    Woodturners make the world go ROUND!

  8. #8
    Quote Originally Posted by Derek Cohen View Post
    Hi Jim

    Those new to a shooting board tend to slam the plane into the workpiece. This loses both control and accuracy.

    One should not need any plane speed when shooting. What is necessary for control is minimum run up. Place the plane with the blade nearly touching the near edge of the board, and then simply push the plane forward, with even and firm pressure. Since the shaving removed is very fine, a plane with a sharp blade will cut without much effort. A low angle blade will cut more easily and more cleanly.
    This tip hits home. Thank you for sharing your wisdom, experience, and work.

    And, lovely plane. The strike button is used to prevent wear at the spot a hammer will be tapped to adjust the blade depth, correct?

  9. #9
    Join Date
    Feb 2004
    Location
    Perth, Australia
    Posts
    9,497
    Quote Originally Posted by Don Orr View Post
    Beautiful and well thought out plane Derek. My question is how and where do you hold it while in use ?
    Hi Don

    Grip the cheek and with the lower part of your hand nestling in the hollow of the wedge.

    It feels quite comfortable.

    Regards fro Perth

    Derek

  10. #10
    Join Date
    Feb 2004
    Location
    Perth, Australia
    Posts
    9,497
    Quote Originally Posted by Danny Thompson View Post
    This tip hits home. Thank you for sharing your wisdom, experience, and work.

    And, lovely plane. The strike button is used to prevent wear at the spot a hammer will be tapped to adjust the blade depth, correct?
    Hi Danny

    The strike button is for adjusting the blade. I installed a micro switch under it, but it is sticking a bit, and so I am forced to use a hammer.

    When you strike the button, the wedge loosens and the blade retracts. Really!

    When you want the blade to project a little more, I say "Lynndy, strike the blade a smidgeon for me". She usually does this a little too much (she is heavy handed, like her mother), and so I have to use the strike button again.

    Got to fix the micro switch.

    Regards from Perth

    Derek

  11. #11
    Join Date
    Jan 2006
    Location
    Schenectady, NY
    Posts
    1,501
    Quote Originally Posted by Derek Cohen View Post
    Hi Don

    Grip the cheek and with the lower part of your hand nestling in the hollow of the wedge.

    It feels quite comfortable.

    Regards fro Perth

    Derek
    Thanks Derek!
    Happy and Safe Turning, Don


    Woodturners make the world go ROUND!

  12. #12
    Join Date
    Dec 2010
    Location
    South Coastal Massachusetts
    Posts
    6,824
    Now hang on...

    You let your missus swing a hammer, with your back turned?
    You're a braver soul than I, Mr. Cohen.

    The microswitch reminds me of my days servicing an early roll-out of x486 era desktop computers in a small hospital.
    The staff was constantly flummoxed by errors and buggy software running on Windows 95.

    I purchased a keyfob with sound effects lifted from the Star Trek series.
    Rebooting and passing this over the rear of the machine while they watched seemed to instill some measure of confidence.

    Microswitch - that's overkill. Everyone knows you employ a frazzistat in this application.
    Must be some Canadian thing you picked up in your travels.

  13. #13
    Join Date
    Jul 2007
    Location
    Houston TX
    Posts
    548
    Jim, unneeded technology works! We had two gals in our drafting group years ago. One was always hot, the other always cold, so both were constantly messing with the thermostat. Our AC guru installed another thermostat nearby and encouraged both to adjust it at will. He never told them it wasn't connected to anything. All were happy...

  14. #14
    Join Date
    Dec 2011
    Location
    Israel
    Posts
    1,503
    Blog Entries
    1
    That is sweet ! do you think abutments give a more solid feel then a crosspin?


    Thanks also for the process showing the making. g-d know I've been looking for something like that, as simple as it is it give a newbie like me confidence to try it.

  15. #15
    Join Date
    Jan 2009
    Location
    Detroit, MI
    Posts
    1,661
    Quote Originally Posted by Derek Cohen View Post
    The ramp on the shooting board creates a little skew on the blade, just a little but enough to reduce the impact and smooth the cut. I've never experience the ramp lifting the workpiece. The piece is aimed "downhill", so gravity and pressure is enough to keep it firmly against the fence.

    Regards from Perth

    Derek
    It would make more sense for the ramp to go the other way ... uphill. As it is, the skew will tend to lift fibers out of the top surface. If the tilt was the other way, the skew would push the fibers down, where they are supprted by the ramp. It would also push the piece more down and into the fence. One could argue that neither of these things matter in real life with a sharp blade and a fine cut, but you might as well reduce the chances as much as possible since it isn't any more difficult.

    Of course, the other nice thing about the ramp is that it spreads the wear across the iron better.

Posting Permissions

  • You may not post new threads
  • You may not post replies
  • You may not post attachments
  • You may not edit your posts
  •