Yup, that really nice looking and I'm glad you posted this. I've got some 16/4 laying around that I'm needing to turn a couple things out of and I was wondering how it looks as a bowl. Very, very nice indeed!


 Member
Yup, that really nice looking and I'm glad you posted this. I've got some 16/4 laying around that I'm needing to turn a couple things out of and I was wondering how it looks as a bowl. Very, very nice indeed!
 Contributor
Great looking first bowl. I like a bigger foot as if it is used it has more stability.
Bernie
Never put off until tomorrow what you can do the day after tomorrow.
To succeed in life, you need three things: a wishbone, a backbone and a funnybone.
 Member
Congrats on the nice looking bowl! Being the first makes it even better!
 [OP]
Member
[OP]
Member
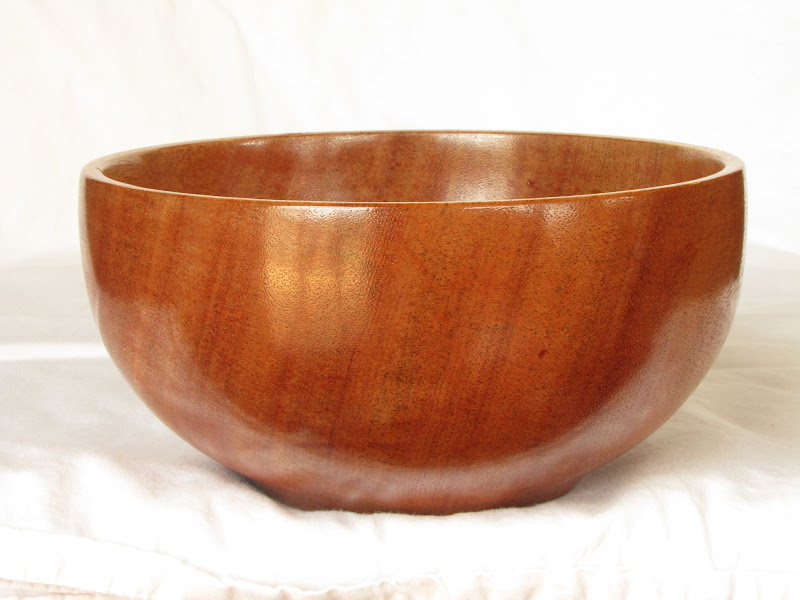
Thanks to all for the kind words. I wish I could say it was designed on purpose, but the foot gives it great stability- it rolls back upright from any position except upside down, so that's a win. I think we'll use it as a fruit bowl, too big for ice cream (maybe). Maybe a salad bowl, who knows. I have one more chunk the exact same size, it will either be another bowl or some pepper mills. Next up is a 10x10x4 chunk of dried walnut I picked up.
As far as working it, besides pens all I've really turned dry is mahogany- a couple of cake pedestals, the end table legs, and this- so I have nothing to compare to. The end grain was trying to tear out a bit. For the final pass I soaked it with BLO and then took very light cuts with a scraper. then I sanded with abranet 100-600 grit. The feel of the bOwl right now is great, I'm not sure I want a film finish on it or not. Maybe I'll lacquer this one and use walnut oil or something similar on the next one.
Thanks again for the feedback and help along the way. You guys/gals are great.
Where did I put that?
Member
Nice 1st Rob. Did you use a glue block so that you could end up with 3 5/8" height? The 1/4" thickness is not a problem and comfort and ending up with a nice finish bowl is a lot better than having a thin funnel or some other display item. You have a nice insice curve which is harder to do at start with the deeper bowl. Keep at it.
 Moderator

Congrats on your first 'real' bowl Rob! Nice work! I sure like the wood!
Steve
You never know what you got til it's gone!
Please dont let that happen!
Become a financial Contributor today!
 Contributor
Excellent work, Rob!! Very nice piece of wood, too. I am a foot guy, so I find it very appealing.
[OP]
Member
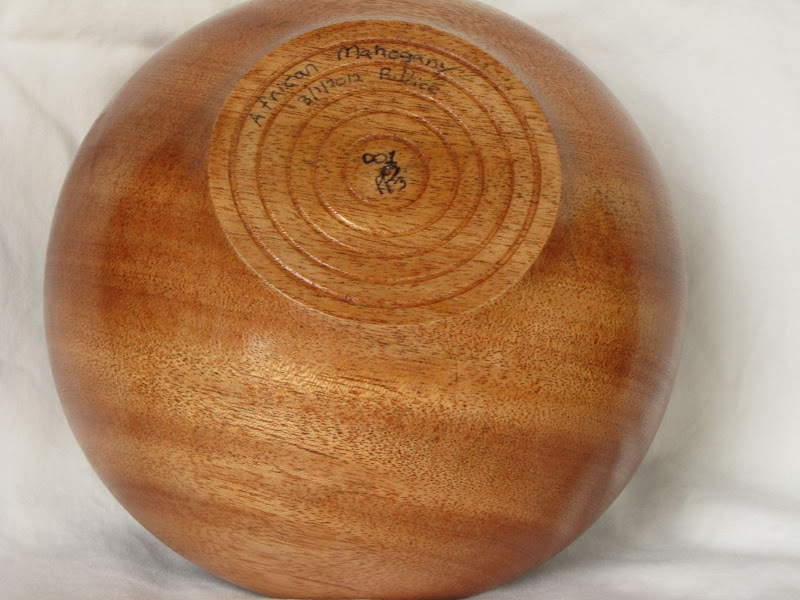
I used a tenon and chuck to turn it. I have a buddy who swears the only way is with a glue block because he doesn't like the way chucked feet look, so I tried to go for a glue block look just to mess with him. The sequence was: screw chuck-turned a tenon-gripped in jaws-cole chuck to finish the bottom. The finished foot was the shoulder of the tenon, I ended up turning the whole tenon away which is where I lost the 1/4 or so of height. I took this pic as an example of the 'one more pass' syndrome trying to clean up the upper bowl and had a catch, but you can see the foot/tenon.Originally Posted by Thomas Canfield

That way too I could true up the foot, sand and finish the whole bugger once I turned it around. I knew the bowl was going to be fairly tall for it's width so I figured it could loose a little height. I was using 100mm jaws which is part of why the foot is so big. I didn't feel comfortable with a little 2" tenon with my 50mm jaws- at least for now while catches are more common for me. I did have a catch on the bottom which sent the nearly finished bowl flyingbut luckily only minor damage was done.
Thanks again for the comments.
Where did I put that?
[OP]
Member
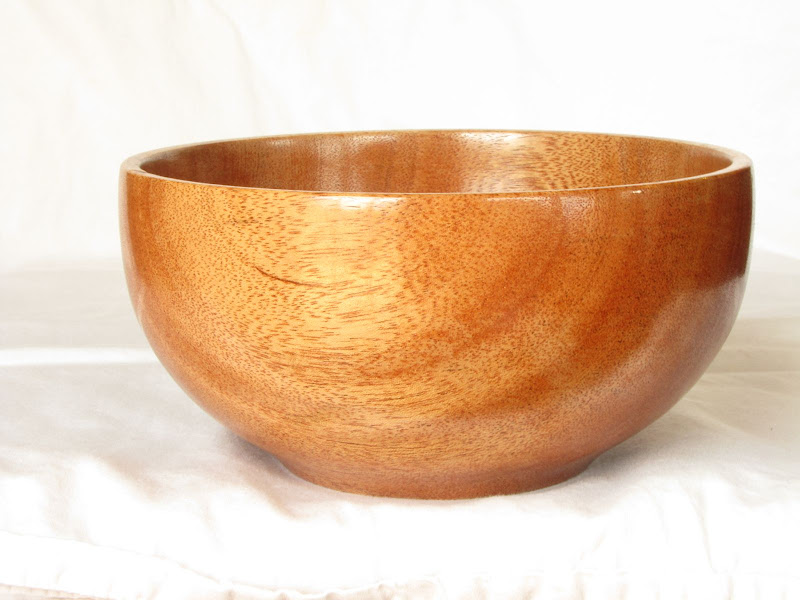
I decided I wanted a film finish on the bowl. It had two coats of BLO, and I wanted to try General WTF on it, so I hit it with a coat of shellac sealer. After reading Keeton's post about WTF maybe I should have done a few more coats of shellac. I used BLO to help pop the grain- my previous experience with WTF on a mahogany cake platter was a rather flat looking finish with little depth. Maybe next time shellac for depth and then WTF and skip the oil?
I really like how the grain catches light as you rotate the bowl. This has much more of that 'lacquer' look than the flat water based poly look I had on my cake platter. Up close you can see the pores, but at arms length you really don't notice them. Sorry if this is too much of a re-post, but I thought I'd post the 'finished' piece.
Where did I put that?
 Contributor
Very nice work. That bowl has a nice smooth flow that screams to be held. Save this one for yourself and as a measure of your progress down the road. Although from the good looks of this one, I don't know if there will be much difference ...down the road!
-------
No, it's not thin enough yet.
-------
Moderator
Very nice work. No tearout and the xition from wall to bottom is a smooth, natural curve. Can't wait to see more from you.
As for the finish - and I think it's really great the way it is - you can improve it EVEN more by leveling the surface with some very fine spaper and then giving it one or two more coats of finish. This makes a difference for me, and I believe was the key to JK's finish on that Claro piece.
 Member
That's an amazing first "real" bowl, Rob. I like the shape, the wood and yes, the foot. Nice job.
Contributor
Rob, mahogany is one of the most open grained woods I have used. You did a fine job with this one, for sure. Glad you enjoyed the General WTF, and what may have worked to your advantage was to wet sand the bowl with BLO prior to a few coats of shellac. Even now, you could probably sand it back some and apply a few more coats of WTF.
 Member
Very pleasing to look at, both shape and color. Love the bottom treatment; I'll have to imitate that.
[OP]
Member
Thanks again for the encouragement. I feel like I'm starting (just barely) to get the hang of this.
John, I'm interested in how you sanded it back, after the initial 5 or 6 coats, I let it dry for a week and then went to rub it out with steel wool and it seemed like I got some ghosting of the finish- like maybe I cut through in spots. I put another coat on and they are less apparent ut still there. I wonder if it isn't some incompatibility between the blo and wtf. Either way I was scared to hit it with sandpaper after the final coat.
 Posting Permissions

 Reply With Quote