Page 1 of 2 12 LastLast
Results 1 to 15 of 19

Thread: FINALLY - Doug fir Scandinavian style bench, shoulder vise, enclosed tail vise

  1. #1
    Join Date
    Apr 2010
    Location
    Essex, MD
    Posts
    421

    FINALLY - Doug fir Scandinavian style bench, shoulder vise, enclosed tail vise

    After months of working on my new bench between necessary projects and work, I finally completed it. I just thought I'd post a few beauty and build shots since there are a few neanders out there considering DF and/ or bench styles. All the wood was bought at Home Depot since all sawmills and yards around here think hardwood is made of gold, so the total bill for the bench, including LV vise hardware, was about $120 as opposed to about $800 for 2-inch ash. The top is laminated DF 4x4s, except when I went for one culling trip and the HD had "white fir" labeled as DF. I didn't notice until I laid it up next to the redder DF, then I saw the ink stamp with the correct ID - the bar code label said DF. I put it in the back reaches of the top since it is softer. So, here goes:
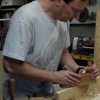
    bench01.JPGbench03.JPGbench04.JPGbench05.JPGbench07.JPGbench02.JPGbench06.JPGbench10.JPG

    I jointed the boards for the top to remove the rounded corners on the top and side, leaving the bottom alone so I'd save every bit of thickness. I then routed grooves 2.5 inches from the top and installed 3/8 inch plywood splines. This helpd a lot during glue-up, keeping them all aligned while I clamped them. After final smoothing, the top is about 3 3/8 inches thick.

    The base is made of two trestles, one with three legs and one with two. The feet have through-mortises, but the top support on the right (narrower) side has bridle joints since I wanted the stretcher to be flush with the top to act as the rail for the sliding board jack. The stretchers are through-mortised to the trestles with extra long tenons that are secured with 3/4-in. thick oak tusk tenons. I glued brackets to the stretchers at the tenons to give them more lateral strength - the result is a very stiff connection with no racking or wobble. the top is held to the trestles with one lag bolt on each side.

    I don't want to get carried away writing about a fairly straighforward bench, but I'd be happy to answer any questions. I will add another message in this thread to describe the enclosed tail vise assembly and explain the dark stringing around the triple dovetail on the right end.

    Karl

  2. #2
    Join Date
    Apr 2010
    Location
    Essex, MD
    Posts
    421
    OK, about the tail vise. There is a very similar one in the Landis book, but I had to make some changes.vise06.JPG

    for one thing, I didn't want to build a metal rail system - it didn't seem to make sense, since this isn't going to be subjected to extreme lateral pressures - so I made it all out of hardwood. The rails are red oak, secured to the outside of the "dog box" - red oak sides glued and screwed to hard maple spacers:


    vise03.JPG

    the "drive box" - the part with the hole for the vise screw that the srew bolster attaches to - was made out of white oak, since this will take a lot of side-loading and I wanted it to be strong. I had to make an inlet for the screw bolster, as it had to be mounted with the "cone" facing away from the vise handle and into the box- otherwise any screws securing it would eventually strip from the pressure on the dogs.

    vise01.JPGvise02.JPG
    I made the drive box in four pieces, used a gouge to give each a space for the "cone" of the bolster, then glued and clamped them.

    vise05.JPG
    The slots for the sliding box's rails were also red oak, attached to the sides of the space left for the tail vise. I also varied from the Landis example in that I didn't leave the section of the bench top with a hollowed space underneath - I only had 3/4 in of bench thickness left after subtracting for the screw and the sliding box, so I inlet a piece of white oak and attached it with screws so I can remove it and service/ replace vise parts as needed. Oh, and the picture also shows how I drilled the 1 1/4-in hole for the end of the vise screw into the end of the top - I couldn't do it before glue-up, since I needed the slider box in place to get a very close fit. Oi.

    vise07.JPG

    Now, about that triple dovetail and the fancy walnut stringing...DF is VERY prone to blow-out and splintering. At least the stuff I have is. While cutting the triple dovetail (made that way to avoid splitting the end under pressure) I had a good-sized chip blow out of the front and fall in a pile of shavings. I couldn't find it to glue back, so I chisled a 1/8 wide x 3/8 deep channel and inlet some strips of black walnut scrap. It almost looks intentional, don't you think? I also had a concern with the vise racking and making the corner joint flare out wider, so I compressed it with a screw clamp front to back, drilled a 3/4 wide hole, and turned a walnut peg to fit tightly. It stayed put after removing the clamp so it can still be removed to work on the vise if needed.

    I hope some of you found this helpful or at least entertaining - merry Christmas, Happy Holidays, and make great things!

    Karl

  3. #3
    Well, you have to be pretty happy with how that came out.

    I love the look of Doug Fir benches.

    Outstanding work.

  4. #4
    Join Date
    Feb 2007
    Location
    Vancouver Island BC-eh!
    Posts
    615
    Nice classic looking bench Karl and some thoughtful details.

    Jim B

  5. #5
    Join Date
    Aug 2010
    Location
    Grants Pass, Oregon
    Posts
    57
    Nice bench Karl. Douglas fir is a great choice but it definitely tears out and splinters easily. Creative recoveries like yours are a real plus.
    Andy Margeson
    oregonwoodworker.blogspot.com

  6. #6
    Join Date
    Mar 2006
    Location
    North Carolina
    Posts
    167
    Very nice! I've always been partial to Scandinavian bench designs. You have executed it well.

  7. #7
    Join Date
    Feb 2010
    Location
    Philadelphia, PA
    Posts
    3,697
    Real nice Karl! Brilliant work the tail vise design.

  8. #8
    Join Date
    Apr 2010
    Location
    Essex, MD
    Posts
    421
    Thanks for all the compliments, I can't wait to start the first project I'll use it for - my tool cabinet.

    The DF and especially the white fir have pretty delicate surfaces, so to minimize fuzz and dust getting ingrained, I varnished the lower structure (egads) and put 4 coats of low-sheen tung oil on the top to help consolidate the fibers.

    Dang, I forgot to include the most important feature; the bench dogs are made of...dogwood, naturaly (ba-dump!). The vise handles are as well - beautiful stuff to work with. I'm working on home-made holdfasts; will let you-all know if that turns out.

    bench dogs.JPG

    Thanks again,
    Karl

  9. #9
    Join Date
    Jun 2009
    Location
    Salt Lake City
    Posts
    1,506
    What are the overall dimensions? I am curious how you came up with the $800 figure for ash. Nice bench.

  10. #10
    Join Date
    Apr 2010
    Location
    Essex, MD
    Posts
    421
    Zach,
    The top is 79 inches long, 20 inches wide, with the wider left side being an additional 10" x about 20". The plan was to have the top be 4" thick. I wanted the legs and top and bottom trestles to be 4x4 and I believe I planned to use 2x6 stretchers originally. So, 5 4x4 legs about 34 inches long, 4 4x4 trestles -2 at 19 inches and 2 at 29 inches, plus the two 2x6 stretchers at 75 inches. That seems to give a bd/ft of about 104, but I remember asking for 120 or 130 for some reason, probably because the wood I saw was fairly variable quality (this was about 14 months ago). With tax and cutting fees to make them all close to proper width, the totals from the 4 local lumber dealers and sawmills I visited were all about $700- $750, then about $60 for the LV vise screws.

    The price I was quoted for ash at the time was close to $6 per bd/ft. I could have gotten it cheaper if I asked for 4/4 or 6/4 - for some reason 8/4 was "special". One place had clear 4x6 DF, but that was even more expensive, as it was intended for mantlepieces.

    On second thought, I guess the current bench cost more like $160 - the 8' fir 4x4s cost about $10 each.

    I probably could have gotten a better price if I wanted to drive 80 miles to Frederick, MD or up into PA, but I couldn't seem to find small sawmills on the web and I also read Schwartz's book that led me to use what was easily available. I may replace the top with hardwood if it gives me trouble - at least now I have a bench to build it on instead of balancing everything on a table saw deck (my only flat reference surface indoors).

    Karl

  11. #11
    Join Date
    Jun 2009
    Location
    Salt Lake City
    Posts
    1,506
    Aah. That $6/BF seems high to me. You were also figuring for a thicker top and more robust stretchers than I had assumed.

  12. #12
    Join Date
    Apr 2010
    Location
    savannah
    Posts
    1,102
    Very cool. Love the tusked tenons and what I can only call the Ian Kirby stretcher supports. Very cool and unique. Kudos.
    It's sufficiently stout..


  13. #13
    Join Date
    Apr 2010
    Location
    Essex, MD
    Posts
    421
    Thanks, John - it will be even more stout when I add some planking between the stretchers and put an old tool chest and bin for bench accessories (bench hooks, shooting board, etc) on it. As is is, it doesn't move even when I hip-check it - it's pretty heavy and I made replaceable feet out of the softer white fir, which seems to grab the floor deck well.

    Zach - in this Baltimore/DC metro area, all decent wood seems to be aimed at the custom cabinet market, so the prices are/were fairly high. Maybe if I were in The Trade I'd get a more realistic price. Following advice in Roy Underhill's books, I asked if the sawmills had and "seconds", abandoned, or lower-grade wood...they were rather offended and claimed they didn't have anything but prime. I came really close to making the top from 5/4 red oak oversize pallet boards, which I can get free if I want to try pulling dozens of ring-shank nails out of oak and laminating short boards. Eh, it's done for now - on to greater things

    Karl

  14. #14
    Awesome! You'll get some real enjoyment doing your work on that.
    Steve, mostly hand tools. Click on my name above and click on "Visit Homepage" to see my woodworking blog.

  15. #15
    Karl,

    In a tidal wave of Roubos and Nicholsons, it is encouraging to see a workhorse Scandinavian bench.

    Further, you have made some very good improvements to the traditional design that are worth taking note of.

    1) Replaced the traditional Rube-Godlberg tailvise. My only minor suggestion would be to use an even simpler direct wheel vise.
    2) Eliminated the tool tray which significantly increased the working area of the top.
    3) Made the top uniformly thick which increased the weight as well as simplified the top assembly. (Most Scandinavian benches look as though they have thick tops but are only 2" thick once one gets past the dog holes.)
    4) Modifed the leg design to accommodate an integral sliding dead man eliminating the need for a bench slave.
    5) Used tusk tenons rather than the commonplacebolted stretchers.

    Your bench should serve as a reference for those that want to build a low cost, Scandinavian bench with improved functionality, that has been greatly simplified.

    Great job.
    Last edited by Jeff Schmidt; 12-19-2011 at 10:26 PM.

Posting Permissions

  • You may not post new threads
  • You may not post replies
  • You may not post attachments
  • You may not edit your posts
  •