It's not really an option for me is that it combines the fence and the dust collection, and I already have an Incra fence so I'm working around that - but it's significant that you reckon it works very well...
ian
Last edited by ian maybury; 12-06-2011 at 11:35 AM.
A PS. I asked this question in the main reply, but it's probably a little buried.
Presuming that the gap was maintained at say 1/4in or so around the router body can anybody say how much (if any) dust gets back down through the gap between the router body and the floor of the dust box when using Bill Huber's layout?
25 years old and still going great, with original router and shop vac. No matter how big your shop, I feel that it is important to make the best use of every cubic inch. My router table is filled with drawers, and the old shop vac with a 2" hose connects on the back of the cabinet. The router is turned on with the first switch, and right beside it is a second switch that turns on the shop vac.
Last edited by Tom Clark FL; 05-07-2012 at 11:08 PM.
Thanks for posting all of your router table dust collection designs. After viewing this thread, I added dust collection to my friend's router table this past weekend. I have attached some photos and commentary if anyone is interested...
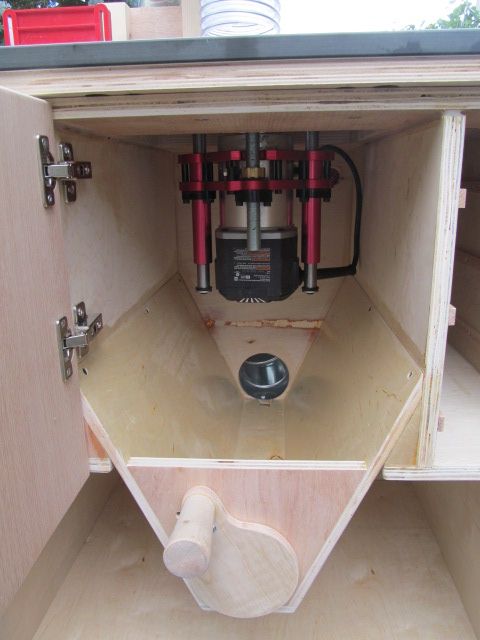
1. There is a box under the router to catch the dust. I used pre-finished plywood with sloped sides to direct the dust to the middle of the box. I am hoping that the pre-finished plywood will make the slope a little more slippery, so the dust slides down to the bottom. Note that the side drawers are missing. I left those at my friend's shop.
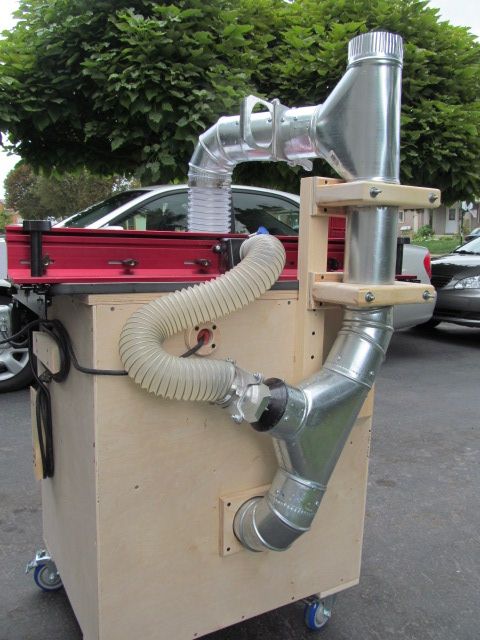
2. The box has a 4" port out the back to connect to an Oneida 3HP dust Gorilla dust collector. The router is a Porter Cable 7518 Speedmatic 5 speed router. It is ridiculously heavy! The Jessem router lift lets you adjust the height of the router from above. It seems to be a very convenient arrangement.
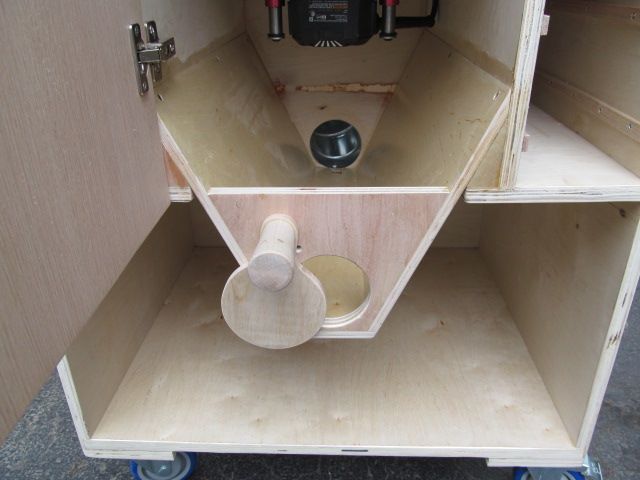
3. I have read that it is not a good idea to have too much negative pressure below the router. It can interfere with the cooling of the router and also suck dust down into the router. So, I designed an adjustable make-up-air port at the front of the router box. The paddle is spring loaded with 5 different positions to let different flow rates of air into the box.
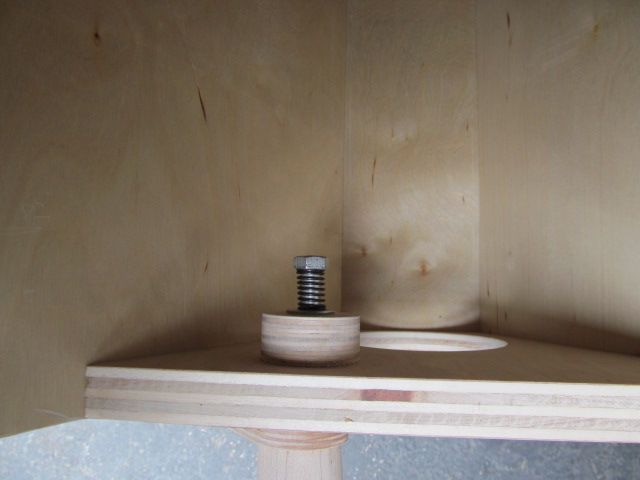
4. Here is a view looking at the spring load mechanism.
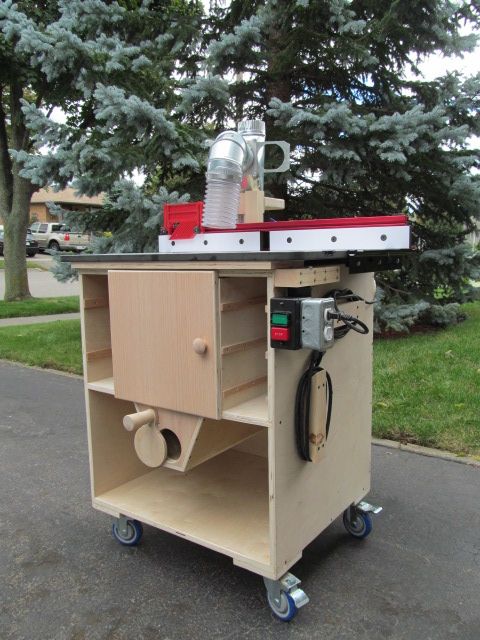
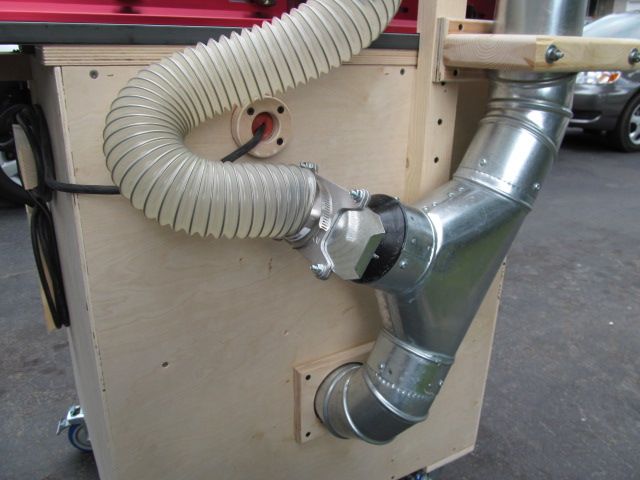
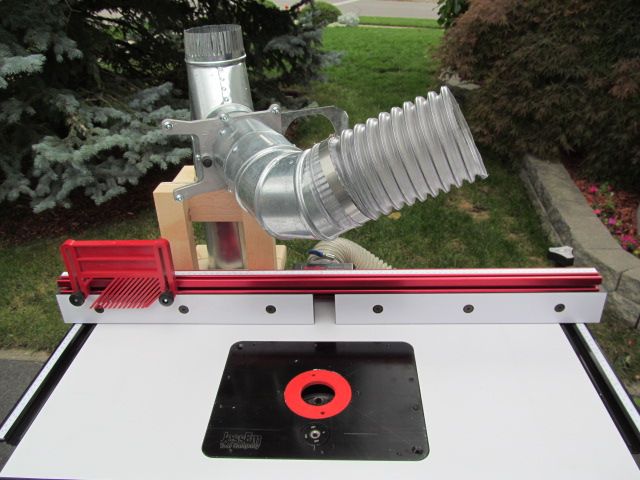
5. Here is a back view of the table. The duct work is cheap heating duct from Home Depot. There is a 2.5" blast gate and flex hose connected to the router fence dust pickup. The router power cable is sealed where is comes out by a sandwiched rubber sheet with slits cut into it. I used the self cleaning aluminum blast gates from Lee Valley.
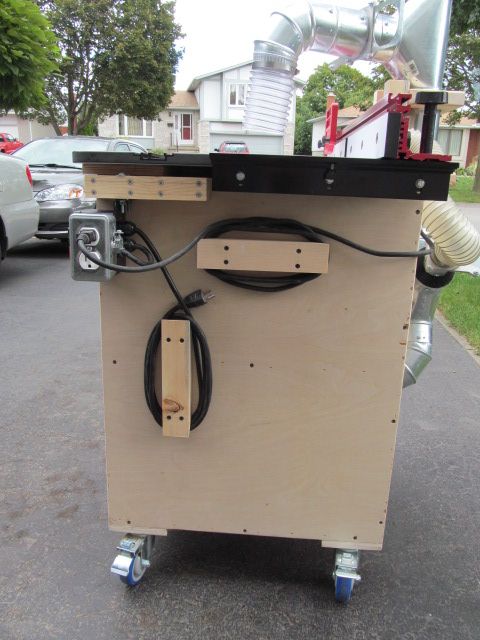
6. Side view showing cable management and On-Off switch. 4 swivel brake casters make it very easy to roll the cart around the shop.
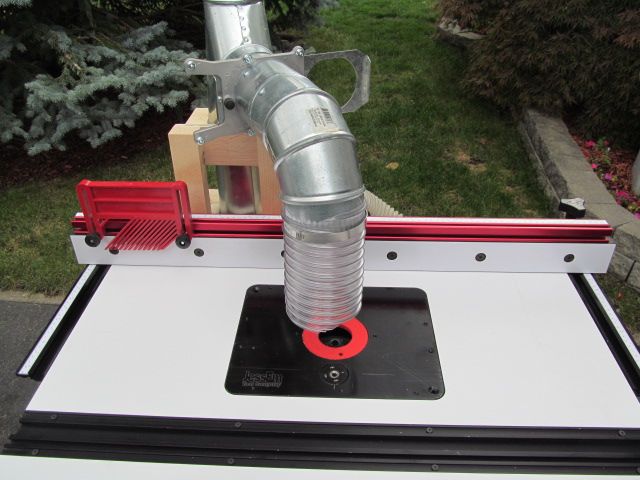
When routing free hand without the fence, there is a 4" dust pick-up above the table with a 4" blast gate to shut off or throttle the airflow. This won't pick-up the major chips, but I am hoping that it will pick up the fine dust. The top pick-up easily swivels out of the way when adjusting the height of the router using the Jessem router lift.
It still remains to be seen how good this set-up works. Will let you know after my friend has an opportunity to give it a good work out.
Don, that looks cool and should work well. However, I would suggest sealing all of the joints in the ductwork. I prefer self amalgamating tape but foil tape or silicone will work also.
You (or your friend) will especially need this if you use the overhead pick-up exclusively. You will lose a lot of suction in the many gaps in the ducting if you do not seal it. Again, pretty inventive set up.


 Reply With Quote