Page 1 of 2 12 LastLast
Results 1 to 15 of 384

Thread: "old money"

Hybrid View

Previous Post Previous Post   Next Post Next Post
  1. #1
    Join Date
    Feb 2007
    Location
    Poconos, Pa
    Posts
    125
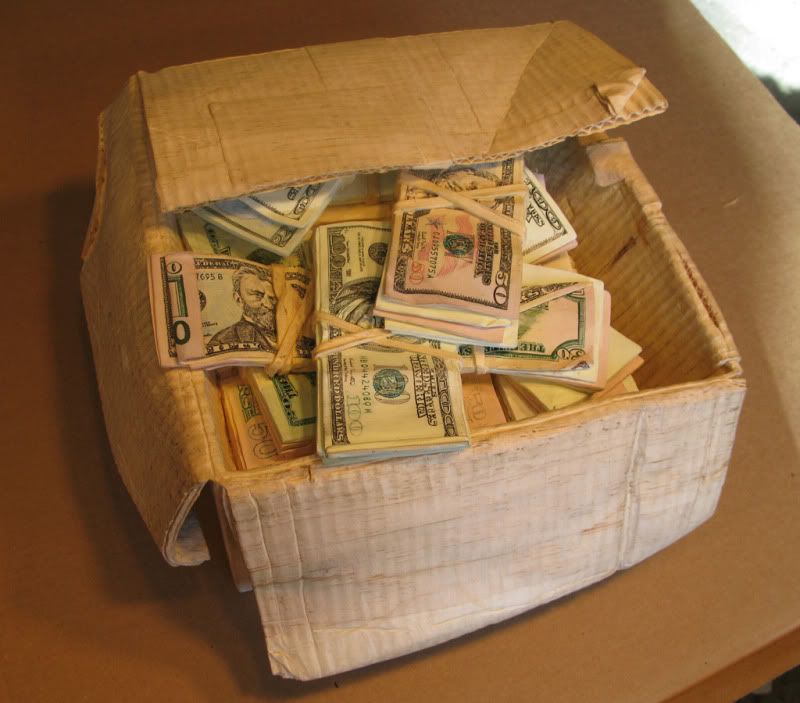
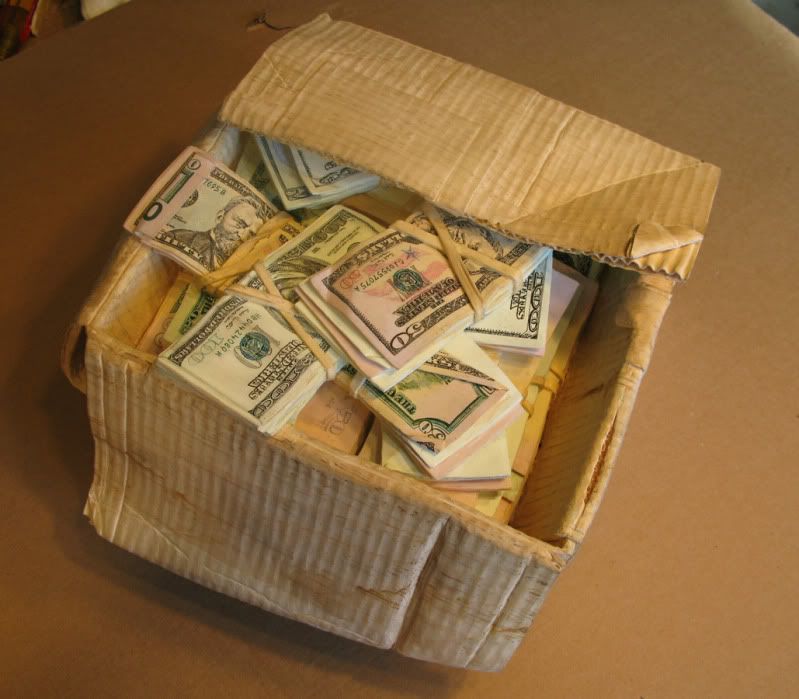
    I'm following in awe also, Randall. I have the same question as Kevin: how do you make those deep, clean cuts such as the area between the money and the inner box side in the lower right-hand portion of the carving in that last photo? As always, amazing work!
    Last edited by Dave McGeehan; 03-16-2011 at 9:11 AM.

  2. #2
    dave....sharp tools and a willingness to sneak up on it. i see it in my mind and rather than try and make a few big cuts i make a lot of little cuts...however i do it fast. one thing i do is make everything slightly larger than i really think it should be. later i will trim back and it will give it a look of complexity. its more about tenacity than anything else. the stacks fall out randomly the way they do and there is no short cut to an honest rendition of them.

    OK...i'm tired of carving at this point so lets play with color.


  3. #3
    Join Date
    Mar 2009
    Location
    Chevy Chase, Maryland
    Posts
    2,484
    That's really impressive.

    Do you have a real box that you are working from or do you make it all up from your mind?

  4. #4
    thanks sean.....i saw the ripped corner (highest spot on sculpture) on a real box and the whole sculpture flowed from that. i usually want to be able to make it up as i go and make radical changes rather than conform to a rigid representation. the painting however is in so many ways the opposite.

  5. #5
    Join Date
    Feb 2003
    Location
    In the foothills of the NM Sandia Mountains
    Posts
    16,661
    Randall, that is amazing. I was wondering what that triangular lump on the box flap was going to be.
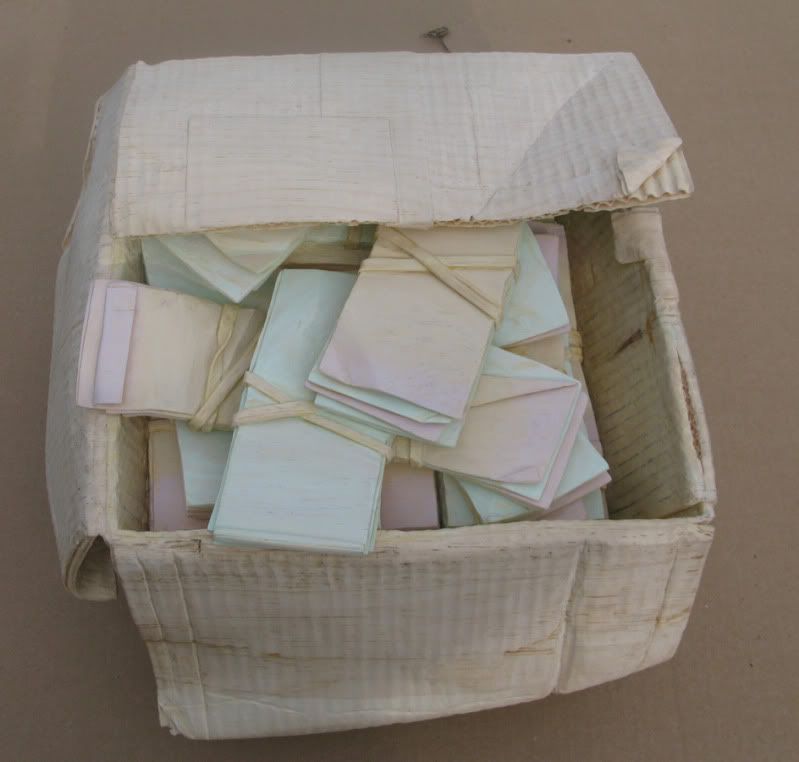
    Please help support the Creek.
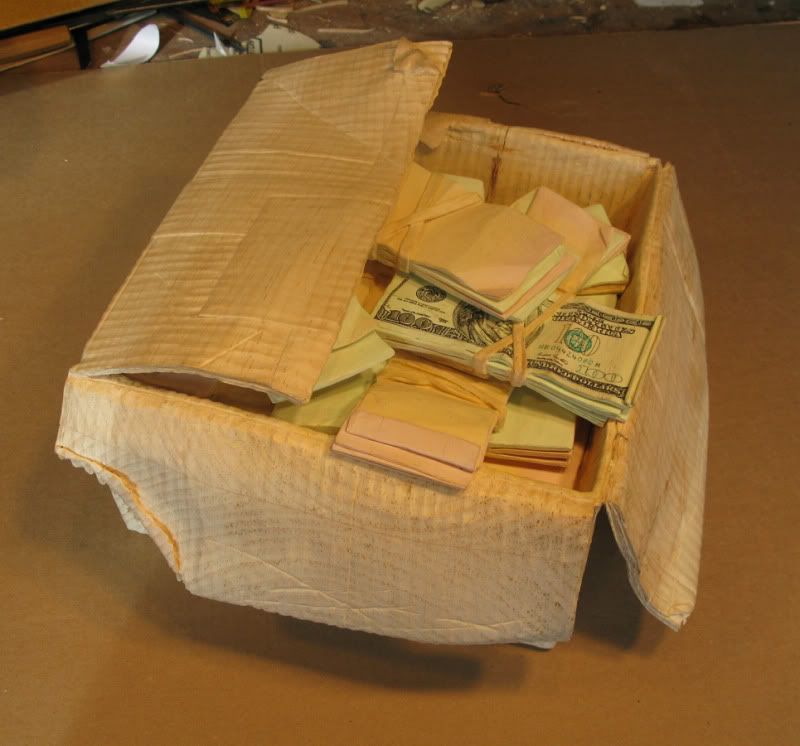

    "The older I get, the better I used to be."
    Lee Trevino


  6. #6
    OK...no surprise here. i figured i do the easiest one first. some of the buried ones are going to be a bigger challenge to paint than to carve. you cant see it but under the flap goes in quite a ways.


  7. #7
    Join Date
    Apr 2006
    Location
    Escondido, CA
    Posts
    6,224
    What kind of tools do you use for that kind of painting accuracy (in addition to gifted and practiced genius in your brain and hands)?
    Veni Vidi Vendi Vente! I came, I saw, I bought a large coffee!

  8. #8
    thanks brian. first i mix a lot of the background color so i can tune up the painting every step of the way. i draw it on in pencil and then use a "micron" brand felt tip pen with archival ink. then i use the finest brush i can find with carbon black acrylic. then i do the color. the 50's have far more color and present a greater challenge. i finish with washes of carbon black. the green sides (which you will see in a bit) are done entirely with brushes as there is no pen i've found yet thats close to the right color and thin enough to be useful. unlike carving i can keep adding paint forever until i'm are satisfied.

  9. #9
    Join Date
    Jan 2007
    Location
    West Simsbury, CT
    Posts
    384
    Nice save on that corner, Randall, looks great!

  10. #10
    dont get too attached to it kevin....it dosent stay like that. eventually i come to dislike the shape of both flaps and put sharp bends in them. then i run out of wood.

  11. #11
    moving right along


  12. #12
    its kinda strange how this forum threads run. most just have pages and you go to the next page. sorry if i lose my place.


  13. #13
    Join Date
    Nov 2007
    Location
    Glenelg, MD
    Posts
    12,256
    Blog Entries
    1
    Quote Originally Posted by randall rosenthal View Post
    its kinda strange how this forum threads run. most just have pages and you go to the next page. sorry if i lose my place.
    Randall,

    Make sure you have "Linear" display mode selected (near upper right).
    Hi-Tec Designs, LLC -- Owner (and self-proclaimed LED guru )

    Trotec 80W Speedy 300 laser w/everything
    CAMaster Stinger CNC (25" x 36" x 5")
    USCutter 24" LaserPoint Vinyl Cutter
    Jet JWBS-18QT-3 18", 3HP bandsaw
    Robust Beauty 25"x52" wood lathe w/everything
    Jet BD-920W 9"x20" metal lathe
    Delta 18-900L 18" drill press

    Flame Polisher (ooooh, FIRE!)
    Freeware: InkScape, Paint.NET, DoubleCAD XT
    Paidware: Wacom Intuos4 (Large), CorelDRAW X5

  14. #14
    thanks dan!.....duh.

  15. #15
    amazing work!
    Carpe Lignum

Posting Permissions

  • You may not post new threads
  • You may not post replies
  • You may not post attachments
  • You may not edit your posts
  •