Page 1 of 2 12 LastLast
Results 1 to 15 of 19

Thread: Napkin Rings

  1. #1
    Join Date
    Oct 2010
    Location
    Imperial, MO
    Posts
    589

    Napkin Rings

    OK, you may have already guessed it. I have been watching Bob Hamilton video's and have to give one of his latest tutorials a shot, I had quite a fun time making these and also made a jig to make some bracelets. One thing I did find out on the bracelet is that when you make them from a board (flat stock) and drill them and put them on the jig for turning is that you are then cutting directly into end grain with your spindle gouge making it a little difficult to turn a bead.

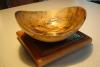
    The napkin rings here are made from, I believe maple or poplar that I cut up from greenwood last year, and then put a spray on varnish finish.

    Also got to try out the new photo tent I put together today.Napkinrings.jpg

  2. #2
    Join Date
    Nov 2009
    Location
    Alpine, WY
    Posts
    434
    His tutorial was very good, you did a good job. They will make any napkin proud.

  3. #3
    Join Date
    Aug 2010
    Location
    South Central Michigan
    Posts
    90
    Ya know he could make a mint selling his Video's instead of putting them out on u tube. Thank goodness he doesn't because I wouldn't have anything else to make besides Pens, Bowls, Treen's, and other nick nacks.
    Yet I also have to tip my hat to Carl Jacobson too. Nor Capt. Eddie.
    If you ain't Cheatin', You ain't tryin'...

    "If A equals success, then the formula is, A = X + Y + Z, Where X is work, Y is play, And Z is keep your mouth shut." -Albert Einstein.

  4. #4
    Ron, very nice work! They all look amazingly alike - not sure I could do that!

    Congrats on the photo tent. What color is your backdrop? Just wondering if the colors in the pic are true.

  5. #5
    Join Date
    Feb 2009
    Location
    Raleigh,NC
    Posts
    525
    Nice little project! Those look great too!

  6. #6
    Join Date
    Mar 2006
    Location
    Indianapolis
    Posts
    723
    Ron, can you post a photo of your braclet jig. My wife wants me to make her some braclets but I need a way of holding them while turning. Thanks.
    U.S.A.F. Ret. MSgt 2006

  7. #7
    Join Date
    Jul 2008
    Location
    Atikokan, Rainy River district, Ontario
    Posts
    3,540
    You did very well on those Ron, nice ones ;-))
    Have fun and take care

  8. #8
    Join Date
    Mar 2007
    Location
    Stony Plain, Alberta
    Posts
    2,702
    Nice work on the napkin rings Ron.

  9. #9
    Join Date
    Sep 2009
    Location
    Enid, Oklahoma
    Posts
    6,741
    Those look great, Ron.

    Jack, I'd watch Bob Hamilton's youtube video for the details on his homemade 'collet' system.

  10. #10
    Join Date
    Jan 2005
    Location
    Goodland, Kansas
    Posts
    22,605
    Ron those look really nice. Well done. I watch his video all the time.
    Bernie

    Never put off until tomorrow what you can do the day after tomorrow.

    To succeed in life, you need three things: a wishbone, a backbone and a funnybone.


  11. #11
    Ron
    I've made allot of those but all of them by accident.Nice job
    Harry

  12. #12
    Join Date
    Jan 2009
    Location
    La Grange, IL
    Posts
    1,425
    Those look good Ron. Nice set.

  13. #13
    Join Date
    Oct 2010
    Location
    Imperial, MO
    Posts
    589
    Thanks everyone for the nice replies, John the colors in the pic did come out true, I bought the green background paper and a cream color one. I think I'm liking the tent thingy which is kinda fun, feel like I'm a photographer. Also having a pool table at home made it kinda nice for the setup, I just changed the light bulbs to a little bit stronger wattage and it lit up these rings pretty well, but I put bowl in there and wasn't getting quite enough in front of the bowl so I will have to do something there.

    Well I'm getting on here a little late so I'll post those pics tomorrow Jack, but really it is pretty much the same as the napkin jig only bigger, I used it to turn the outside of the bracelet and then stuck it in my 4 jaw chuck on expansion mode and turned the inside one half of it at a time.

    Your'e right Andrew, but don't tell them about it, I really love all there tutorials and Bob cracks me up sometimes. I hope he and all keep making these for us, they are so informative and entertaining to watch. I actually made 12 hours of DVD's from the you-tube video's so I can watch them on the big screen and amazingly they look pretty darn good.

  14. #14
    Join Date
    Nov 2006
    Location
    Forest, Ontario, Canada
    Posts
    386
    Hi, Ron:
    Looks like you did a good job! When I decided to make the napkin rings I was already out in my shop and I wasn't sure how big the hole should be so I took a guess and made my first fixture for rings with a 1 1/4" hole and then made one ring with that size hole. Then I came back in the house and did some searching on the net and found out the hole should be 1 1/2", so when I went out after supper I made the fixture in the video. I did find a use for the 1 1/4" fixture, though. I found that I could stick one end of a strip of sandpaper in one of the slots and wrap the rest of the strip around the fixture. That worked really well to sand the inside of the holes on the 40 napkin rings I turned over the next couple of days.

    Take care
    Bob

  15. #15
    Join Date
    May 2009
    Location
    Washington's Coast
    Posts
    1,767
    Really nice job on the napkin rings-very consistent from what I can see. Kudos to Bob H for sharing his tricks of the trade.

Posting Permissions

  • You may not post new threads
  • You may not post replies
  • You may not post attachments
  • You may not edit your posts
  •