Now that's an idea. Pm me with more info.


 Member
Now that's an idea. Pm me with more info.
Carol in NV
[OP]
Member
Machine is 100% apart and I am waiting on the new base!
Glad its my shop I am responsible for - I only have to make me happy.
Member
Mike, your PM box is full! Clean house.
Carol in NV
[OP]
Member
Cleaned out inbox and will clean out some carriages and rails and ship them off to AZ. Congrats to Carol!
Glad its my shop I am responsible for - I only have to make me happy.
[OP]
Member
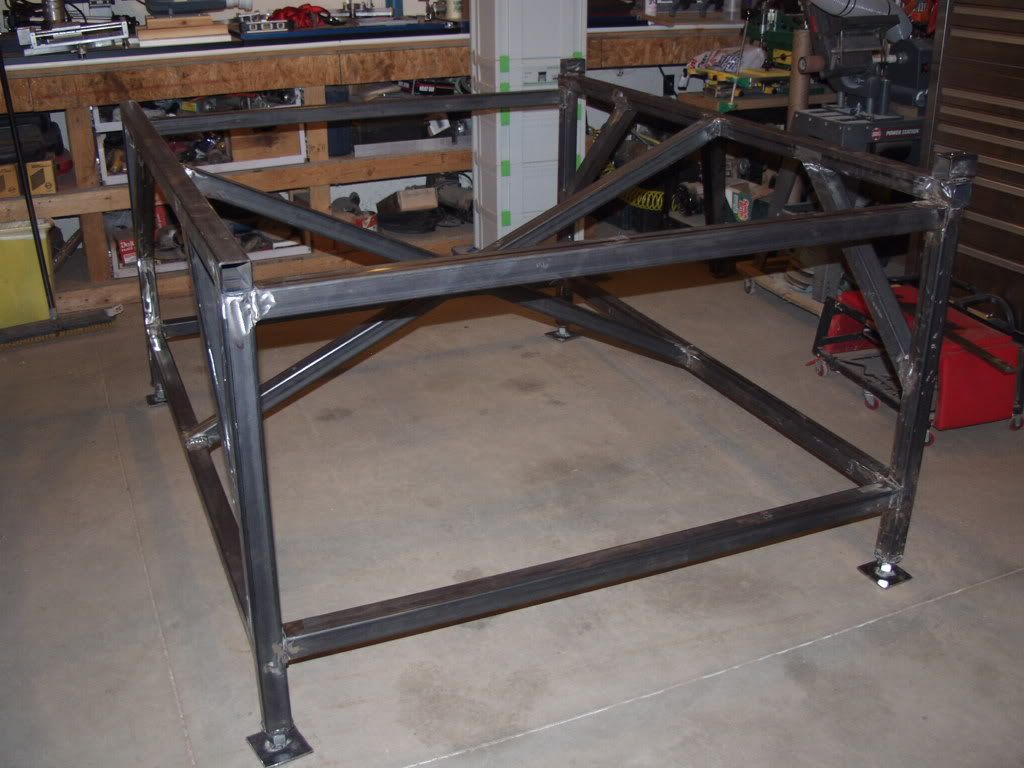
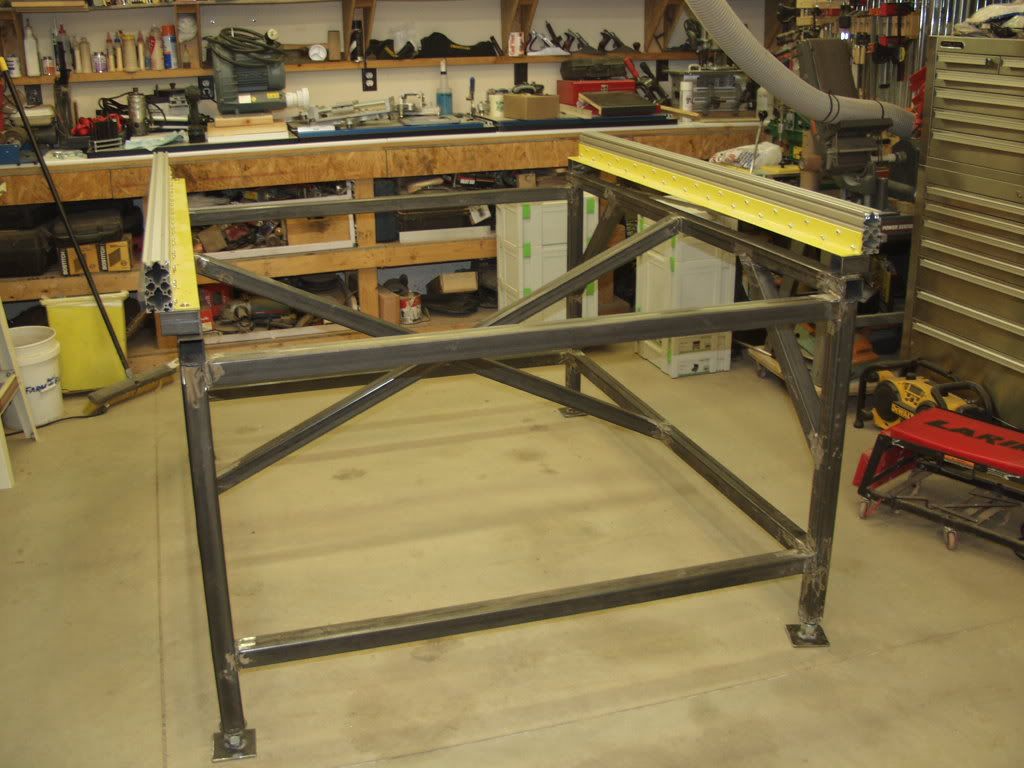
Well its in the shop - the base that is! 2" box 11ga steel.
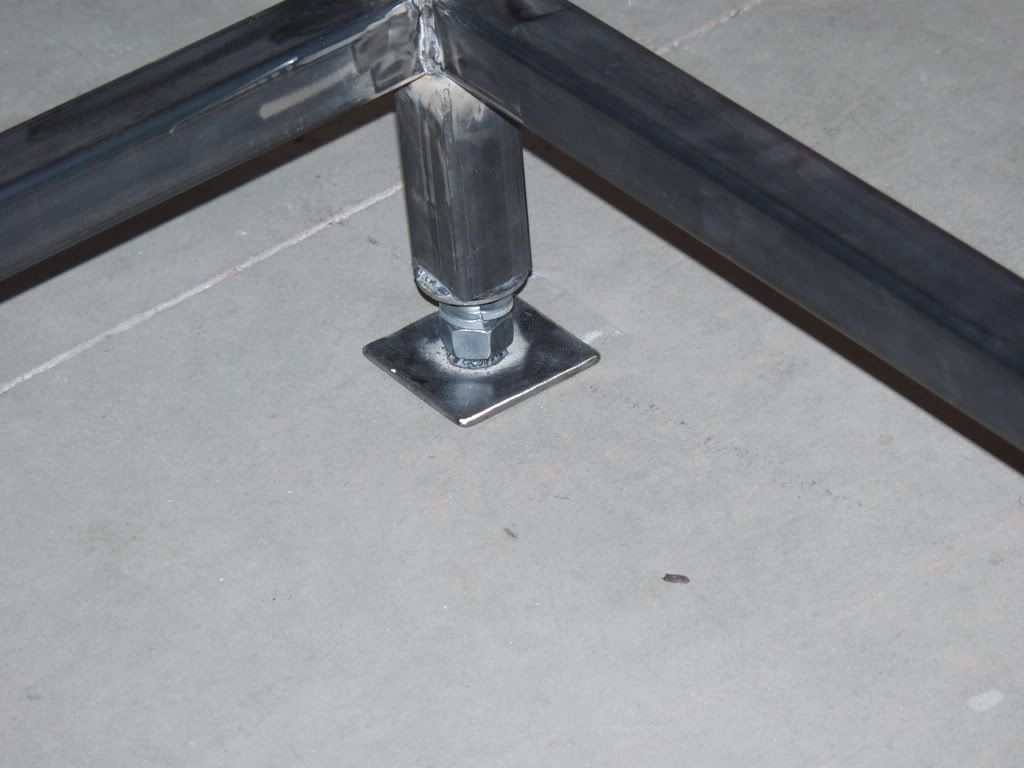
Leveling feet - 1" all-thread, lock washer, nut, and flat plate.
Glad its my shop I am responsible for - I only have to make me happy.
Member
Looks great, Mike.
My brother is a welder so I have to do is get the steel and give him the plan. But I have some planning to do. Mine will be a custom size.
What color will this one be?
Carol in NV
[OP]
Member
Picked up some gloss black for teh stand tonight. Thinking Black and cast alum with a couple yellow rails for good measure to remember my cnc roots!
Glad its my shop I am responsible for - I only have to make me happy.
[OP]
Member
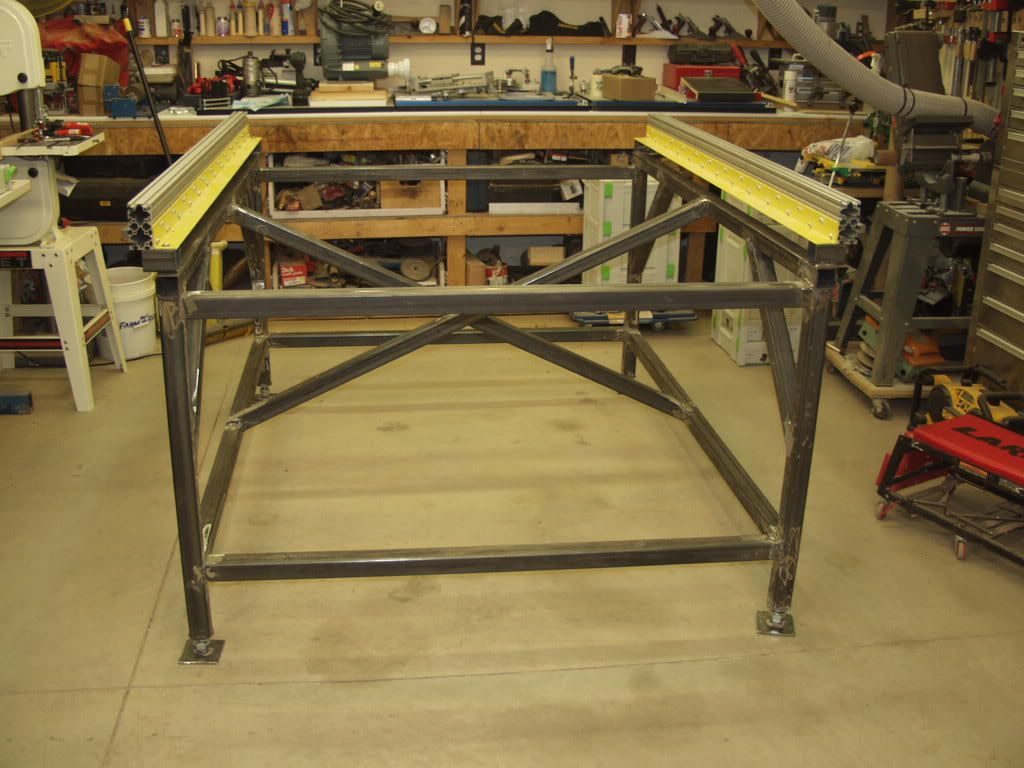
Spent some time tonight leveling the base and adjust the rails square and perpendicular. Tonorrow at 3:30pm CST the welder will come and attach the two left side rail steel stubes to the stand. Right now I have them boleted with lock washers in place. After that the 8020 rails will come back off and I will get to painting it. Decided to take back the paint I bought Thursday and I am going with the hammered rustoleum in black.
Glad its my shop I am responsible for - I only have to make me happy.
[OP]
Member
Welds done, welds cleaned, base wirecup cleaned, and 1st coat of Rustoleum Hammered Black is on 4 of 6 sides. Time for a dinner break and a test drive of a Fuqi Q4 pro a buddy bought.
BTW, to the guy that misfired a mini 14 .223 round into two people at our local gun show,
Also to Steve my welder - you rock bro! Thanks for the weld on Johnny's mower deck as well!
Last edited by Keith Outten; 03-02-2011 at 5:54 AM.
Glad its my shop I am responsible for - I only have to make me happy.
[OP]
Member
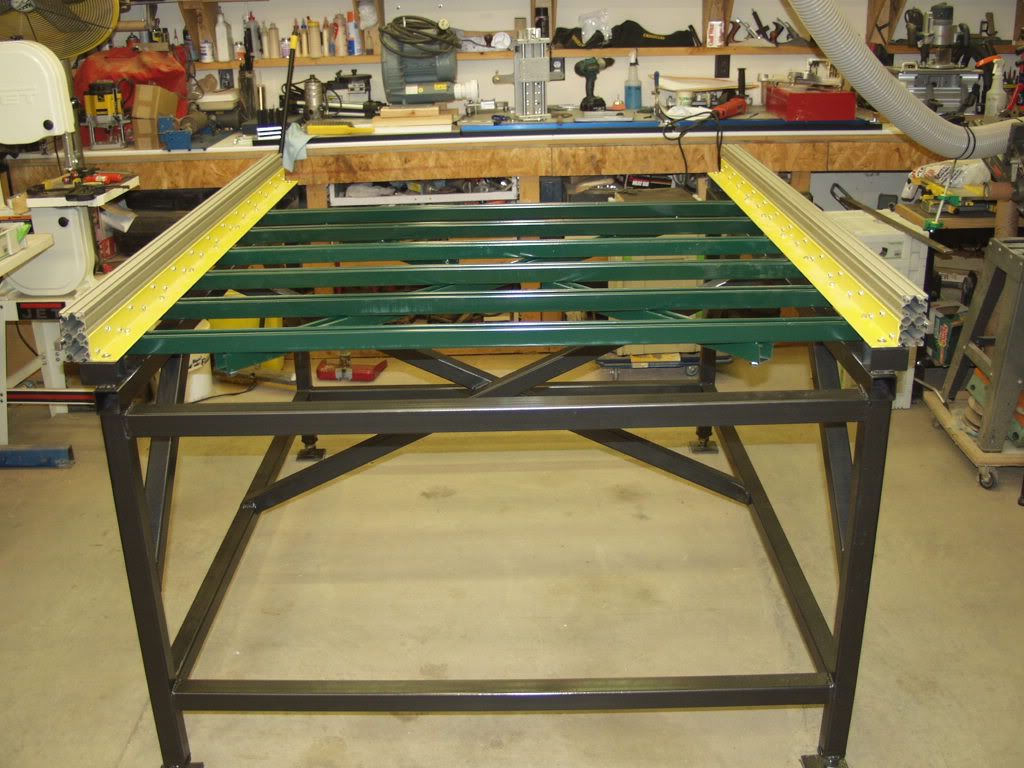
Painting done. Y rails reinstalled and squared and leveled, Angle iron bolts to stand installed, and unistrut bed reinstalled.
Glad its my shop I am responsible for - I only have to make me happy.
[OP]
Member
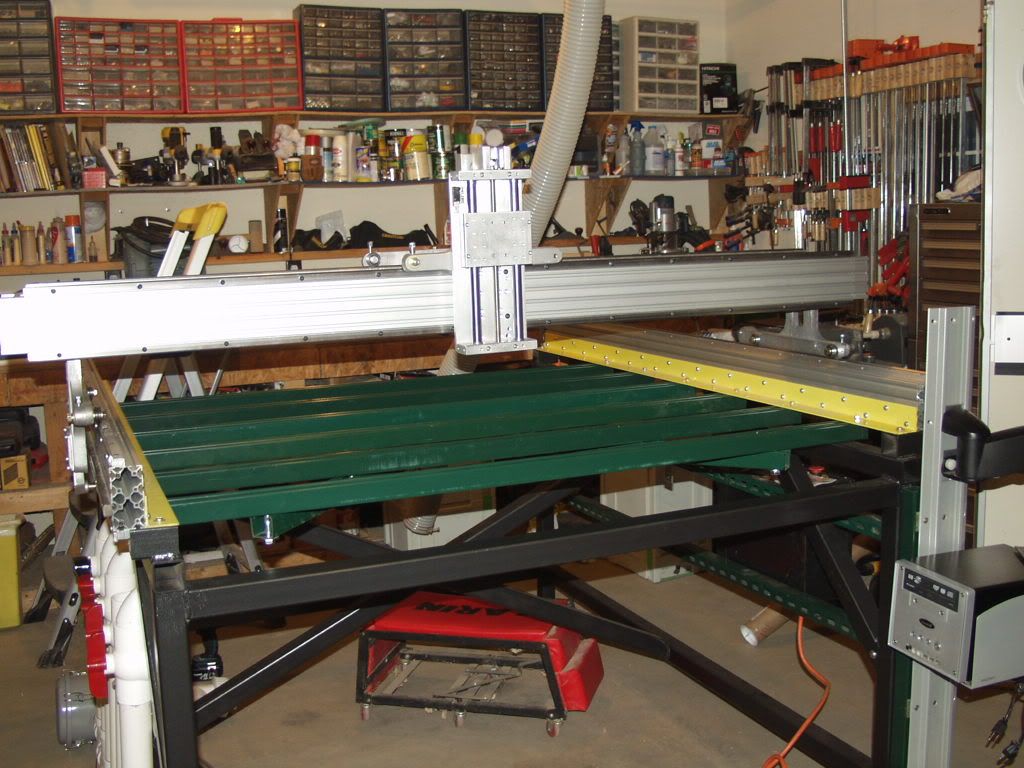
Y carriages installed, Rails installed , vrail installed, rack on X installed, braces added and X carriages positioned tonight. I had forgot to install the T nuts for the braces when I mounted the rails. Luckily a buddy had given me some tip-in T nuts which I used. Whew! those saved me. I was like a oil change mechanic working under the machine tonight. Creeper is still there.
Glad its my shop I am responsible for - I only have to make me happy.
Member
Looking good, Mike. Can't wait to see it in person.
Carol in NV
[OP]
Member
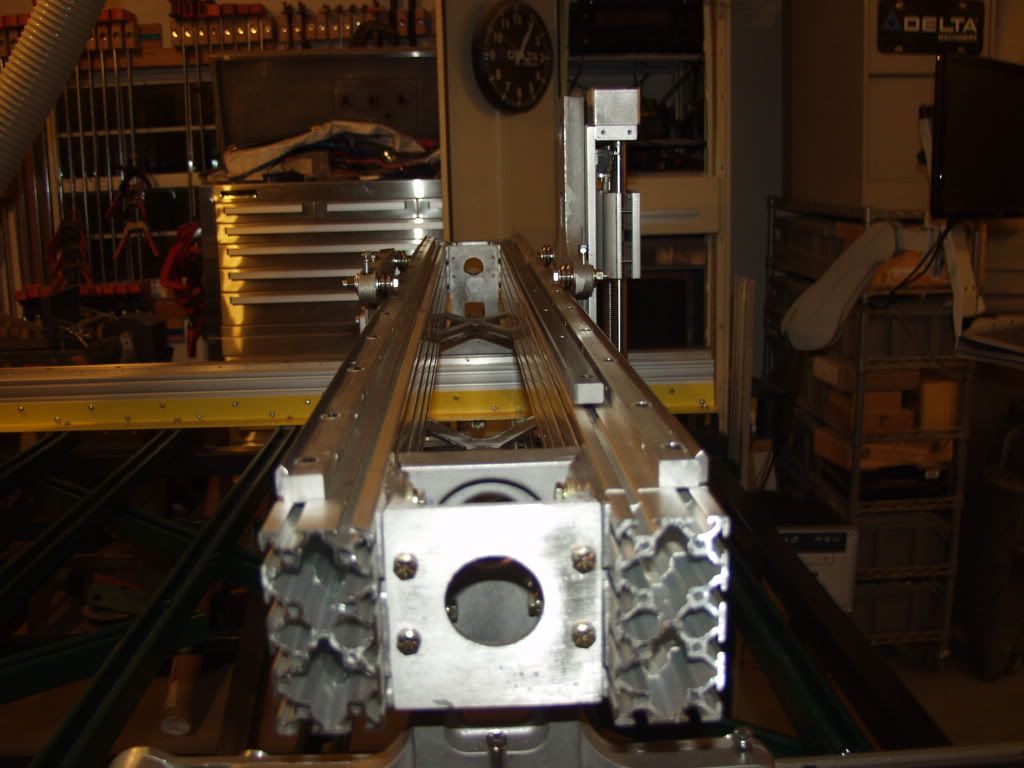
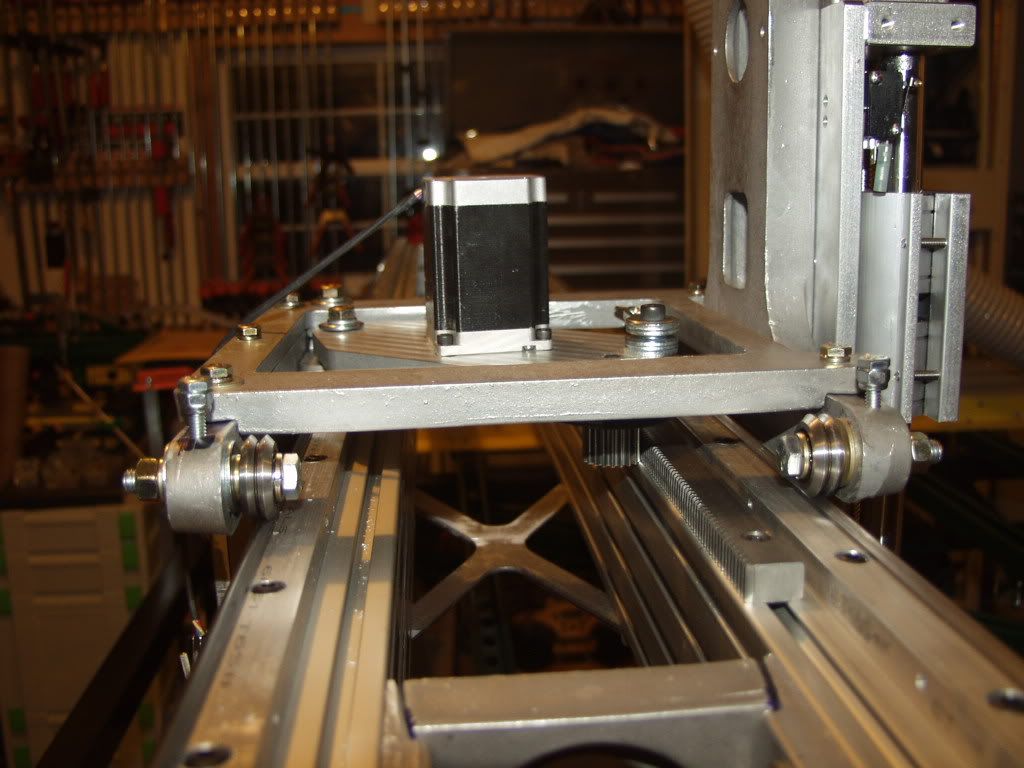
I LOVE the CAST CNC kit. It is so heavy duty. Zero racking!! Here is a pic showing the saddle work I did tonight on my X.
Glad its my shop I am responsible for - I only have to make me happy.
Member
I am looking closely at the uni-strut connection to the side rails. The plans call for an angle bracket at the end of each uni-strut attached to the 8020 rail. Your picture looks like they are attached to the angle iron that is attached to the 8020. Is that right? How about a close-up of that connection?
That makes more sense to me that all those brackets and nuts and screws. So, a bolt through the uni-strut, u-shape up. Or a bolt and t-nut holding the uni-strut?
Inquiring minds....
Carol in NV
[OP]
Member
Carol this is called the angle iron mod. Folks found doing it as the plan said was kind of a chhallenge once the 8020 was installed on the base. To solve this people added angle iron to the lower inside channel of the 8020. It was drilled on the verticall side to slip into the 8020 and also drilled to bolt to cone or spring nuts that attach to the unistrut. I will send you a link to the mod on Joes forum when I get to work.
Last edited by Mike Heidrick; 03-02-2011 at 12:59 PM.
Glad its my shop I am responsible for - I only have to make me happy.
 Posting Permissions

 Reply With Quote