I'd probably just chuck a small router bit in my drill press, setup a straight edge with a couple of clamps, and make the lines like that. That's usually my goto technique with I have to route small, oblique groves in something.


 Contributor
I'd probably just chuck a small router bit in my drill press, setup a straight edge with a couple of clamps, and make the lines like that. That's usually my goto technique with I have to route small, oblique groves in something.
[OP]
Member
Well, ended up using the Eurekazone track with my Makita saw which was the perfect solution. I could clamp the piece from the bottom along the straight edge and move from line to line while my son slid the saw back and forth. It came out better than we expected!
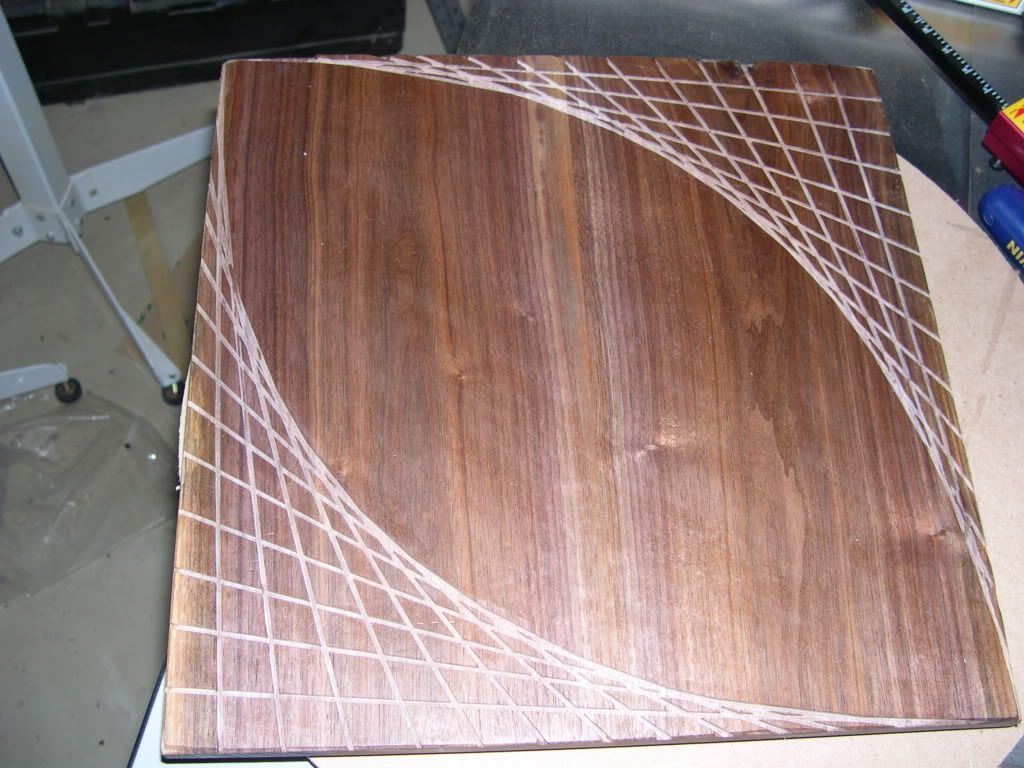
What's wrong with the results you're getting? Looks like exactly what I would expect...
Hi-Tec Designs, LLC -- Owner (and self-proclaimed LED guru)
Trotec 80W Speedy 300 laser w/everything
CAMaster Stinger CNC (25" x 36" x 5")
USCutter 24" LaserPoint Vinyl Cutter
Jet JWBS-18QT-3 18", 3HP bandsaw
Robust Beauty 25"x52" wood lathe w/everything
Jet BD-920W 9"x20" metal lathe
Delta 18-900L 18" drill press
Flame Polisher (ooooh, FIRE!)
Freeware: InkScape, Paint.NET, DoubleCAD XT
Paidware: Wacom Intuos4 (Large), CorelDRAW X5
[OP]
Member
I had to go back and make sure I said what I thought I said---I did say it came out better than expected. We were very happy with the results.Originally Posted by Dan Hintz

Kevin,
My reply was to your earlier post with the computer graphic version... I didn't see page 2 until after I hit submit, but I was too lazy to go back and edit last night.
Hi-Tec Designs, LLC -- Owner (and self-proclaimed LED guru
Trotec 80W Speedy 300 laser w/everything
CAMaster Stinger CNC (25" x 36" x 5")
USCutter 24" LaserPoint Vinyl Cutter
Jet JWBS-18QT-3 18", 3HP bandsaw
Robust Beauty 25"x52" wood lathe w/everything
Jet BD-920W 9"x20" metal lathe
Delta 18-900L 18" drill press
Flame Polisher (ooooh, FIRE!)
Freeware: InkScape, Paint.NET, DoubleCAD XT
Paidware: Wacom Intuos4 (Large), CorelDRAW X5
[OP]
Member
Teacher was happy with the results as well, giving him a grade of 110%!
Member
Sure you could. Purchase 1/8" or 1/16" end mills on ebay. I like the layered aproach. You get the relief and contrast automatically. You may need to purchase a collet adapter from Lee Valley so you can use 1/8" shank bits. I even use 1/32" end mills! By the way, I was thinking of a smallish router in this case (something your child can safely use)
Member
I'd say something similar except ... use walnut and brass. Polished brass and walnut has a beauty that is hard to beat.
Use a table saw (with a carbide blade) and the slicing through the brass should be no problem.
The "math" part comes in when setting the miter angle for each cut (something YOU should leave to the student even if you make the cuts). Document the process with pics of the student setting up the miter (and/or making the cuts).
Sand to 600+ grit and perhaps a spray of poly. The brass and walnut will be stunning.
One cheap source of brass can be "door kicker" plates ...
Last edited by Rob Currey; 02-17-2011 at 4:12 PM. Reason: DOH, old post
 Posting Permissions

 Reply With Quote