I have already posted this at BT3Central so sorry if you have already seen it.
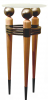
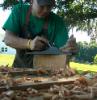
I plan on using this stand as a printer desk, as most printers lately do not need any mysterious compartments for tractor feed paper or extensive computer connections. The top is about 22 inches deep by 28 inches wide. The wood (maple for the draw fronts and cherry for everything else) was all obtained from trees on my property downed in a windstorm two years ago and sawn on site. It is more or less my own design, with some copying or incorporation of design elements from other pieces I have seen. For instance, the legs are rounded on two sides so that the cross section looks like a rounded diamond shape - this is from Michael Fortune. The main cabinet section floats within the legs and is held in place by stretchers running front to back from the rails. They are hard to see when looking at the stand when standing so the cabinet appears to be floating. Likewise, the top is not attached to the legs but instead is attached to the top side of the stretchers holding up the cabninet at the top. The lattice sides do not touch the cabinet. Drawers are on standard full extension slides and consist of through dovetail sides and front/backs with false fronts of curly/wild maple. I did not know the maple would have such interesting figure until I planed it. The cherry was first coated with shellac and then I applied a gel stain called mission cherry by General Finishes. This was finished with precatalyzed lacquer. I have tried to provide enough pictures to show some of the structure, but they are not the best. This took about 40 hours with the help of a friend along the way. I contemplated some inlay or other decorative elements, but thought the wood was so pretty I couldn't improve on it.

 Reply With Quote